Set up Visitor Self-Registration
Visitor self-registration is open to external parties to schedule visits, differentiating from targeted visit schedules created by employees.
Visitor self-registration allows any interested external parties to submit visit requests to your company, however, only when the visit requests are approved will the visits be scheduled, thus helping your company to filter out valuable and desired visits.
This topic describes how to enable visitor self-registration, set up the approver for visit requests, and the notification for visitors.
Requirement
Yeastar Workplace Plan: Standard Plan or Pro Plan
Visitor self-registration process
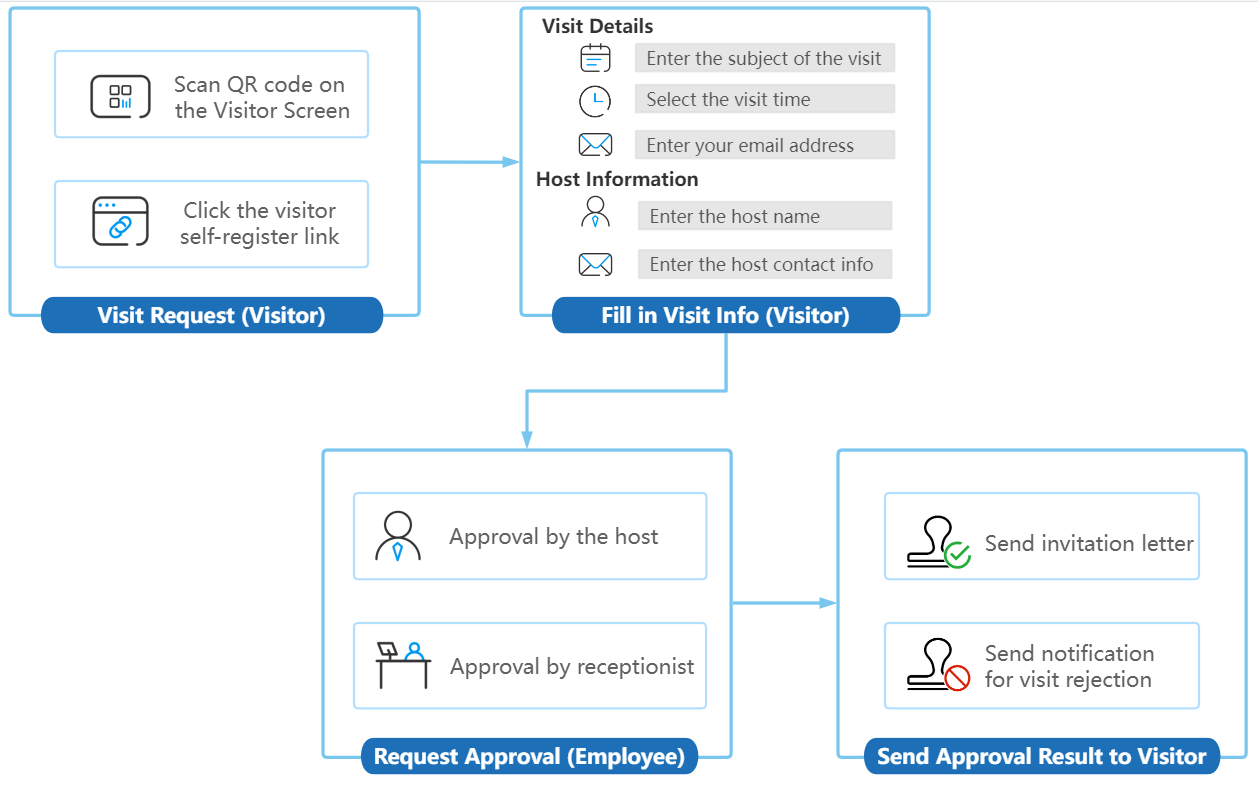
We provide a diagram to help you understand the process of visitor self-registration in a better manner.
Step1. Enable visitor self-registration
Yeastar Workplace provides the following methods for visitor self-registration.
QR code on Visitor Screen
After a Visitor Screen is added to Yeastar Workplace, a visitor registration QR code will be displayed on the screen automatically. Visitors can scan the QR code to access the self-registration page.
QR code is applicable for visitors to submit visit requests on-site.
To use QR code on Visitor Screen, see Register a Visitor Screen.
Visitor self-register link
Yeastar Workplace provides a visitor self-register link, you can publish the link on your company's website, blog, and other promotions. Visitors can click the link to access the self-registration page.
Visitor self-register link is applicable for visitors to submit visit requests in advance.
To use the visitor self-register link, do as follows:
- Log in to Yeastar Workplace management portal, go to Visit > Visit Log.
- Click the Visitor Self-register Link, then click Copy Link.
-
Publish the link on your company's website, blog, and other promotions.
Important
Visitors must fill in the host information when trying to submit a visit request. Only when the Name or Contact Information (phone number or email address) of the host filled in matches the user information in your system, can the request be submitted successfully.
To ensure that visitors can submit visit requests successfully, we recommend that you attach the name and contact information of the employee(s) when publishing the visitor Self-register Link.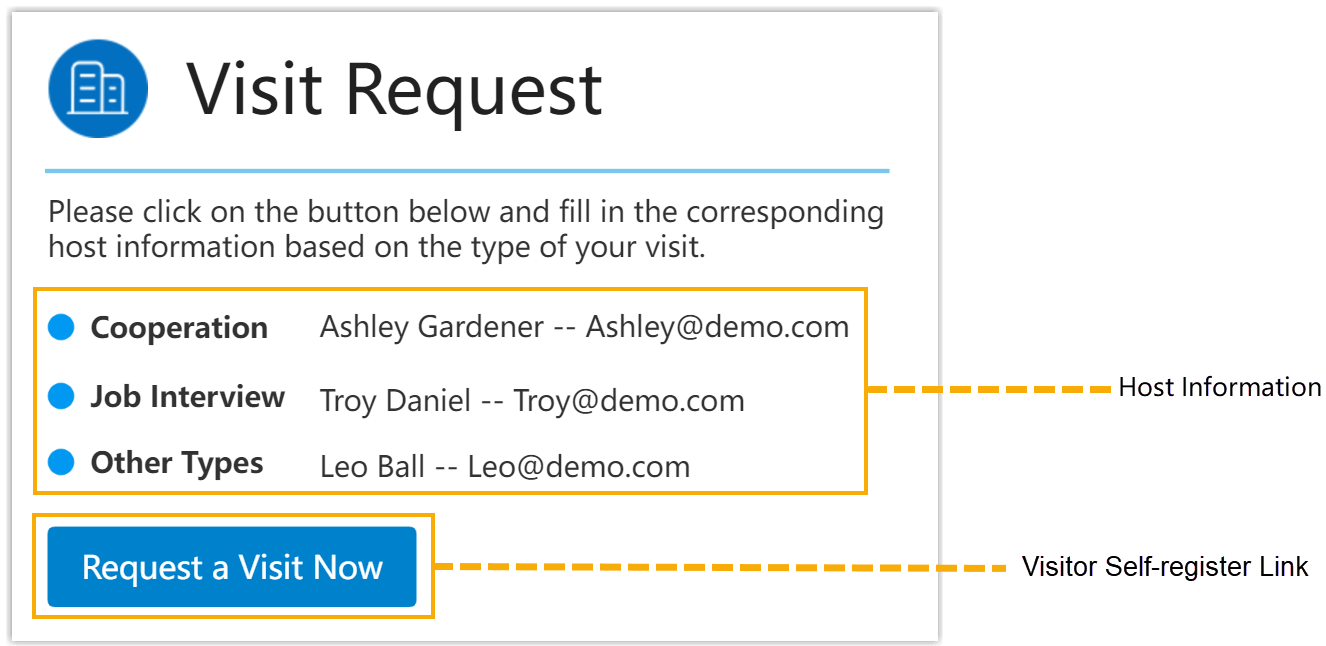
Step2. Set up the approver
After visitors submit a visit request successfully, the system will send a notification to the approver to remind him or her to handle this request (approve or reject).
Yeastar Workplace supports the following users to handle visit requests.
Host
The Host filled in the visit request is the default approver, no additional settings are required.
The Host can only handle visit schedules that he/she is involved.
Receptionist
After setting up the receptionist(s) as the approver, receptionist(s) can handle all the visit requests submitted to your company.
To set receptionists as approvers, do as follows:
- Log in to Yeastar Workplace management portal, go to Visit > Visit Settings > Receptionist Settings.
- In the Allow Receptionists to Approve Requests drop-down list, select Enable.
- Click Save.
Step3. Set up the notification for visitors
When a visit request is approved or rejected, the system will send a notification email to the visitor according to the approval result: invitation letters for approved requests, and visit rejection notifications for rejected requests.
To ensure that these notification emails can be sent to the visitors, do as follows:
- Log in to Yeastar Workplace management portal, go to Visit > Visit Preferences.
- In the top bar, click the Notification Templates tab.
- Turn on Invitation for visitor and The visit request has been rejected.
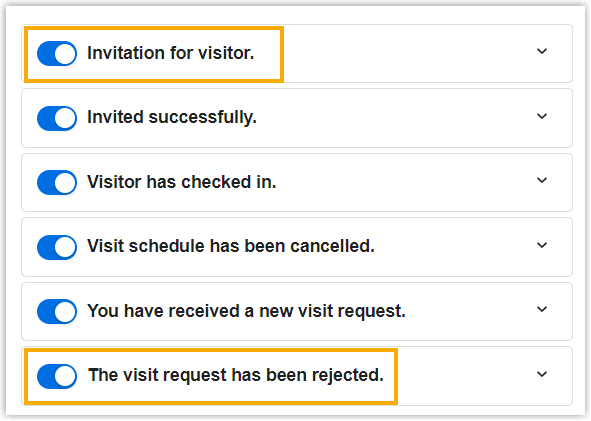
- Click Save.
Related information
- Invite a visitor (Visit schedules created by employees)
- Handle Visit Requests (Learn how employees can handle visit requests)
- Check in to a visit schedule (Learn how visitors and employees check in for a visit schedule)
Created: February 3, 2023