Add Users and Groups
Add your coworkers to your Yeastar Workplace company account, so that they can interact with the Yeastar Workplace system.
Add user groups
Before you jump in, think about if you need to configure user groups and assign different booking permissions. If no user groups are added, all users are directly classified under your organization.
Procedure
- Log in to Yeastar Workplace management portal.
- Go to User Management > Users and Groups, click Add User Group.
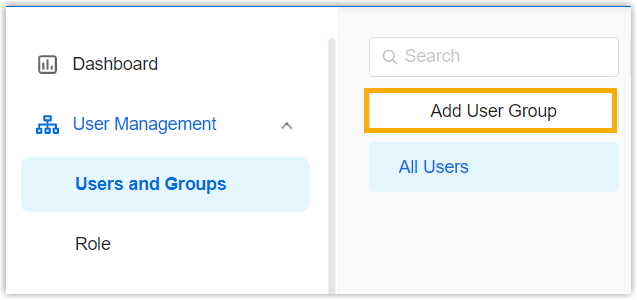
- Enter the group name, then click OK.
Result
The added groups are displayed under the organization, you can group users based on departments, roles, or location.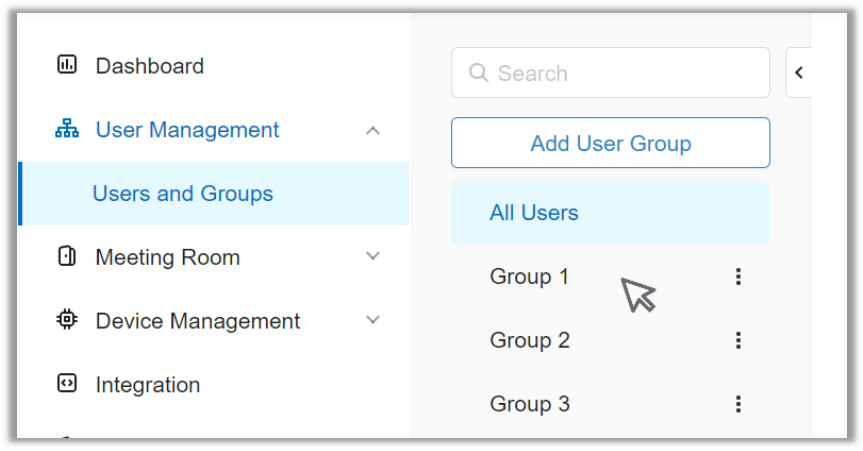
Bulk add users
You have two ways to add users: add an individual user or bulk import users. For the first-time setup, we suggest that you import users by an Excel file to improve work efficiency.
Prerequisites
Prepare an Excel file that contains user information. The import feature supports seven columns.
Sample file
Check the following sample file to start with.
| A | B | C | D | E | F | G | |
|---|---|---|---|---|---|---|---|
| 1 | First Name | Last Name | Department | Email Address | Mobile | Extension | Role |
| 2 | Alisa | Liu | PM Team | alisa@yeastar.com | 15772938735 | 6002 | user |
| 3 | Betty | Zhang | R&D Team | betty@yeastar.com | 15772938700 | 6008 | user |
| 4 | Cindy | Ma | Sales Team | cindy@yeastar.com | 15778838700 | 6021 | administrator |
Requirements of an imported file
- Format:
xlsorxlsx. - Size: Less than 100 MB
- File name: Less than 127 characters
- Import parameters: Ensure that the import parameters meet requirements. For more information, see Users Parameters.
Important
- The Headers (parameters in the first row) are case sensitive, do NOT change them.
- The First Name, Department, Email Address, and Role are required parameters.
- The Department names (or group names) must be created on the web portal in advance.
Procedure
-
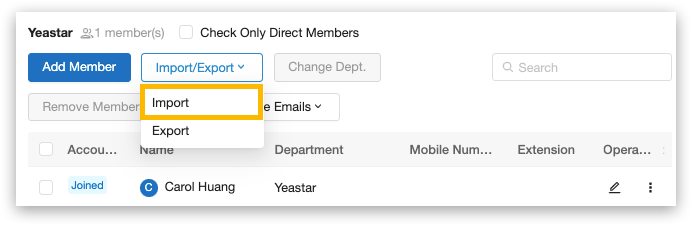
Log in to Yeastar Workplace management portal.
-
Go to User Management > Users and Groups, click Import/Export and select Import.
-
In the pop-up window, click Upload Excel.
-
Select your prepared Excel file, and click Import to start uploading the file.
Result
Users are imported successfully.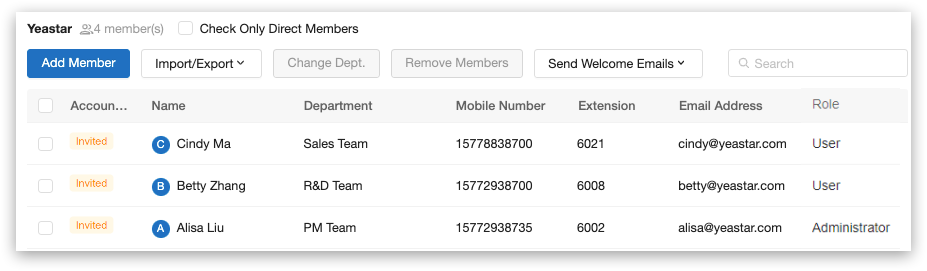
- The users are listed on the web page with the Account Status Invited.
- An invitation email is sent to the imported users, through which users can activate their Yeastar Workplace accounts.
Importing failed?
If A pop-up window says "Import failed", it indicates that the imported file did NOT meet the requirements.
To solve this issue, do as follows:
- Modify the imported file according to Users Parameters.
- Re-import the modified file.
Related topics

Created: December 16, 2021
Author: carol