Book a Desk
This topic describes how to book a desk.
Background information
Yeastar Workplace provides two different methods to book a desk.
| Method | Description |
|---|---|
| Office map | Display a floor's desk resources on a map to help you locate specific desks easily. For more information, see Book a desk on the office map. |
| Desk list | Display all the available time periods for all desk resources in the system, and enable you to to quickly find a desk that meets your time requirements. For more information, see book a desk using desk list. |
Book a desk on office map
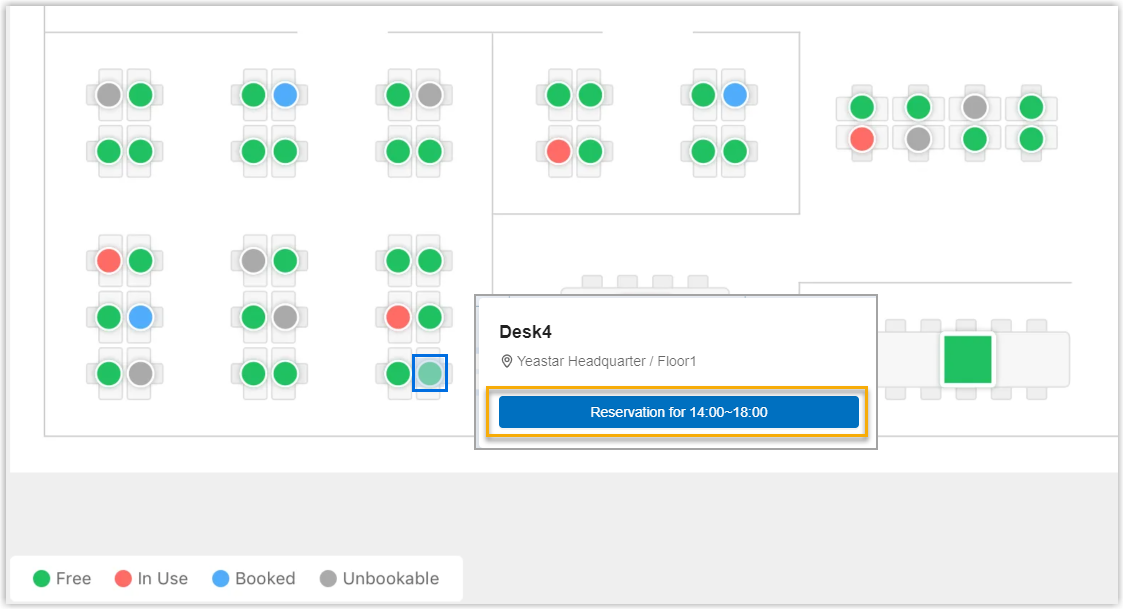
Office map visualizes all the desk resources of a floor on the map to help you locate specific desks easily and quickly.
- Log in to Yeastar Workplace, and select the Map tab in the top bar.

- In the top filter bar, specify the location, date, and start/end time. Or search for specific rooms in the search bar.

- The office map displays the status of all the desk resources during the selected time range.

- Click an available desk, and click Reservation for xx~xx in the pop-up dialog box.
-
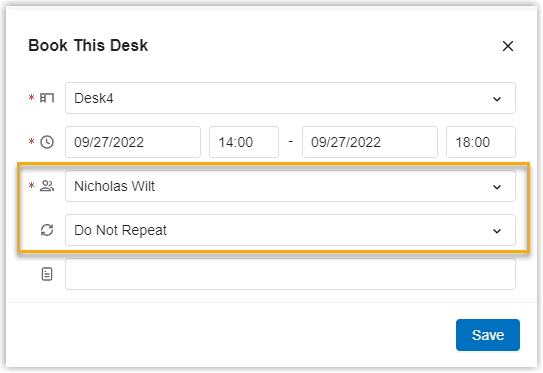
Edit the reservation details as needed:
-
If you are an administrator, you can book a desk for others. Click the User dropdown list to select which user you wish to book the desk for.
-
Optional: To make it a recurring booking, click the Repeat dropdown list and select the recurring pattern.
-
-
Click Save.
Your desk reservation is saved and displayed on the office map.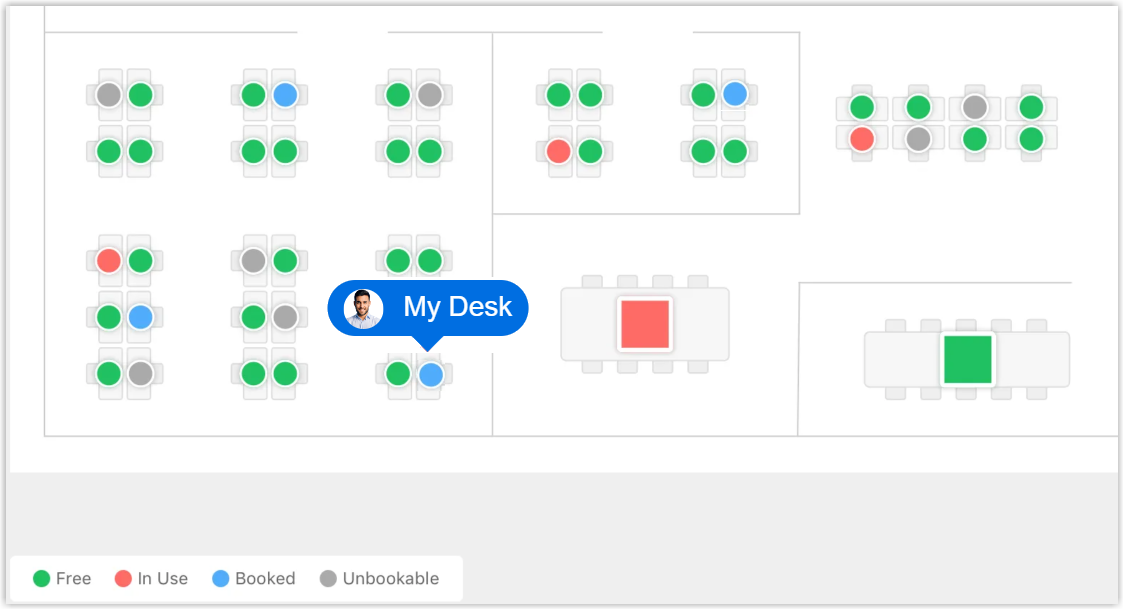
Book a desk using the desk list
- Log in to Yeastar Workplace, and select the Desk tab in the top bar.

- In the top filter bar, specify the location, date, and occupancy status. Or show your favorite desks.

- The desk list displays the schedule of desks that meet the criteria.
- Click an empty time slot in the calendar grid of the desired desk.
-
In the pop-up window, complete the following configurations to book a desk.
- Desk: Confirm the desk you are gonna book or click the dropdown list to select another desk.
- Time: Select the date and start/end time of your desk reservation.
- User: This field is only available when you are an administrator.
Click the dropdown list to select which user you wish to book the desk for. - Repeat: optional. To make it a recurring reservation, click the dropdown list and select the recurring pattern.
-
Click Save
Last update:
October 21, 2022
Created: September 30, 2022
Created: September 30, 2022