Set up Desk Occupancy Sensor
This topic provides step-by-step instructions on setting up Desk Occupancy Sensors for Yeastar desk booking system.
Requirements
-
Yeastar Workplace: Pro Plan
-
Device model: Milesight Occupancy Sensor WS202
Prerequisites
- You have added desk resources in Yeastar Workplace.
- You have set up at least one of your LoRaWAN gateways for Yeastar Workplace.
Step 1. Register Desk Occupancy Sensors
-
Log in to Yeastar Workplace management portal, go to Device Management > Device List.
-
Click Add, and configure the following information in the pop-up window.
Item Description Registration Code / SN Enter the Serial Number of this device.
If the SN is correct, the system automatically detects the device type.Note
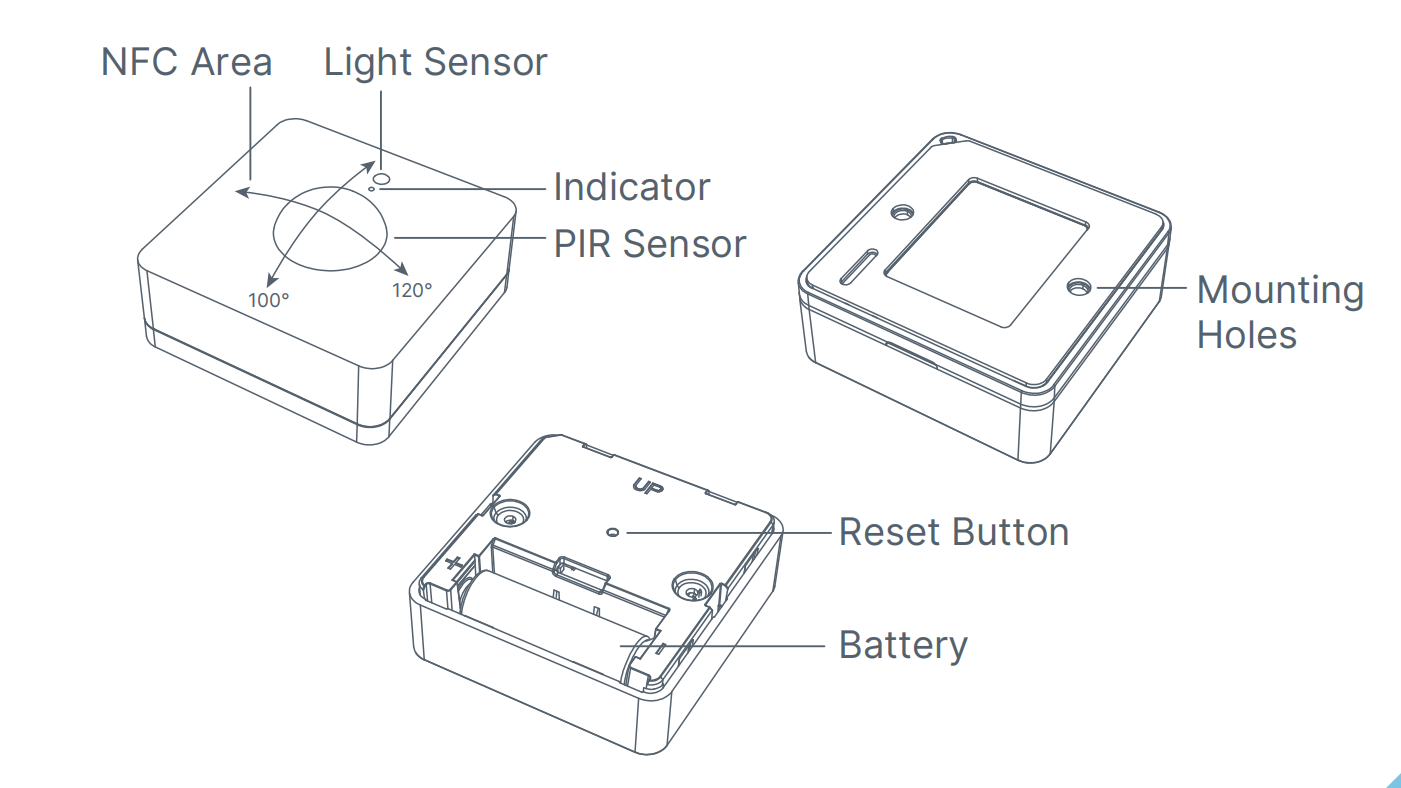
You can collect the SN on the back panel of the device.
Device Name Specify a name to help you identify this device. Associated Gateway Select a gateway for transmitting data between Yeastar Workplace and the device. Note
To guarantee the quality of data transmission, it is recommended to choose a gateway installed on the same floor as the Desk Occupancy Sensor.
Bind to Select a desk resource to be associated with this Desk Occupancy Sensor. -
Click OK.
-
Mark the device to remind you where it will be installed.
For example, attach a label of its associated desk on the back of the device. -
Repeat Step 2 ~ Step 4 for all the Desk Occupancy Sensors that need to be set up.
You have registered Desk Occupancy Sensors to Yeastar Workplace. After the devices are powered on, they will be activated and connected to Yeastar Workplace automatically.
Step 2. Install Desk Occupancy Sensors
Package contents
Before you begin to install the Desk Occupancy Sensor, you need to check the package contents to verify that you have received the items below.
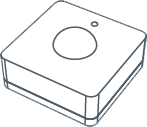


Hardware overview
Mount Occupancy Sensor WS202
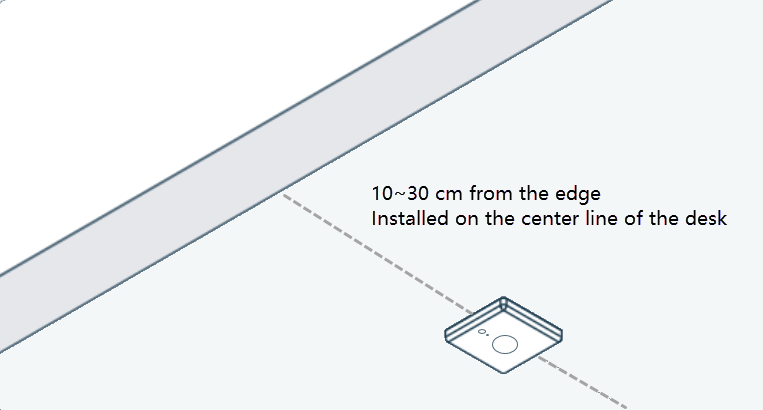
Mounting Position
Mount the Occupancy sensor under the desk, approximately 10 to 30 cm from the edge, at the center line of the desk.
- Pull out the battery insulating sheet to power on the device.

- Paste 3M tape to the back of the sensor.
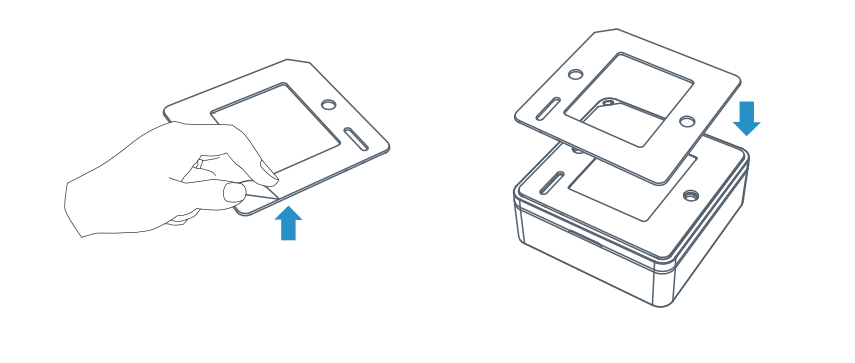
- Tear the other side and place it under a desk.
Step 3. Check the device status
- Log in to Yeastar Workplace management portal, go to Device Management > Device List.
-
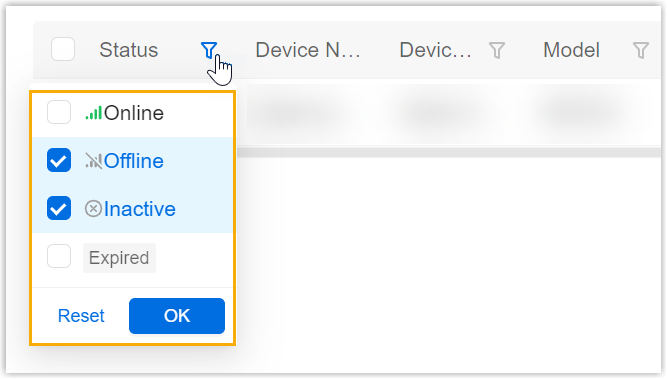
Under the Status column, view the device status.
If the device status shows , indicating that the Desk Occupancy Sensor is connected to Yeastar Workplace.
Best Practice
Use the status filter to check for abnormal device connections and fix the abnormal connections accordingly.
Result
You have set up Desk Occupancy Sensors, the following features are achieved.
-
The Desk Occupancy Sensor automatically detects the desk occupancy and synchronizes the real-time data to Yeastar Workplace user portal.
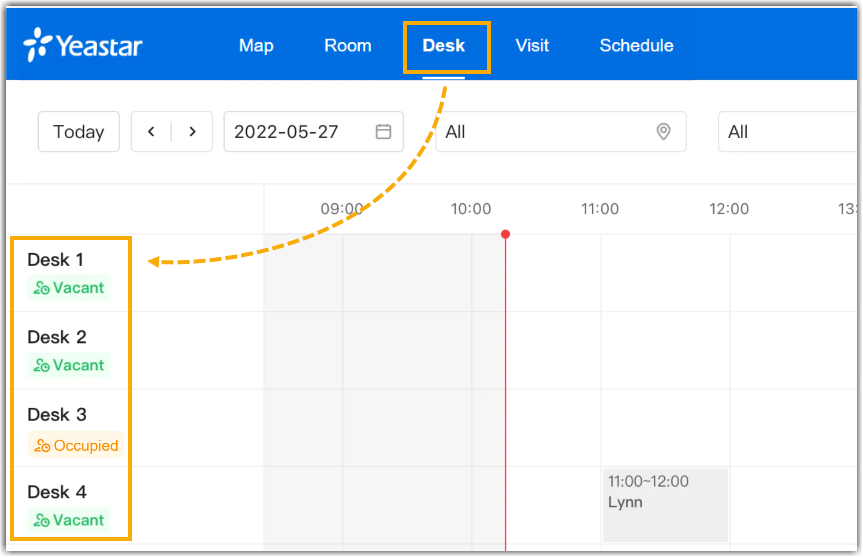
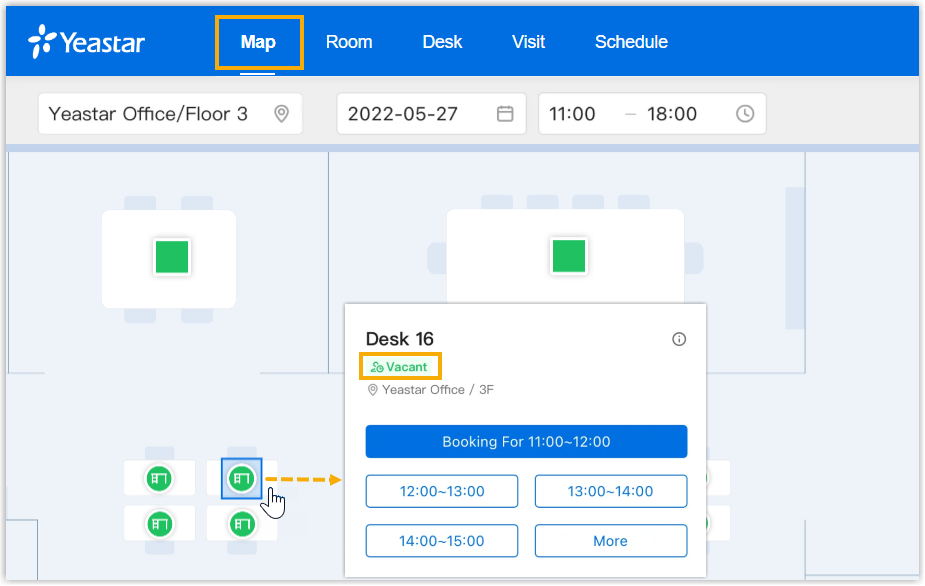
Desk Tab Map Tab -
If the Desk Occupancy Sensor detects an in-use desk (flexible desks only) is empty for thirty minutes, the system will automatically release this desk.
Note
You can specify the timeout duration for auto-release or disable this feature.
For more information, see Manage Auto-Release Strategy based on Desk Occupancy Sensor.
FAQ & Troubleshooting
Q: What to do when the status shows ![]() ?
?
The status ![]() indicates the device is NOT activated. Refer to the following corrective actions to fix this issue:
indicates the device is NOT activated. Refer to the following corrective actions to fix this issue:
- Ensure the device is powered on.
- Ensure the sensor's associated gateway can access the Internet.
Q: What to do when the status shows ![]() ?
?
The status ![]() indicates the device failed to connect to the LoraWAN network. Refer to the following corrective actions to fix this issue:
indicates the device failed to connect to the LoraWAN network. Refer to the following corrective actions to fix this issue:
-
Ensure the sensor's associated gateway can access the Internet.
-
Reboot the device to rejoin the LoraWAN network.
- Download and install Milesight ToolBox App from Google Play or App Store.
- Enable NFC on your mobile phone and open Milesight ToolBox.
- Attach your phone with NFC area to the device.
- Go to Device > Maintenance, tap Reboot.
Created: March 16, 2023