Configure Room Resources Synced from Google Workspace
After you synchronize room resources from Google Workspace, you can configure the room resources to manage how and when users can book meeting rooms.
Background information
Yeastar Workplace supports 3 types of room resources, and the room type determines whether and how users can book this meeting room:
Regular Meeting Room:
Regular Meeting Rooms can be booked by any user with booking permission, through Yeastar Workplace web portal and their associated Room Displays.
Request-only Room
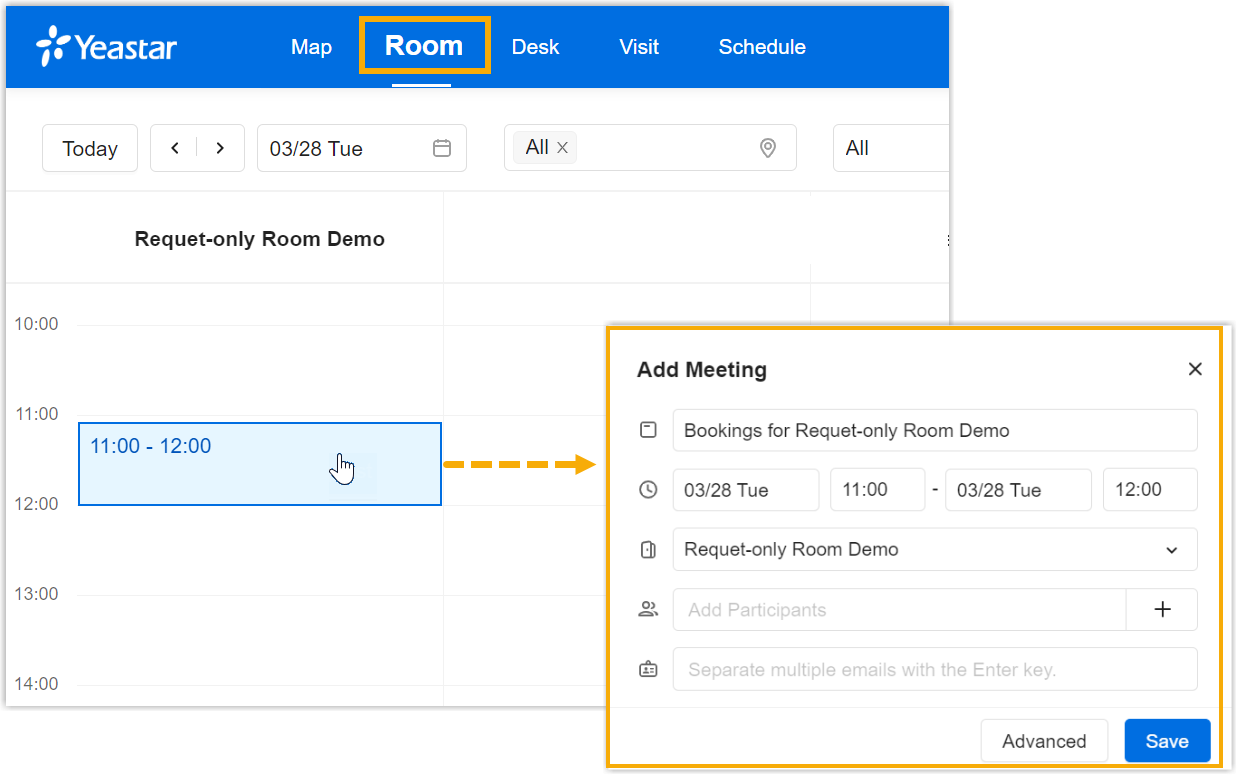
Request-only Rooms can be booked by any user with booking permission on Yeastar Workplace web portal only. When users try to book a Request-only Room, they need to submit a reservation request first, and only when the request is approved will the room be booked.
You can specify the approver(s) for each Request-only Room and which users can directly book Request-only Rooms without approval.
Dedicated Meeting Room
Dedicated Meeting Rooms are for specific use and can NOT be booked by any users on Yeastar Workplace web portal.
Note
By default, all room resources synced from Google Workspace are Regular Meeting Rooms, you can set the room resources to different types and configure the corresponding settings as needed.
Configure room resources
Procedure
-
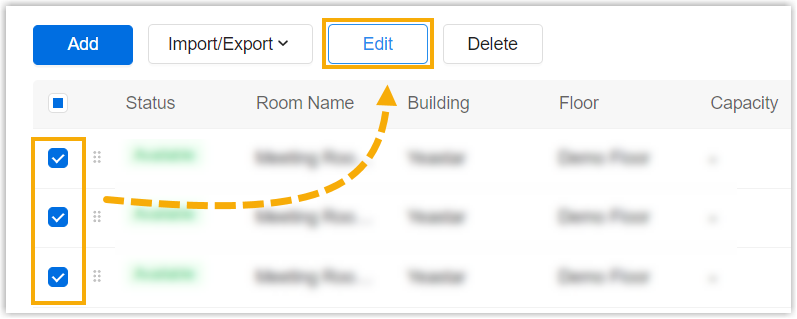
Log in to Yeastar Workplace management portal, go to Meeting room > Room Management.
Select the desired meeting room resource(s), and click Edit.
-
In the Basic Information tab, select the desired fields and configure the meeting room information.
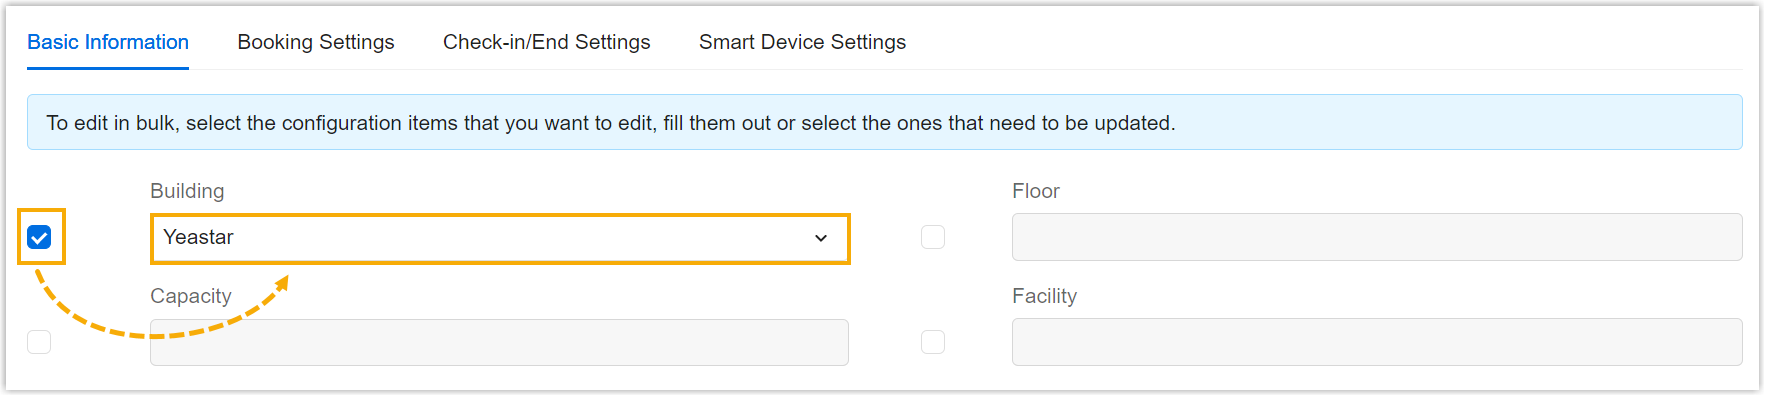
Setting Description Building In the drop-down list, select the building where the meeting room is located. Floor In the drop-down list, select the floor where the meeting room is located. Capacity Enter the maximum number of people the room can accommodate to help users find a room that matched their meeting size. Facility In the drop-down list, select the available facilities in the meeting room.
5 items by default, all editable. You can add or delete items as needed.Booking Type In the drop-down list, select Regular Meeting Room. Users with Room Booking Permission In the drop-down list, select which users or groups can book the meeting room. Remark (optional) Enter remark for this meeting room. -
Click the Booking Settings tab, select the desired fields and set booking rules to manage how and when users can book this meeting room.
Setting Description Restrict Schedules in Company Working Hours Decide whether to restrict meeting room bookings to Company Working Hours. - Enabled: The meeting rooms can only be booked during working hours.
- Disabled: The meeting rooms can be booked for any time.
Minimum Duration of a Meeting Specify the minimum duration for a meeting room that can be booked. Maximum Duration for a Meeting Specify the maximum duration for a meeting room that can be booked. Advance Booking Window Specify how far in advance users can book meeting rooms. Allow Recurring Booking Decide whether users can schedule recurring meeting room reservations. -
Click the Check-in/End Settings tab, select the desired fields and configure settings.
-
In the Enable Check-in drop-down list, decide whether users need to check in to confirm their reservations when using the room.
- No check-in is required, select Disable.
-
Users need to check in for their meeting room reservations, select Enable, and configure the following settings:
Setting Description Advance Check-in Window Specify how far in advance users can check in to their meeting room reservations.
The system will send a reminder to users with check-in permission when it reaches the pre-configured time.Permission to Check in Decide who can check in for meeting reservations. Release the Meeting Room Upon Check-in Timeout
Check in timeout refers to the latest time for users to check in after the meeting has started. - Enable: If no check-in occurs within the check-in timeout, the system will automatically release this meeting room.
Specify the check-in timeout in the dropdown list next to it. - Disable: The meeting room will not be released, even if no check-in occurs.
- Enable: If no check-in occurs within the check-in timeout, the system will automatically release this meeting room.
-
Permission to End: Decide who can end meetings.
- Participants Check-in Count: Decide whether to enable check-in for meeting participants, so that the system can record and disiplay the actual attendees for a meeting.
-
-
Click Save.
Note
You can customize the settings in the Smart Device Settings tab after you set up smart devices for Yeastar Meeting Room Booking system.
Result
You have set the room resources as Regular Meeting Rooms. Users with booking permission can click the desired time slot to book this meeting room.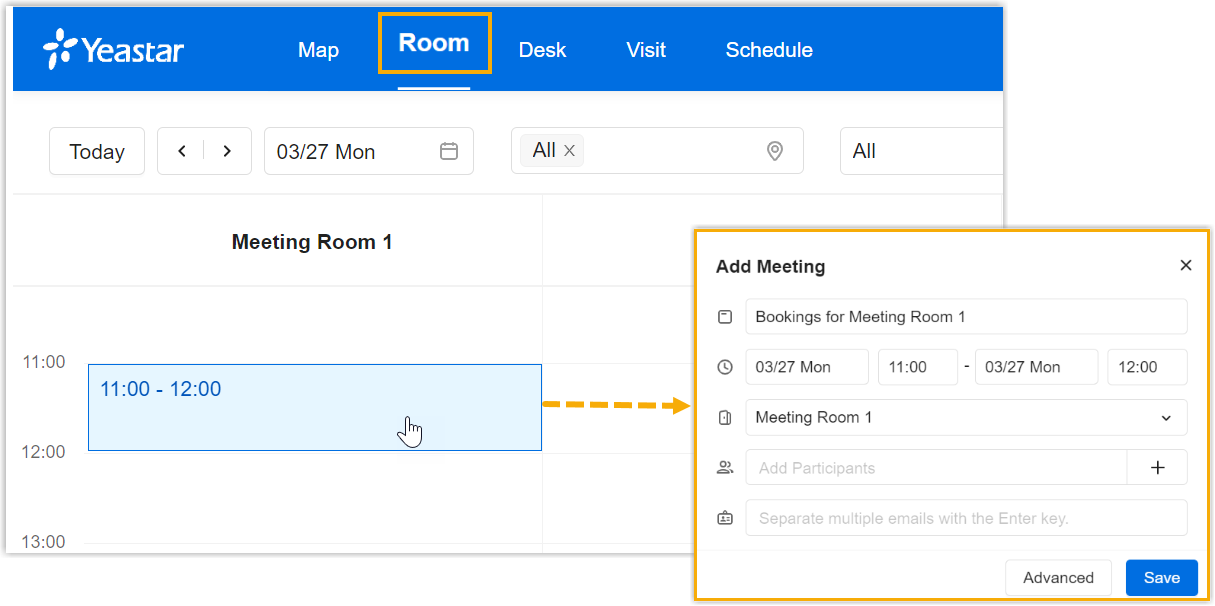
What to do next
Mark room resources on your floor map, so users can book meeting rooms from the map directly.
For more information, see Mark Existing Desks and Rooms on Floor Maps.
Prerequisites
Ensure you have enabled and set up meeting room approvals.
Procedure
-
Log in to Yeastar Workplace management portal, go to Meeting room > Room Management.
-
Select the desired meeting room resource(s), and click Edit.
-
In the Basic Information tab, select the desired fields and configure the meeting room information.
Setting Description Building In the drop-down list, select the building where the meeting room is located. Floor In the drop-down list, select the floor where the meeting room is located. Capacity Enter the maximum number of people the room can accommodate to help users find a room that matched their meeting size. Facility In the drop-down list, select the available facilities in the meeting room.
5 items by default, all editable. You can add or delete items as needed.Booking Type In the drop-down list, select Requet-only Room. Users with Approval Permission In the drop-down list, select which users or groups can manage the reservation requests for this Request-only room. Users with Room Booking Permission In the drop-down list, select which users or groups can book the meeting room. Optional: Remark Enter remark for this meeting room. -
Click the Booking Settings tab, select the desired fields and set booking rules to manage how and when users can book this meeting room.
Setting Description Restrict Schedules in Company Working Hours Decide whether to restrict meeting room bookings to Company Working Hours. - Enabled: The meeting rooms can only be booked during working hours.
- Disabled: The meeting rooms can be booked for any time.
Minimum Duration of a Meeting Specify the minimum duration for a meeting room that can be booked. Maximum Duration for a Meeting Specify the maximum duration for a meeting room that can be booked. Advance Booking Window Specify how far in advance users can book meeting rooms. Allow Recurring Booking Decide whether users can schedule recurring meeting room reservations. -
Click the Check-in/End Settings tab, select the desired fields to configure the following settings.
-
In the Enable Check-in drop-down list, decide whether users need to check in to confirm their reservations when using the room.
- No check-in is required, select Disable.
-
Users need to check in for their meeting room reservations, select Enable, and configure the following settings:
Setting Description Advance Check-in Window Specify how far in advance users can check in to their meeting room reservations.
The system will send a reminder to users with check-in permission when it reaches the pre-configured time.Permission to Check in Decide who can check in for meeting reservations. Release the Meeting Room Upon Check-in Timeout
Check in timeout refers to the latest time for users to check in after the meeting has started. - Enable: If no check-in occurs within the check-in timeout, the system will automatically release this meeting room.
Specify the check-in timeout in the dropdown list next to it. - Disable: The meeting room will not be released, even if no check-in occurs.
- Enable: If no check-in occurs within the check-in timeout, the system will automatically release this meeting room.
-
Permission to End: Decide who can end meetings.
- Participants Check-in Count: Decide whether to enable check-in for meeting participants, so that the system can record and disiplay the actual attendees for a meeting.
-
-
Click Save.
Note
You can customize the settings in the Smart Device Settings tab after you set up smart devices for Yeastar Meeting Room Booking system.
Result
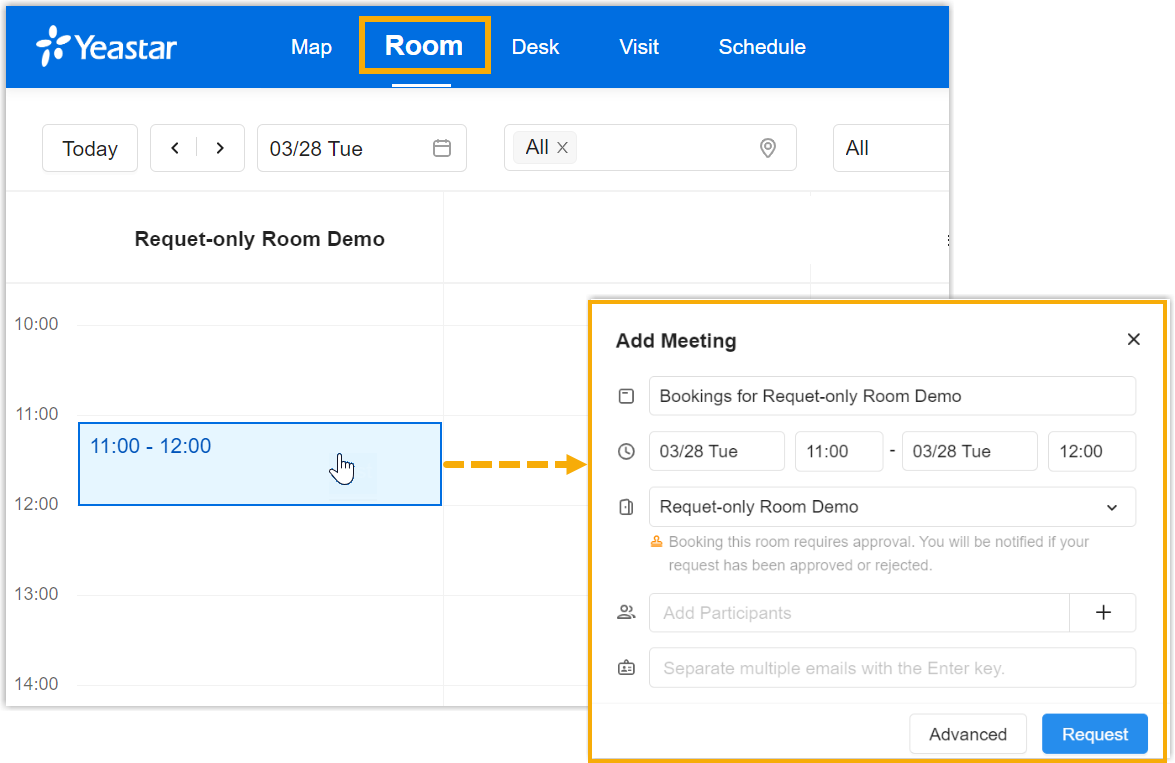
You have set the room resources as Request-only Rooms, the room resources are displayed on Yeastar Workplace user portal.
The following features are achieved:
-
Users with booking permission can click the desired time slot to submit a reservation request. After the request is approved by the approver(s), this meeting room will be booked.
-
Users from the No Approval Required drop-down list can directly book Request-only Rooms without approval.
What to do next
Mark room resources on your floor map, so users can book meeting rooms from the map directly.
For more information, see Mark Existing Desks and Rooms on Floor Maps.
Procedure
-
Log in to Yeastar Workplace management portal, go to Meeting room > Room Management.
-
Select the desired meeting room resource(s), and click Edit.
-
In the Basic Information tab, select the desired fields and configure the meeting room information.
Setting Description Room Name Specify a name to help you and your colleagues identify this meeting room. Building In the drop-down list, select the building where the meeting room is located. Floor In the drop-down list, select the floor where the meeting room is located. Capacity Enter the maximum number of people the room can accommodate to help users find a room that matched their meeting size. Facility In the drop-down list, select the available facilities in the meeting room.
5 items by default, all editable. You can add or delete items as needed.Booking Type In the drop-down list, select Dedicated Meeting Room. Optional: Remark Enter remark for this meeting room. -
Click Save.
Note
You can customize the settings in the Smart Device Settings tab after you set up smart devices for Yeastar Meeting Room Booking system.
Result
You have set the room resources as Dedicated Meeting Rooms.
- The room resources are NOT displayed on the Room tab of Yeastar Workplace user portal.
- No users can book these meeting room resources.
What to do next
Created: April 10, 2023