Install Milesight People Counting Sensor VS121
This topic describes the hardware overview of Milesight People Counting Sensor VS121 and gives instructions on how to install, power up, and network a Milesight People Counting Sensor VS121
Package contents
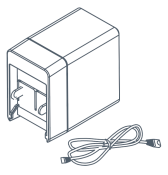
Before you begin to install the people counting sensor VS121, you need to check the package contents to verify that you have received the items below.


Hardware overview
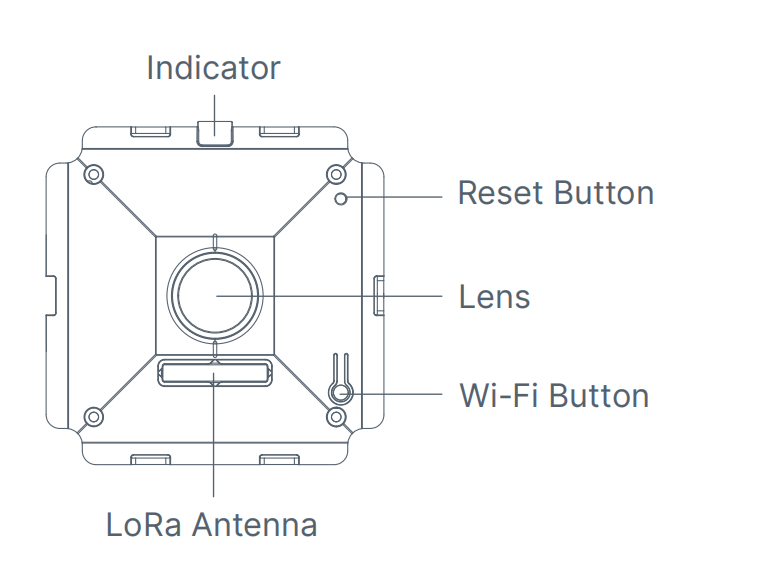
Front panel (with the front cover removed)
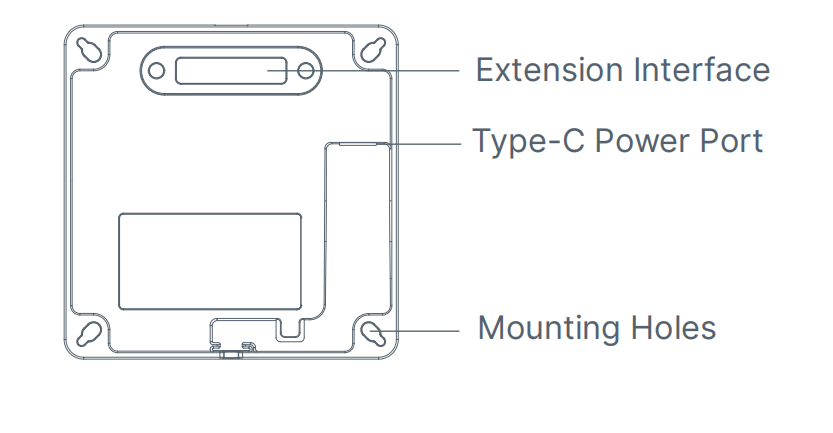
Back panel
Buttons and functions
| Button | Function | Action |
|---|---|---|
| Wi-Fi |
Enable Wi-Fi |
Press and hold the Wi-Fi button for more than 3 seconds, and the indicator will turn solid green.
Note It is recommended to enable Wi-Fi for subsequent configuration of detection region if your sensor is installed in the following cases:
|
| Disable Wi-Fi | Press and hold the Wi-Fi button for more than 3 seconds, and the indicator will turn off. | |
| Reset | Reset to factory settings | Press and hold the reset button for more than 10 seconds, and the indicator will blink 6 times. |
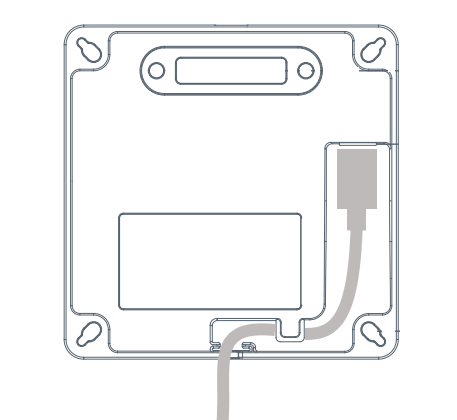
Connect power cable
|
 |
Install people counting sensor VS121
Mounting position
- Mount VS121 sensor on the ceiling, facing downward and level with the ceiling.
- Mount VS121 sensor away from bright light interference.
- Mount VS121 sensor away from reflective objects such as mirrors.
Recommended mounting height
| Object | Height |
|---|---|
| Sitting object | > 2.5m (8.2ft) |
| Standing object | > 3m (9.8ft) Optimum height: 3m |
Detection area
| Height | Detection Area | Height | Detection Area |
|---|---|---|---|
| 2.5m | 3m*4m | 3.5m | 4.9m*6.4m |
| 3m | 4.4m*5.7m | 4m | 5.6m*7.4m |
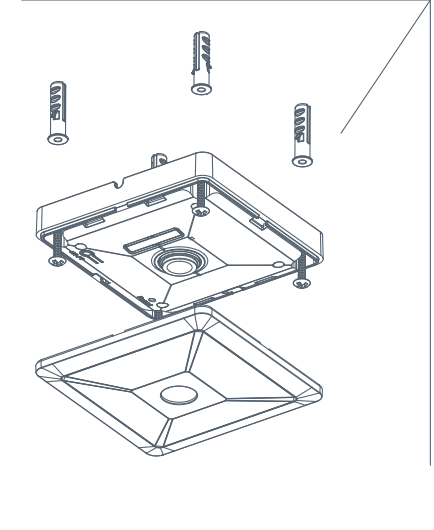
Mount the sensor
Expand to see the required materials
| Materials required | In package contents |
|---|---|
| 1 x Mounting sticker | |
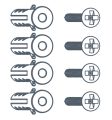
| 4 x Screws | |
| 4 x Wall plugs | |
| Standard Screwdriver | |
| Eletric drill a 6 mm drill bit | |
| Hammer |
-
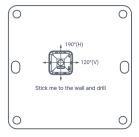
Ensure the thickness of the ceiling is more than 30 mm, then paste the mounting sticker to the ceiling in the desired location.
-
Drill four holes by using your drill with a 6 mm drill bit on the circles of the mounting sticker.
-
Hammer four wall plugs into the holes respectively.
-
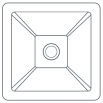
Remove the front cover on the sensor, then press the sensor on the ceiling with its mounting holes align with the wall plugs, then fix the screws into the wall plugs.
-
Install the front cover back to the sensor with the
 logo facing the indicator.
Power on the sensor
Connect the power adapter of the People Counting Sensor to a power outlet.
What to do next
After the People Counting Sensors are installed and powered on, you can check the device status to see if they are connected to Yeastar Workplace, and learn the features that People Counting Sensors can achieve.
For more information, see Check the Status of People Counting Sensor.
Created: December 16, 2021
Author: Cody