Register A Room Display
Register your Room Displays to the Yeastar Workplace, so that the devices can be associated with the room resources in your system. Which allows users to view real-time room availability and book rooms on Room Displays.
Prerequisites
The Room Display is powered on and connected to the Internet.
Step1. Select the server and note down the device information
-
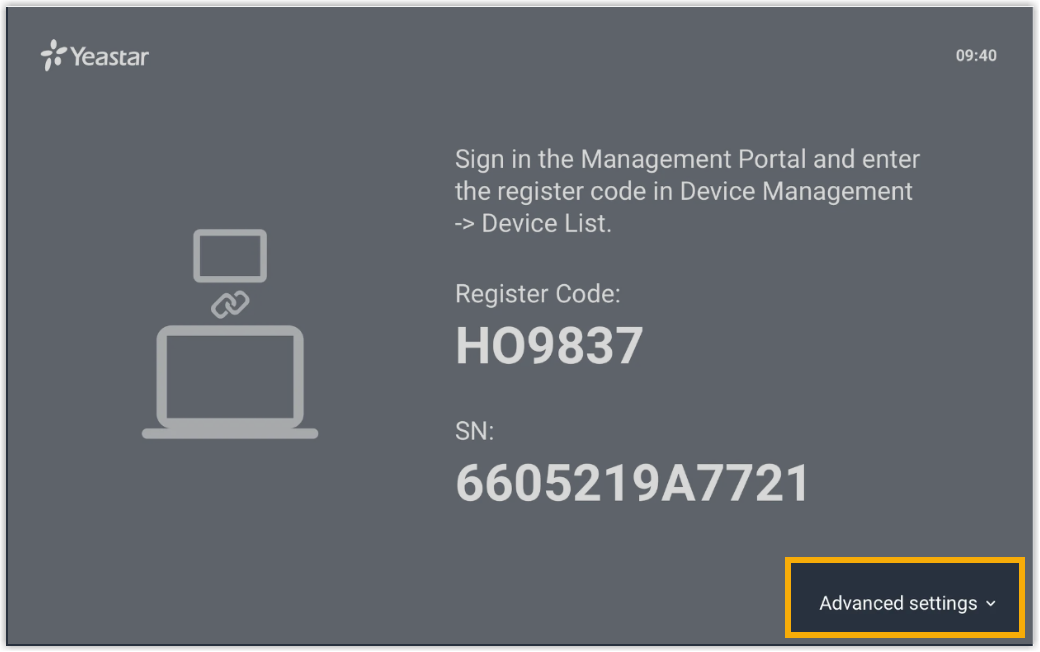
On the screen of the Room Display, tap Advanced Settings .
-
Select your server based on the version of your Yeastar Workplacet, then click Save.
-
For SaaS version: Select the same server as your Yeastar Workplace web portal.
Tip
Go to Yeastar Workplace login page, and check the server selection in the top bar.

-
For On-Premise version: Select Custom Server and enter your domain name or the IP address of your server.
-
-
Note down the following information of Room Displays.
- SN/Registration Code: The Serial Number or Registration Code that is displayed on the screen.
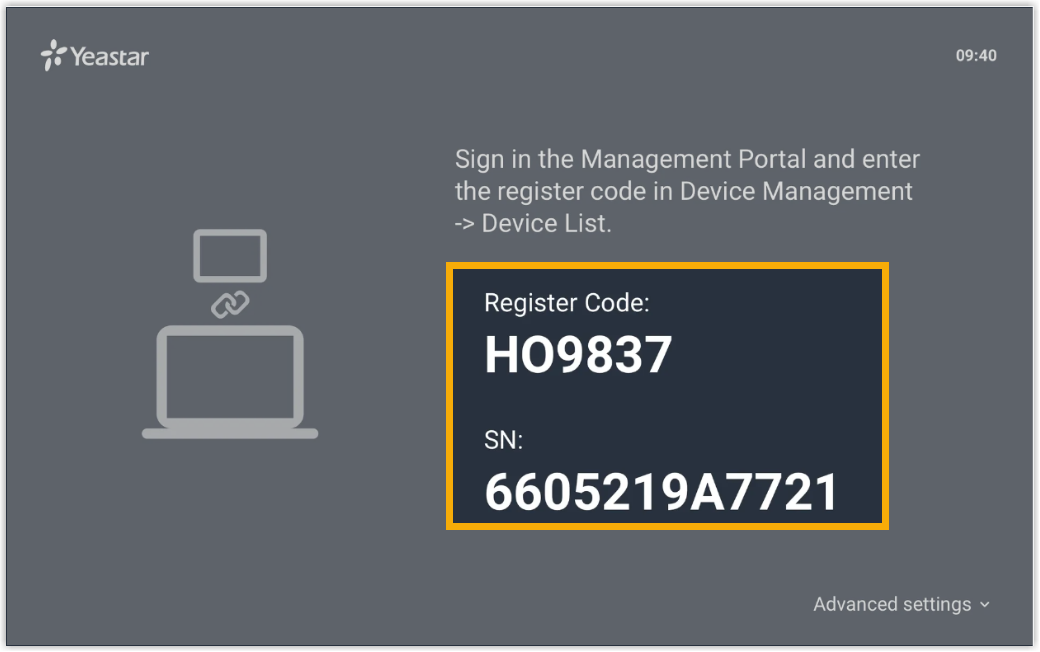
- Location: The meeting room where the Room Display is installed.
Check the following sample file for reference.
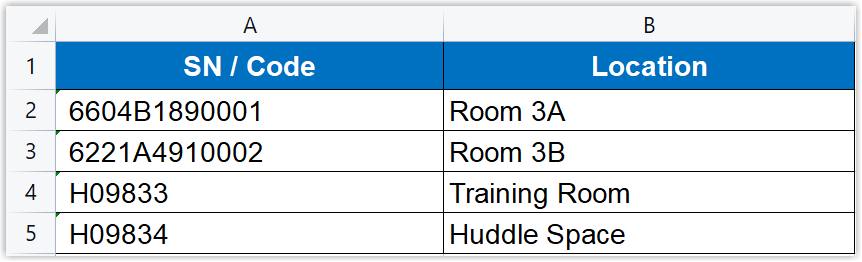
- SN/Registration Code: The Serial Number or Registration Code that is displayed on the screen.
-
Repeat the above steps for all the Room Displays that need to be registered.
Step2. Register the Room Display to Yeastar Workplace
-
Log in to Yeastar Workplace management portal, go to Device Management > Device List.
-
Click Add, and configure the following information according to the device information you recorded.
- Registration Code / SN: Enter the Registration Code or Serial Number of this device.
If the Registration Code/SN is correct, the system automatically detects the device type. - Device Name: Specify a name to help you identify this device.
- Bind to: Select a room resource to be associated with this Room Display.
- Registration Code / SN: Enter the Registration Code or Serial Number of this device.
-
Click OK.
-
Repeat the above steps for all the Room Displays that need to be registered.
What to do next
On the device list page, the device status shows ![]() , indicating that the Room Display is registered to Yeastar Workplace.
, indicating that the Room Display is registered to Yeastar Workplace.
The following features are achieved:
-
The Room Display shows real-time availability of its associated meeting room.
Click on a status below to view the screen interface: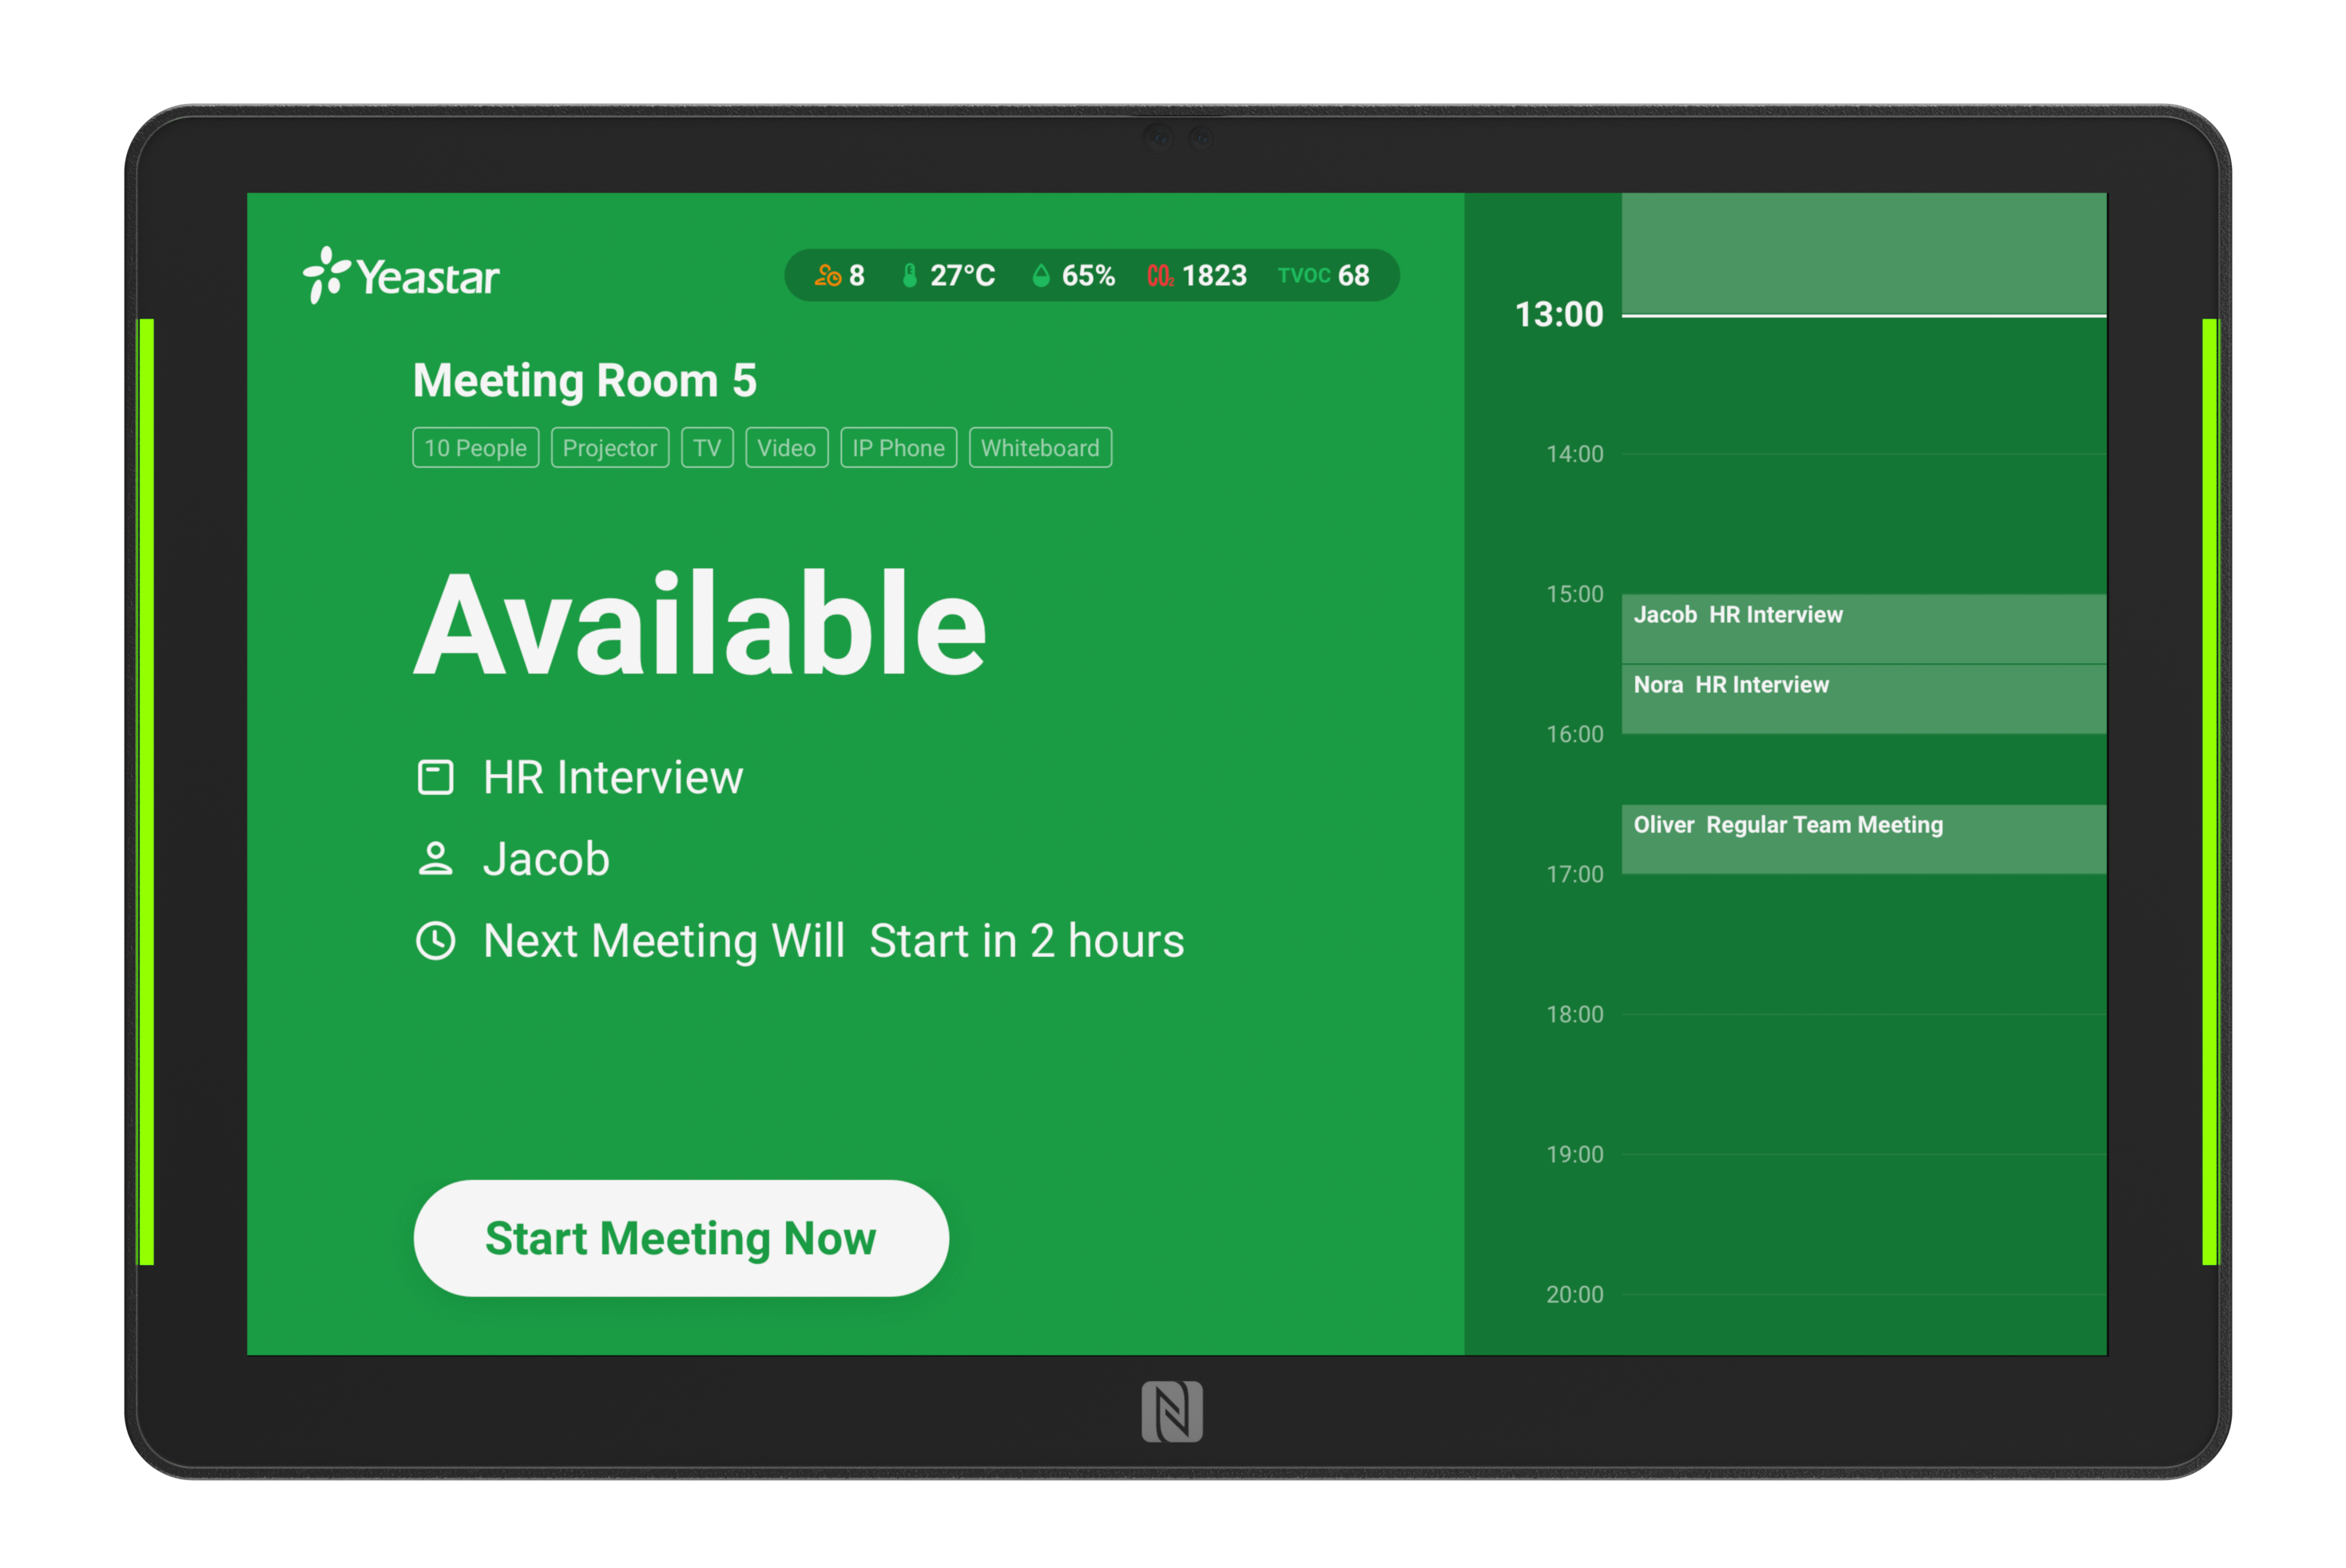
Note
You can customize the screen display and the status theme color for Room Displays. For more information, see Configure System Settings for Room Display.
-
Users can book, check in, and end meetings on Room Display.
Note
- By default, all users can book,check in, and end meetings on Room Display. If you want to restrict the above operations to users with permission only, see Enable Identity Authentication for Room Display
- To decide whether users can book meeting rooms through Room Displays, see Allow or Disallow Booking on Room Display.
-
Meeting room schedules between Yeastar Workplace web portal and Room Displays stay in sync to avoid conflicts in booking meeting rooms.
FAQ
Q: Why does the status shows ![]() ?
?
The status ![]() indicates the Room Display failed to connect to Yeasatr Workplace.
indicates the Room Display failed to connect to Yeasatr Workplace.
Refer to the following corrective actions to fix this issue:
-
Ensure the Room Display can access the Internet.
-
Ensure the server you selected for the Room Display is the same as your Yeastar Workplace web portal.
Q: Meeting schedules between Room Display and Yeastar Workplace are out of sync?
Ensure your Room Displays are connected to a stable network.
To change the network connection of Room Displays, see Change the Network Connection Type for a Room Display.
Created: December 16, 2021
Author: carol