Book a Room on Web Portal
This topic describes how to book a meeting room on Yeastar Workplace web portal.
Background information
Yeastar Workplace provides two different methods to book a meeting room.
| Method | Description |
|---|---|
| Floor map | Display a floor's room resources on a map to help you locate and book specific meeting rooms easily. For more information, see Book a meeting room on the office map. |
| Room list | Display all the available time periods for all room resources in the system, and enable you to to quickly find a meeting room that meets your time requirements. For more information, see book a meeting room using room list. |
Book a meeting room on office map
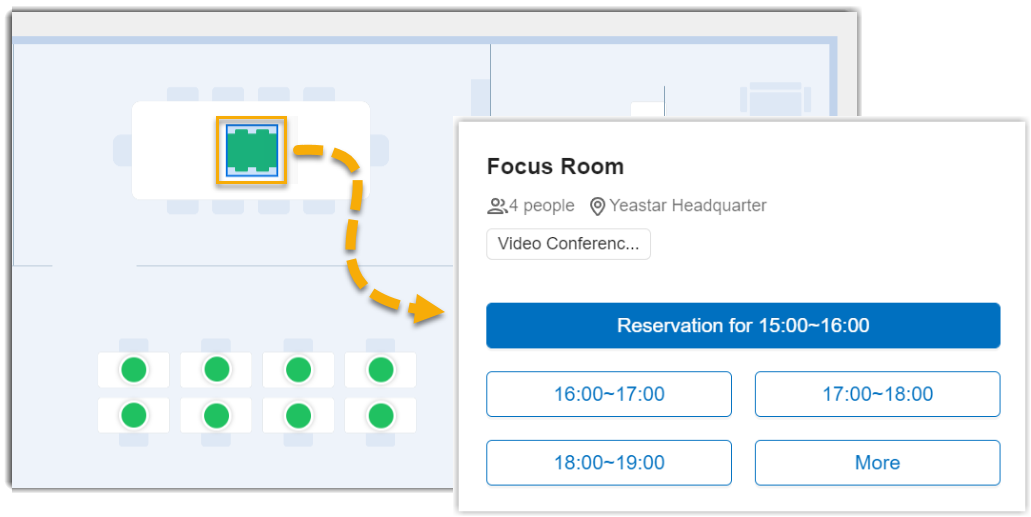
- Log in to Yeastar Workplace, and select the Map tab in the top bar.

- In the top filter bar, select the location, and date. Or search for specific rooms in the search bar.

- Click the icon of the desired meeting room, a pop-up dialog box will appear immediately, displaying the meeting room information and the recommended periods for reservation.
-
Click a desired time period, and complete the following configurations to book a meeting room.
-
Enter the basic information:
-
 ( Subject): Enter the meeting subject.
 -
 (Time): Select the date, start time and end time for this meeting.
 -
 Meeting Room: Confirm the meeting room to be booked.
 -
 ( Participants): Click
  to add internal participants.
If you want to count the actual number of attendees, select Participants Check-in Count. -
 (Guest): To invite external guests to this meeting, enter the emails of external guests and seperate multiple emails with the Enter key.
 -
 Create Visit: Select the checkbox to create visit schedules for external guests.
Note
You can only create visit schedules for external guests when it's NOT a recurring meeting.
-
-
Optional: Click the Advanced button to set the meeting notification, recurrence pattern and meeting service.
 (Meeting notification)
Click the dropdown list and select the notification time or disable it.
 (Recurrence pattern)
Click the dropdown list and select the recurrence pattern or customize the recurrence pattern.
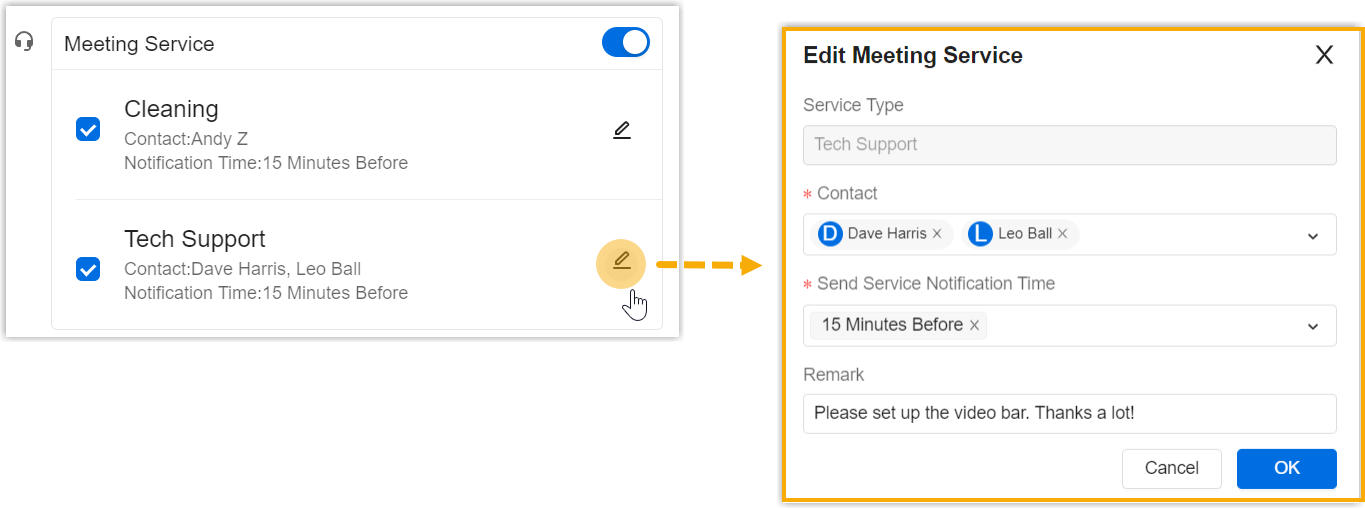
 (Meeting Service)
If you have specific meeting needs, turn on the option and select the desired meeting service(s).
-
If you are using Microsoft Teams to book a meeting room, you can decide whether to generate a Teams meeting link by the checkbox Create Microsoft Teams Meeting Link.
-
Click Save (For Request-only Rooms, click Request).
-
If you selected Create Visit, a pop-up window will appear where you can configure the visit details and click OK to create the visit schedule.
-
Book a meeting room using room list
- Log in to Yeastar Workplace web portal, and select the Room tab in the top bar.

- Filter the desired meeting rooms by date, location, capacity, and facility.
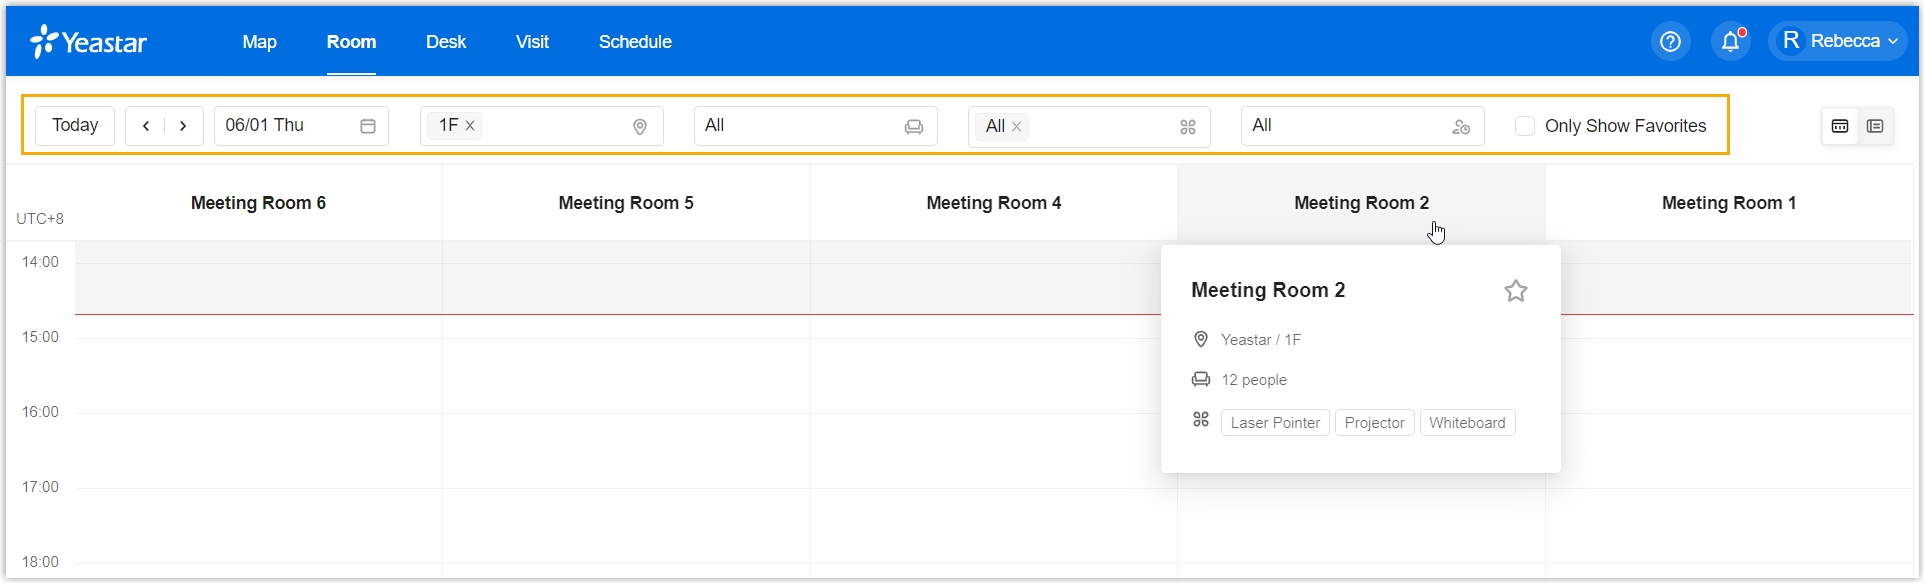
- Click an empty time slot in the calendar grid of the desired meeting room.
-
In the pop-up window, complete the following configurations to book a meeting room.
-
Enter the basic information:
-
(Subject): Enter the meeting subject.
-
(Time): Select the date, start time and end time for this meeting.
-
(Meeting Room): Confirm the meeting room to be booked.
-
(Participants): Click to add internal participants.
If you want to count the actual number of attendees, select Participants Check-in Count. -
(Guest): To invite external guests to this meeting, enter the emails of external guests and seperate multiple emails with the Enter key.
-
Create Visit: Select the checkbox to create visit schedules for external guests.
Note
You can only create visit schedules for external guests when it's NOT a recurring meeting.
-
-
Optional: Click the Advanced button to set the meeting notification, recurrence pattern and meeting service.
(Meeting notification)Click the dropdown list and select the notification time or disable it.
(Recurrence pattern)Click the dropdown list and select the recurrence pattern or customize the recurrence pattern.
(Meeting Service)If you have specific meeting needs, turn on the option and select the desired meeting service(s).
-
If you are using Microsoft Teams to book a meeting room, you can decide whether to generate a Teams meeting link by the checkbox Create Microsoft Teams Meeting Link.
-
Click Save (For Request-only Rooms, click Request).
-
If you selected Create Visit, a pop-up window will appear where you can configure the visit details and click OK to create the visit schedule.
-
Result
-
For regular meeting rooms: You have booked a meeting room successfully.
-
For request-only rooms: You have submitted the reservation request, and you will be notified if your request has been approved or rejected.
-
If you selected Participants Check-in Count, a QR code will be generated after you check in to this room reservation, through which meeting participants can check in to indicate their attendance.
-
If you checked the Create Visit, you can configure the visit details and create a visit schedule in the pop-up window.
-
If you enabled the Meeting Service, the selected contact(s) will be notified at the time you set.
-
If the meeting room you booked comes with the icon
 ,
,  , or
, or  , your room bookings will be synced to your Google Calendar or Outlook calendar respectively.
Note
Any reservations synced to Outlook will be displayed on the calendar of the booked room instead of your personal calendar, due to Microsoft default settings.
Select the room calendar to view synced reservations.
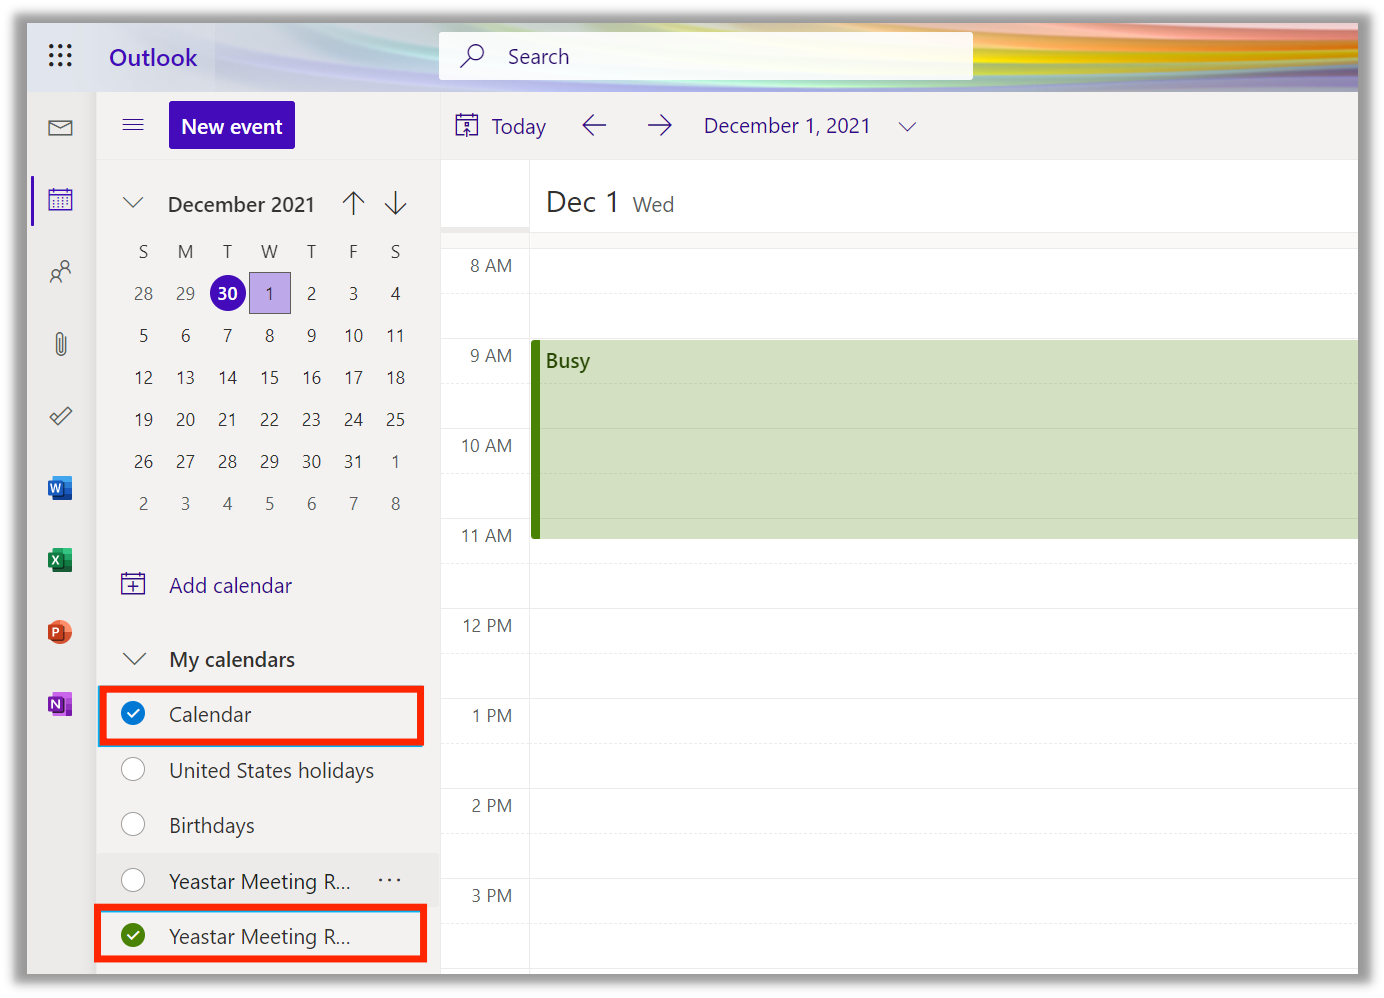
Personal calendar Personal calendar & selected room calendar
Created: December 16, 2021
Author: Cody