Register A Visitor Screen
Register your Visitor Screens to Yeastar Workplace, so that visitors can check in to their visit schedules and submit visit requests on Visitor Screens.
Requirements
- Yeastar Workplace: Standard Plan or Pro Plan
- Device model: Yeastar Visitor Screen DS7510, DS7310
Prerequisite
- You have purchased the Visitor License.
- The visitor screen is powered on and connected to the Internet.
Step1. Select the server and note down the SN
-
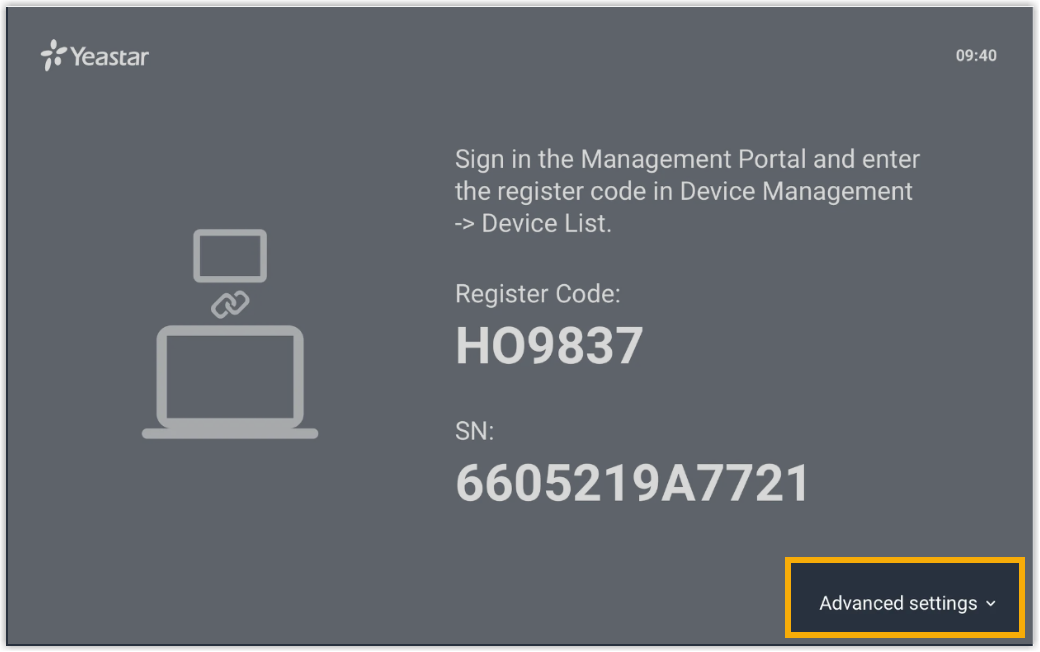
On the screen of the visitor screen, tap Advanced Settings .
-
Select your server based on the version of your Yeastar Workplacet, then click Save.
-
For SaaS version: Select the same server as your Yeastar Workplace web portal.
Tip
Go to Yeastar Workplace login page, and check the server selection in the top bar.

-
For On-Premise version: Select Custom Server and enter your domain name or the IP address of your server.
-
-
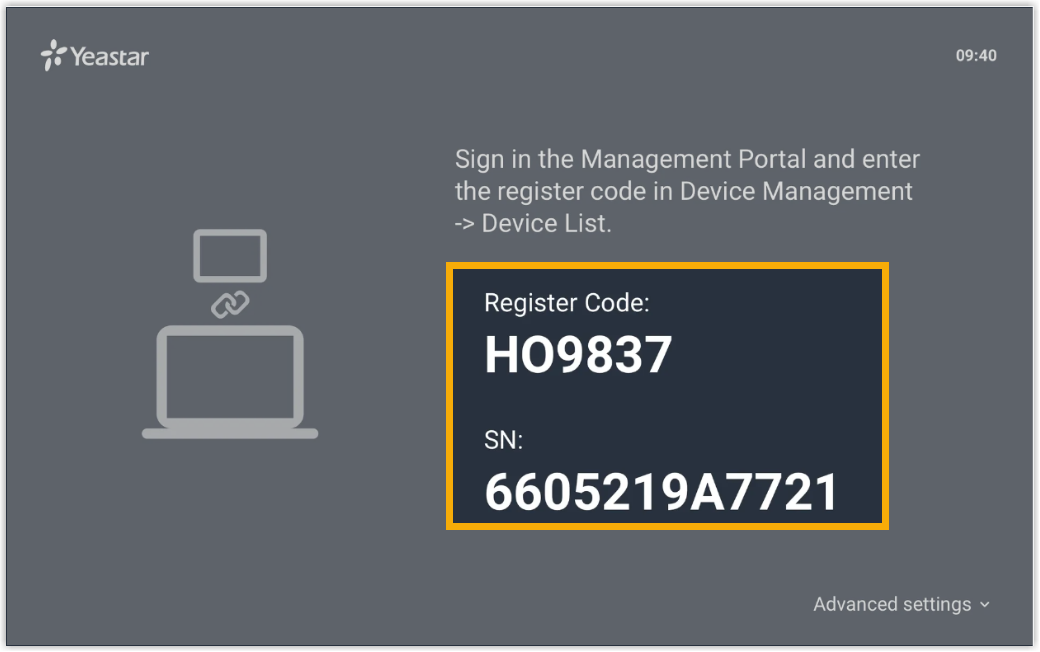
Note down the SN (Serial Number).
Step2. Register the Visitor Screen to Yeastar Workplace
-
Log in to Yeastar Workplace management portal, and go to Device Management > Device List, click Add Device.
-
In the pop-up window, configure the following settings.
- Registration Code / SN: Enter the Registration Code or Serial Number of this device.
If the Registration Code/SN is correct, the system automatically detects the device type. - Device Name: Specify a name to help you identify this device.
- Registration Code / SN: Enter the Registration Code or Serial Number of this device.
-
Click Save.
Result
On the device list page, the device status shows ![]() , indicating that the Visitor Screen is registered to Yeastar Workplace.
, indicating that the Visitor Screen is registered to Yeastar Workplace.
The following features are achieved:
-
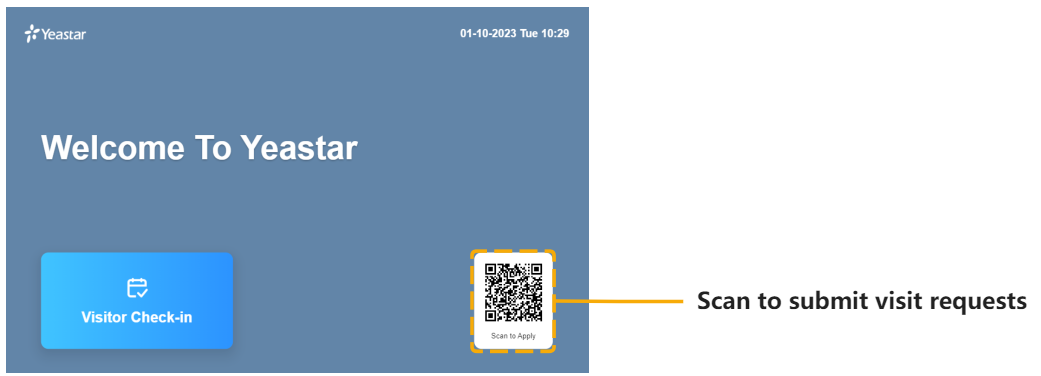
Any external parties can submit visit requests by scanning the QR Code on the Visitor Screen. After the visit request is approved, a visit schedule will be created, and an invitation letter will be sent to the visitor.
-
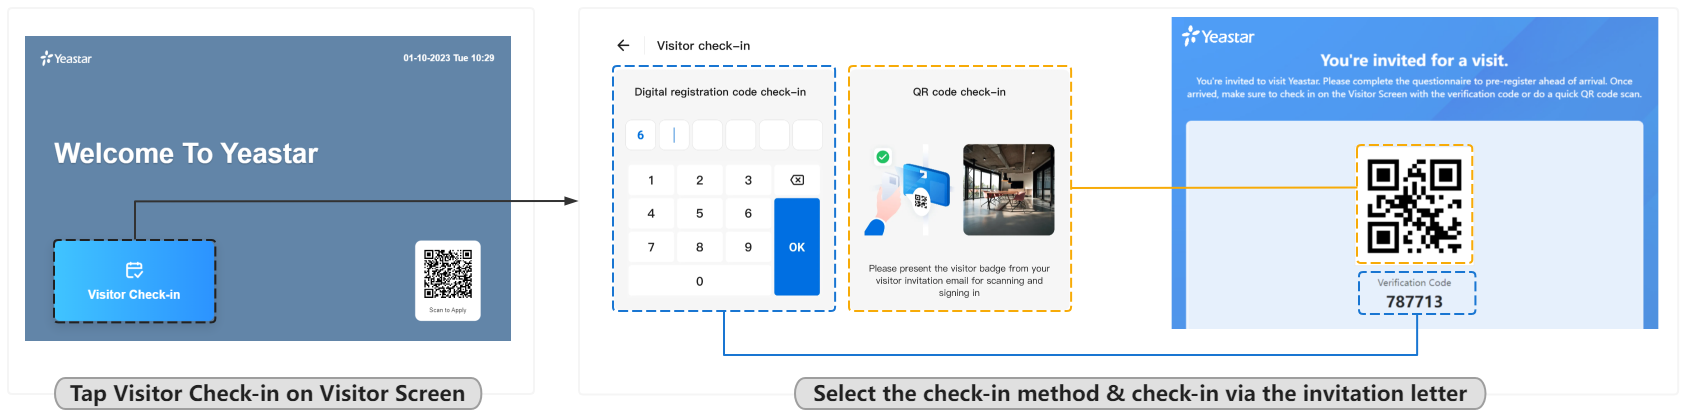
Visitors can use the invitation letter to check in to their visit schedules on Visitor Screens.
Related information
 Set up the Welcome Screen: Customize the visitor screen to match your company branding.
- Set up Visitor Self-Registration: Learn how visitor self-registration works.
FAQ & Troubleshooting
Q: Why does the status shows ![]() ?
?
The status ![]() indicates the Visitor Screen failed to connect to Yeasatr Workplace.
indicates the Visitor Screen failed to connect to Yeasatr Workplace.
Refer to the following corrective actions to fix this issue:
-
Ensure the Visitor Screen can access the Internet.
-
Ensure the server you selected for the Visitor Screen is the same as your Yeastar Workplace web portal.
Created: September 16, 2022
Author: carol