Set up Call Recording
This topic describes how to set up call recording for extensions, trunks, pagings/intercoms, conferences, queues, and IVRs.
Prerequisites
Only when the storage location for recording files is configured will the recording function take effect.For more information, see manage storage locations.
Set up call recording for trunks
The system automatically records the external calls on the selected trunks.
- Log in to PBX web portal, go to .
- In the Record Trunks section, select the desired trunks from the Available box to the Selected box.
- Optional: To periodically play beep tones to inform
both parties when the call on the selected trunk is being
recorded,
do as follows.Note: This setting will not take effect on the calls where multiple participants are involved, such as conference calls and multi-party calls.
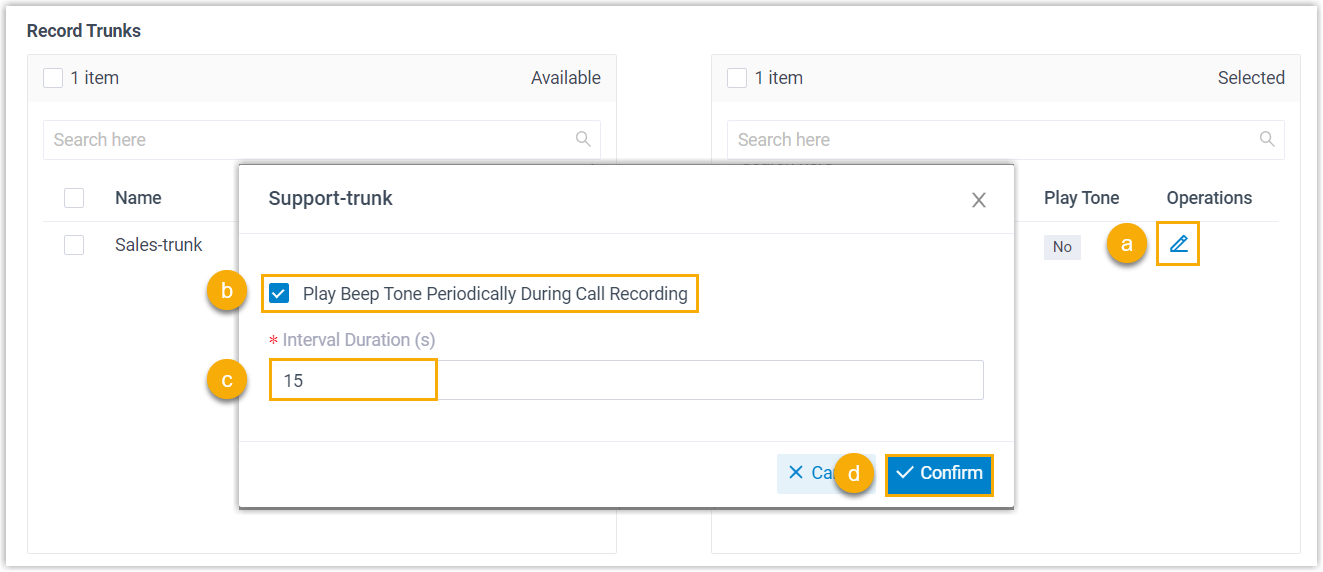
- In the Selected box, click
 beside a selected trunk.
 - In the pop-up window, select the checkbox of Play Beep Tone Periodically During Call Recording.
- In the Interval Duration (s) field, specify the interval for playing the beep tone.
- Click Confirm.
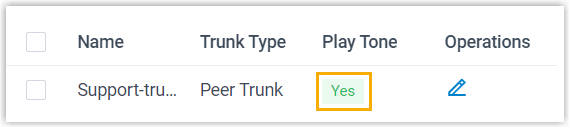
The Play Tone of the selected trunk displays Yes, indicating that periodic playback of beep tone is enabled for the trunk.
- In the Selected box, click
- Click Save and Apply.
Set up call recording for extensions
The system automatically records the internal calls and external calls on the selected extensions.
- Log in to PBX web portal, go to .
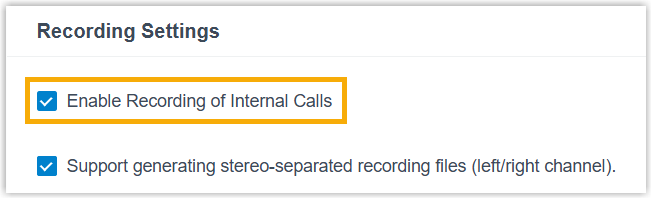
- Optional: In the Recording Settings section,
select the checkbox of Enable Recording of Internal
Calls to automatically record the internal calls.
- In the Record Extensions section, select the desired extensions from
the Available box to the
Selected box.
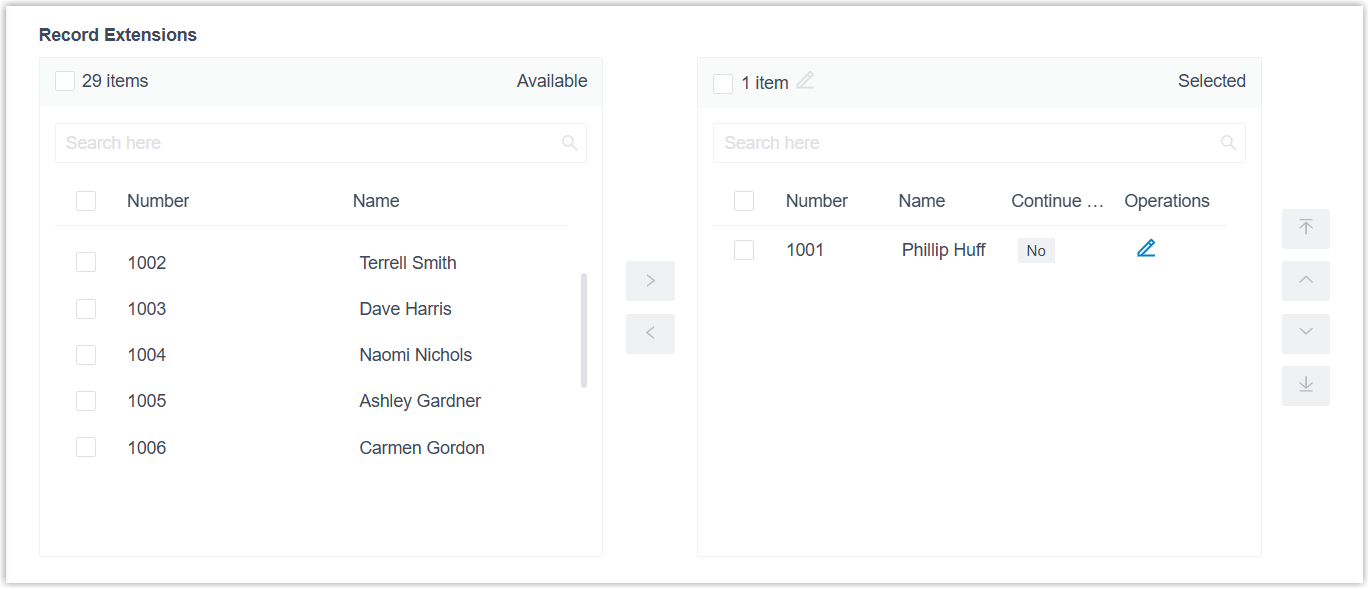
- Optional: To continue call recording after the extensions transfer
the incoming calls to another destination, do as follows:
 Note:
Note:- Recording CONTINUES if the transfer destination is a Queue, even if recording is not enabled for the queue.
- Recording does NOT continue if the transfer destination is a Call Flow that includes a recording component to disable recording, or an IVR in which callers press the key to opt out of recording.
- Recording may NOT continue for calls attended-transferred from Linkus UC Clients to a Paging/Intercom Group or a Conference, unless the destination is configured for recording.
- Recording may NOT continue for calls transferred to Linkus UC Clients and subsequently attended-transferred to another destination, unless either party is configured for recording.
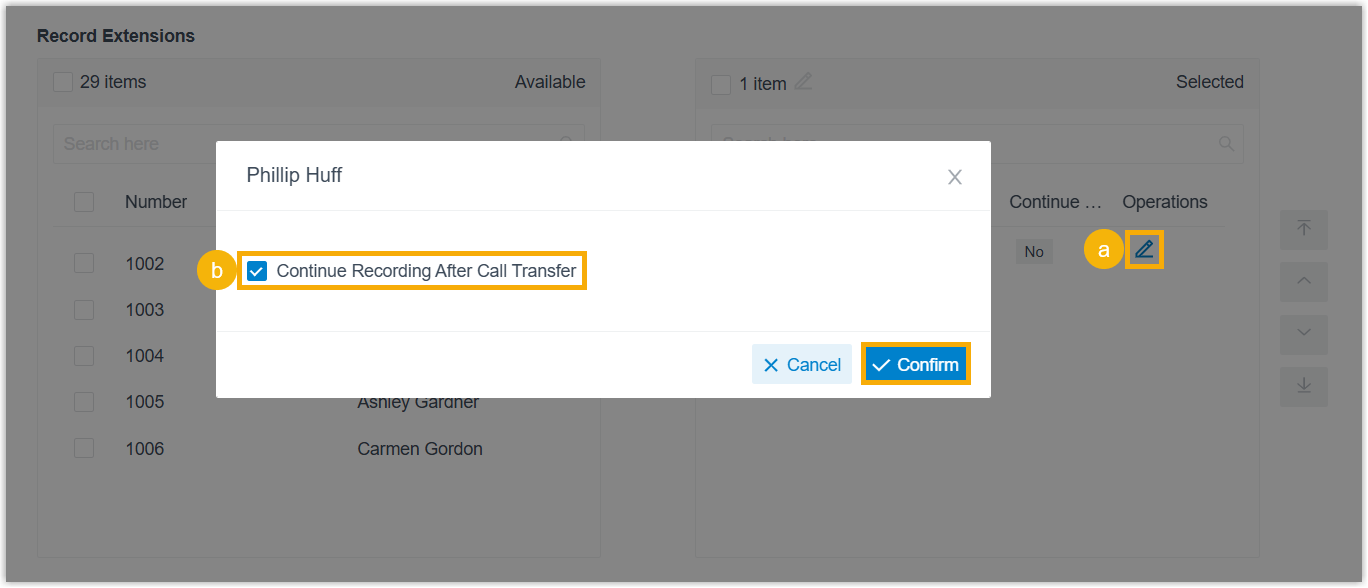
- In the Selected box, click
beside a selected extension.
- In the pop-up window, select the checkbox of Continue Recording After Call Transfer, then click Confirm.
- Click Save and Apply.
Set up call recording for pagings/intercoms
You can enable call recording for paging/intercom. If enabled, the system automatically records all the paging and intercom calls.
- Log in to PBX web portal, go to .
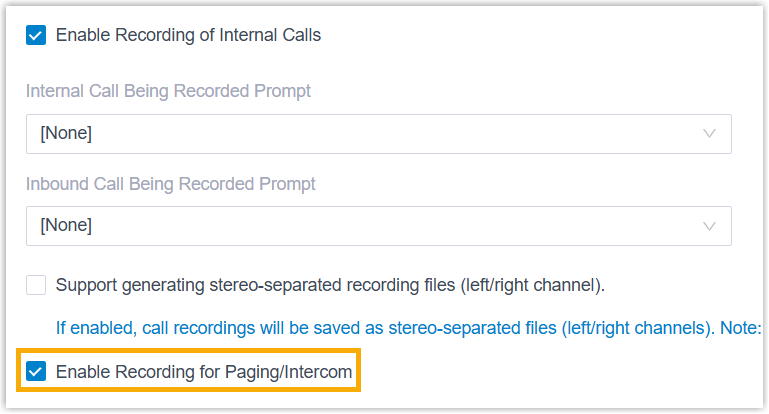
- In the Recording Scope section, select the checkbox
of Enable Recording for Paging/Intercom.
- Click Save and Apply.
Set up call recording for conferences
The system automatically records the calls on the selected conferences.
- Log in to PBX web portal, go to .
- In the Record Conferences section, select the desired conferences from the Available box to the Selected box.
- Click Save and Apply.
Set up call recording for queues
The system automatically records the calls on the selected queues.
- Log in to PBX web portal, go to .
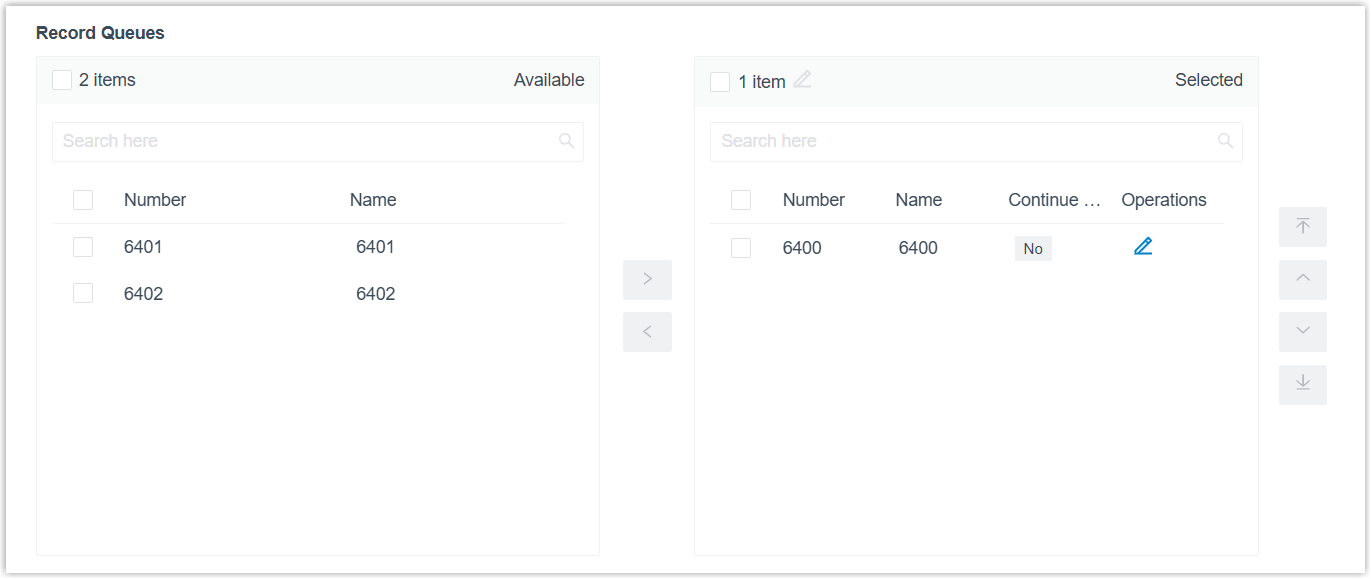
- In the Record Queues section, select the desired queues from the
Available box to the
Selected box.
- Optional: To continue call recording after queue agents transfer
incoming calls to another destination, do as follows:
 Note:
Note:- Recording CONTINUES if the transfer destination is a Queue, even if recording is not enabled for the queue.
- Recording does NOT continue if the transfer destination is a Call Flow that includes a recording component to disable recording, or an IVR in which callers press the key to opt out of recording.
- Recording may NOT continue for calls attended-transferred from Linkus UC Clients to a Paging/Intercom Group or a Conference, unless the destination is configured for recording.
- Recording may NOT continue for calls transferred to Linkus UC Clients and subsequently attended-transferred to another destination, unless either party is configured for recording.
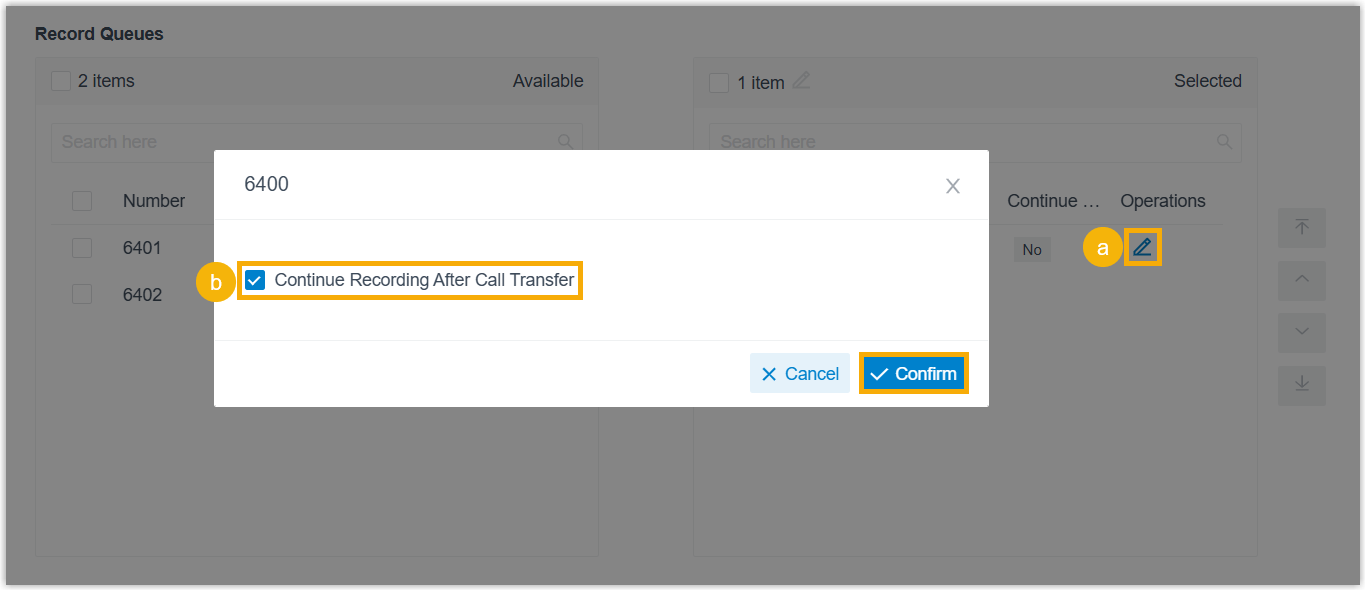
- In the Selected box, click
beside a selected queue.
- In the pop-up window, select the checkbox of Continue Recording After Call Transfer, then click Confirm.
- Click Save and Apply.
Set up call recording for IVRs
The system automatically records the calls on the selected IVRs.
- Log in to PBX web portal, go to .
- In the Record IVR section, select the desired IVRs from the Available box to the Selected box.
- Click Save and Apply.