Set up Recording Prompts
Yeastar P-Series Software Edition supports configuring recording prompts to notify both caller and callee of the recording status during a call. You can create and apply different prompts for different communication types. This topic describes how to set up recording prompts on Yeastar P-Series Software Edition.
Requirements
The firmware of Yeastar P-Series Software Edition is 83.24.0.122 or later.Procedure
- Log in to PBX web portal, go to .
- In the Recording Tones section, select different
prompts for different communication types.
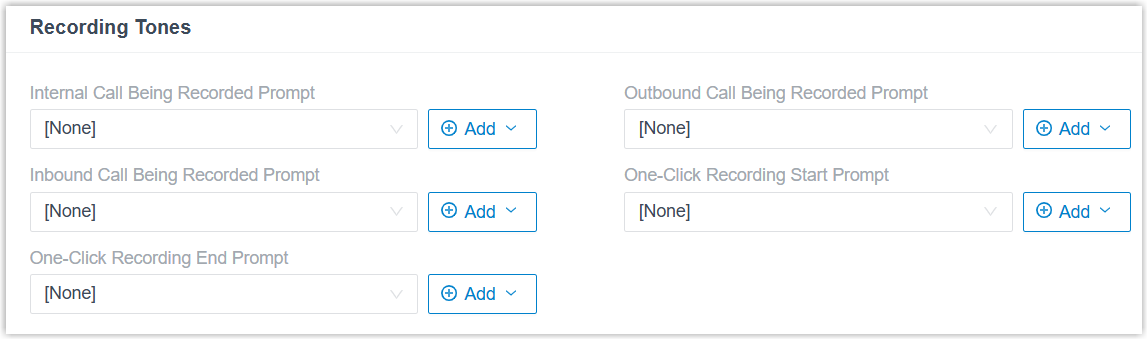
Setting Instruction Internal Call Being Recorded Prompt Select a prompt from the drop-down list. When an internal call is established, the system plays the prompt and starts recording. Outbound Call Being Recorded Prompt Select a prompt from the drop-down list. When an outbound call from these objects is established, the system plays the prompt and starts recording. Inbound Call Being Recorded Prompt Select a prompt from the drop-down list. When an inbound call to these objects is answered, the system plays the prompt and starts recording. One-Click Recording Start Prompt Select a prompt from the drop-down list. During a call, if authorized extension users start call recording by pressing the recording button on Linkus UC Clients or by dialing the feature code (default
*1), the system plays the prompt.One-Click Recording End Prompt Select a prompt from the drop-down list. During a call, if authorized extension users stop call recording by pressing the recording button on Linkus UC Clients or by dialing the feature code (default
*1), the system plays the prompt.Note:- The available prompts are synchronized from .
- If the desired prompt is not
available in the list, click Add beside the
drop-down list to create a new prompt using one of
the following methods.
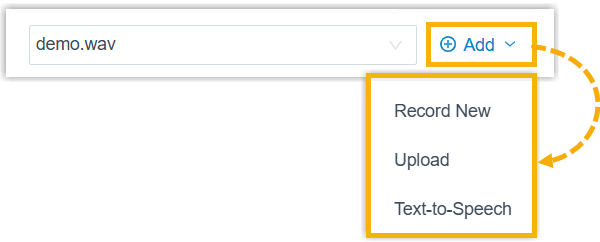
- Record a prompt by an extension.
- Upload a prompt. The upload prompt file should meet the audio file requirements.
- Generate a prompt using text-to-speech (TTS).
The newly added prompt will be displayed in the drop-down list and be synchronized to .
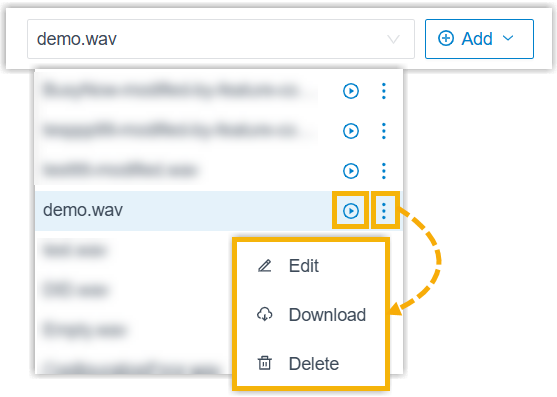
- In the drop-down list, you
can play, edit, download or delete the desired
custom prompt.
All changes will be synchronized to .
- Click Save and Apply.