Configure Network for Remote SIP Access by a Yeastar FQDN
With a Yeastar FQDN, you can quickly establish a secure tunnel for remote registration of IP phones, alike SIP endpoints, and account trunks, without the need of configuring public IP and port forwarding for the PBX. This topic describes how to configure network for remote SIP access via FQDN.
Procedure
- Log in to PBX web portal, go to .
- Turn on Yeastar FQDN.
- In the Fully Qualified Domain Name
(FQDN) field, set up an FQDN domain name.
In this example, set FQDN to
yeastardocs.ras.yeastar.com.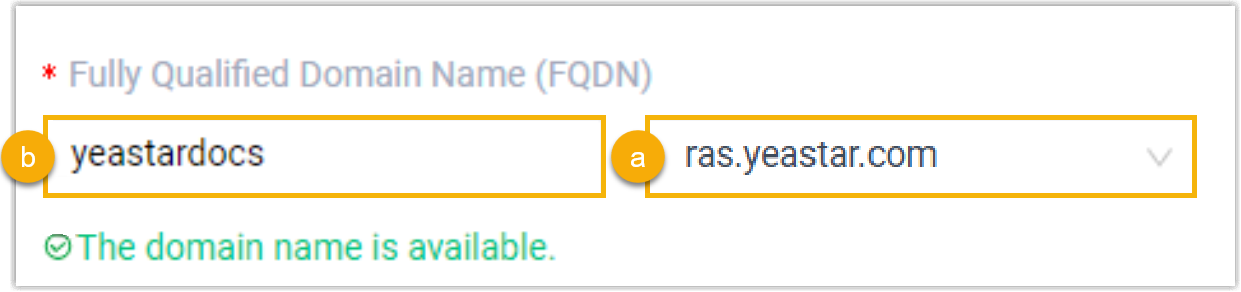
- Select a domain name from the drop-down list.
- Enter a host name in the first field.Note: Think twice before you enter the hostname. The FQDN cannot be changed after you save the configurations.
- Enable remote SIP access.
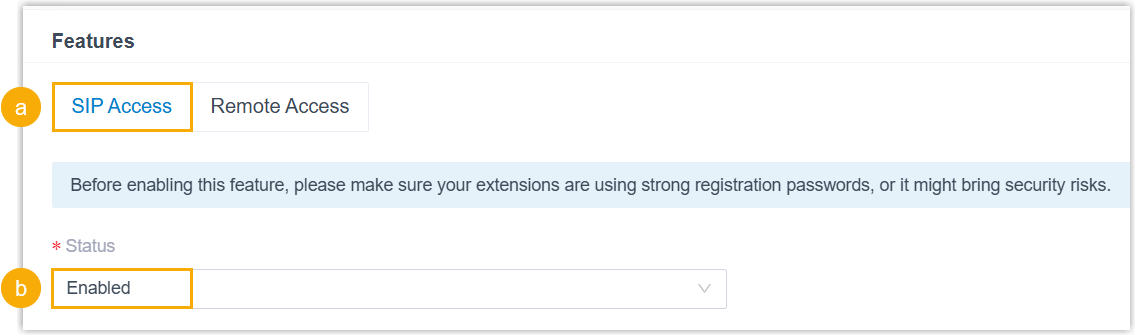
- In the Features section, go to the SIP Access tab.
- In the Status drop-down list, select Enabled.
- Configure access control for remote SIP registration.
To secure remote registration via Yeastar FQDN, you can configure access restrictions via the following methods:
Method Description Restrict by extension account By default, all extension accounts are NOT allowed to use the remote SIP access feature. You need to grant usage permission to the desired accounts. 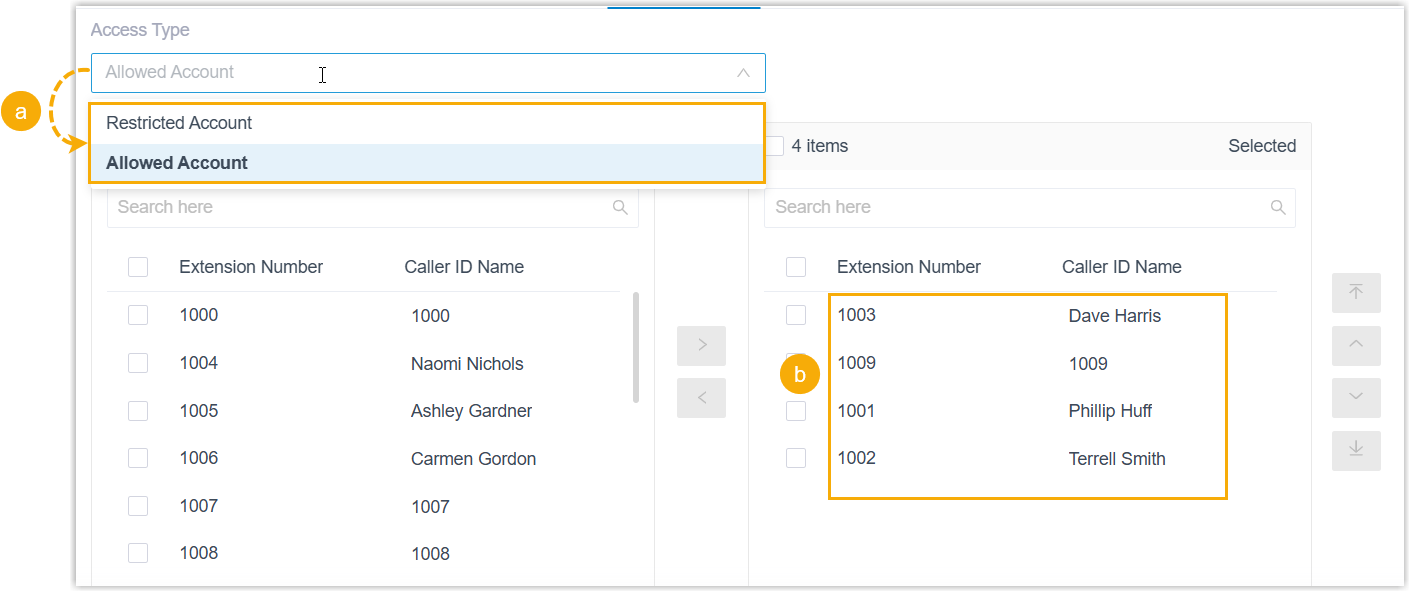
- In the Access Type
drop-down list, select a type.
- Allowed Account: Only the selected accounts can register remotely via Yeastar FQDN.
- Restricted Account: Only the selected accounts are restricted; all other extensions can register remotely via Yeastar FQDN.
- Select the desired accounts from the Available box to the Selected box.
Restrict by IP address (Optional) By default, the PBX allows SIP registrations without the limit of IP address. You can restrict the registration sources by specifying permitted IP addresses.

- Select the checkbox of Enable IP Restriction.
- Add one or more permitted IP addresses and
their corresponding subnet masks.
Only devices with an IP address within the permitted range can register extensions remotely via Yeastar FQDN.
- In the Access Type
drop-down list, select a type.
- Click Save and Apply.
Result
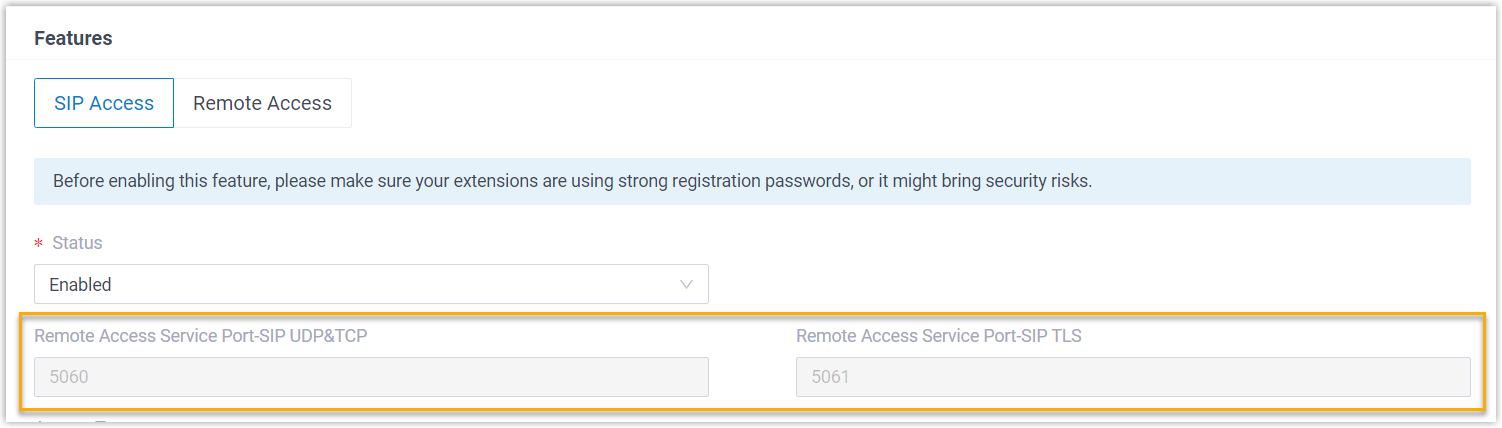
- The Remote Access Service automatically assigns ports for remote SIP access,
you can check the port in Remote Access Service
Port.
- You can implement the followings:
- Set up a Remote SIP Phone via Yeastar FQDN.
- Perform remote registration of SIP Account trunk via Yeastar FQDN.Important: The remote registration of SIP peer trunk via Yeastar FQDN is NOT supported.