Configure Prompts for an Extension
This topic describes how to customize audio prompts, such as Music on Hold (MoH) and ringback tone, for individual extension.
Customize Music on Hold for extension
By default, extensions' music on hold follows the system's global prompt settings (set on ). You can customize music on hold for a specific extension to provide a more personalized experience. This includes customizing the music played when the extension user places a call on hold, as well as when a call is forwarded to another destination.
- Requirements
- The firmware version of PBX server is 83.24.0.122 or later.
- Procedure
-
- Log in to PBX web portal, go to .
- Click
 beside the desired extension, then
go to .
beside the desired extension, then
go to . - In the drop-down list of the music on hold settings, select the
desired MoH playlist.
 Note:
Note:- The available MoH playlists are synchronized from .
- If the desired MoH playlist is not available in the
list, click Create New beside the drop-down
list to create a new playlist and upload your MoH
audio files.
The newly added MoH playlist will be displayed in the drop-down list and be synchronized to .
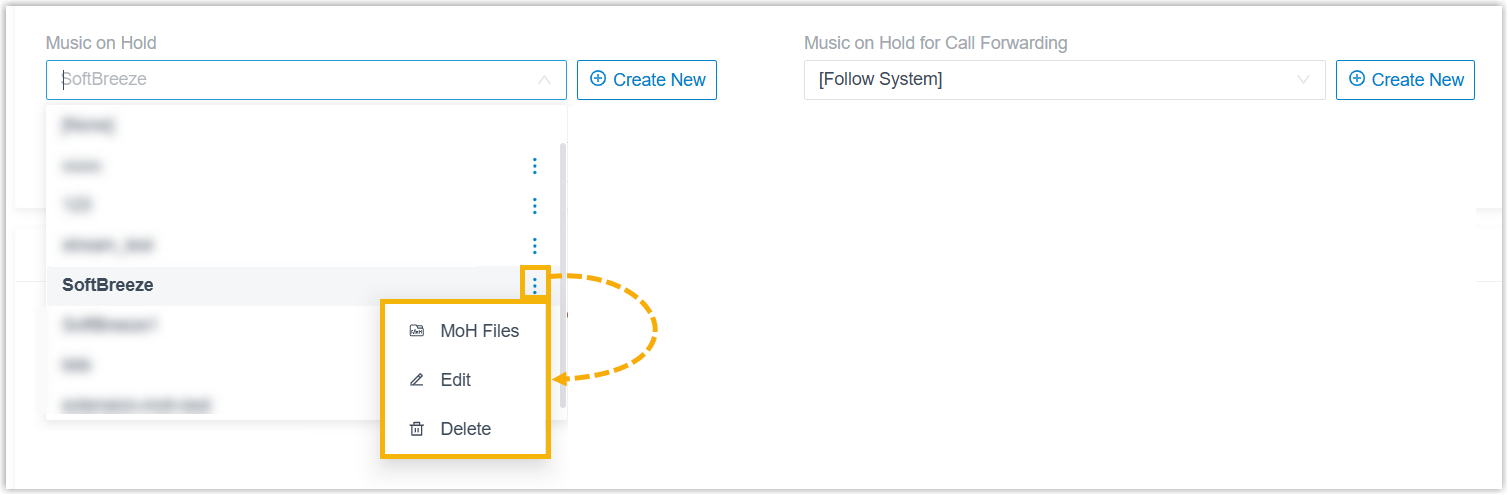
- In the drop-down list, you can click
 beside the desired MoH
playlist to manage it.
beside the desired MoH
playlist to manage it.You can manage MoH audio files within the playlist (upload, edit, play, download or delete audio files), edit the playlist (modify its name, play order, or streaming music URL), or delete the playlist.
All changes will be synchronized to .
- Click Save and Apply.
Configure ringback tone for extension
You can set a custom ringback tone for an extension, which is played to the caller before the extension user answers the call.
- Requirements
- The firmware version of PBX server is 83.24.0.122or later.
- Procedure
-
- Log in to PBX web portal, go to .
- Click beside the desired extension, then
go to .
- In the Ringback Tone drop-down list,
select the desired prompt.Note:
- The available prompts are synchronized from .
- If the desired prompt is not
available in the list, click Add beside the
drop-down list to create a new prompt using one of
the following methods.
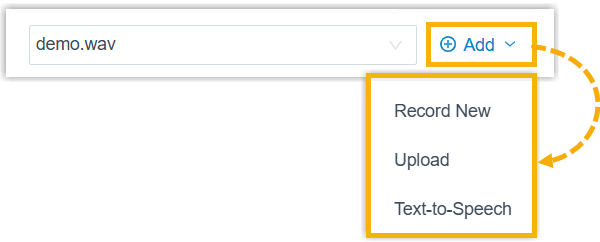
- Record a prompt by an extension.
- Upload a prompt. The upload prompt file should meet the audio file requirements.
- Generate a prompt using text-to-speech (TTS).
The newly added prompt will be displayed in the drop-down list and be synchronized to .
- In the drop-down list, you can manage the
desired MoH playlist or custom prompt.
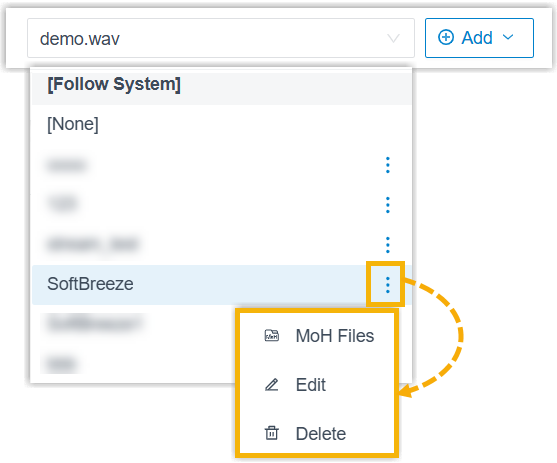
- For an MoH playlist, you can manage MoH audio
files within the playlist (upload, edit, play,
download or delete audio files), edit the playlist
(modify its name or play order), or delete the
playlist.
All changes will be synchronized to .
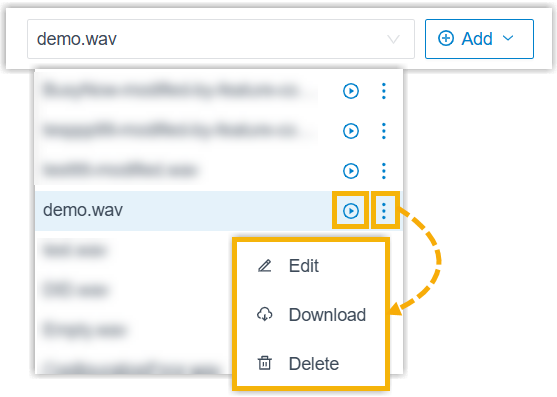
- For a custom prompt, you can play, edit,
download or delete the prompt.
All changes will be synchronized to .
- For an MoH playlist, you can manage MoH audio
files within the playlist (upload, edit, play,
download or delete audio files), edit the playlist
(modify its name or play order), or delete the
playlist.
- Click Save and Apply.
Configure outbound call recording prompt for extension
You can set an outbound call recording prompt for an extension to notify both call participants that the outbound call is being recorded before recording starts.
- Requirements
- The firmware version of PBX server is 83.24.0.122 or later.
- Procedure
-
- Log in to PBX web portal, go to .
- Click beside the desired extension, then
go to .
- In the Outbound Call Being Recorded
Prompt drop-down list, select the desired prompt.Note:
- The available prompts are synchronized from .
- If you select Follow System, the global outbound call recording prompt is applied (Path: ).
- If the desired prompt is not
available in the list, click Add beside the
drop-down list to create a new prompt using one of
the following methods.
- Record a prompt by an extension.
- Upload a prompt. The upload prompt file should meet the audio file requirements.
- Generate a prompt using text-to-speech (TTS).
The newly added prompt will be displayed in the drop-down list and be synchronized to .
- In the drop-down list, you
can play, edit, download or delete the desired
custom prompt.
All changes will be synchronized to .
- Click Save and Apply.