Configure Network for Remote Access by a Yeastar Domain Name
To ensure that remote Linkus clients and other SIP devices can communicate with Yeastar P-Series Software Edition normally, you need to configure Public IP and Ports on the PBX. This topic provides a configuration example to describe how to easily implement remote connection by setting up a Yeastar-provided domain name.
Prerequisites
- The firmware version of Yeastar P-Series Software Edition is 83.18.0.102 or later.
- You have added an A record (for static public IP address) or configured DDNS (for dynamic public IP addresses) at your DNS provider to point your domain to your public IP address.
- You have configured the following settings on the router:
- If SIP ALG option is provided in your router, disable it.
- If using DDNS (Dynamic DNS), ensure that your router is configured to update the DDNS service with its current public IP.
- Set up port forwarding rules to forwarded the following ports to
allow remote access of Linkus clients and other SIP devices.Note: To check the relevant internal ports of your PBX, see Manage Service Ports of the PBX.In this scenario, forward the following ports:
Service Internal Port External Port SIP registration UDP 5060 (default) UDP 5060 RTP UDP 10000-20000 (default) UDP 10000-20000 Web server TCP 8088 (default) TCP 8088 Linkus server TCP&UDP 8111 (default) TCP&UDP 8111 Secure tunnel TCP&UDP 1090 TCP&UDP 1090
Procedure
- Log in to PBX web portal, go to .
- Turn on Public IP (NAT).
- In the NAT Type drop-down list, select Yeastar Domain.
- In the Yeastar Domain section, set up the Yeastar
domain name.
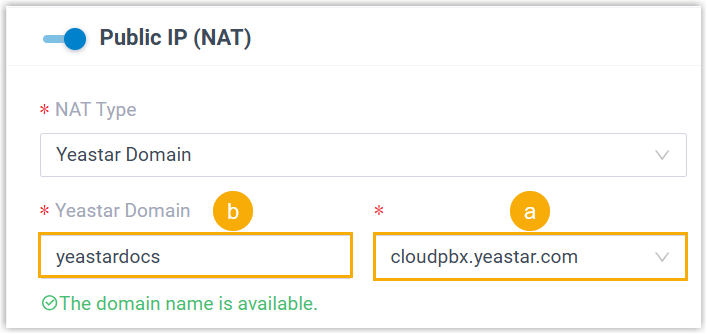
- Select a domain suffix from the drop-down list.
- Specify the subdomain in the first field.Note: Think twice before you enter the subdomain, as the Yeastar domain name cannot be changed after you save the configurations.In this example, you will get a domain name
yeastardocs.cloudpbx.yeastar.com.
- In the Public IP Type drop-down list, select the type
of public IP address you use, and complete the related settings.
- To use a static public IP address, do as follows:

- Select Static Public IP Address (IP address does not change).
- In the Public IP Address field, enter your public IP address.
- To use a dynamic public IP address, do as follows:

- Select Dynamic Public IP Address (IP changes).
- Optional: In the STUN Server
field, enter the address of your STUN server.Note: If left empty, Yeastar's STUN server will be used by default.
- In the Refresh Interval (s) field,
specify the time interval for the PBX to request the STUN
server for public IP.
The default value is 120, and the available value should be an integer between 30 and 3600.
- To use a static public IP address, do as follows:
- Local Network Identification:
Add all your local network. This setting will allow all your
local devices to communicate with the PBX by the local IP
address instead of passing through the router.
In this scenario, add the local network
192.168.28.0/255.255.255.0. - NAT Mode: Select a SIP NAT mode.
In this scenario, select Yes.
- Yes: Use NAT and ignore the address information in the SIP/SDP headers and reply to the sender's IP address and port.
- No: Use NAT mode only according to RFC3581.
- Never: Never attempt NAT mode or RFC3581 support.
- Route: Use NAT but do not include Rport in headers.
- Prioritize NAT over
FQDN: Optional. Specify whether NAT should take
precedence over FQDN when both network settings are
enabled.
If this option is enabled, the system will use the NAT address instead of the FQDN when generating remote access URLs, such as Linkus login link, Live Chat embed code, etc.
- In the Public Ports section, enter
the external ports that you have forwarded on your router.Note: At least one of the following fields must be filled: External SIP UDP Port, External SIP TCP Port, or External SIP TLS Port.
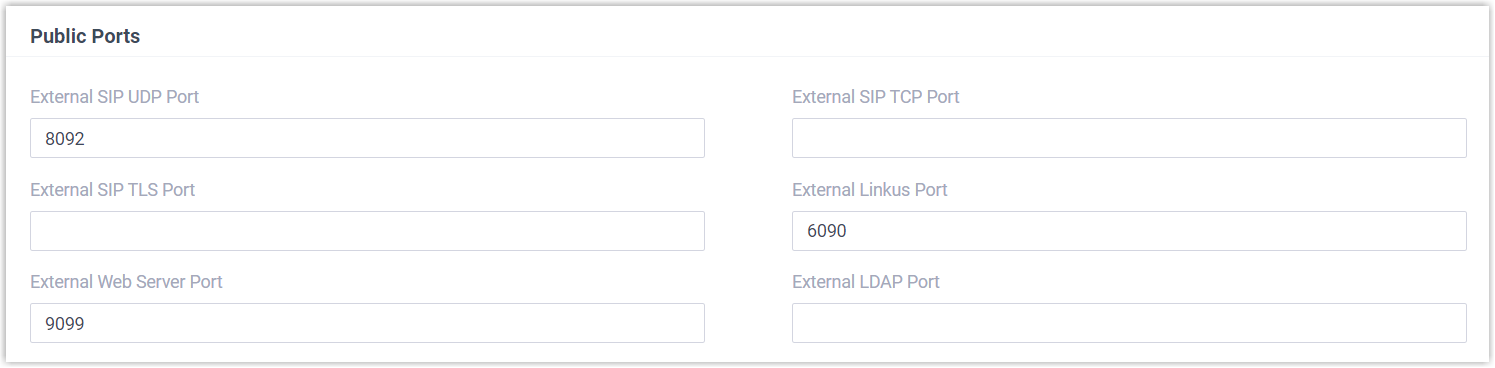
- External SIP UDP Port: Enter 5060.
- External SIP TCP Port: Leave it blank because SIP TCP protocol is not used in this scenario.
- External SIP TLS Port: Leave it blank because SIP TLS protocol is not used in this scenario.
- External Linkus Port: Enter 8111.
- External Web Server Port: Enter 8088.
- External LDAP Port: Leave it blank because LDAP protocol is not used in this scenario.
- External Tunnel Port: Enter 1090.
- Click Save.
Result
- Once the configuration is completed, the PBX will automatically apply for a certificate for the Yeastar domain name. The certificate can be check on , and will be automatically renewed before it expires.
- The followings remote access features can be implemented:
- Users can remotely access the PBX web portal and log in to Linkus clients via the Yeastar domain name.
- Remote devices based on SIP protocol can register to the PBX via the domain name.
- The login links and QR codes for Linkus remote access are
generated based on the information provided on the
Public IP and Ports page.Note: If you have configured network for remote access by a Yeastar FQDN, the login links and QR codes are generated based on the FQDN.