Set up Split DNS
Split DNS allows extension users to seamlessly access and use their Linkus clients via the same domain name, whether they are inside the office or working remotely, which improves access speed and reliability. This topic describes how to set up split DNS in a typical company network.
Introduction
- For external users, the domain resolves to the public IP address of the PBX
system (e.g.
203.0.113.10).This resolution is typically handled by public DNS servers, which rely on DNS records (such as A records) configured when the domain name is registered or managed with your domain registrar.
- For internal users, the domain resolves to the private IP address of the PBX
system (e.g.
192.168.28.39).This depends on your company's network configuration. It is recommended to implement this functionality on a firewall or router, if supported by the vendor. Alternatively, you can configure an internal DNS server to manage internal domain resolution. This guide uses Microsoft DNS server as an example to demonstrate how to configure internal DNS resolution.
Prerequisites
To implement split DNS, make sure the followings are in place:
| Item | Description |
|---|---|
| Domain |
|
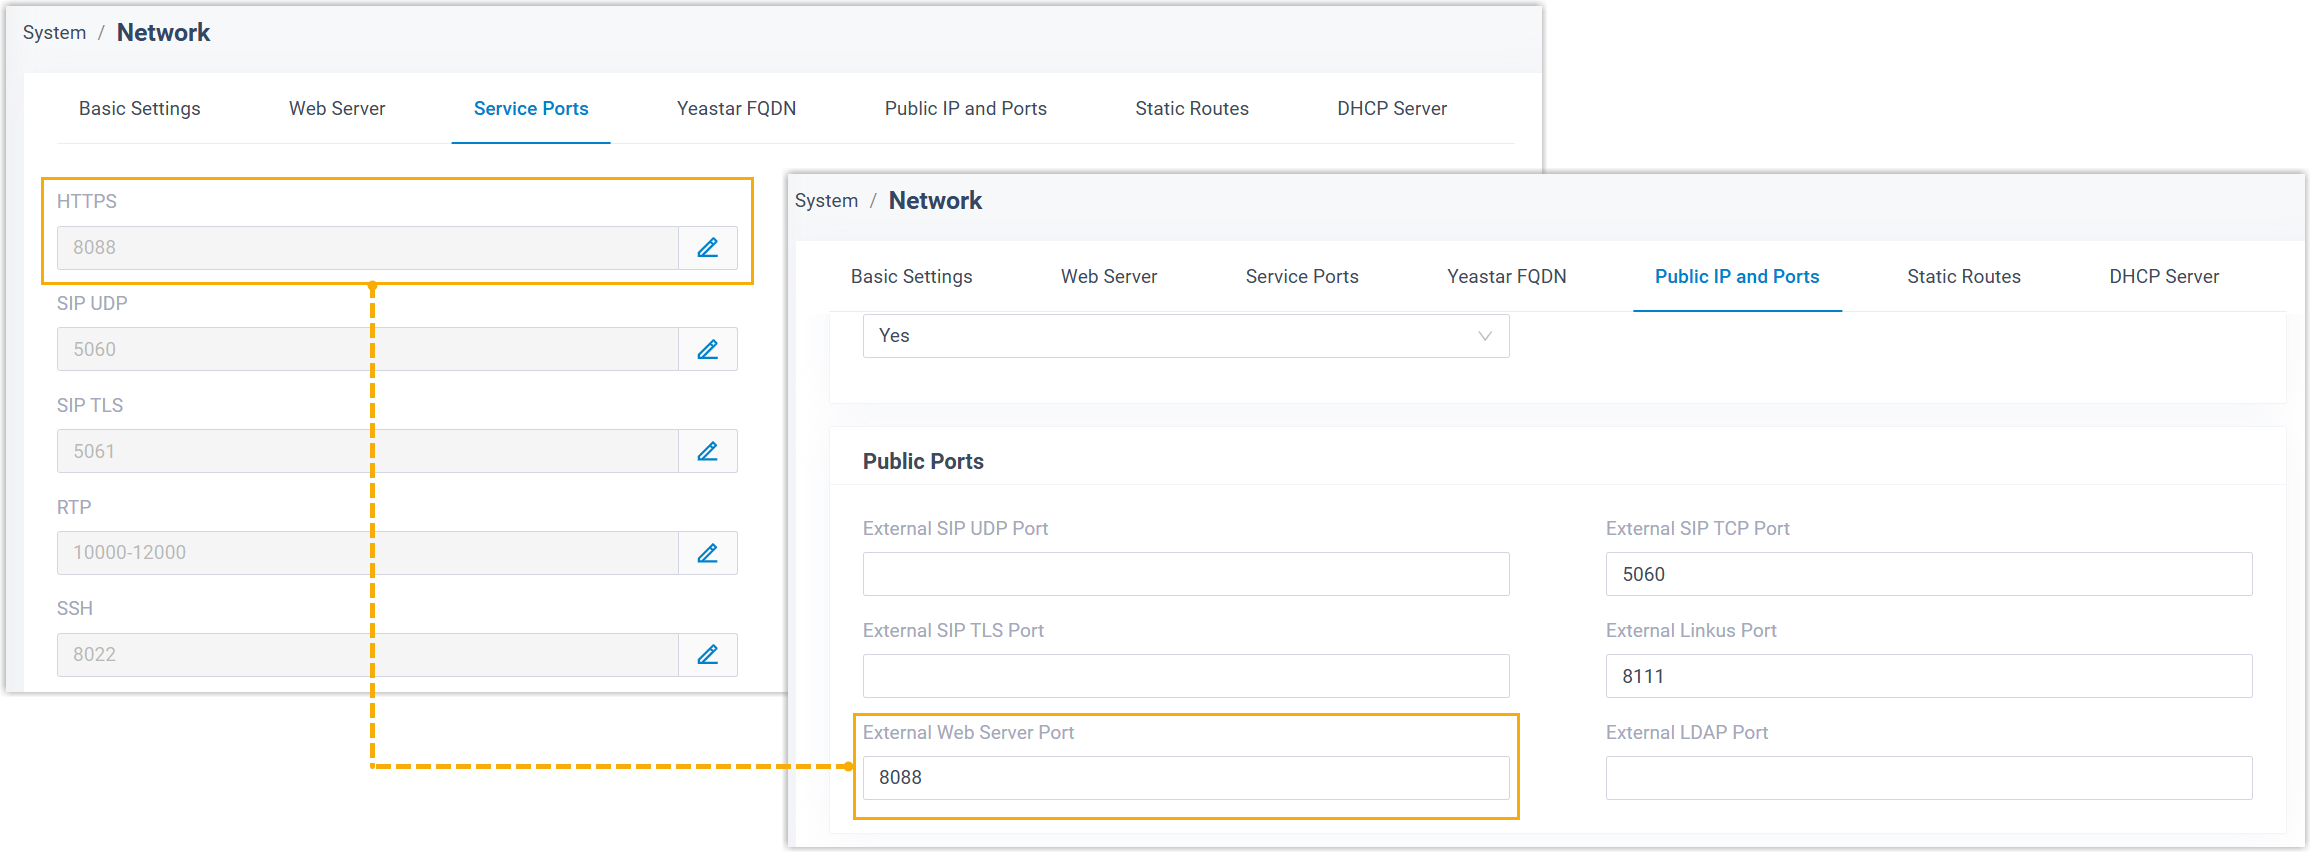
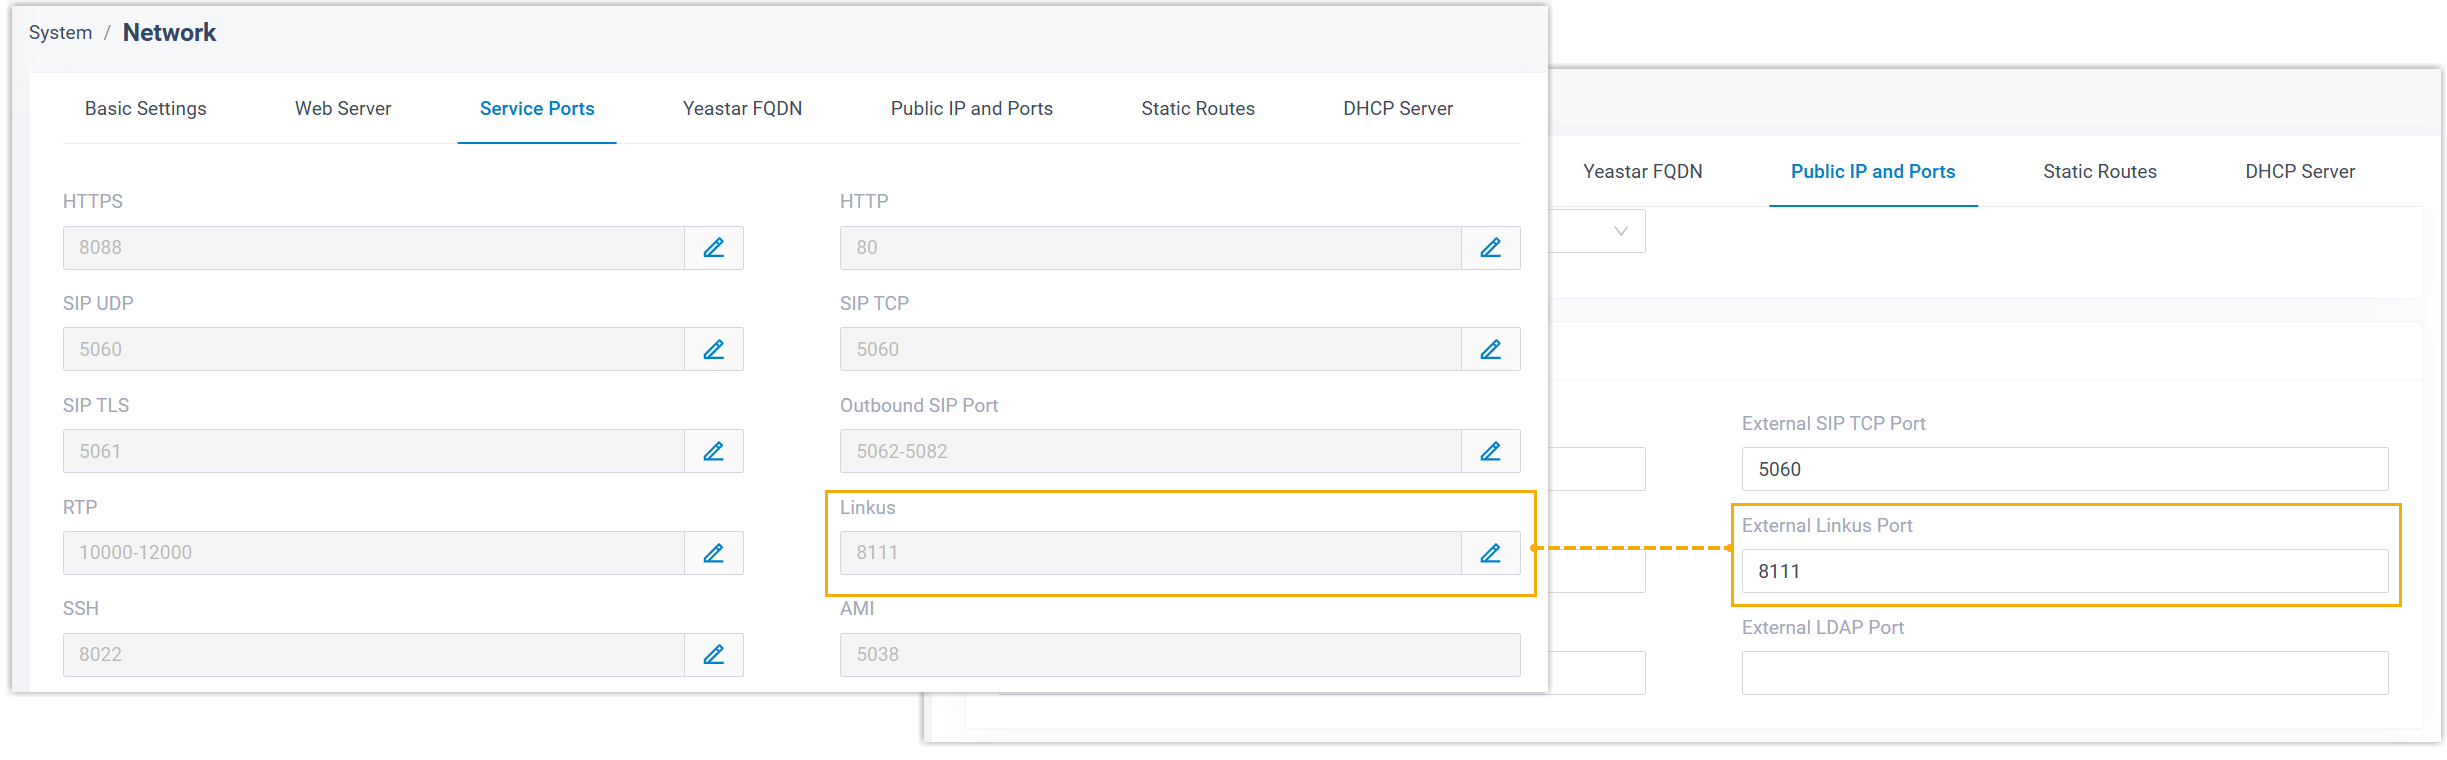
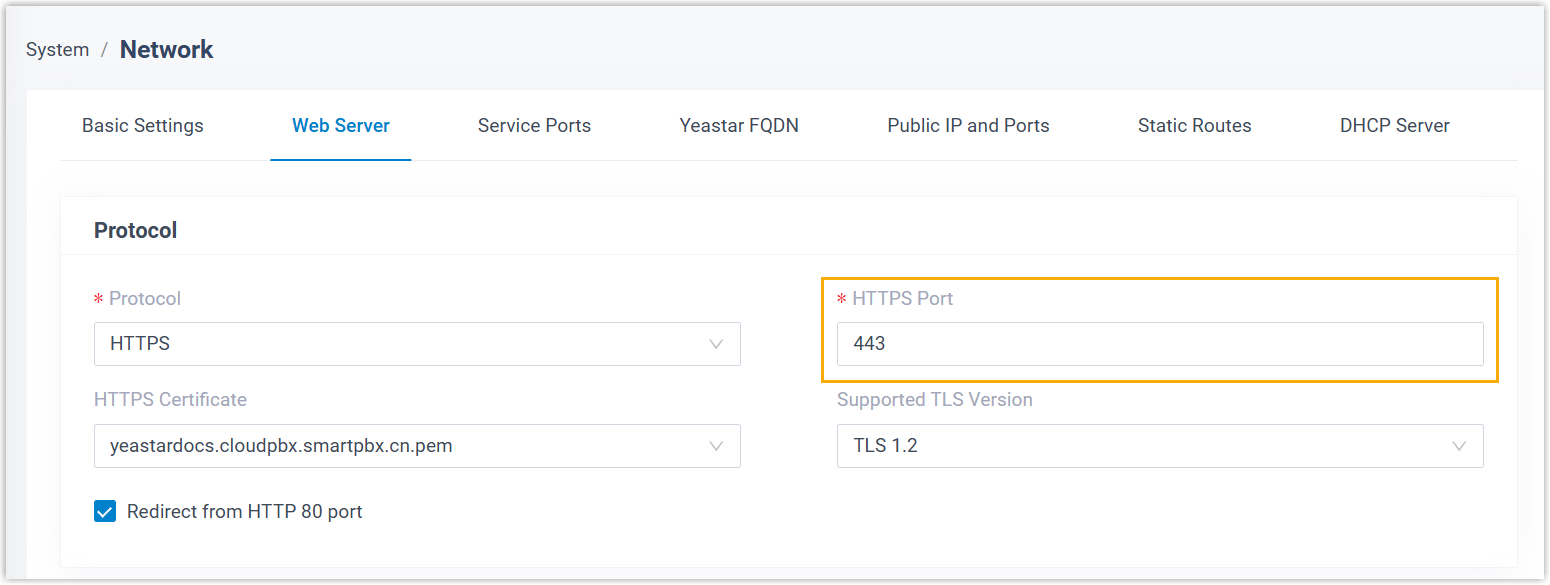
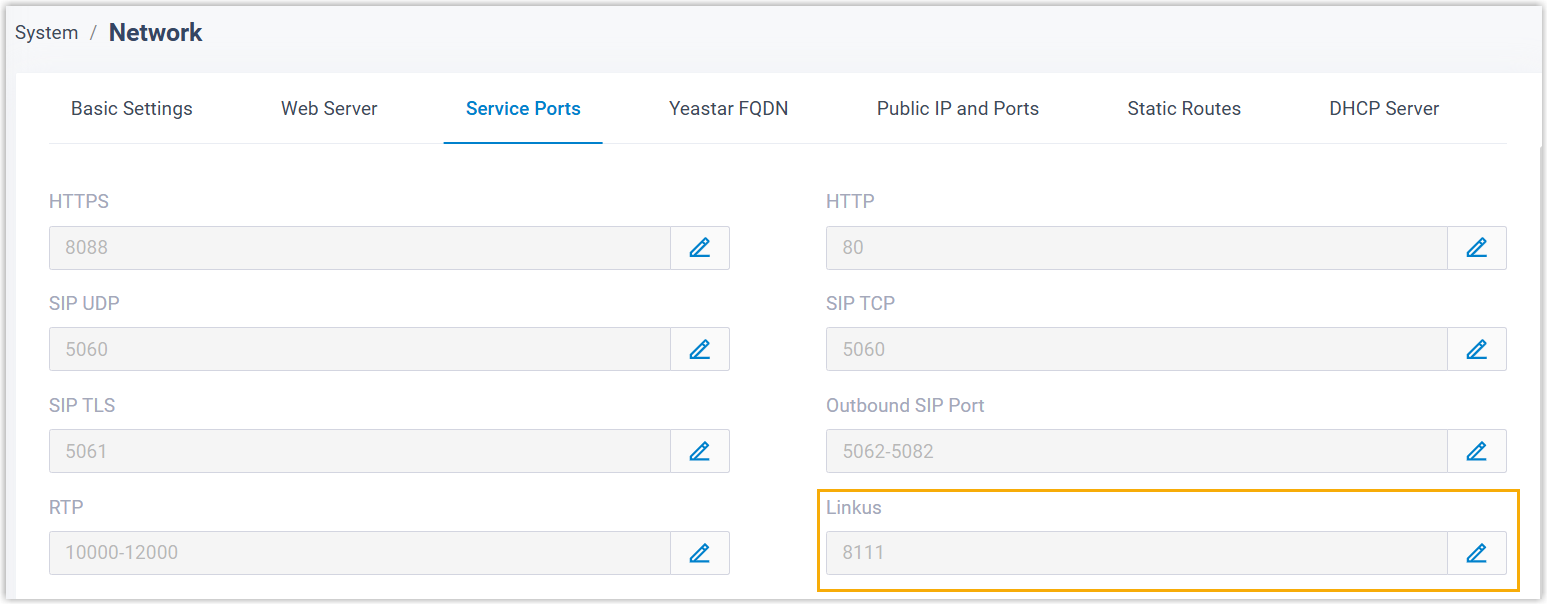
| Port |
Configure the ports for PBX server based on the domain type.
|
| Internal DNS Server | A Microsoft DNS Server has been deployed within the company's internal network to handle internal domain resolution. |
Procedures
Create an internal DNS record
- At the top-right of the Server Manager window on Windows Server, go to to open the DNS manager.
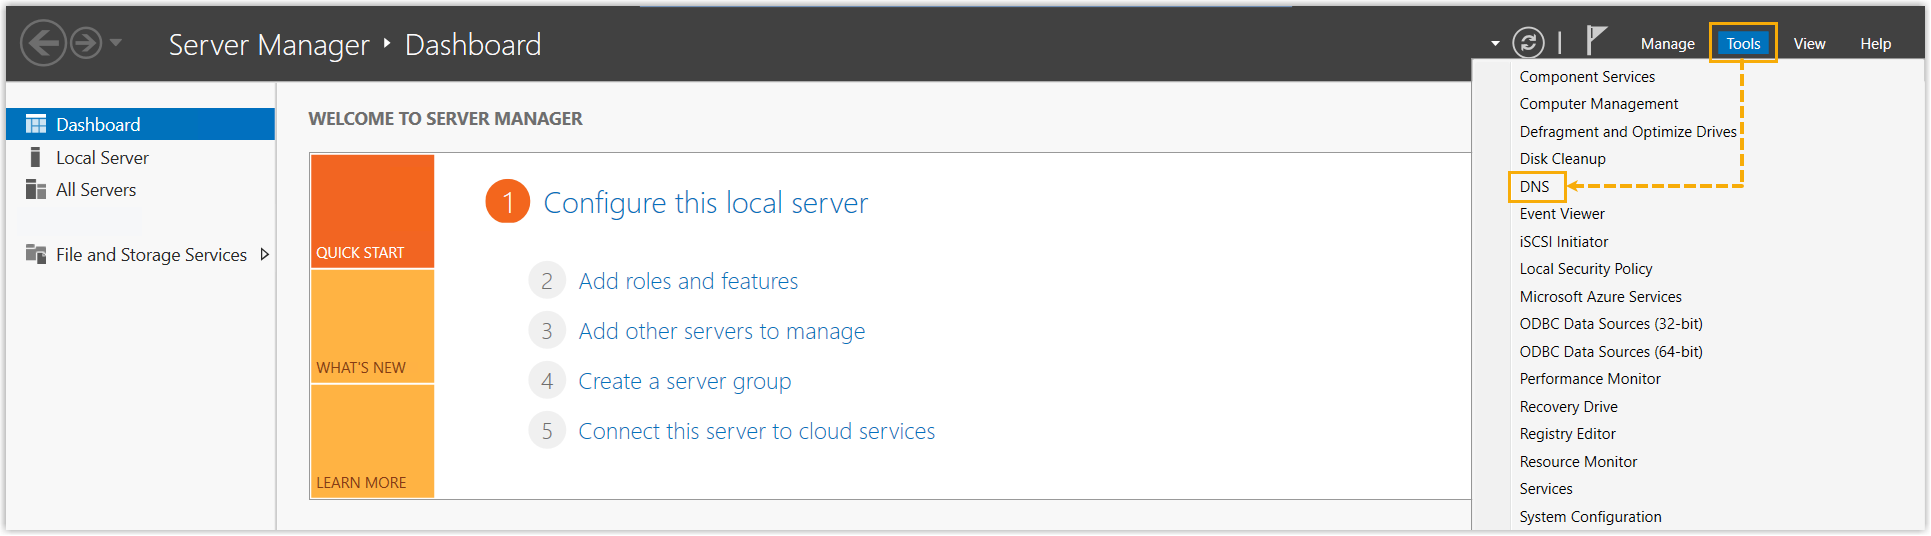
- Add a Forward Lookup Zone.
- Right click Forward Lookup Zones, then select
New Zone....

The New Zone Wizard will open.
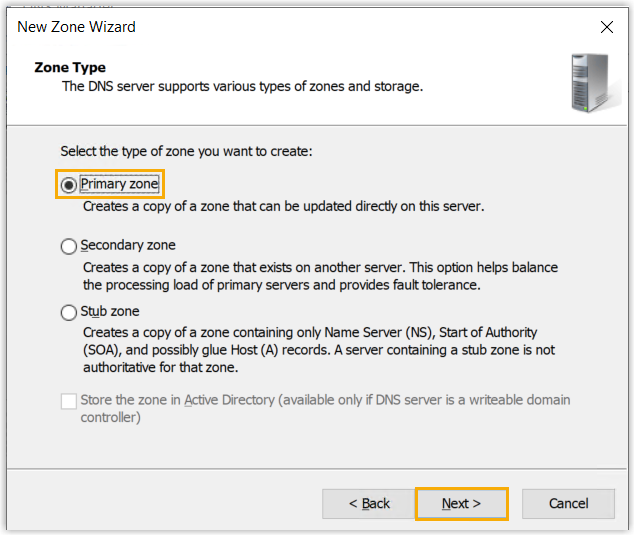
- On the wizard, click Next to continue.
- In the Zone Type page, leave the default
option Primary zone selected, then click
Next.
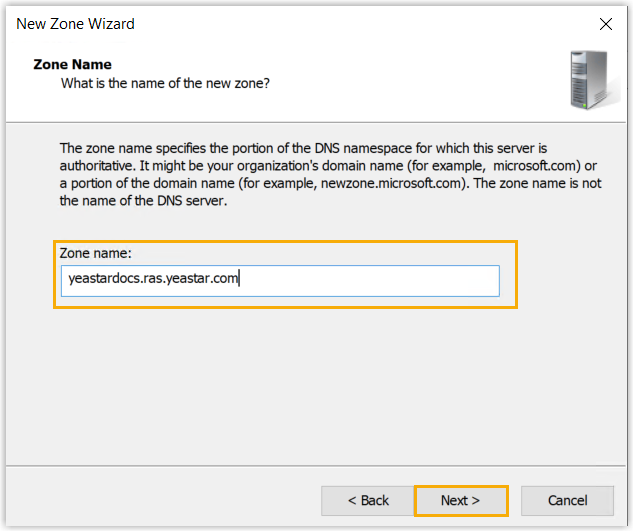
- In the Zone Name page, enter the domain name
of the PBX, then click Next.
- On the remaining pages, keep the default settings and click Next until you reach the final step.
- Click Finish to complete the setup.
- Right click Forward Lookup Zones, then select
New Zone....
- Add a new host.
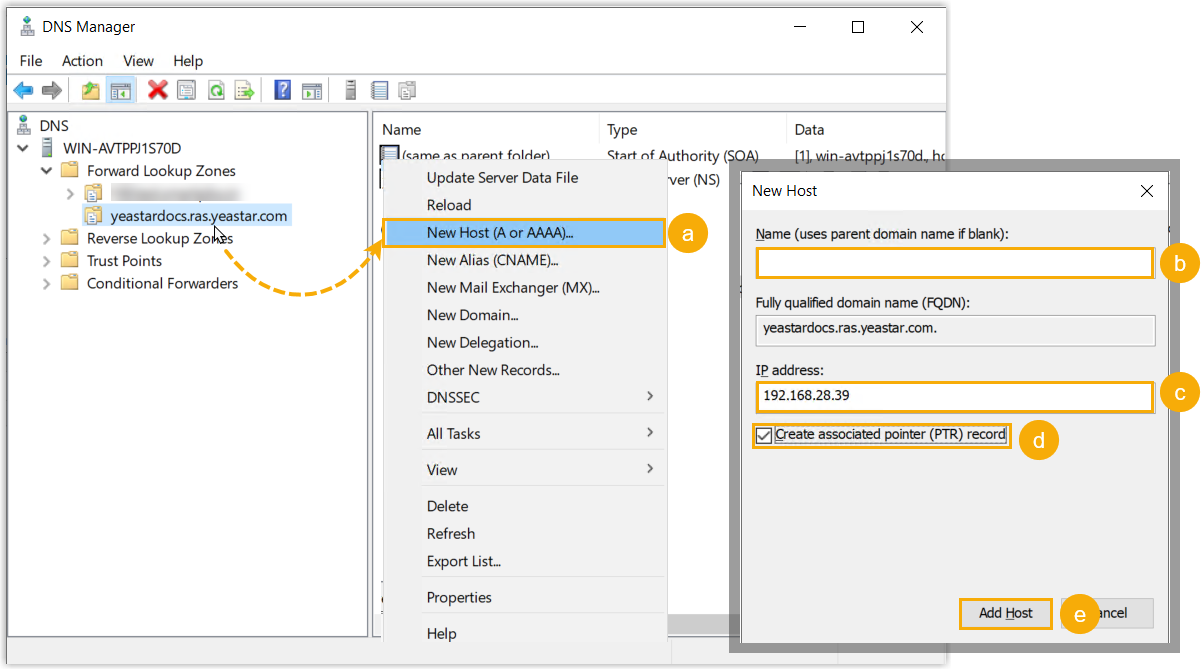
- Right click on the domain name you added, then select New Host (A or AAAA)....
- Leave the Name field empty, which means the parent domain will be used.
- In the IP address field, enter the private IP address of the PBX system.
- Optional: To enable reverse DNS lookup, select the checkbox of Create associated PTR record.
- Click Add Host.
A dialog box pops up to indicate that the host record is successfully created, click OK to close.
Verify internal DNS resolution
- Configure your computer to use the internal DNS server.
- On your computer, press Win+R to open the Run dialog box.
- Type ncpa.cpl, then press Enter.
- In the Network Connections window, right click your active network connection, then go to Properties.
- Double click the Internal Protocol Version 4 (TCP/IPv4).
- Select Use the following DNS server
addresses, then enter the IP address of the internal DNS
server (E.g.
192.168.21.102).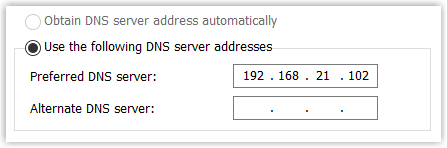
- Click OK to save the settings, then click OK again to close the window.
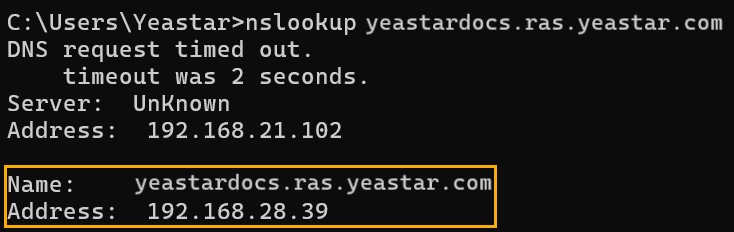
- Test internal DNS resolution on your computer.Tip: For external DNS resolution, you can verify using an online DNS checker to see if the domain name is correctly resolved to the PBX's public IP address.
- On your computer, press Win+R to open the Run dialog box.
- Type cmd, then press Enter.
- In the Command Prompt window, enter the
following command and press
Enter.
For example,nslookup {your PBX's domain name}nslookup yeastardocs.ras.yeastar.comThe output returns the private IP address of the PBX, indicating that the internal DNS resolution is configured successfully.
Enforce internal DNS usage for user devices
- Configure DHCP server to assign internal DNS.
Set the DHCP scope options to assign the IP address of the internal DNS server as the primary DNS for all devices connected to the corporate network.
- Optional: Block external DNS requests on firewall.
On the company's firewall, block outbound DNS requests (UDP/TCP port 53) to public DNS servers to prevent clients from bypassing the internal DNS.
- Connect user devices to the company network.
Client Type Connection Method Linkus Web / Desktop Client - Connect user's computer to the company's Wi-Fi
to automatically obtain the internal DNS server
via DHCP.Note: This method is recommended to avoid manual switching DNS settings when moving between different networks.
- If user's computer uses a static IP configuration, manually specify the internal DNS server address in the network settings.
Linkus Mobile Client Connect to company's Wi-Fi to obtain internal DNS via DHCP. - Connect user's computer to the company's Wi-Fi
to automatically obtain the internal DNS server
via DHCP.
Result
Extension users can access their Linkus clients using the same domain name from both internal and external networks, eliminating the need to manually switch between different addresses and ensuring a consistent login experience.