Set up a Hard Disk Drive
By default, all the voicemails, logs, and backup files are stored in the local disk (LOCAL). If you install Yeastar P-Series Software Edition on a physical machine, you can set up hard disk drives for storage. This topic describes how to set up a hard disk drive on Dell EMC PowerEdge R340 Server.
Restrictions
Before you get started, familiarize yourself with the following restrictions:
- Number of hard disk drive: Max. 4
- Type of hard disk drive: SATA/SAS/VSD
Prerequisites
- If you want to replace an installed hard disk drive with a new one, make
sure the hard disk drive is not used for storage.Note: Go to to check.
- Shut down the PBX system.
For more information, see Shut Down Yeastar P-Series Software Edition.
Procedure
Step1. Install a hard disk drive on Dell EMC PowerEdge R340 Server
- Power off Dell EMC PowerEdge R340 Server.
- Remove the front bezel.
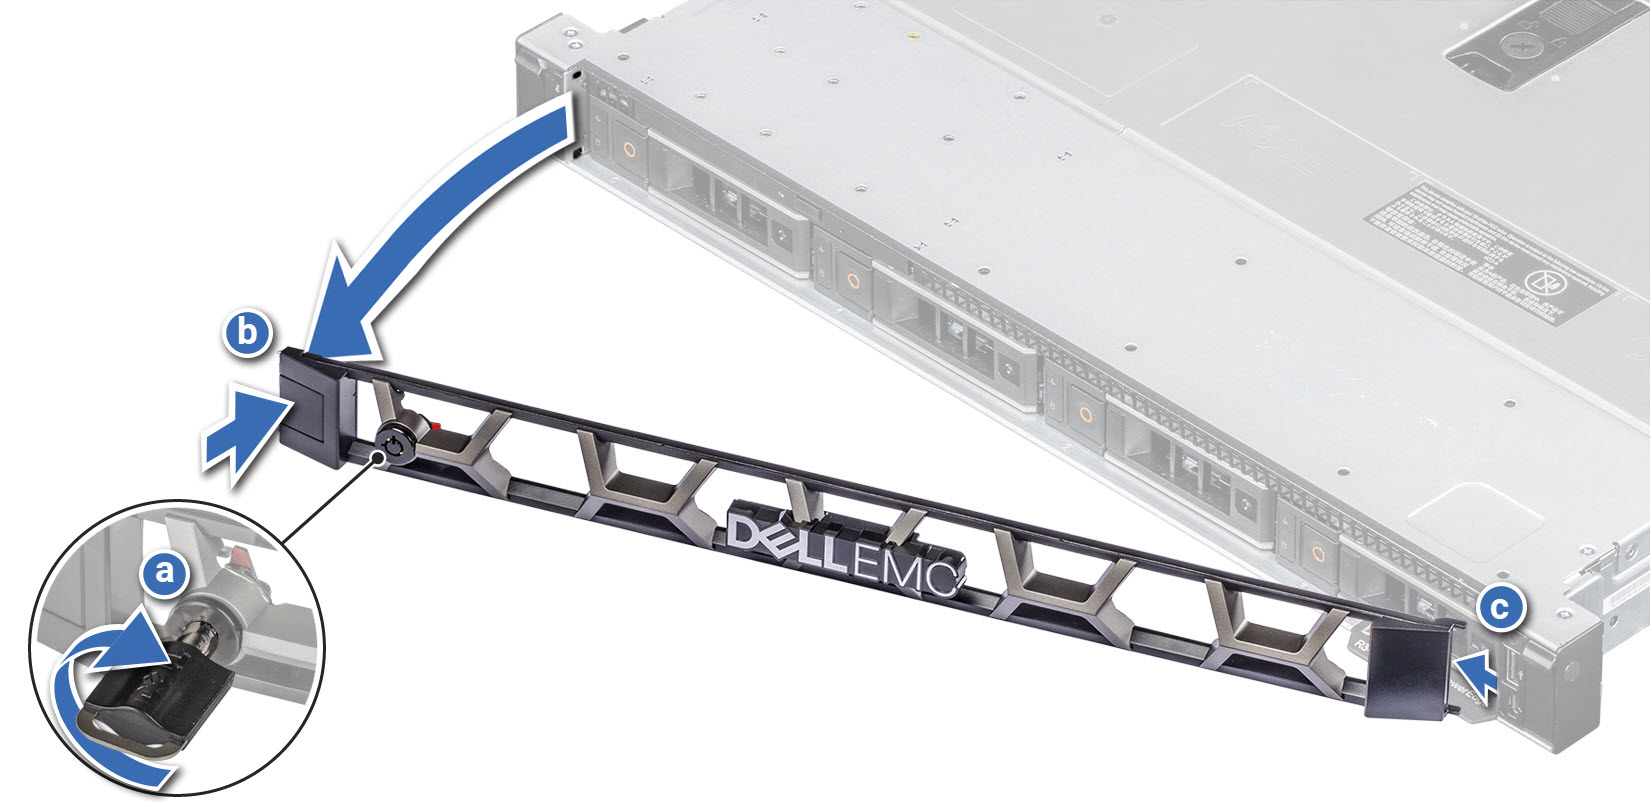
- Unlock the bezel.
- Press the release button, and remove the left end of the bezel.
- Slide the tabs on the right end of the bezel out of the slots on the chassis and remove the bezel.
- Remove drive carrier.
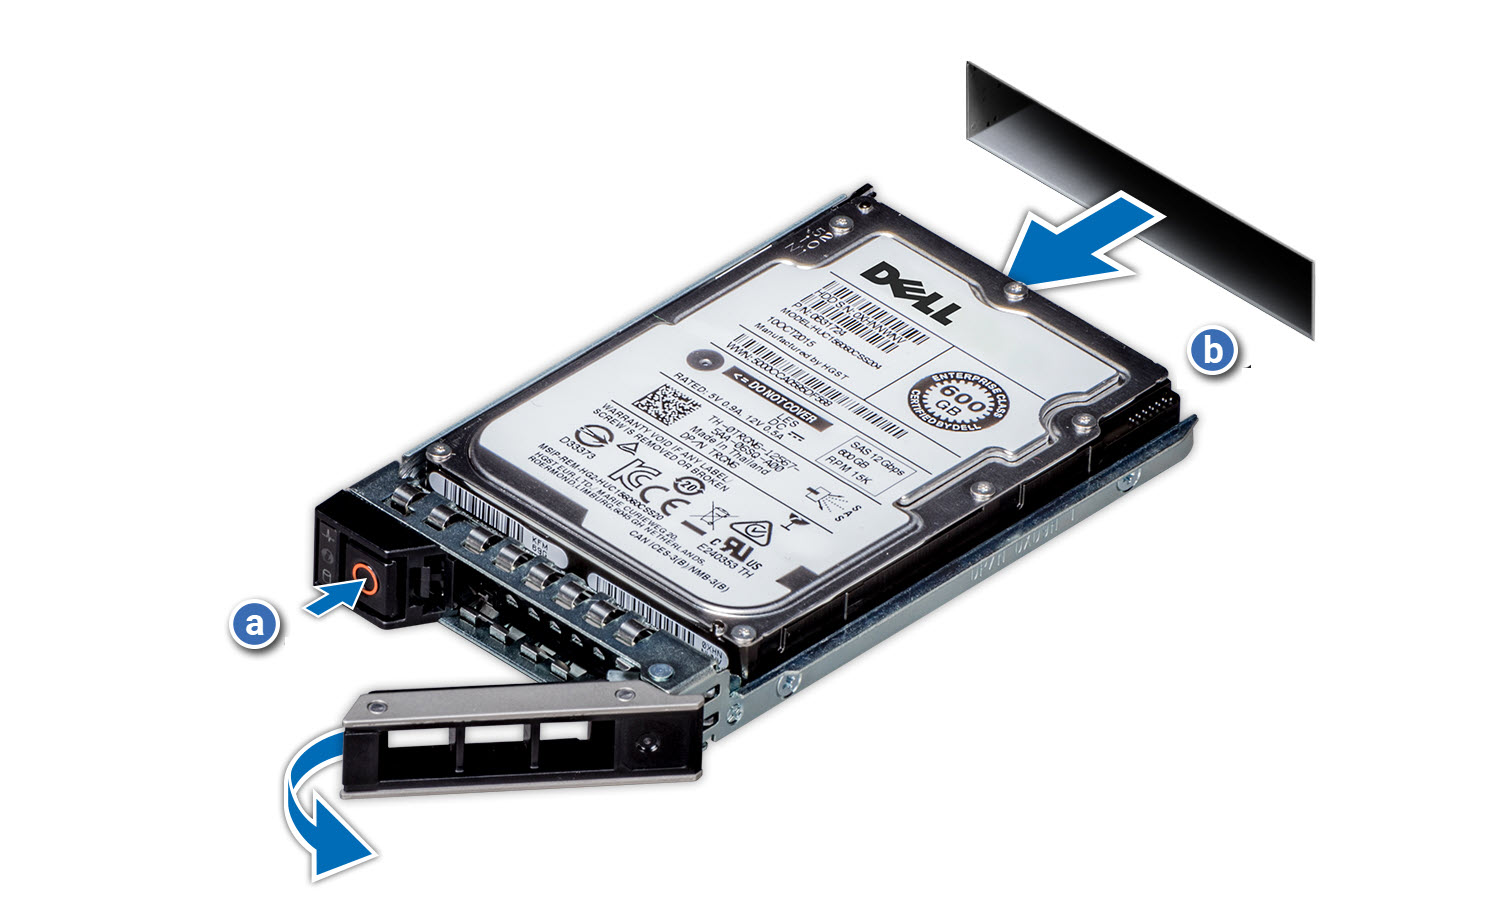
- Press the release button to open the drive carrier release handle.
- Holding the drive carrier release handle, slide the drive carrier out of the drive slot.
- Install the drive into the drive carrier.Important: The system names hard disk drives based on the installation order, whichever drive carrier the drive is installed. For example, the system names the firstly installed hard disk drive as HD1, the second one as HD2, and the alike. To avoid confusion, install the drive in strict order.
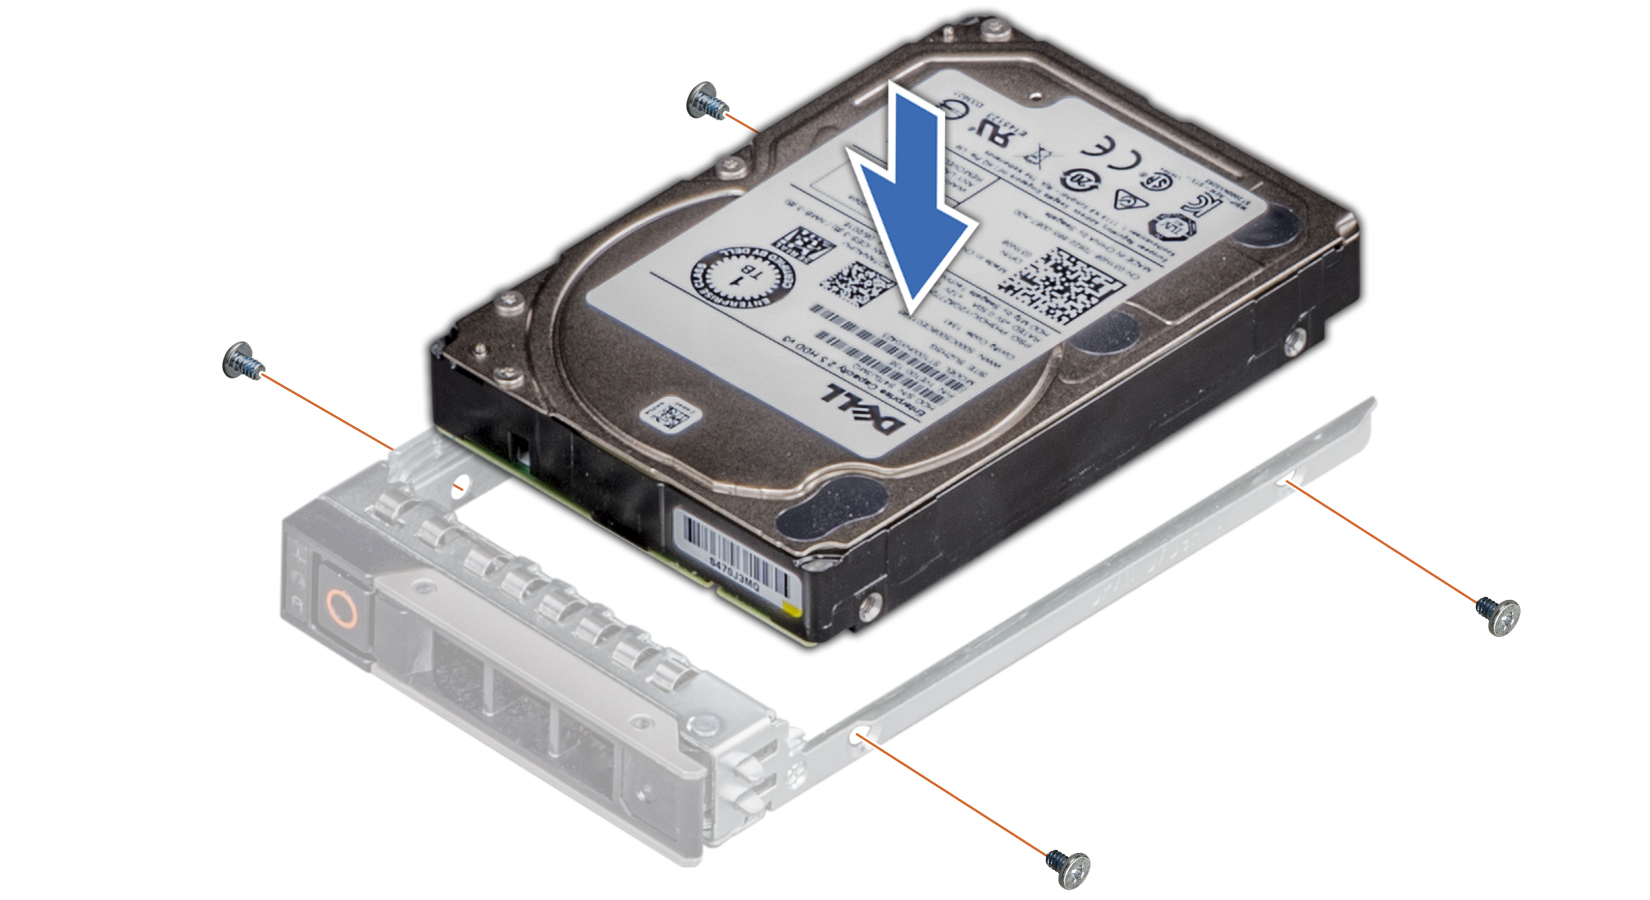
- Insert the drive into the drive carrier with the drive connector facing towards the rear of the carrier.
- Align the screw holes on the drive with the screws holes on the drive carrier.
- Using a Phillips #1 screwdriver, replace the screws to secure the drive to the drive carrier.
- Install drive carrier.
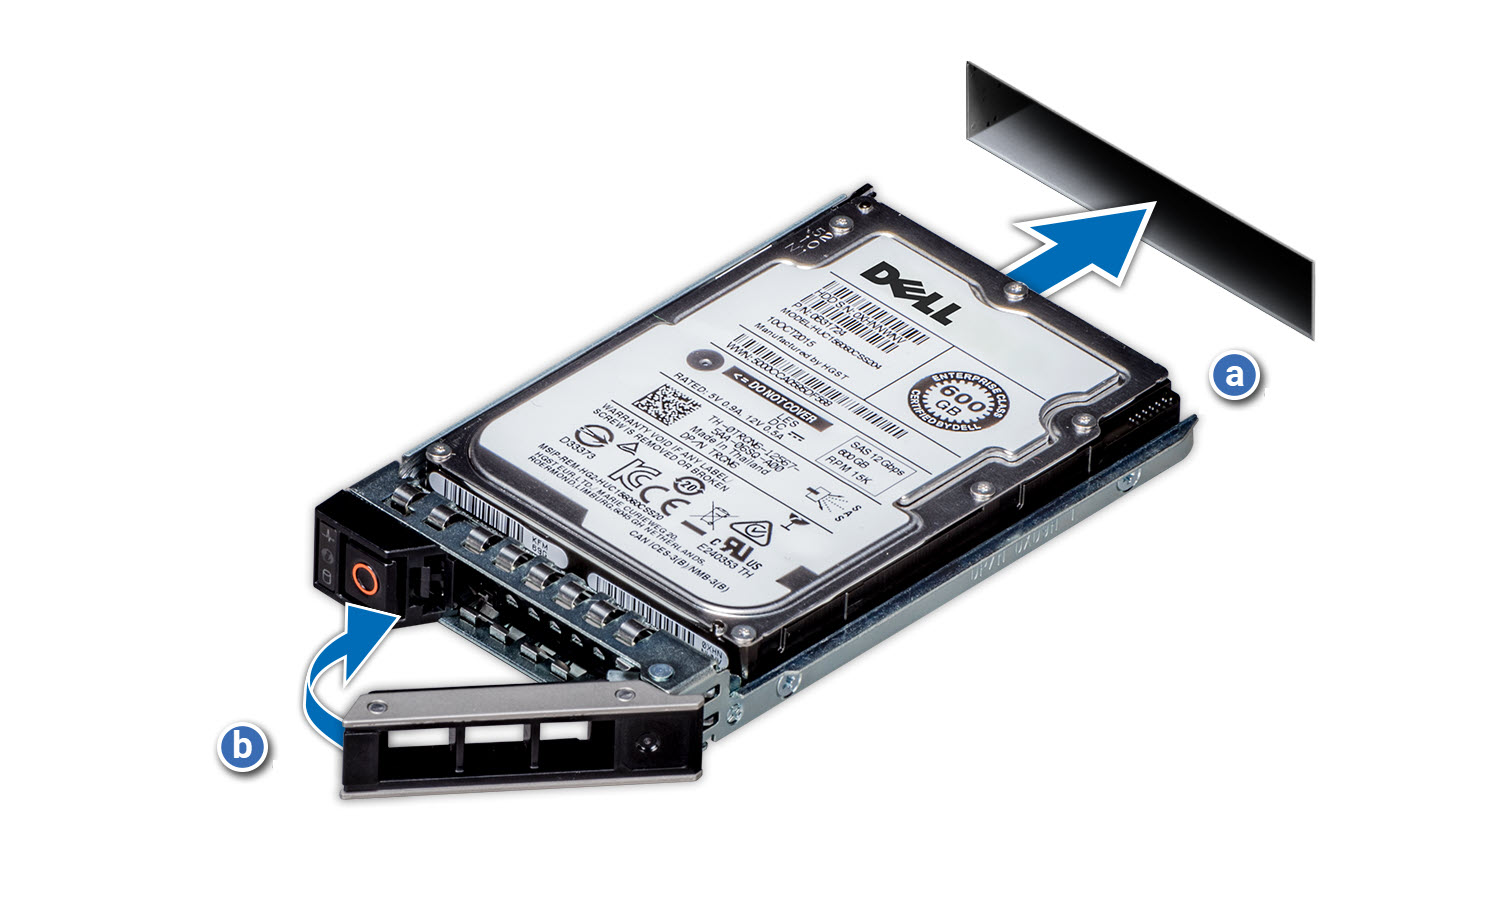
- Slide the drive carrier into the drive slot.
- Close the drive carrier release handle to lock the drive in place.
- Install the front bezel.
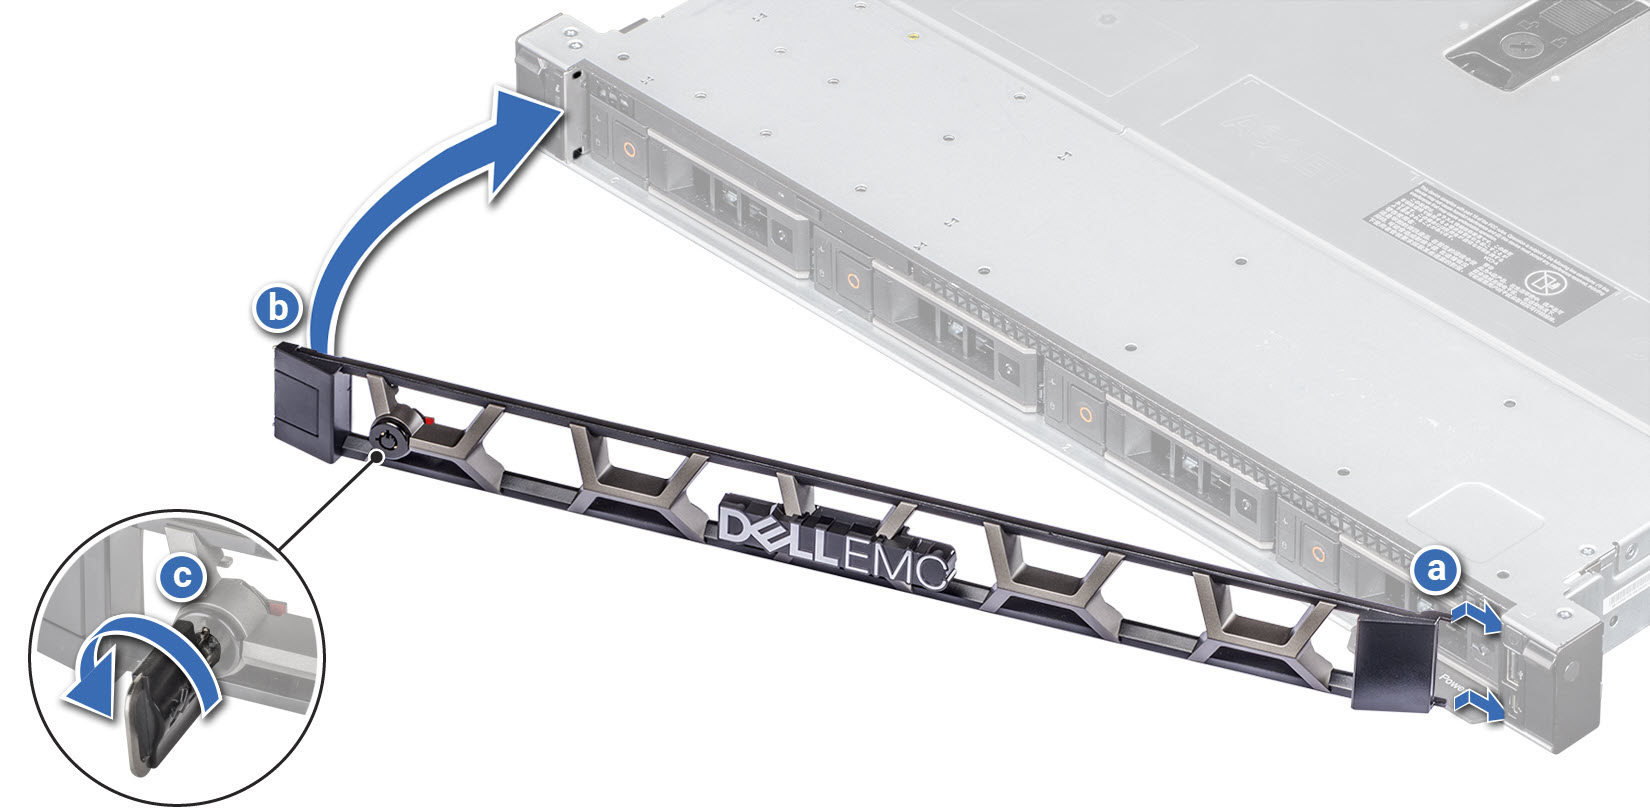
- Align and insert the tabs on the bezel into the slots on the chassis.
- Press the bezel until the release button clicks in place.
- Lock the bezel.
- Power on Dell EMC PowerEdge R340 Server.
Step2. Set up the hard disk drive on Yeastar P-Series Software Edition
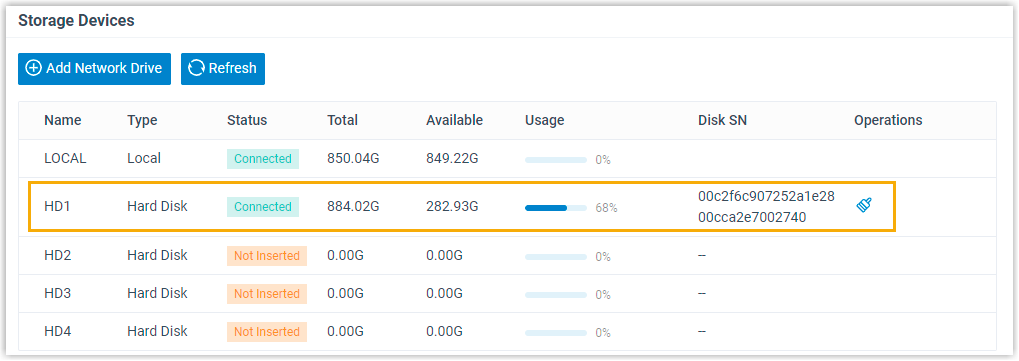
- Log in to PBX web portal, go to .
- In the Storage Devices section, check the installed
hard disk drive.
- Format the hard disk drive.
- Click
 beside the hard disk drive.
 - In the pop-up dialog box, click Yes.
- Click
Result
The Status is displayed as Connected, which indicates that the hard disk drive is ready for storage.
What to do next
Decide what data will be stored on the hard disk drive. For more information, see Manage Storage Locations.