Add a Mac Network Drive
Network drive is used to extend storage space. You can save voicemails, recordings, and logs on a network drive. This topic describes how to add a shared folder on Mac and mount the shared folder to Yeastar P-Series Software Edition.
Restriction
You can add up to 2 network drives.
Prerequisites
Make sure that the computer is always in service, or Yeastar P-Series Software Edition cannot add files to the shared folder.
Step1. Create a shared folder on Mac
- On your Mac, create a folder and specify a name to help you identify it.
- Go to Apple menu
 > System Preferences > Sharing to set up file sharing.
- On the left navigation bar, select the checkbox of File Sharing.
- Click Options to configure sharing
credentials.
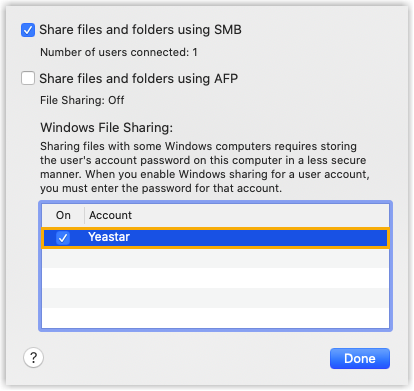
- Select the checkbox of Share files and folders using SMB.
- In the Windows File Sharing section, enable the admin account and enter login password.
- Click Done.
- In the Shared Folders section, click
 to add the folder that
you want to share.
to add the folder that
you want to share. - In the Users section, select Everyone and set permission level to Read & Write.
- Click
 to close
the window.
to close
the window.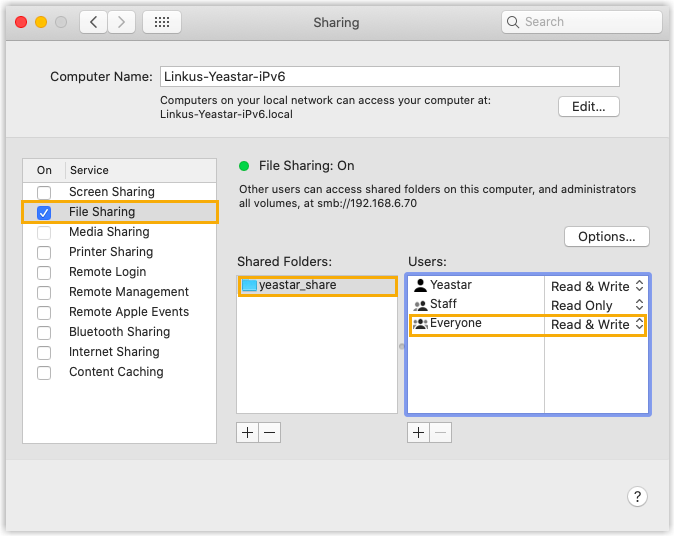
Step2. Turn off Mac firewall
Firewall on Mac is disabled by default. Follow the instructions below to ensure that the firewall is disabled, or the shared folder on the Mac may not be accessed.
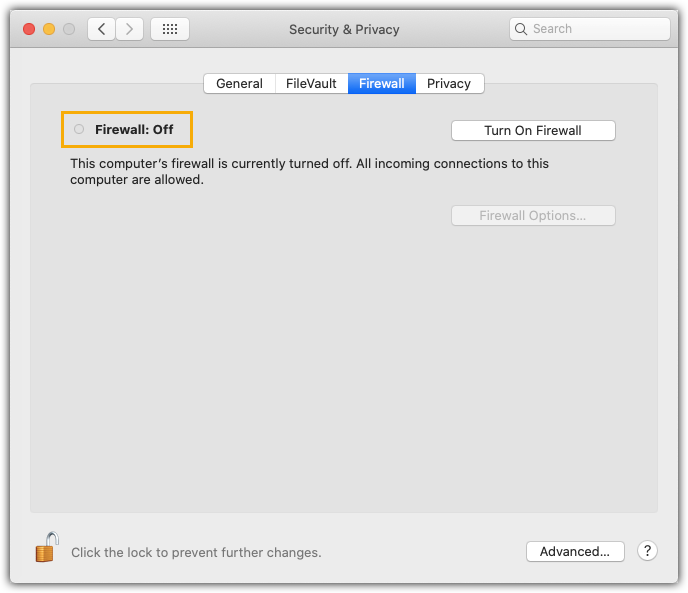
- Go to Apple menu > System Preferences > Security & Privacy, click Firewall tab.
- Make sure that firewall is disabled as follows.
Step3. Mount the shared folder to PBX
- Log in to PBX web portal, go to .
- In the Storage Devices section, click Add Network Drive.
- In the pop-up window, configure the following settings.
- Name: Specify a name to help you identify the network drive.
- Host/IP: Enter the IP address of the Mac.
- Share Name: Enter the name of the shared
folder that you have created on the Mac.Note: To mount a subdirectory of the shared folder, enter subdirectory name.
- Access Username: Enter the username to access the shared folder.
- Access Password: Enter the password to access the shared folder.
- Work Group: Optional. If you have set work group on your network drive, enter the name of the work group. If not, leave this field blank.
- Samba Version: Select the Samba version for the network drive. The default value is Auto.
- Click Save.
Step4. Check connection status
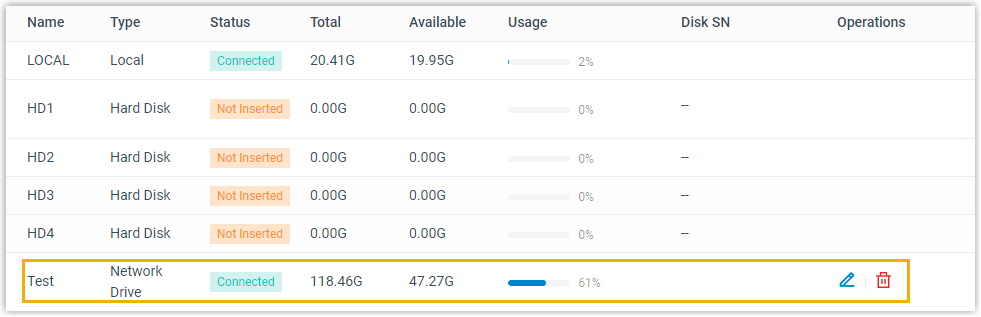
In the Storage Devices section, check status of the network
drive.
- Connected: The network drive is connected.
- Unmounted: No network drive is mounted.
- Read Only: Can NOT write data to the network drive.
- Error
What to do next
Decide what data will be stored on the network drive. For more information, see Manage Storage Locations.
Network Drive FAQ
- How to check the user name that is used to access the shared folder?
- Go to Apple menu > System Preferences > Users & Groups, check the current user name.

- Go to Apple menu