Configure Display Settings for a Provisioned Phone
Yeastar P-Series Software Edition allows you to configure display settings for IP phones via provisioning, including setting the wallpaper, screensaver, and boot logo, as well as adjusting display options such as backlight timeout and screensaver exit behavior. This topic uses Yealink T54W as an example to describe how to configure display settings for a provisioned phone.
Requirements
The firmware of Yeastar P-Series Software Edition is 83.20.0.21 or later.
Prerequisites
- You have uploaded the desired image file for the phone.
- You have connected the IP phone to the PBX and associate it with an
extension via auto provisioning. For more information about the
configuration, see the following topics:
- Auto Provision IP Phones in Local Network (PnP Method)
- Auto Provision IP Phones Remotely (PnP Method)
- Auto Provision IP Phones in Local Network (DHCP Method)
- Auto Provision IP Phones Remotely (DHCP Method)
- Auto Provision IP Phones Remotely (RPS FQDN Method)
- Auto Provision IP Phones Remotely (RPS Method)
- Auto Provision IP Phones Remotely (Provision Link - FQDN Method)
- Auto Provision IP Phones Remotely (Provision Link Method)
Procedure
- Log in to PBX web portal, go to .
- Click
 beside the IP phone.
You are redirected to the Phone setting page of the associated extension.
- In the Preference section, configure the display
settings according to your needs.
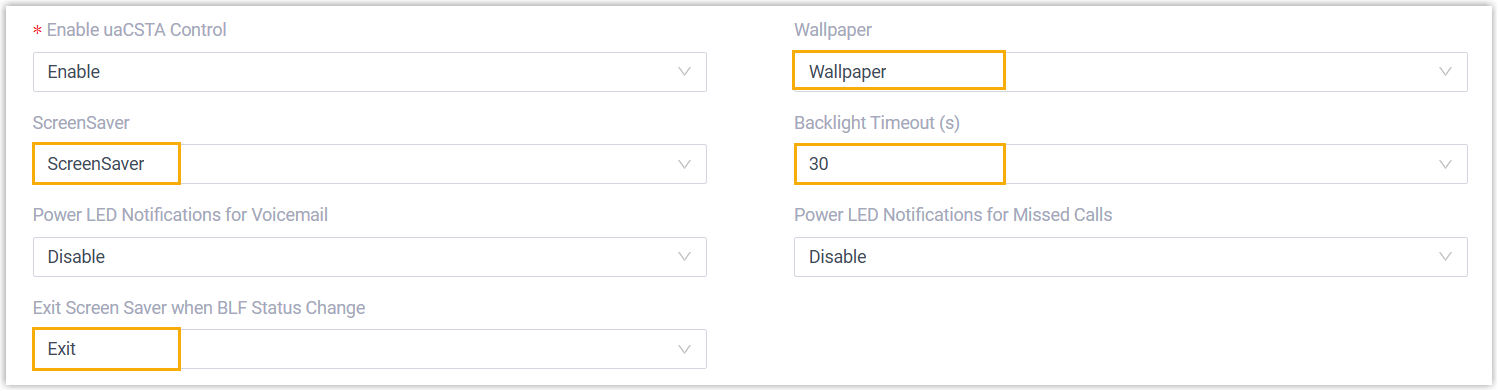
- Wallpaper: Select the wallpaper image you uploaded to the system.
- ScreenSaver: Select the screensaver image you uploaded to the system.
- Backlight Timeout (s): Set the amount of idle time (in seconds) before the phone launches the screen saver.
- Exit Screen Saver when BLF Status Change: Configure whether the phone will exit the screensaver when there is an update to the BLF status.
- Click Save.
- Reprovision the IP phone.

- Click
 beside the IP phone.
 - In the pop-up window, click OK.
- Click