Set up a Multi-language IVR
A multi-language IVR allows callers to select their language preferences and provides them with system prompts in their preferred language. You can set the IVR to route the callers to designated destinations based on different language selections, enabling better handling of customer calls and improved customer satisfaction.
Requirements
Yeastar P-Series Software Edition is 83.14.0.24 or later.
Step 1. Design a multi-language IVR
Design a multi-language IVR and outlines the following information:- Language options the IVR supports
- Key for each language option
- Call routing destination for each language option Note: Make sure that you have created the respective destinations on PBX.
| Language Option | Key | Destination |
|---|---|---|
| English | key 1 | IVR: English (6202) |
| Mandarin | key 2 | Queue: Mandarin-agents (6400) |
Step 2. Upload the IVR prompt
- Prepare a voice prompt for the IVR to announce the available language
options and their respective key actions.
For example, "Welcome. For English, please press 1. For Mandarin, please press 2".
- Upload the voice prompt to the PBX system.
- Log in to PBX web portal, go to .
- Click Upload, and select the audio file to
upload.
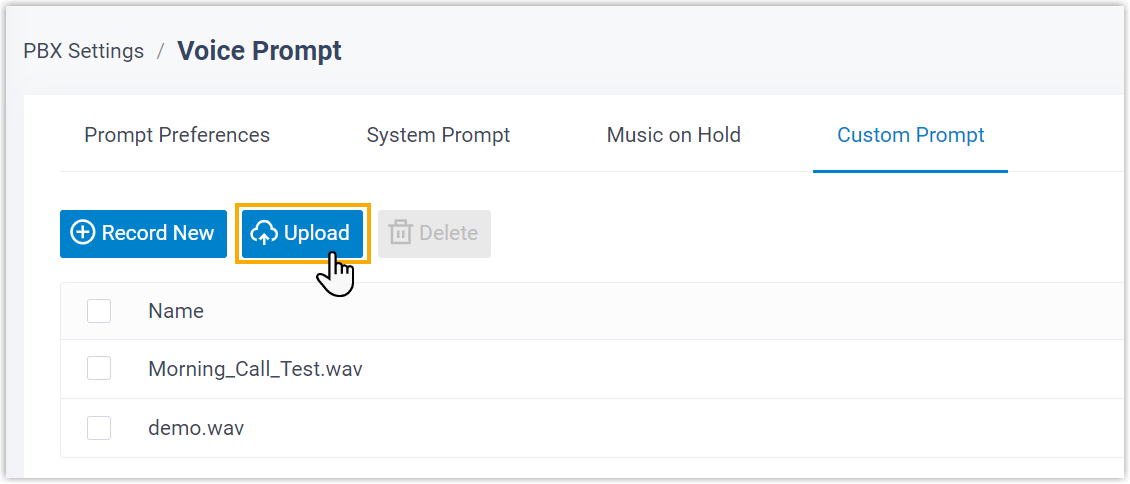
- Click Save and Apply.
Step 3. Set up the multi-language IVR
- On PBX web portal, go to , click Add.
- In the Basic tab, configure the basic settings for
the IVR.
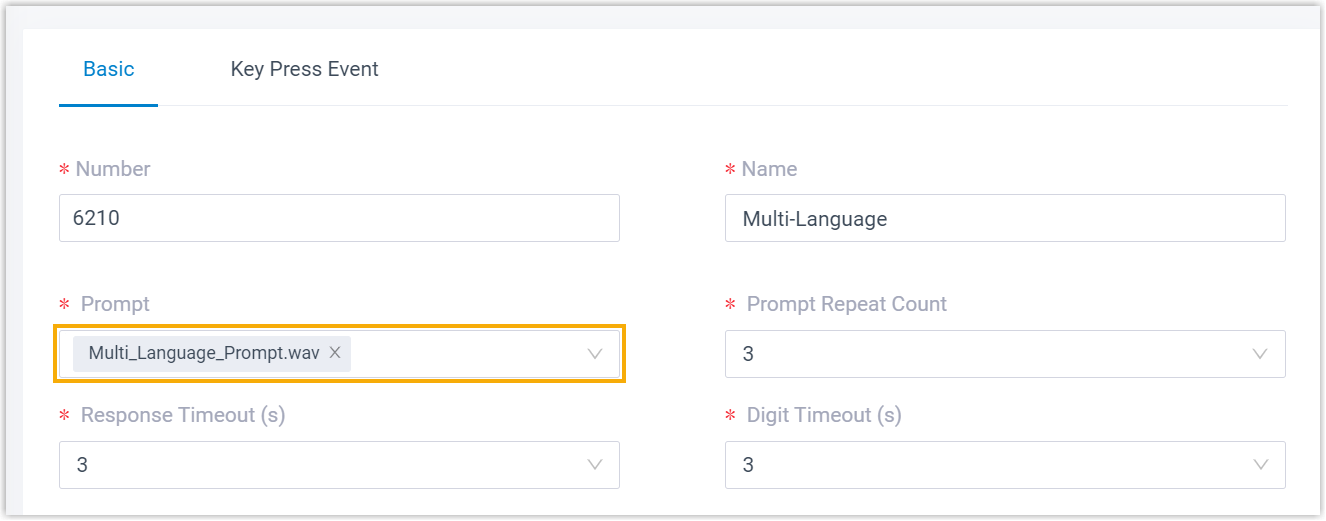
- In the Prompt drop-down list, select the uploaded voice prompt.
- Configure other settings as needed.
- In the Key Press Event tab, enable multi-language
setting for the IVR.
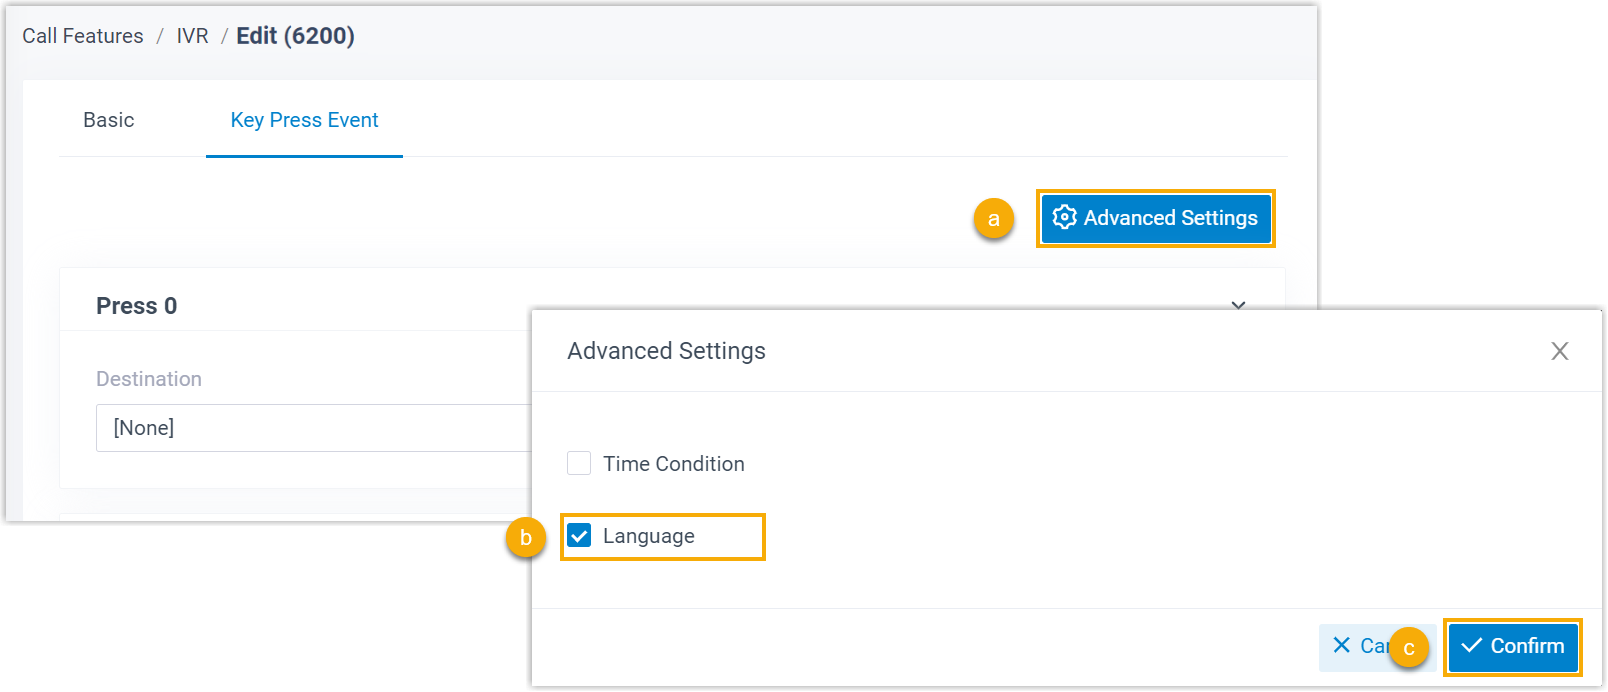
- On the top-right corner, click Advanced Settings.
- In the pop-up window, select the checkbox of Language.
- Click Confirm.
- Configure the corresponding key events based on your IVR design.
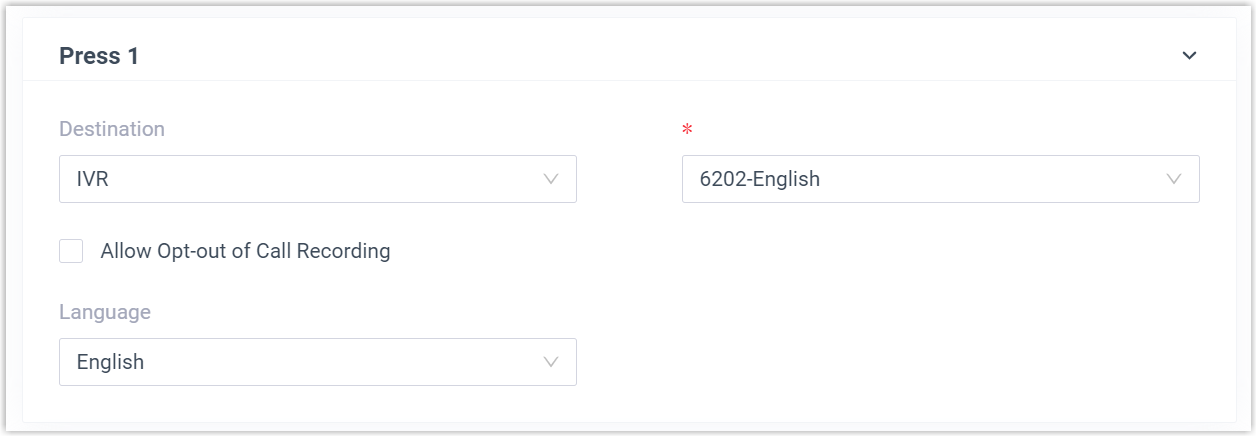
- Destination: Specify the call routing
destination.
When callers press the key, the call will be routed to the specified destination.
- Optional: Select the checkbox of Allow Opt-out of
Call Recording.
If enabled, when the call is routed to the key press destination, the call would not be recorded even if Call Recording is enabled.
- Language: Select the system prompt
language.Note: The displayed language options are synchronized from System Prompts (Path: ).
When callers press the key, all the subsequent system prompts will be played in the specified language.
- Destination: Specify the call routing
destination.
- Click Save and Apply.
Result
When calling into the IVR, callers hear the voice prompt for language preference selection. After they press the corresponding key, all subsequent system prompts (except the custom ones) will be played in the selected language, and the call will be routed to the respective key press destination.