PBX Call Activity Report
PBX Call Activity report provides granular insights into the hourly, daily, and monthly breakdown of internal calls and external calls. This topic describes how to access the report and explains the key metrics in detail.
Access PBX Call Activity report
- Log in to PBX web portal, go to .
- Access PBX Call Activity report.
- Click Default Reports tab.
 Note: To enhance system performance, Yeastar has upgraded the CDR module in version 84.21.0.117 with a new data structure for clearer display and more comprehensive call details. The system gradually deletes old CDRs and related call report data according to the CDR Auto Cleanup setting. Before old call report data are cleaned up, new and historical data are managed separately - the Default Reports tab for new data and the Call Reports(Legacy) tab for historical data.
This topic describes how to access new call report data generated after upgrading to version 84.21.0.117 or later. To access historical data, click Call Reports(Legacy) tab to proceed.
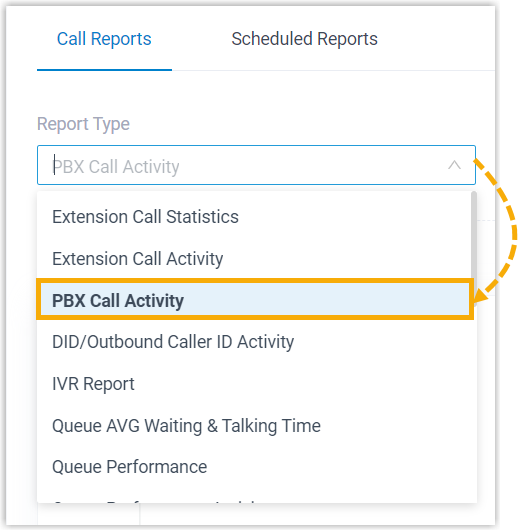
- In the Call Activity Reports pane, click PBX Call Activity.
- Click Default Reports tab.
- Set filter criteria for the call report.
- In the Time Range and Select Date fields, specify the time range that the report will cover.
- Filter data by trunk(s), call type, or communication type.
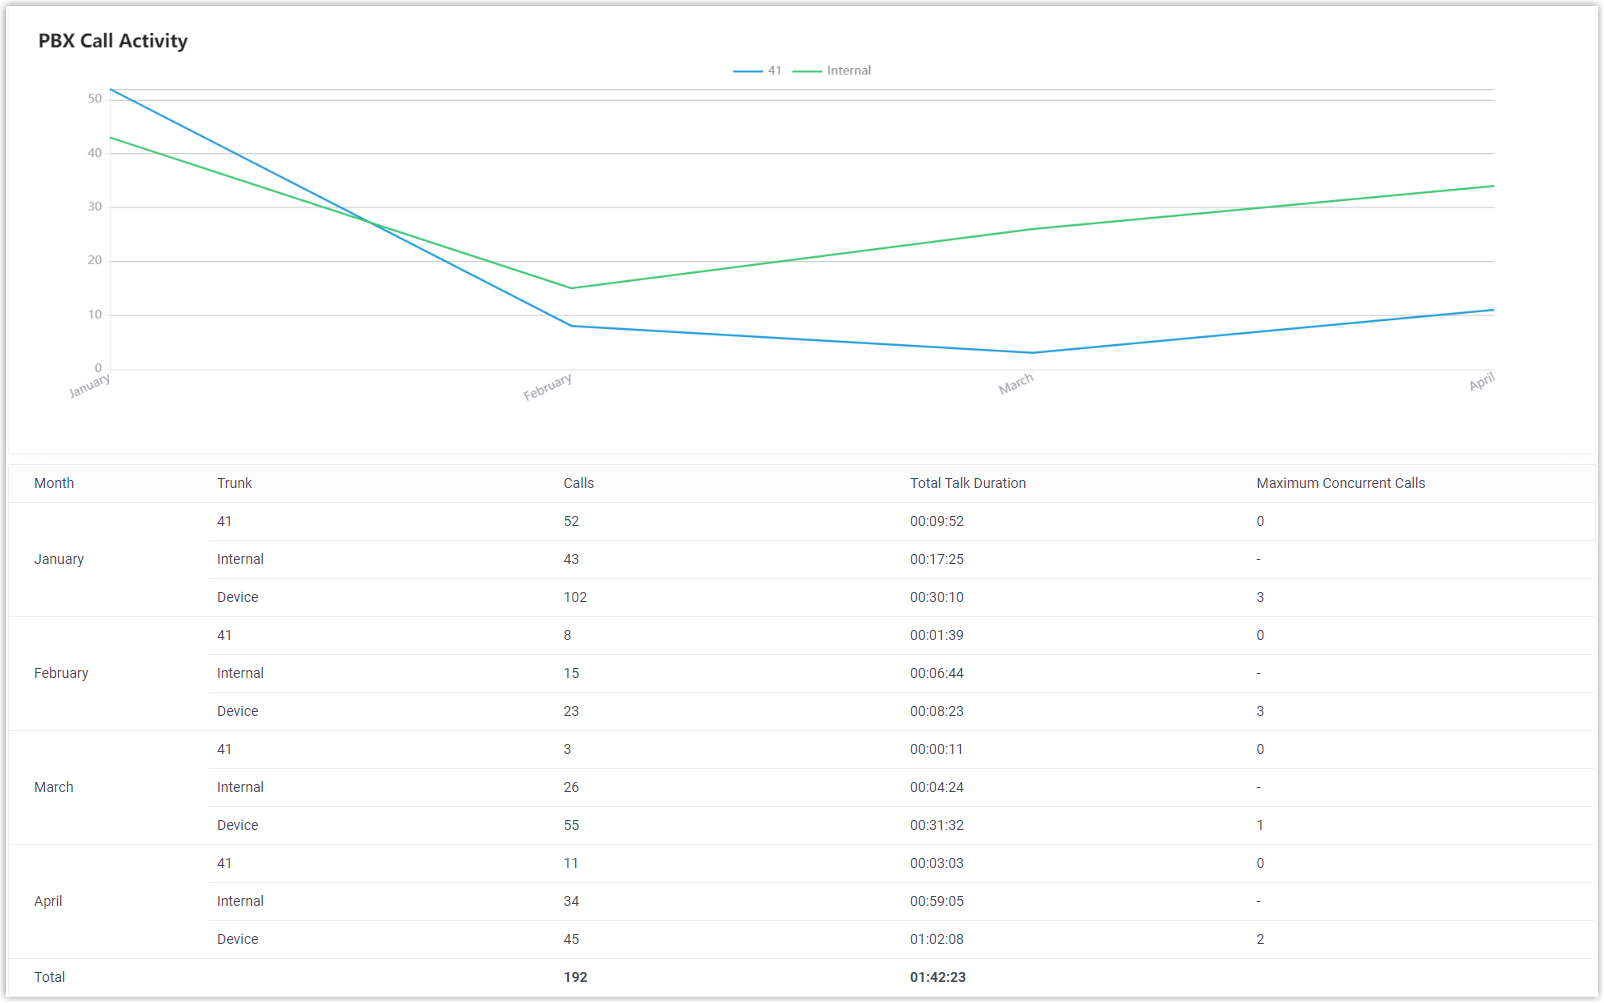
The report that matches the filter criteria is displayed on the page, as shown below.
- Optional: Adjust columns in the list to focus on
the key performance indicators that you want to track.
Operation Description Select columns to display Click  to select the
columns to display.
to select the
columns to display.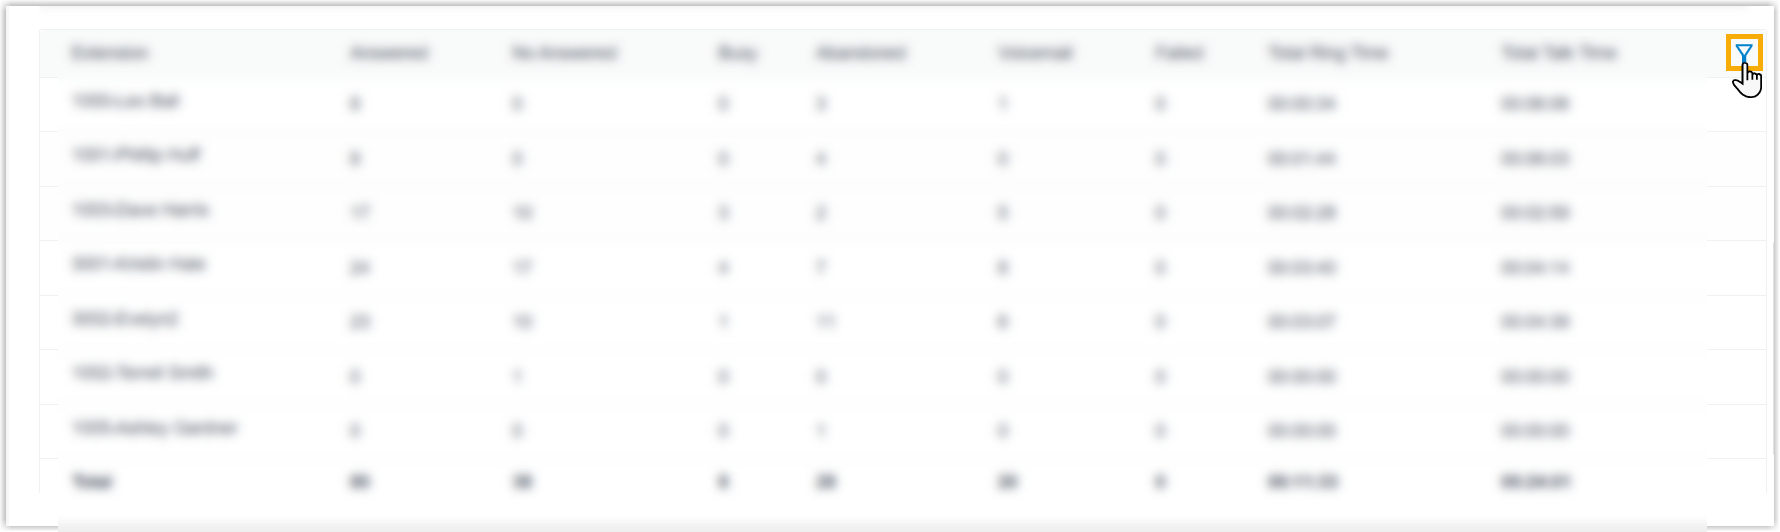
Change column order Click  beside the desired field,
then drag it to the desired position.
beside the desired field,
then drag it to the desired position.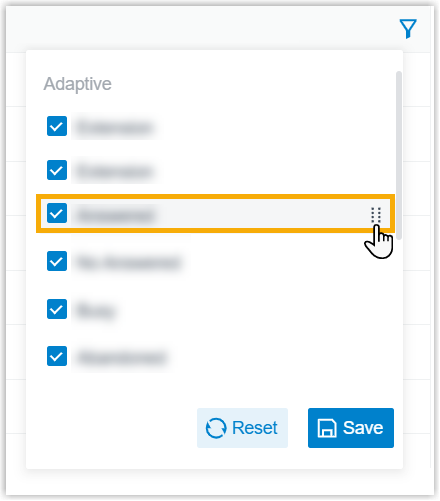
- Optional: Save the report for quick access, or
schedule it for automatic delivery via email.
Operation Description Add to My Reports Add this report to My Reports list for quick access. - At the bottom of the page, click Add to My Reports.
- Enter a name to help you identify the report, and adjust filters or metrics as needed.
- Click Save.
Add to Scheduled Reports Schedule a task to automatically send the report via email. - At the bottom of the page, click Add to Scheduled Reports.
- Complete the follow-up settings according to scheduled task.
Download the report Download the report to local PC for offline review and further analysis. 
- Optional: Click
 to customize the report
download setting, then save the changes.
to customize the report
download setting, then save the changes.- File
Format: Specify the download format
for the report.
- CSV
- XLS
- HTML
- Duration
Format: Specify the display format for
all duration-related fields.
- Display in Second (s)
- Display as HH:MM:SS
- Export
Fields: Specify the fields to
export.
- All
- Selected
- File
Format: Specify the download format
for the report.
- Click Download.
Report details
Refer to the table below for a detailed description of the report metrics.
| Metric | Description |
|---|---|
| Trunk | Trunk name.
|
| Calls | The number of calls that were made or received. |
| Total Talk Time | The total time between calls answered and calls ended. |
| Maximum Concurrent Calls | The maximum number of concurrent calls within the time
frame. Note:
|