Set up Contact Synchronization from Microsoft SQL
By synchronizing Microsoft SQL contacts to Yeastar P-Series Software Edition, extension users can conveniently call these contacts from Linkus UC Clients. In addition, the system can automatically route inbound calls from Microsoft SQL contacts to the specified destinations based on phonebook matches.
Restrictions
Refer to the table below for the maximum number of company contacts and phonebooks supported by your system.
| Maximum Number of Extensions (N) | N < 1000 | N ≥ 1000 |
| Company contacts (total) | 200,000 | 500,000 |
| Company phonebooks | 200 | 500 |
Prerequisites
Procedure
- On Microsoft SQL configuration page, scroll down to the Contacts Synchronization section.
- Enable and set up contact synchronization from Microsoft SQL server.
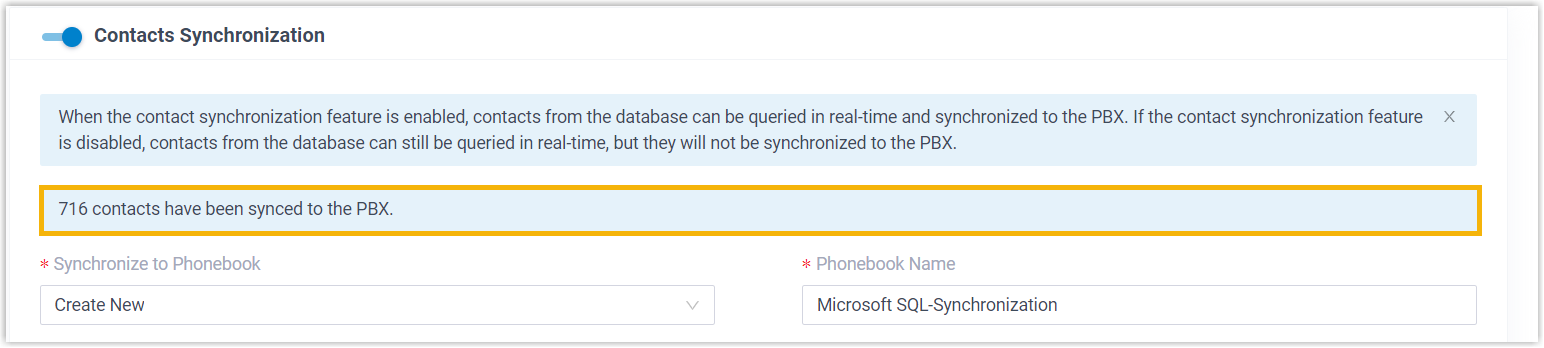
- Turn on the option Contacts Synchronization.
- Complete the following settings.
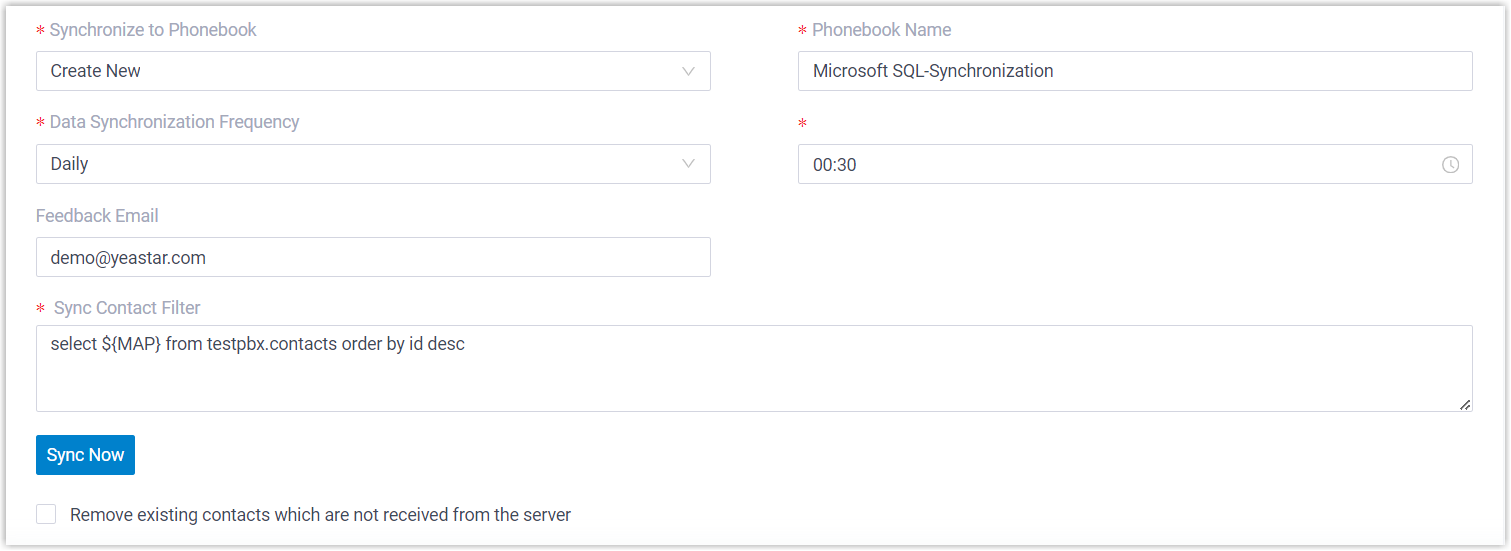
Item Description Synchronize to Phonebook Select where to store the contacts that will be synchronized from your database. - Create New: Create a
new phonebook from scratch to store the synced
contacts.
If you choose the option, enter the phonebook name in the Phonebook Name field.
- Read Specific Property Value and
Create New: Create a new phonebook
based on the property value of a specific column
in your contact table to store the synced
contacts.If you choose the option, enter a column name of the contact table in the Property Name field.Note: This is helpful when you want to route inbound calls from Microsoft SQL contacts to the specified destinations in PBX based on phonebook matches.
For example, there is a column named as belongto, which designates the team responsible for servicing the contacts - Sales and Support. By entering belongto in the field, the system will create two phonebooks - Sales and Support after you save the setting, and route inbound calls to the responsible team based on the phonebook matches after you configure proper inbound routes.
- {existing_phonebook}:
Select an existing empty phonebook to store the
synced contacts.Note: The existing empty phonebooks are synchronized from .
Data Synchronization Frequency Select the frequency to synchronize contacts, then configure time in the follow-up field. Note: Synchronizing a large number of contacts will affect system performance, we recommend that you schedule contact synchronization during off-peak hours.Feedback Email Optional. Enter an email address to get notified of the contact synchronization result.Note: A maximum of 5 email addresses are supported; Use a semicolon;to separate multiple addresses.Sync Contact Filter Enter a SELECT statement for contact synchronization from Microsoft SQL, in the format select ${MAP} from{schema_name}.{table_name}.Note: TOP clause is not supported.Example: select ${MAP} from testpbx.contacts order by id desc- select ${MAP}: Specify the name of the
column in the database that you want to
synchronize to PBX.Note: ${MAP} will be replaced by the field values corresponding to the PBX field enabled in the Map section.
- from testpbx.contacts: The table from
which you want to select data, which must include
two-part names (schema name and table name) in the
format
{schema_name}.{table_name}. - order by id desc: Sort the result in descending order.
Remove existing contacts which are not received from the server If enabled, contacts that were successfully synchronized last time but do not exist in the current synchronization will be deleted by default. - Create New: Create a
new phonebook from scratch to store the synced
contacts.
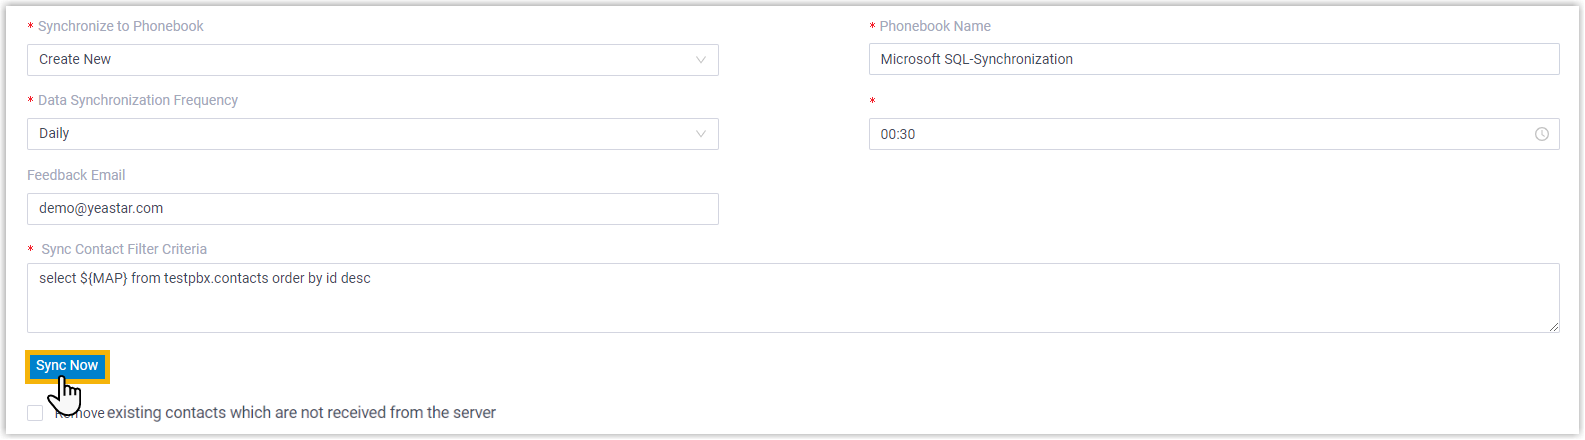
- Click Save.
- Click Sync Now to synchronize contacts to PBX
immediately.
Result
- A notification banner is appeared, displaying the number of contacts that
have been successfully synchronized to PBX.
-
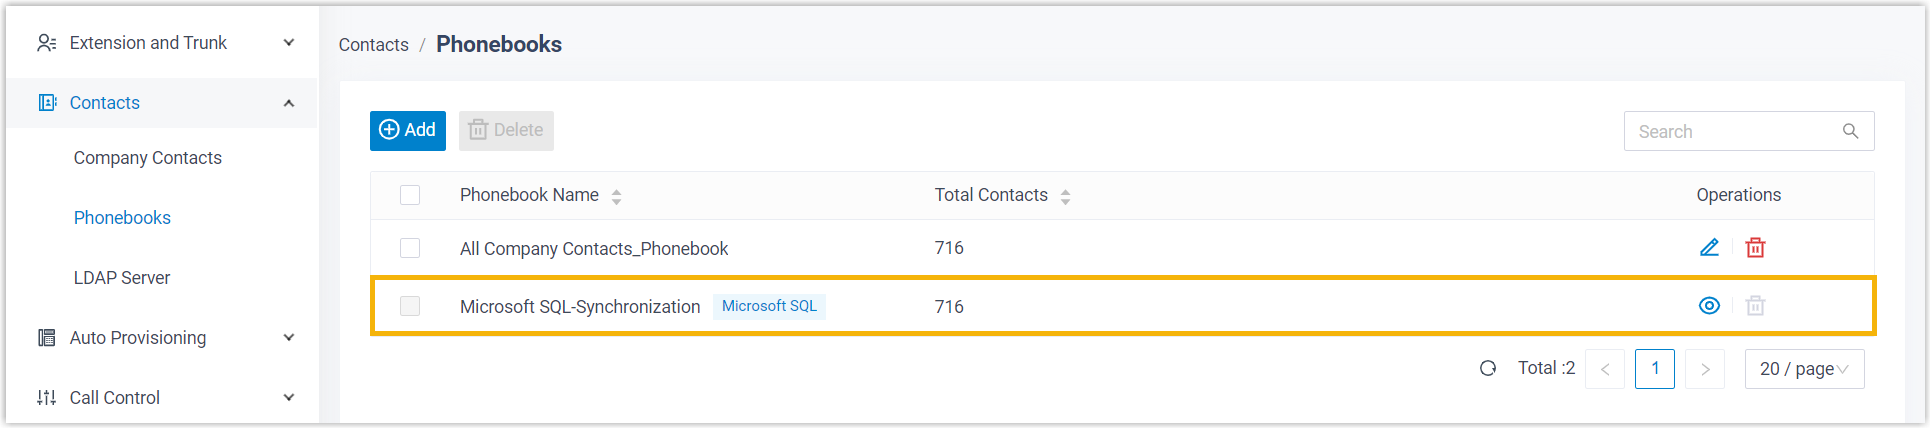
You can check the synchronized contacts and their associated phonebook(s) in , which are tagged as
 .
.
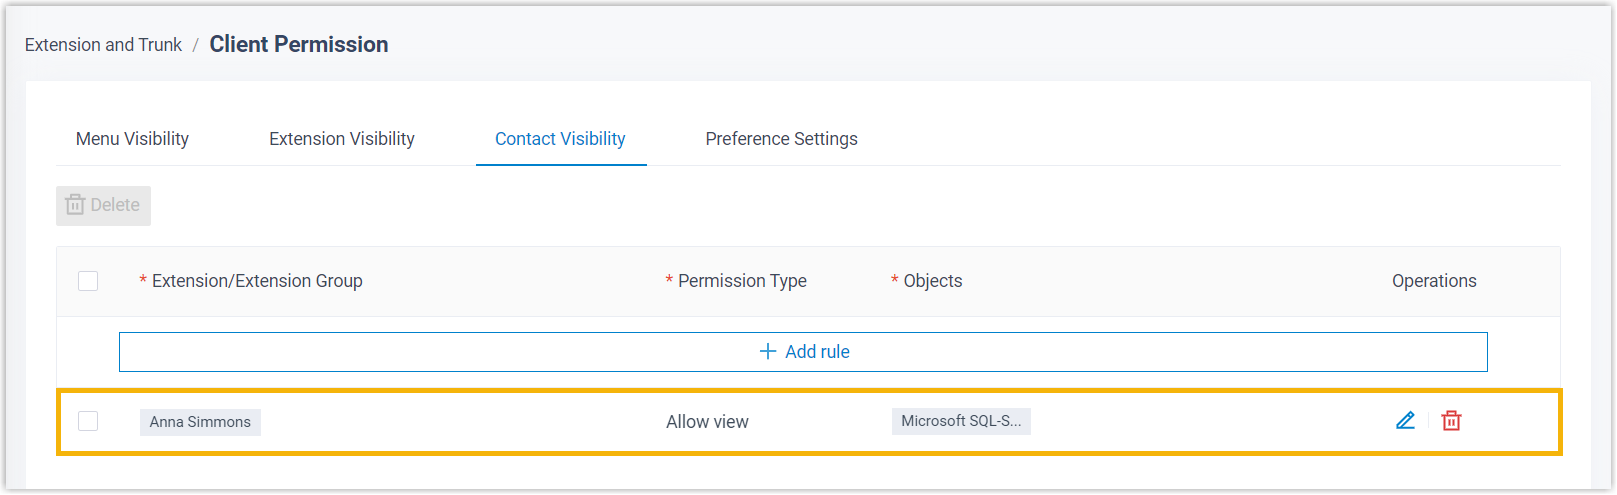
- Authorized extension users can view and call the contacts directly from
Linkus UC Clients.Note: To achieve this, you need to grant the viewing permission of the associated phonebook to extension users (Path: ) and extension users need to upgrade Linkus UC Clients to the specified version, as shown below:
- Linkus iOS Client: Version 5.7.3 or later
- Linkus Android Client: Version 5.7.4 or later
- Linkus Windows Desktop: Version 1.7.3 or later
- Linkus Mac Desktop: Version 1.7.3 or later
What to do next
If you want to route inbound calls to specified destinations based on phonebook matches, you need to configure inbound routes to route calls by matching contacts in different phonebooks.
For more information, see Route Inbound Calls by Matched Phonebook Contacts.