Forward Incoming Calls to Another Destination
Yeastar P-Series Cloud Edition supports status-based call forwarding, which allows users to forward incoming calls to different destinations based on extension presence status. This topic describes how to preconfigure call forwarding rules for extension users on PBX, and how to enable and configure feature code so that extension users can make immediate changes to call forwarding destinations by dialing a feature code when needed.
Set up call forwarding (destination preset)
For each presence status of an extension, you can define a different destination to which the incoming calls will be forwarded. Every time the presence status changes, the incoming calls will be forwarded to the corresponding destination.
- Procedure
-
- Log in to PBX web portal, go to , edit the desired extension.
- Click Presence tab.
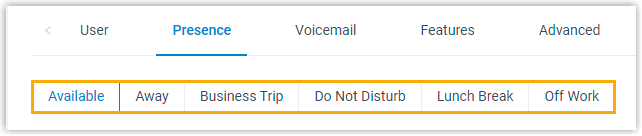
- In the status bar, select a status to which the call
forwarding rule will be applied.
- In the Internal Calls and
External Calls section, complete the
following settings:
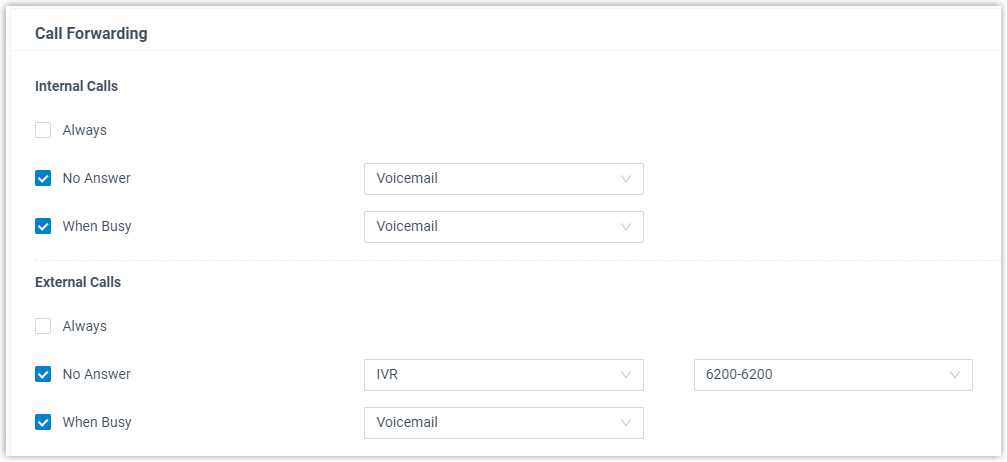
- Select a forwarding condition.
- Always: Forward all incoming calls to the designated destination.
- No Answer: Only forward unanswered calls to the designated destination.
- When Busy: Only forward the calls that come in while the user is talking on the phone to the designated destination.
- Configure a destination for the forwarding condition.
- Optional: To require call confirmation when an
external recipient receives the forwarded calls, select
the checkbox of Call
Confirmation.Note: This option is available only when the following requirements are met:
- The firmware version of Yeastar P-Series Cloud Edition is 84.24.0.73 or later.
- The call forwarding destination is set to
Mobile Number or
External Number.

- Select a forwarding condition.
- Click Save and Apply.
- Result
-
- When a call reaches the extension number, the system will check the user's presence, identify whether it originates from an internal caller or external caller, and then route the call to the specified destination.
-
When the call confirmation feature is enabled, the system plays a prompt asking the external recipient to press a key to accept or decline the call.
Action Description Press 1 (Accept) The call will be connected successfully. Press # (Decline) The call is declined, and the subsequent behavior depends on the call source: - If the call is routed directly to the extension, it will be forwarded to the extension's voicemail.
- If the call is from a ring group or queue (with the Make the extension's 'Always' call forwarding destination effective setting enabled), the ring group/queue continues to ring other members according to the ring strategy.
Note: Call Confirmation does not take effect in the following scenarios:- An external call is sent to the extension through a trunk (with the Return 302 on External Forward setting enabled), and the extension's call forwarding is triggered.
- The call is forwarded directly from an IP phone (e.g., using the Forward softkey during an incoming call).
Enable feature code for call forwarding (destination immediate change)
Extension users can change the preset call forwarding destinations on Linkus UC Client. For users with no access to Linkus UC Client, you can enable feature codes for call forwarding, so that these users can dial a feature code on their phones to change the call forwarding destinations.
- Restrictions
-
- Be it internal calls or external calls, all the incoming calls received under the same forwarding type (Always, No Answer, and When Busy) will be routed to the same destination.
- Only the call forwarding destination of the extension's current presence status can be changed.
- Procedure
-
- Log in to PBX web portal, go to .
- In the Call Forwarding section, enable and
configure the feature codes for call forwarding as needed.

- Enable ''Forward All Calls''/''Forward When
Busy''/''Forward No Answer'': Select the
checkbox, then configure a feature code.
Extension users can dial the feature code to forward calls to voicemail or a specific number. For more information, see Call Forwarding Feature Code.
- Disable ''Forward All Calls''/''Forward When
Busy''/''Forward No Answer'': Select the
checkbox, then configure a feature code.
Extension users can dial the feature code to disable automatic call forwarding.
- Enable ''Forward All Calls''/''Forward When
Busy''/''Forward No Answer'': Select the
checkbox, then configure a feature code.
- To allow extension users to change call forwarding destinations for
other extensions, do as follows:
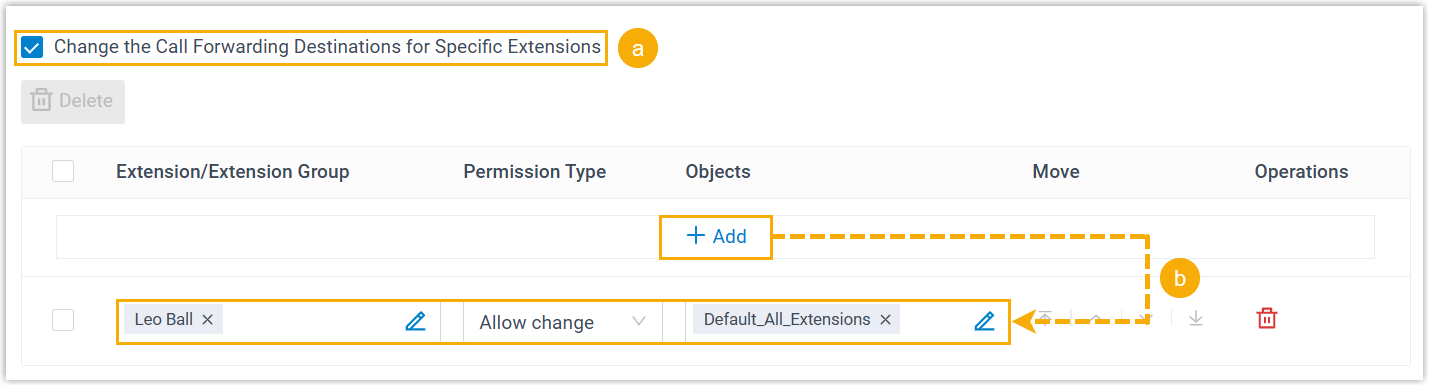
- Select the checkbox of Change the Call Forwarding Destinations for Specific Extensions.
- Click Add to add permission rules,
specifying which extension users are allowed to change the
call forwarding destinations for specific extensions.Note: You can add up to 10 permission rules.
Item Description Extension/Extension Group Click  to select the
desired extension which can change call forwarding
destinations for specified extensions.
to select the
desired extension which can change call forwarding
destinations for specified extensions.- All extensions
- Specific extensions and extension groups
Permission Type Select Allow change. Objects Click to select the
desired extensions or extension groups, whose call
forwarding destination can be changed by
authorized extension users.- All extensions and extension groups
- Groups that the extension belongs to
- Selected extensions and groups
- Specific extensions and extension groups
- Click Save and Apply.
- Result
-
- When an extension user dials the feature code, incoming calls they received under the current presence status will be routed to the specified destination.
- When an authorized extension user dials the feature code plus the target extension number and the destination number, incoming calls the specified extension received under its current presence status will be routed to the specified destination.
Note: Forwarding type No Answer and When Busy are not supported under Do Not Disturb presence status, which means that even if extension users dial the corresponding feature code, the configuration will not work.