Allow Users to Select Outbound Caller ID (DOD) to Call
By default, the value that you have configured in the From header field for a trunk will be used as outbound caller ID when extension users make outbound calls through the trunk. You can customize outbound caller IDs for extension users based on trunk and allow them to select DOD when making outbound calls.
Requirements
- The PBX version is 84.21.0.16 or later.
- Customizing outbound caller ID should be supported by the trunk provider.
Step 1. Set outbound caller IDs for extensions based on a trunk
Set up outbound caller IDs for extensions based on a trunk, so that an associated DOD can be sent out when a user calls out.
- Log in to PBX web portal, go to , edit the desired trunk.
- Click Outbound Caller ID tab.
- In the Outbound Caller ID List section, click Add under the Outbound Caller ID tab, and configure outbound caller IDs for extensions by different methods.
- To associate one outbound caller ID with multiple
extensions, select Shared Outbound Caller ID and
configure the following settings:
Setting Description Short Code Optional. Set a short code for the outbound caller ID. This code can be used in conjunction with the feature code prefix to select the outbound caller ID for various operations, such as setting it as default or making outbound calls.
Note:- The short code must be unique within the system.
- For more information about how to use the short code, see Set DOD Feature Code.
Outbound Caller ID Specify the number to be displayed as the outbound caller ID on the callee's device. Outbound Caller ID Name Optional. Specify the name to be displayed alongside the outbound caller ID on the callee's device. Default DOD Label Optional. Set a default label to identify the outbound caller ID. Note: Extension users can modify the default label on their Linkus Web Client and Desktop Client (Path: ); each user’s customized label is only visible to themselves.Associated Extensions Select the extension(s) to associate with the outbound caller ID. The authorized extension users can use these numbers for outbound calls. - To bind consecutive outbound caller IDs to consecutive
extensions with one-to-one correspondence, select Outbound Caller
ID Range and configure the following settings:
Setting Description Outbound Caller ID Range Specify the start and end numbers to add a range of outbound caller IDs. Extension Range Specify a range of extensions, which will be associated one-to-one with the outbound caller IDs. Outbound Caller ID Name Optional. Specify the name to be displayed alongside the outbound caller ID on the callee's device. Default DOD Label Optional. Set a default label to identify the outbound caller ID. Note: Extension users can modify the default label on their Linkus Web Client and Desktop Client (Path: ); each user’s customized label is only visible to themselves. - Click Save and Apply.
Step 2. Associate the trunk and extensions with an outbound route
Set up an outbound route to allow extension users to dial out through the trunk that has been configured outbound caller IDs.
- Go to , edit the desired outbound route.
- In the Trunk section, select the trunk that has outbound caller IDs configured for extensions.
- In the Extension / Extension Group section, select the extensions that have been associated with the outbound caller IDs.
- Click Save and Apply.
Step 3. Grant extensions the permission to select DOD when dialing out
- Go to , edit the desired extension.
- Scroll down to the Outbound Caller ID (DOD)
section.
The outbound caller IDs that have been associated with the extension are displayed on the Outbound Caller IDs list.
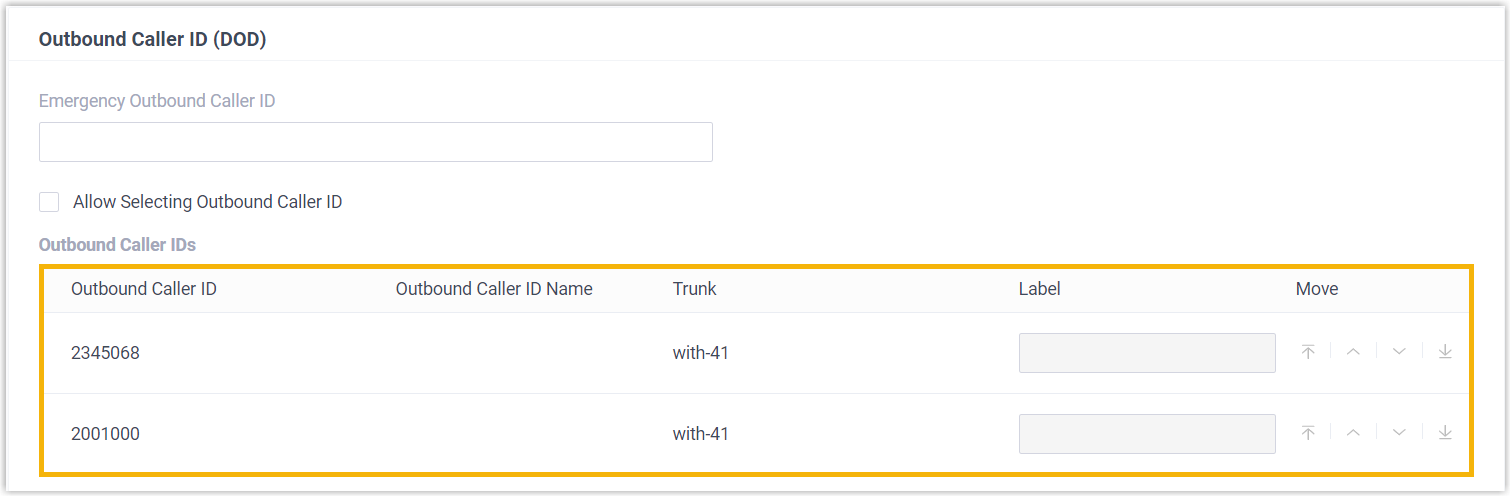
- Select the checkbox of Allow Selecting Outbound Caller ID.
- Customize how the DOD will be displayed on the extension's Linkus UC Clients
as needed.Note: The extension user can also customize the DOD display on his or her Linkus Desktop / Web Client (Path: ).
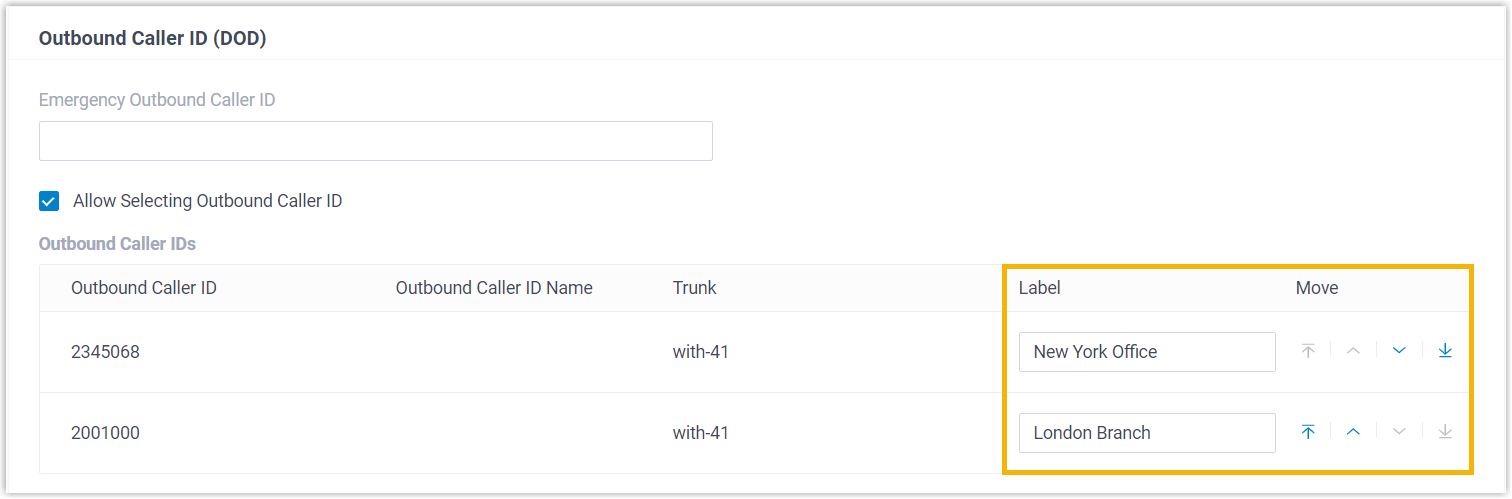
- Label: Use the default DOD label or customize
a short description to label the DOD number.
For example, if the label Support DOD is set for DOD 5503305, the DOD will appear as 5503305 (Support DOD) on the extension user's Linkus UC Clients.
- Move: Click


 to adjust the order in which the DODs are displayed on the
extension user's Linkus UC Clients.
to adjust the order in which the DODs are displayed on the
extension user's Linkus UC Clients.
- Label: Use the default DOD label or customize
a short description to label the DOD number.
- Click Save and Apply.
Result
When making outbound calls from Linkus UC Clients, the extension user can select a DOD to dial out.
- Linkus Mobile Client: 5.6.6 or later
- Linkus Desktop Client: 1.6.0 or later
For more information, see Select Outbound Caller ID (DOD) to Call (Linkus Mobile Client), Select Outbound Caller ID (DOD) to Call (Linkus Desktop Client), and Select Outbound Caller ID (DOD) to Call (Linkus Web Client).