Auto Provision Function Keys for Phones
Function keys allow extension users to monitor status of specific objects or quickly perform specific operations from Linkus or IP phone. This topic describes how to provision function keys for extension users' IP phones.
Supported key types
The following table lists the function keys that you can assign for an extension user:
| Key type | Function |
|---|---|
| N/A | No functionality. |
| Line | Configure line keys. |
| BLF |
|
| Speed Dial | Place a call to the most commonly dialed numbers or extensions. |
| Set Presence |
Quickly set the extension's presence to a specified status. For more information, see Switch Extension Presence by Function Key. |
| Check Voicemail |
|
| Check Group Voicemail |
|
| Park & Retrieve |
|
| Intercom | Place an intercom call to the monitored extension to make an announcement. |
| DTMF | Send DTMF signals directly instead of manually entering the numbers each time. |
| Agent Login/Logout |
|
| Agent Pause/Unpause |
|
| LDAP Directory | Quickly access the LDAP phonebook to query contact
information. Note: This key type is
only available for IP phone. |
| Boss-Secretary Feature |
|
| Call Forward | Quickly enable or disable call forwarding. Note: The key type is only available for IP
phone. For more information, see Forward All Incoming Calls to Another Destination by BLF Key. |
| Action URL | Quickly send an HTTP GET request to a specified URL for
reporting specific events. Note: The key
type is only available for IP phone. |
Prerequisites
- You have connected the IP phone to the PBX and associate it with an
extension via auto provisioning. For more information about the
configuration, see the following topics:
- Auto Provision IP Phones in Local Network (PnP Method)
- Auto Provision IP Phones in Local Network (DHCP Method)
- Auto Provision IP Phones Remotely (RPS FQDN Method)
- Auto Provision IP Phones Remotely (RPS Method)
- Auto Provision IP Phones Remotely (Provision Link - FQDN Method)
- Auto Provision IP Phones Remotely (Provision Link Method)
- You have obtain the relevant feature code if necessary (Path: ).
Auto Provision a function key for an IP phone
- Set up function key.
- Log in to PBX web portal, go to .
- Click
 beside the desired phone.
You are redirected to the setting page of the extension associated with the phone.
- Click the Function keys tab, then configure a
BLF key according to your needs.
- Monitor extension status by BLF key
- Monitor extension's default DOD by BLF key
- Monitor trunk status by BLF key
- Monitor agent status by BLF key
- Monitor extension status by BLF key
-
Configure a BLF key to monitor a specific extension’s status in real time, make calls to it, or pick up its incoming calls with a single press.

- Type: Select BLF.
- Value: In the drop-down list, select an extension to monitor.
- Label: Optional. Enter a value, which will be displayed on the phone screen.
- Monitor extension's default DOD by BLF key
- Configure a BLF key to indicate whether the
specified DOD is set as default for an extension, or
quickly set the DOD as default for the extension.Note: Before you set up, you need to obtain the DOD Prefix feature code (Path: ).

- Type: Select BLF.
- Value: Enter the
feature codes.
The format should be
DOD Prefix feature code+extension number+*+DOD short code/specific DOD number. For example, to monitor the DOD number5503301(short code:123) of extension 2001, enter*0852001*123or*0852001*5503301. - Label: Optional. Enter a value, which will be displayed on the phone screen.
- Monitor trunk status by BLF key
-
Configure a BLF key to monitor a specific trunk's status in real time, and seize the trunk to make outbound calls with a single press.Note:
- Monitoring trunks by BLF key is NOT supported on E1/T1 trunk and BRI trunk.
- To seize a trunk to call out by BLF key, make sure the extension has the permission to use the monitored trunk for outbound calls.

- Type: Select BLF.
- Value: Enter the name of the trunk to be monitored.
- Label: Optional. Enter a value, which will be displayed on the phone screen.
- Monitor agent status by BLF key
-
Configure a BLF key to monitor specific pause status of a queue agent.
Note: Before you set up, you need to obtain the following feature codes:- Pause feature code (Path: )
- Pause Reason feature code (Path: )

- Type: Select BLF key.
- Value: Enter the
feature codes.
The format should be
Pause feature code+extension number+*+queue number+pause reason feature code. For example,*071001*6400*01. - Label: Optional. Enter a value, which will be displayed on the phone screen.
- Click Save.
- Reprovision IP phones with the extensions registered.
- Go to .
- Click
 beside the phone.
 - In the pop-up window, click OK.
The phone automatically applies the change, and the BLF key shows the real-time status of the monitored item.
Scenario BLF LED Monitor extension status by BLF key - Solid Green: The extension is being monitored, and the status is idle.
- Solid Red: The extension is sending a
call or is in a call; or the extension presence is
DND (Do Not Disturb).Note: For Fanvil IP phones that support differentiated DND status indication, the DND status is indicated by a Solid Yellow LED light.
- Flashing Red: The extension is ringing.
- LED off: The extension is not registered, or the extension has been deleted from the PBX system.
Note: You can press the BLF key on the phone to achieve the followings:- Place a call to the monitored extension.
- Pick up the monitored extension's incoming calls if the corresponding feature code is enabled on .
Monitor extension's default DOD by BLF key - Solid Green: The DOD number is set as the extension’s default outbound caller ID.
- Solid Red: The DOD number is not set as the extension’s default outbound caller ID.
Note: You can press the BLF key on the phone to quickly set the specified DOD as default for the extension.Monitor trunk status by BLF key - Solid Green: The trunk is being monitored, and the status is idle.
- Solid Red: The trunk is busy.
- LED off: The BLF key configuration failed.
Note: You can press the BLF key to seize the trunk, then dial a number after a dial tone to call out.Monitor agent status by BLF key - Solid Green: The monitored agent is NOT in the specified pause status.
- Flashing Red: The agent is in the specified pause status.
- LED off: The BLF key configuration failed.
Auto Provision function keys for phones in bulk using a function key template
If you are managing many IP phones and want to simplify configuration while ensuring consistency across all phones, you can auto provision function keys in bulk using a function key template.
- Add a function keys template.
- Log in to PBX web portal, go to .
- Click Function Keys Template.

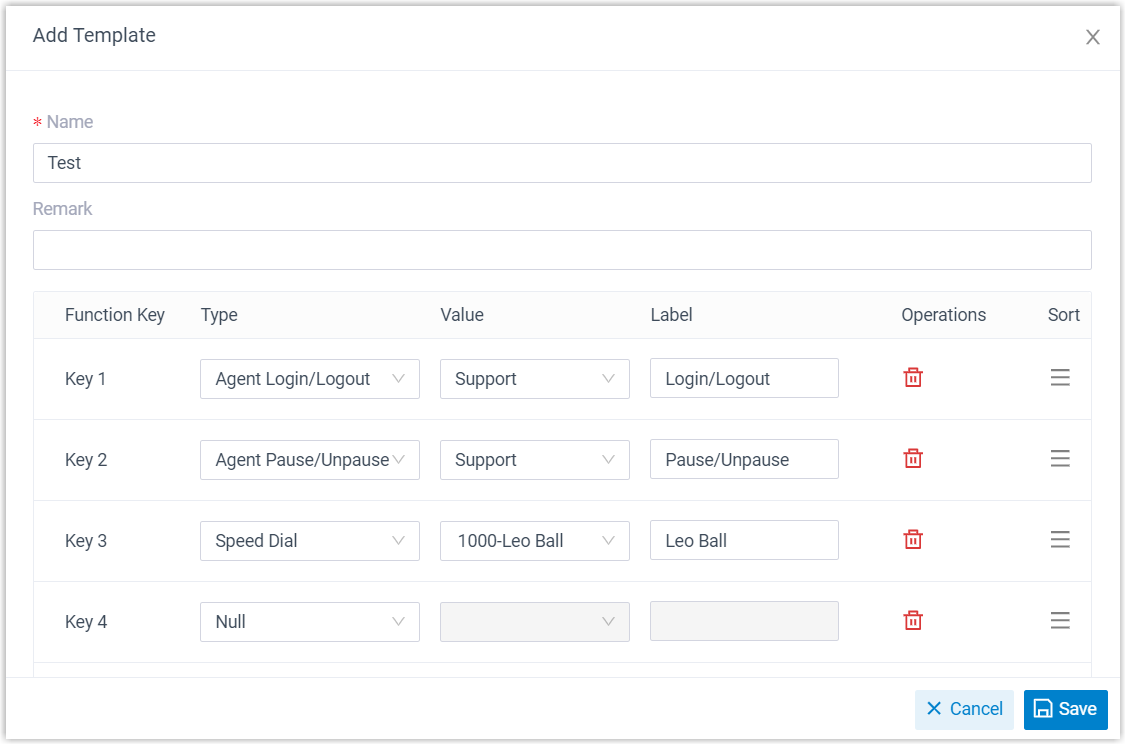
- Click Add to add a function key
template, then configure the following settings.
 Note: The number of programmable keys varies by phone models. If the number of function keys you assign to an extension exceeds the number of programmable keys, the excess function keys cannot take effect. However, if the user's IP phone is connected with an expansion module, the excess function keys are automatically applied to the expansion module.
- In the Name field, enter a name to help you identify the template.
- Optional: In the Remark field, enter a short description about the template.
- In the function keys list, configure function keys according
to your needs.
- Type: Select a key type.
- Value: Configure a desired value based on the key type.
- Label: Optional. Enter a value to help extension users identify the function key.
- Click Save.
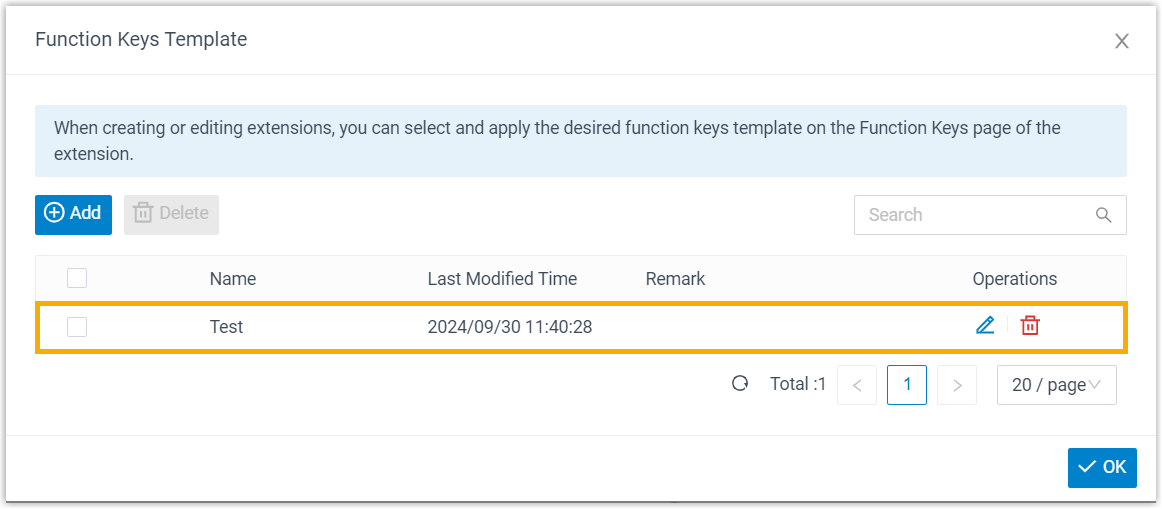
The function key template is created and displayed on the list.

- Click OK.
- Apply the function keys template to extensions.
- On the extension list, select the checkboxes of the desired
extensions, then click Edit.

- Under Function Keys tab, select the checkbox
of Bulk Edit, then click Apply Function
Keys Template.

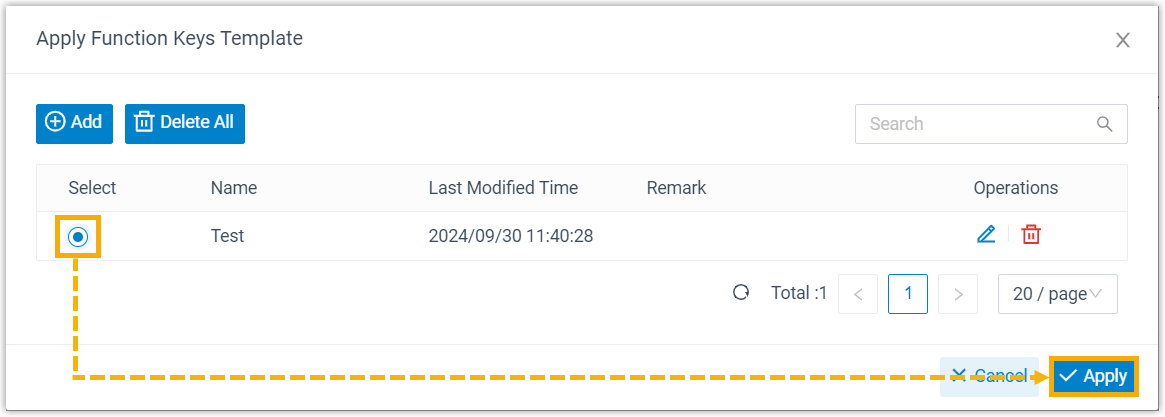
- In the pop-up window, select the function keys
template, then click Apply.

- Click Save.
- On the extension list, select the checkboxes of the desired
extensions, then click Edit.
- Reprovision IP phones with the extensions registered.
- Go to .
- Select the checkboxes of the desired phones, then click
Reprovision.

- In the pop-up window, click OK.
The phones automatically apply the changes. Check the function key status on the phones to see if the changes are applied.