Auto Provision IP Phones Remotely (RPS FQDN Method)
When IP phones are located in remote network, Yeastar P-Series PBX System supports to auto provision the IP phones using RPS (Redirection and Provisioning Service) method through the Yeastar-supplied Fully Qualified Domain Name (FQDN). This method frees you from complicated network settings and helps you quickly establish a secure tunnel for remote provisioning, greatly saving time and cost in mass deployment while resting assured with the remote access security.
Supported IP phones
This topic can be applied to the RPS supported IP phones that are deployed in a remote network.
Prerequisites
-
You have subscribed Yeastar P-Series Enterprise Plan or Ultimate Plan.
- Make sure the following required FQDN settings are ready.
- The Yeastar FQDN domain name is available.
- The remote IP phones and the extension accounts to be assigned can perform remote SIP registration via FQDN. For detailed configurations, see Configure Network for Remote SIP Access by a Yeastar FQDN.
- The remote IP phones are permitted to access the PBX system via FQDN
to obtain configuration files.
For detailed configurations, see Configure Network for Remote Web Access by a Yeastar FQDN.
- Make sure that you have downloaded the template for the desired phone model on the PBX (Path: ).
- Gather information of IP phone, including Vendor, Model, and MAC address.
Scenario
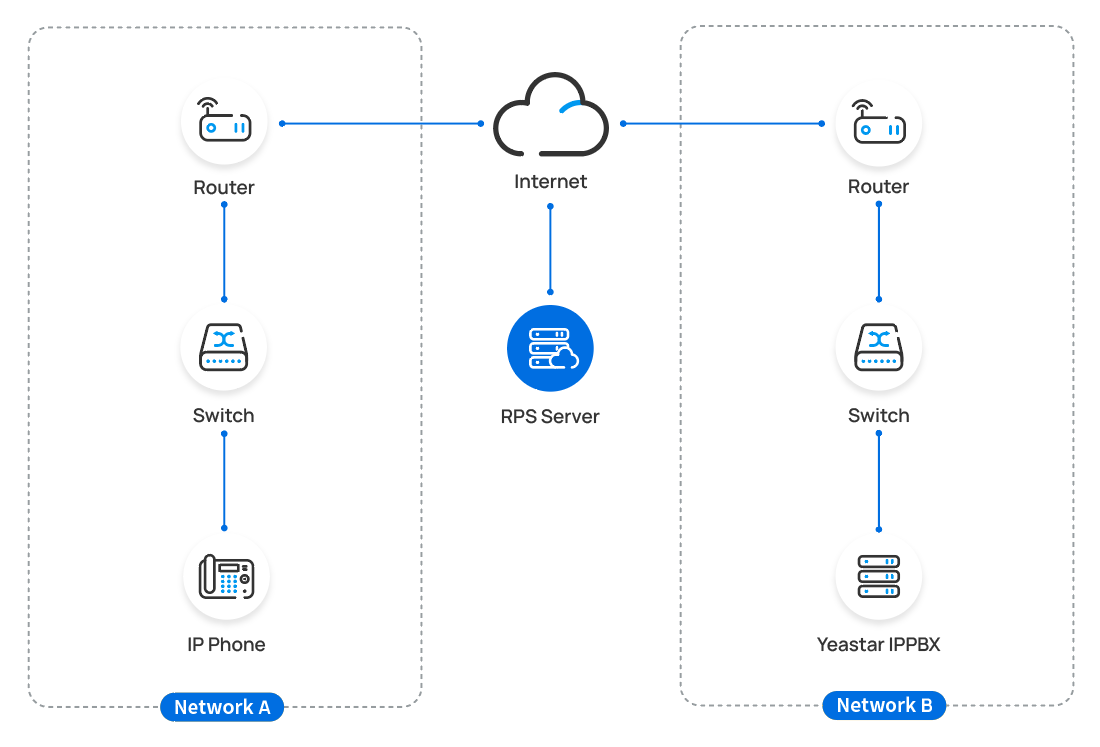
Yeastar P-Series PBX System and IP phones are deployed in different networks. The PBX has enabled and configured the FQDN feature.
Procedure
Step 1. Generate configuration file for an IP phone on the PBX
Step 2. Reboot the IP phone to obtain the configuration file
Step 1. Generate configuration file for an IP phone on the PBX
- RESET the phone if it is previously used.
- Log in to PBX web portal, go to .
- Click Add, then select Add to add an IP phone.
- In the IP Phone section, configure phone information
as follows:
- Vendor: Select a phone vendor.
- Model: Select a phone model.
- MAC Address: Enter MAC address of the phone.
- In the Options section, configure the following
settings:
- Template: Select a desired template from the
drop-down list.Note: The template provides configurations except extension assignment. You can select the default template corresponding to the phone model, or customize your own template.
For more information, see Create a Custom Auto Provisioning Template.
- Provisioning Method: Select RPS
FQDN (Remote).
A provisioning server URL is generated automatically and displayed on the web page.
Troubleshooting: Why don't see the RPS FQDN Auto Provisioning method option? - Authentication for the First-time Auto
Provisioning: If enabled, users are requested to
fill in authentication information on the IP phones before
triggering the first-time provisioning. Note: We recommend that you keep this option selected for security purpose.
- Template: Select a desired template from the
drop-down list.
- In the Assign Extension
section, assign extension(s) to the phone, then specify which extension's
phonebook and function keys you want to use on the phone.Note:
- This feature is available only for non-DECT IP phones that are not set as hot desking phones.
- If your desired extension is not listed in the drop-down list of
the Extension column, it indicates that
the devices registered to the extension has reached the limit.
You can use either of the following methods to proceed.
- To release the previous phone or gateway, see Release an Extension from a Provisioned IP Phone/Gateway.
- To raise the phone registration limit, see Allow Multiple Registrations for One Extension Number.
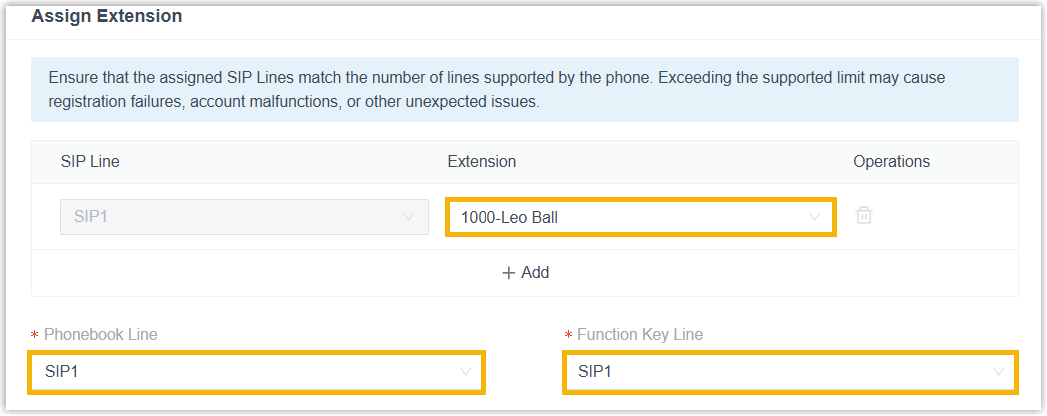
- To assign a single extension, select the desired extension from the
drop-down list beside SIP1.
Both the Phonebook Line and the Function Key Line are set to SIP1 by default, indicating that the phone will use the authorized phonebook(s) and function keys of the extension assigned to the SIP line 1.
- To assign multiple extensions, complete the following
settings.
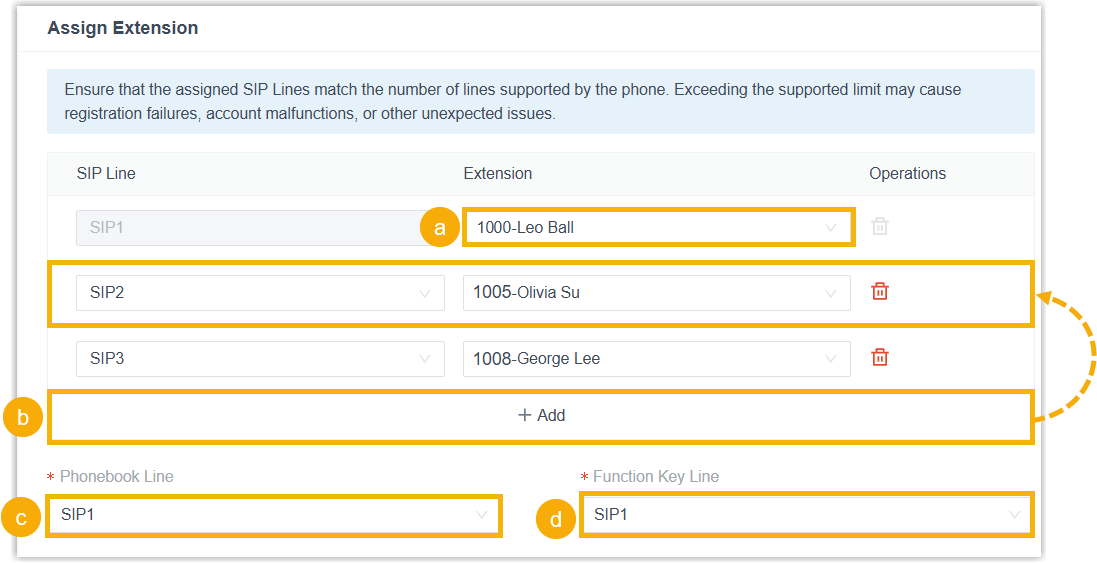
- In the drop-down list beside SIP1, select a desired extension for SIP line 1.
- Click Add, then select a desired SIP
line and an extension for the added entry.To assign more extensions to the phone, repeat this step.Note: The selected SIP lines must be supported by the phone, otherwise the configurations for unsupported SIP line will not be applied. You can check the phone's supported SIP lines via the phone webpage or on the device screen.
- In the Phonebook Line drop-down list,
select a SIP line. The phonebook of extension assigned to
the SIP line will be applied to the phone.Note: After successful registration, contacts are available regardless of which SIP line is currently active on the phone.
- In the Function Key Line drop-down
list, select a SIP line. The function keys of extension
assigned to the SIP line will be applied to the phone.Note: After successful registration, the function keys take effect only when the selected SIP line is active on the phone. For more information about configuring function keys for the phone, see Auto Provision Function Keys for Phones.
- Click Save.
A configuration file for the phone is generated in the PBX.
The PBX will send an event notification of RPS Request Success, which means that the phone MAC is added automatically to the RPS server.
Note: For Yealink phones that no longer receive RPS support from Yealink, you must upgrade them to the specified firmware version and use them together with the RPS PIN to continue using the RPS service. In this case, you can obtain the RPS PIN from PBX web portal (Path: Auto Provisioning > Phones > > Options > RPS PIN), and enter it on the phone to complete the RPS
provisioning process if required.
> Options > RPS PIN), and enter it on the phone to complete the RPS
provisioning process if required. 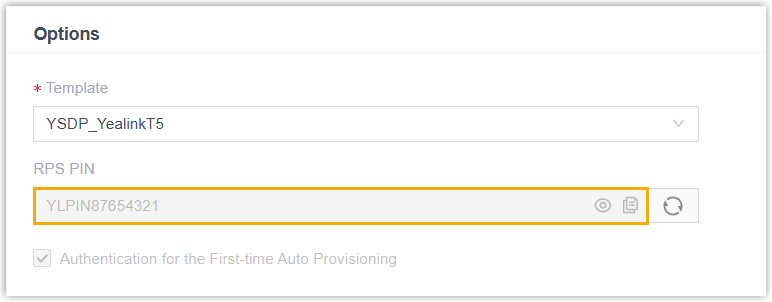
Step 2. Reboot the IP phone to obtain the configuration file
- Reboot the IP phone.
- If you have enabled Authentication for the First-time Auto
Provisioning on the PBX, enter the authentication credential
on the IP phone to finish phone provisioning.
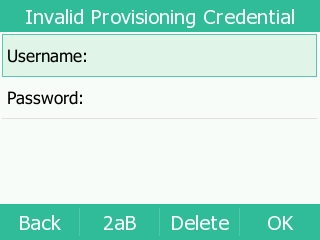
- Username: Enter the extension number that is assigned to the phone.
- Password: Enter the extension's Voicemail
Access PIN. Note: Check the Voicemail Access PIN in the Voicemail tab on the extension configuration page.
Result
- The extension registration status of provisioned phones is displayed on . Tip: You can also check the extension registration status directly via the phone webpage or on the device screen.
 : All assigned extensions are registered on the
phone.
: All assigned extensions are registered on the
phone. : Only some of the assigned extensions
are registered on the phone.Note: You can hover over to view the registration
status of each extension.
: Only some of the assigned extensions
are registered on the phone.Note: You can hover over to view the registration
status of each extension.
 : None of the assigned extensions are
registered on the phone.
: None of the assigned extensions are
registered on the phone.

- If multiple extensions are successfully
registered on the phone, corresponding SIP lines are associated with different
physical line keys on the device.
You can press a line key to activate the target SIP line. The corresponding indicator LED illuminates, and all calls are processed over this SIP line.