Auto Provision IP Phones in Local Network (PnP Method)
This topic describes how to auto provision IP phones that are located in the same local network as Yeastar P-Series PBX System.
Supported IP phones
This topic can be applied to all the IP phones listed in Auto Provisioning - Supported Devices.
Prerequisites
- The IP Phone and PBX must be in the same LAN subnet.
- Example: Same LAN subnet
IP: 192.168.5.150, Mask: 255.255.255.0
IP: 192.168.5.170, Mask: 255.255.255.0
- Example: Different LAN subnet
IP: 192.168.5.150, Mask: 255.255.255.0
IP: 192.168.66.170, Mask: 255.255.255.0
- Example: Same LAN subnet
- IP Phone MUST support PnP provisioning method.
- Make sure that you have downloaded the template for the desired phone model on the PBX (Path: ).
Scenario
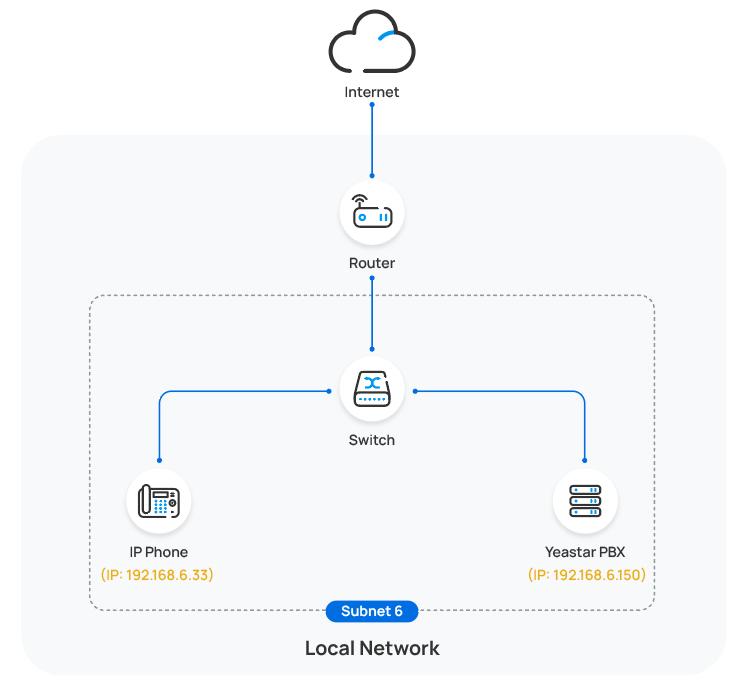
An IP phone (IP: 192.168.6.33) and the PBX (IP: 192.168.6.150) are deployed in the same LAN subnet 6.
Procedure
- Power on the PBX first, then power on the IP phones.
- RESET the IP phone if it is previously used.
- Log in to PBX web portal, go to .
The phone list displays all the discovered IP phones with their related information including model, MAC address, IP address, etc.
Note:- Only the supported devices can be discovered and displayed on the phone provisioning list.
- Restart the phones if they are not discovered and displayed on the phone provisioning list.
- Click
 beside the desired phone.
 - In the Options section, configure the following
settings:
- Template: Select a desired template from the
drop-down list.Note: The template provides configurations except extension assignment. You can select the default template corresponding to the phone model, or customize your own template.
For more information, see Create a Custom Auto Provisioning Template.
- Provisioning Method: Select PnP
(In the Office).
A provisioning server URL is generated automatically and displayed on the web page.
- Template: Select a desired template from the
drop-down list.
- In the Assign Extension section, assign an extension
for the phone.Tip: If your desired extension is not listed in the drop-down list, you can check if the extension has been associated with other IP phone or gateway.
- To release the previous phone or gateway, see Release an Extension from a Provisioned IP Phone/Gateway.
- To associate an extension with multiple IP phones, see Allow Multiple Registrations for One Extension Number.
- Click Save.
Result
- The configurations will be automatically applied to the phone.
The extension registration status of provisioned phones is displayed on .
 : The assigned extension is
registered on the phone.
: The assigned extension is
registered on the phone. : The assigned extension is
unregistered on the phone.
: The assigned extension is
unregistered on the phone.
