Set up a One-way Multicast Paging Group
One-way Multicast Paging feature allows a broadcaster to make an announcement to the users who are listening to a specific multicast group on a specific channel. The called parties' phones will not ring, but instead directly answering into speakerphone mode. This topic describes how to set up a one-way multicast paging group.
Scenario
For a warehouse, the work flow in product line is closely connected and tends to be complex. For example, one zone is responsible for packaging goods, another zone is for dispatching goods. To facilitate supervisors in coordinating daily warehouse activities, you can set up paging groups for each zone.
Requirements
The phone that will receive One-way Multicast Paging must support Multicast Paging feature, and is on the same local subnet as the PBX.
Procedure
Based on the above scenario, you need to create two paging groups on the PBX and set up multicast listening on two phones.
- On Yeastar P-Series PBX System, create two paging groups.
- Create a paging group 6601 for Packaging Area.
- Log in to PBX web portal, go to , click Add.
- Configure a one-way multicast paging group.
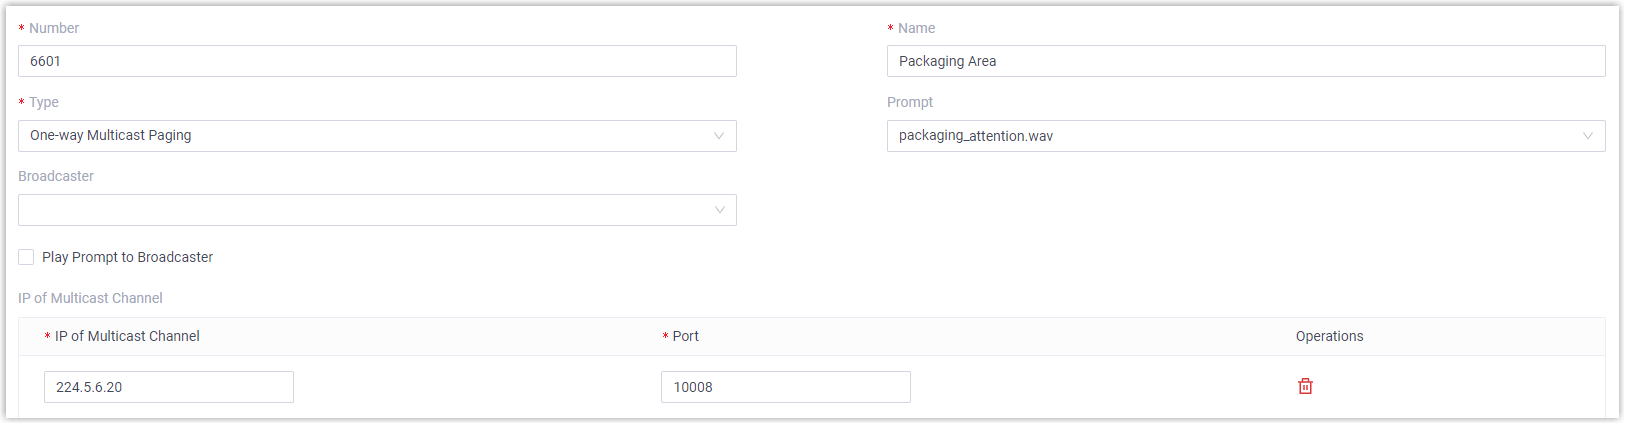
Item Description Number Enter a number for the paging group. In this example, enter 6601. Name Enter a name for the paging group. In this example, enter Packaging Area. Type Select One-way Multicast Paging. Prompt Optional. To play a prompt before making an announcement, you can select a custom prompt. In this example, select packaging_attention.wav. Prompt Playback Times Specify how many times the prompt will be played and repeated. Note: Enter a value between 1 and 100, or select Unlimited to play the prompt in a loop.Broadcaster Optional. To restrict users from making an announcement to the paging group, select allowed extensions or extension groups from the drop-down list. In this example, leave it blank. Dial # to Stop Playing Prompt Optional. If a prompt is selected, enabling this option allows the broadcaster to dial # during playback to stop the prompt. Play Prompt to Broadcaster Optional. To restrict the broadcaster from hearing the prompt, disable this option. In this example, disable this option. Note: This option is available only when a custom prompt is selected and is enabled by default.IP of Multicast Channel Enter a multicast IP address and port. - IP of Multicast Channel: Enter a multicast IP address. In this example, enter 224.5.6.20.
- Port: Enter a multicast port. In this example, enter 10008.
Note:- The range of multicast IP address is 224.0.0.0 - 239.255.255.255.
- You can add at most 30 IP addresses.
- Click Save and Apply.
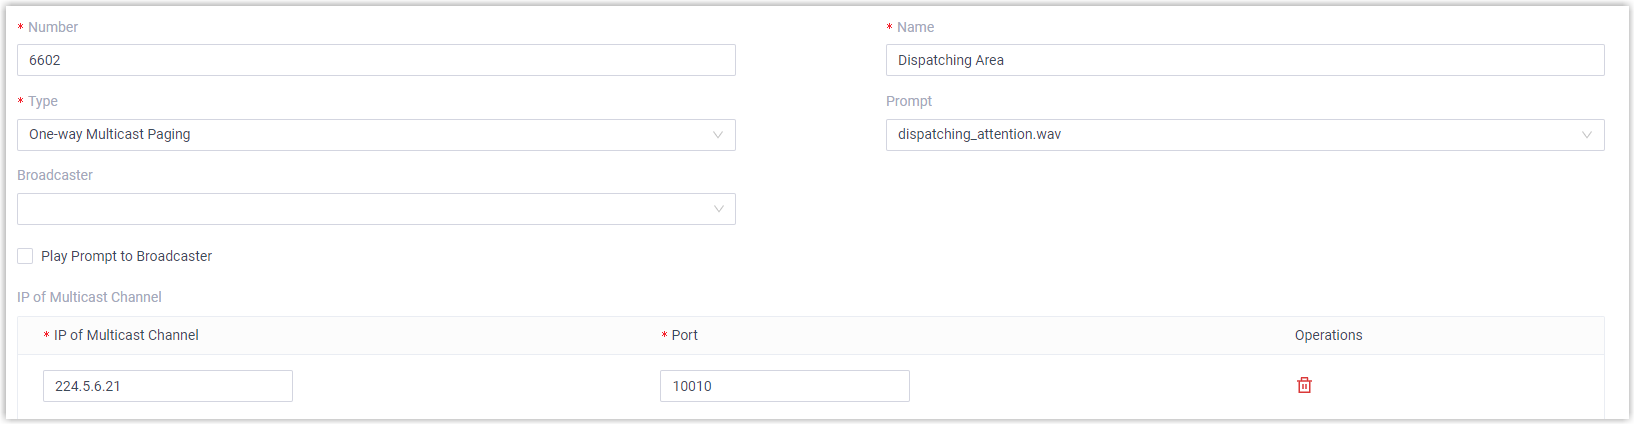
- Repeat step a to create another paging group 6602 for
Dispatching Area.Note: Set a multicast IP address and port that are different from Packaging Area. For example, set IP of Multicast Channel to 224.5.6.21 and set Port to 10010.
- Create a paging group 6601 for Packaging Area.
- Set up multicast listening for the two phones in Packaging Area and
Dispatching Area.
- Set up multicast listening for the phone in Packaging Area. In
this example, we take Yealink T56A as an example.
- Log in to the phone web interface, go to .
- In the Listening Address
field, enter the same multicast IP address and port
as the PBX. In this example, enter
224.5.6.20:10008.
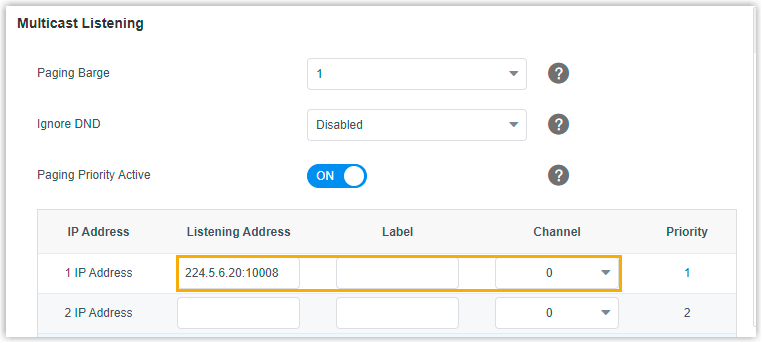
- Click Confirm.
- Set up multicast listening for the phone in Dispatching Area. In
this example, we take Fanvil X210 as an example.
- Log in to the phone web interface, go to .
- In the Host:Port field, enter
the same multicast IP address and port as the PBX.
In this example, enter
224.5.6.21:10010.
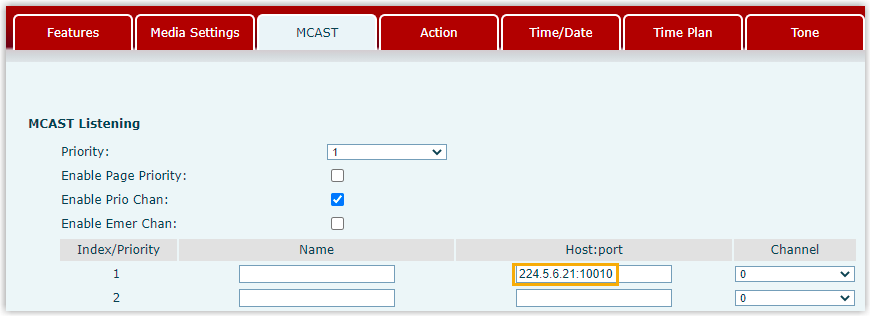
- Click Apply.
- Set up multicast listening for the phone in Packaging Area. In
this example, we take Yealink T56A as an example.
What to do next
- Supervisor dials
6601to reach employees in Packaging Area. Yealink T56A automatically answers into speakerphone mode. - Supervisor dials
6602to reach employees in Dispatching Area. Fanvil X210 automatically answers into speakerphone mode.