Send Faxes from an Analog Fax Machine
To send faxes from Yeastar P-Series PBX System, you need to set up an FXS extension for the fax machine and set up an outbound route for outgoing faxes. This topic describes the configurations for outgoing faxes on the PBX.
Prerequisites
- Install S2 module or SO module on the PBX.
- Connect fax machine to FXS port of the PBX.
In this topic, we connect fax machine to FXS port located in Span2-Port3.
Step1. Assign an extension to the analog fax machine
- Log in to PBX web portal, go to , click Add.
- In the Basic section, select FXS Extension from the Extension Type drop-down list.
- In
the FXS Port drop-down list, select the FXS port to
which the fax machine is connected.
As the following figure shows, select fax port Span2-Port3.

- Leave other settings as default or change the settings according to your needs.
- Click Save and Apply.
Step2. Set up an outbound route for sending faxes
- Log in to PBX web portal, go to , click Add.
- In the Name field, enter an outbound route name to help you identify it.
- Set
the Dial Patterns for the outbound
route.
As the following figure shows, set 88. for Pattern, and 2 for Strip.

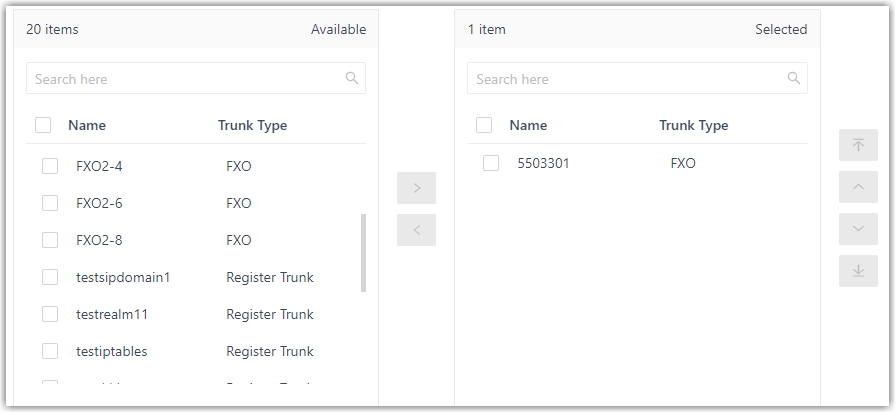
- Select a trunk that supports to send faxes.Note: If you choose a SIP trunk to send faxes, you need to enable T.38 Support for this trunk.
As the following figure shows, select a trunk to send faxes.
- Select the extension that you have assigned to fax machine.
- Click Save and Apply.
Result
In the example shown above, you can dial 885503304 to send faxes to 5503304. After you hear a fax tone, you can start to send fax.