Receive Faxes through a Dedicated Trunk
Having a dedicated trunk for faxing is the best way to prevent interruptions and other problems that arise from using a shared trunk. This topic describes how to receive faxes on an analog fax machine through a dedicated trunk .
Prerequisites
- Install S2 module or SO module on the PBX.
- Connect fax machine to FXS port of the PBX.
In this topic, we connect fax machine to FXS port located in Span2-Port3.
Step1. Assign an extension to the fax machine
- Log in to PBX web portal, go to , click Add.
- In the Basic section, select FXS Extension from the Extension Type drop-down list.
- In the FXS Port drop-down list, select the FXS port
to which the fax machine is connected.
As the following figure shows, select fax port Span2-Port3.

- Click Save and Apply.
Step2. Set up an inbound route for receiving faxes
- Go to , click Add.
- In the Name field, enter an inbound route name to help you identify it.
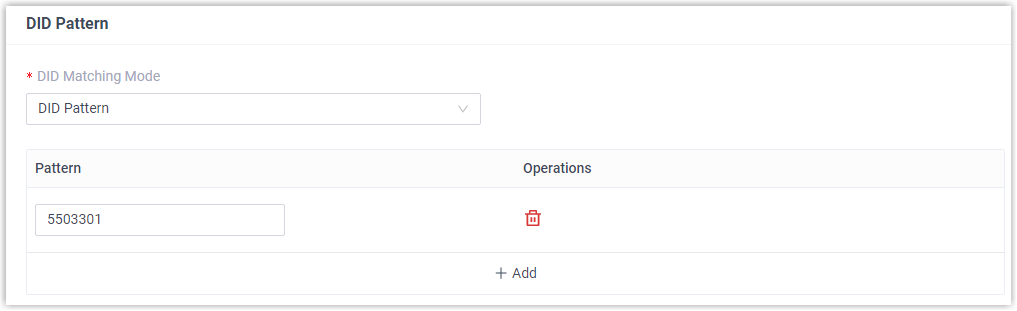
- Set the DID Pattern through which this route pass the
incoming call.
As the following figure shows, set the trunk number as DID pattern.
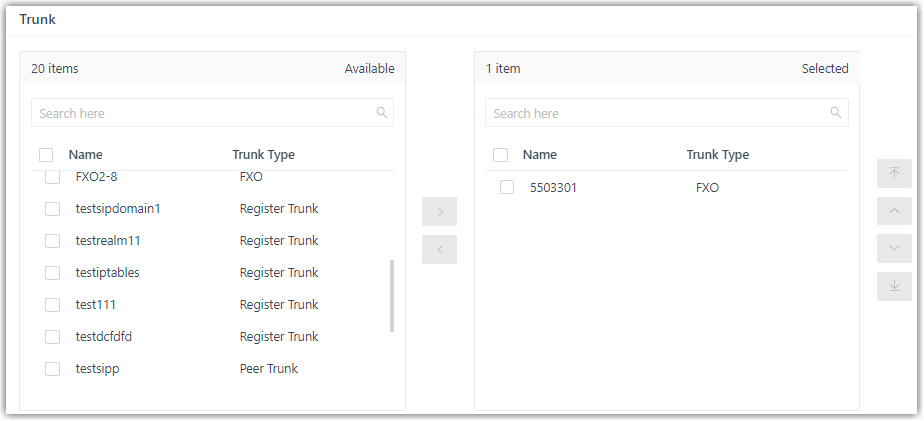
- Select the trunk that supports to receive faxes.Note: If you choose a SIP trunk to receive faxes, you need to enable T.38 Support for this trunk.
As the following figure shows, select a trunk to receive faxes.
- In the Default Destination drop-down list, select Extension.
- Select the extension that you have assigned to the fax machine.
- Click Saveand Apply.
Result
In the example shown above, when a customer sends faxes to trunk 5503301, you can receive the faxes on your analog fax machine.