Install Yeastar P-Series Software Edition on BinaryLane
BinaryLane provides fast, reliable cloud servers and Virtual Private Cloud (VPC) networking. This topic describes how to create a cloud server on BinaryLane and install Yeastar P-Series Software Edition on the created cloud server.
Procedure
Step 1. Add a Virtual Private Cloud (VPC)
BinaryLane provides a default Virtual Private Cloud (VPC) that allows you to launch cloud servers immediately without any network configuration.
If you need to specify your own IP address range to prevent IP conflicts, deploy servers across regions, or enable advanced networking scenarios, you can create a VPC according to your requirements.
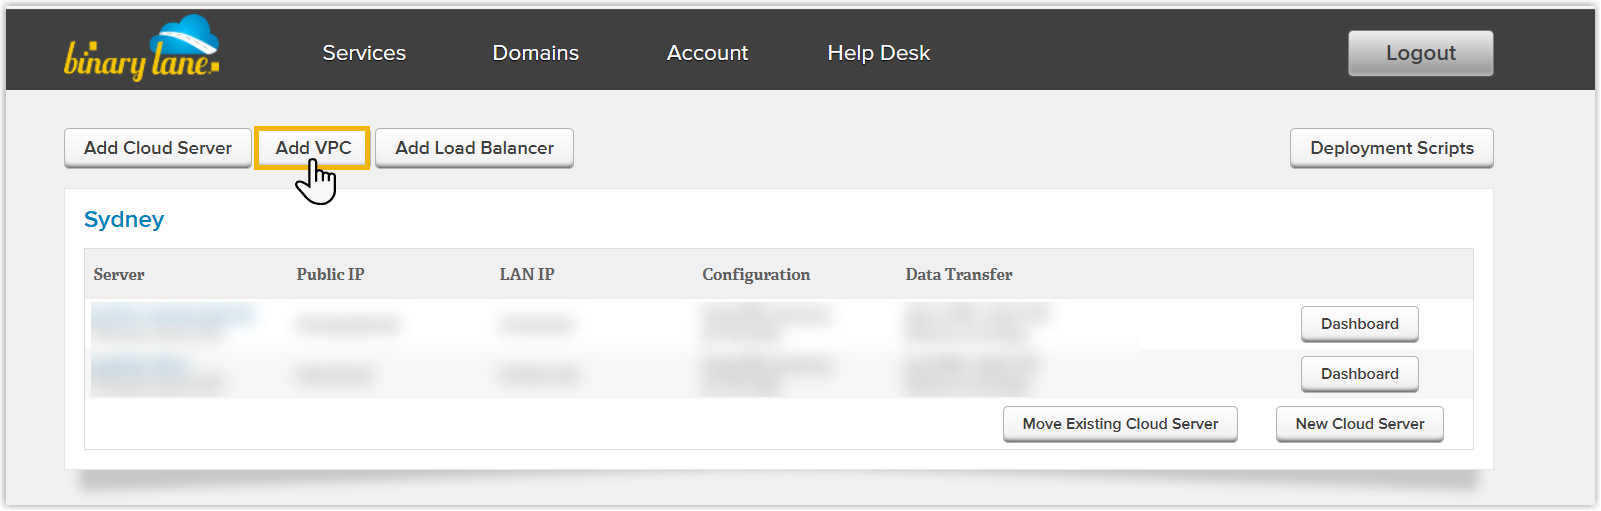
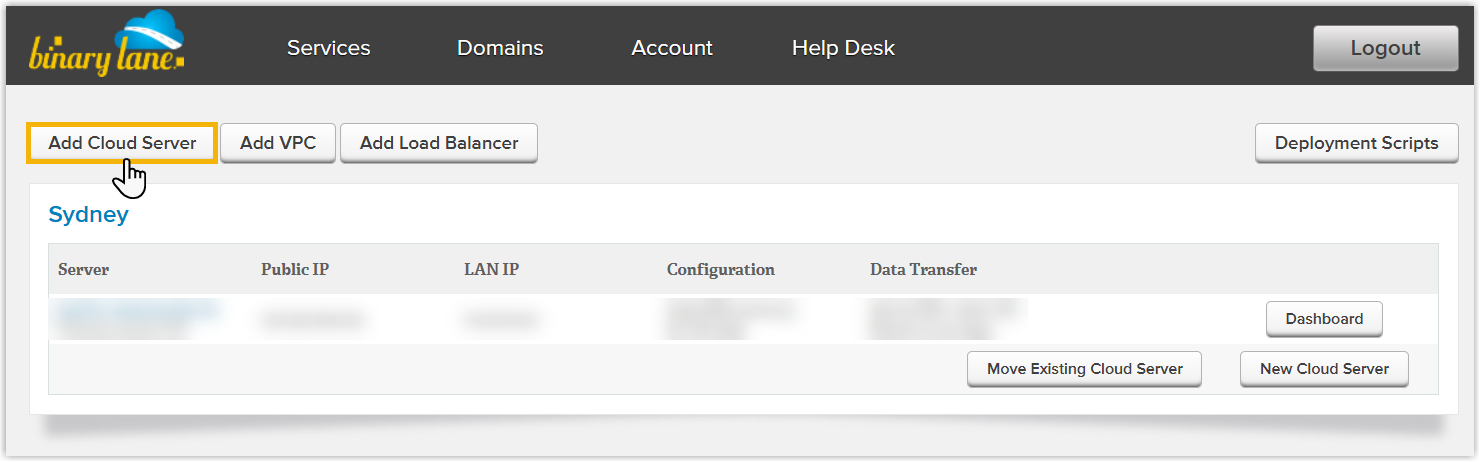
- Log in to BinaryLane using your account.
- Click Add VPC.
- In the VPC Name field, enter a name to help you identify
the VPC.
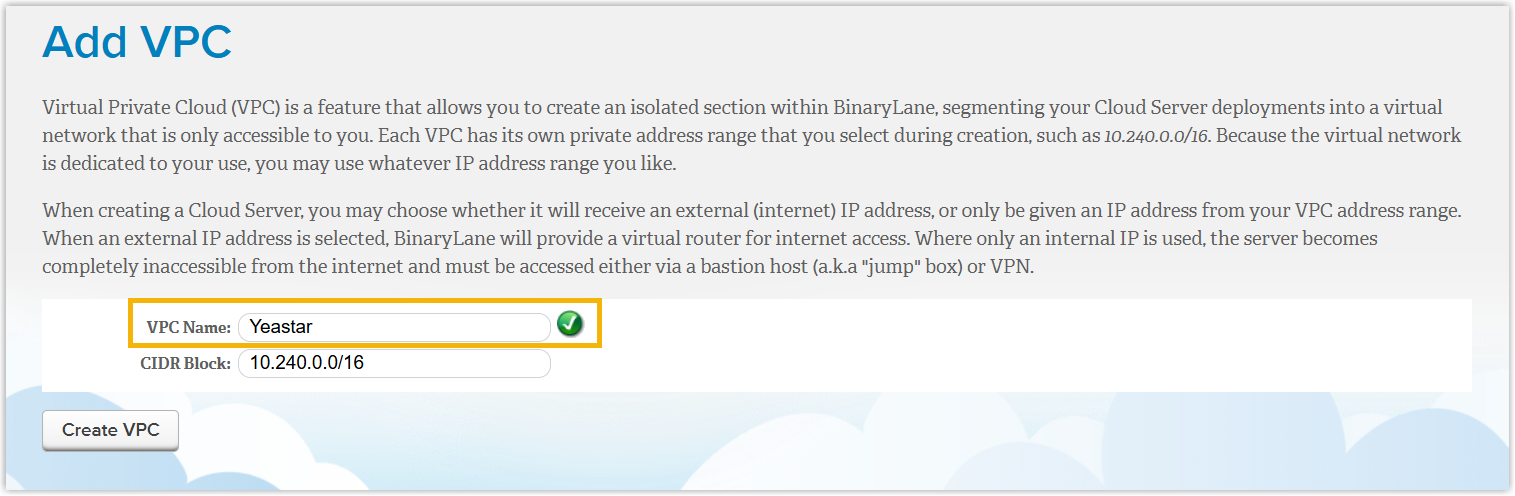
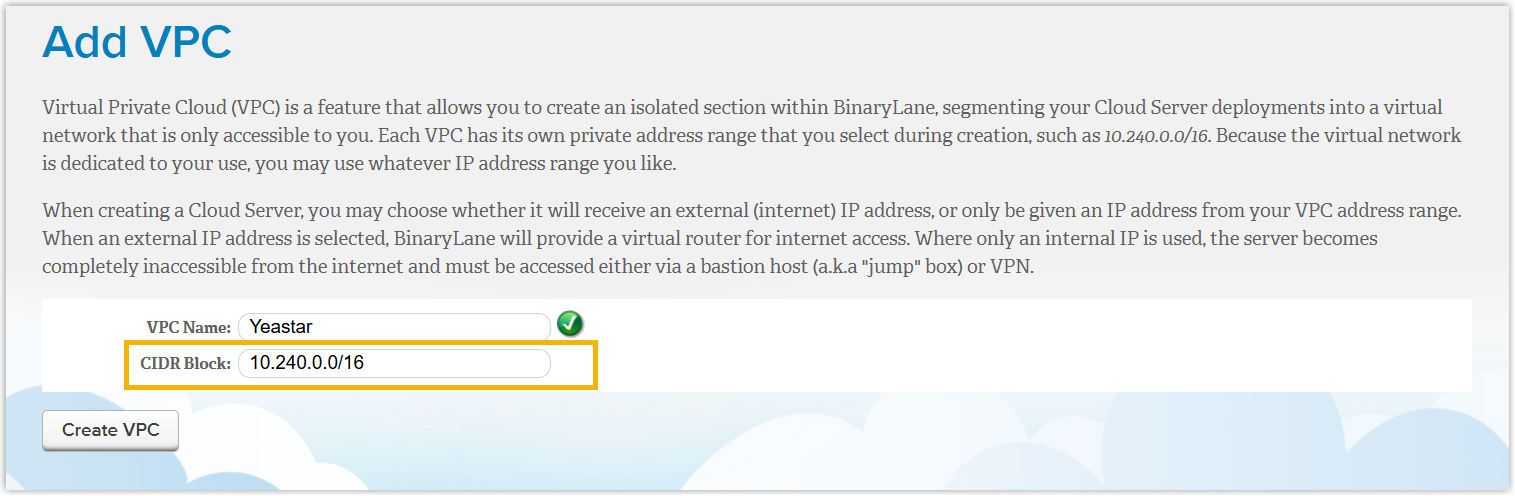
- In the CIDR Block field, fill in the private IP address
range that will be assigned to cloud servers.
- Click Create VPC.
Step 2. Add a Cloud Server
Create a cloud server in the desired VPC.
- Click Add Cloud Server.
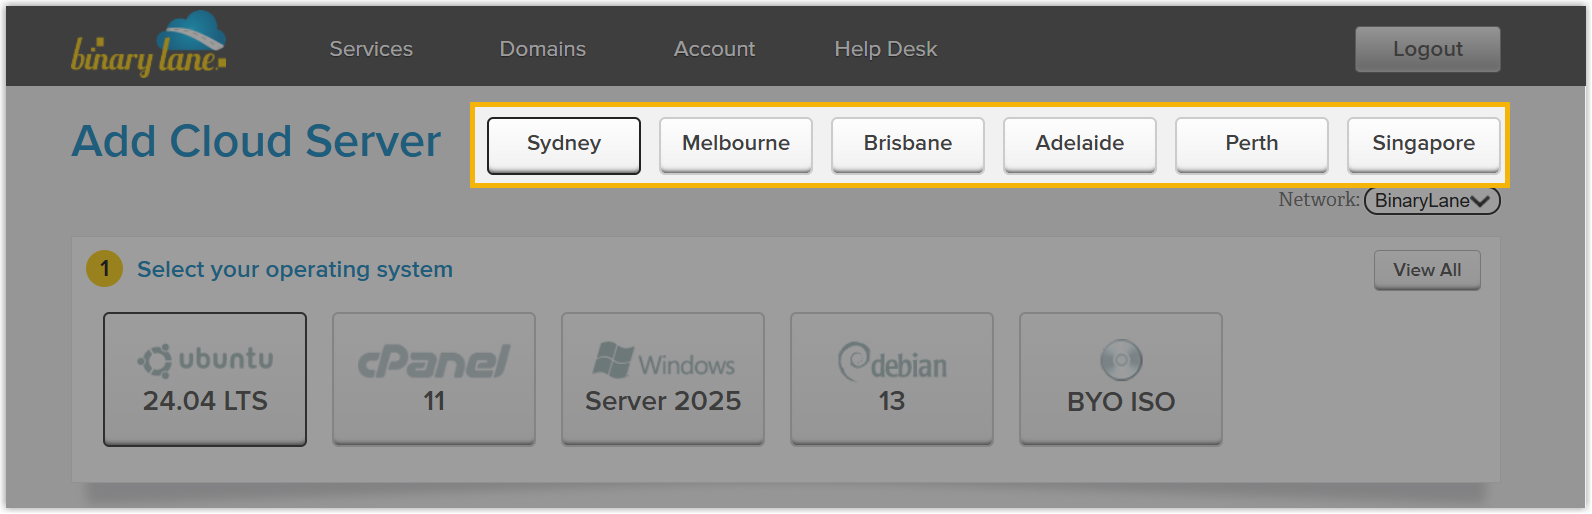
- Select a data center which is closest to you.
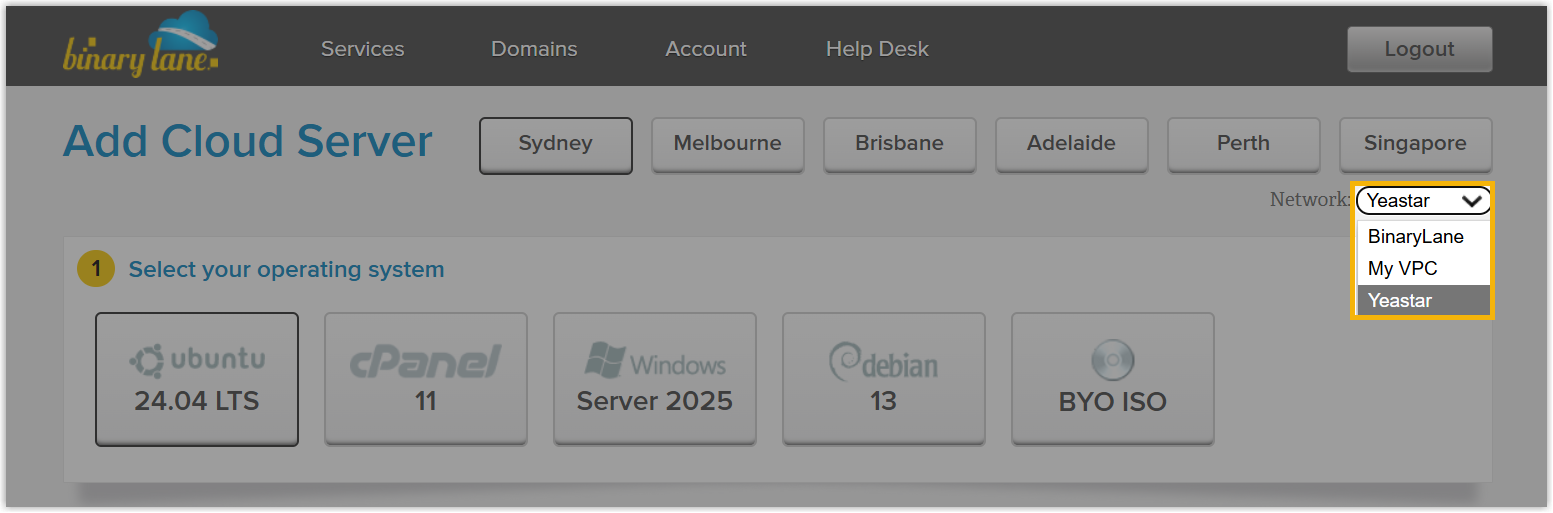
- In the Network drop-down list, select the VPC where
the cloud server will be deployed.
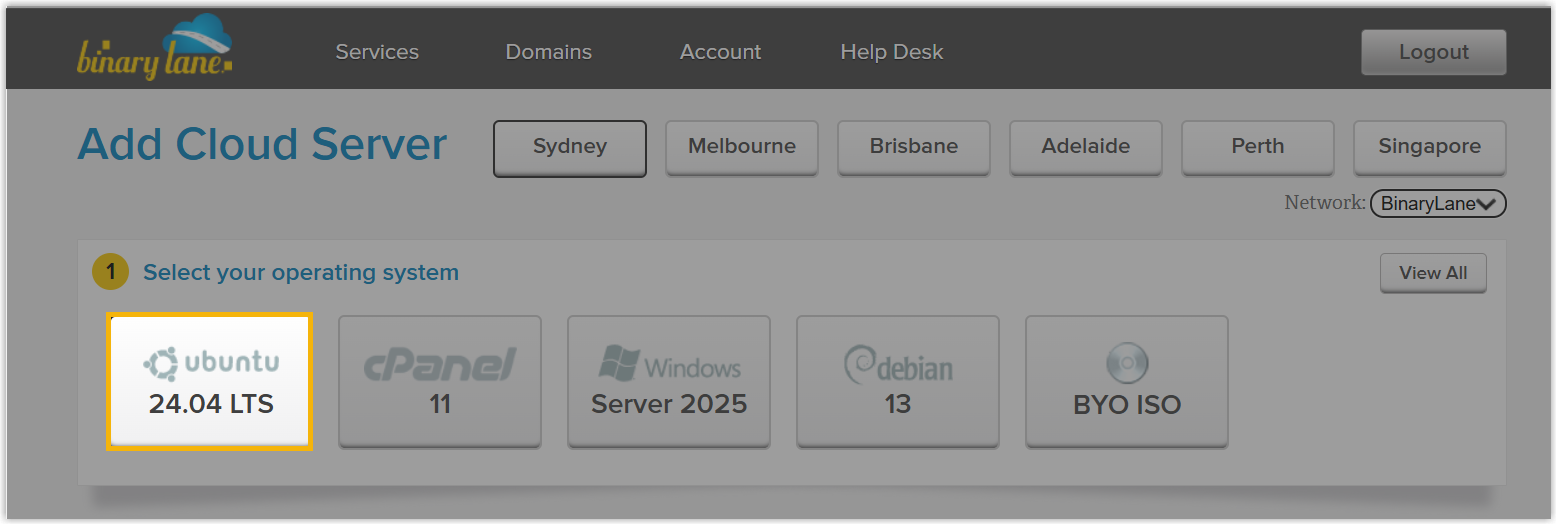
- Select Ubuntu as your operating system.
- Choose your cloud server resources based on the Extensions (EXT) and
Concurrent Calls (CC) of your PBX system. For example, if your PBX system supports 50 extensions and 12 concurrent calls, it's recommended to choose the resource within 2 VCPUs and 4GB memory.
1-20 EXT (1-5 CC)
21-50 EXT (6-13 CC)
51-250 EXT (14-63 CC)
251-500 EXT (64-125 CC)
501-1000 EXT (126-250 CC)
EXT > 1000 (CC > 250)
vCPU 2 2 4 6 8 Contact Yeastar Memory 2 GB 4 GB 4 GB 8 GB 16 GB Storage Call Recording Disabled 40 GB 40 GB 50 GB 100 GB 200 GB Call Recording Enabled 1 GB of storage holds approximately 1000 minutes of recorded calls. You can set up the storage based on your recording usage. 
- In the Hostname field, enter a host name to help you
identify the cloud server, then choose backup subscription plan as
needed.
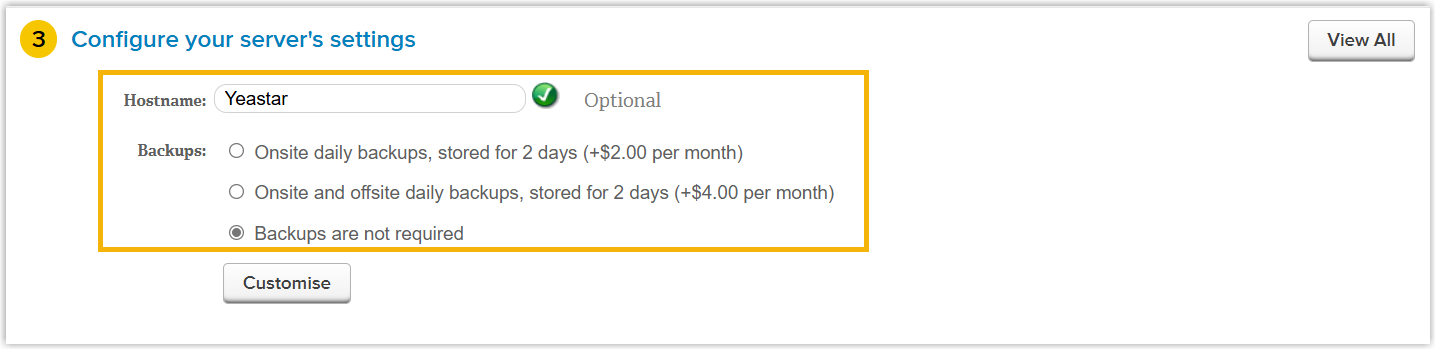
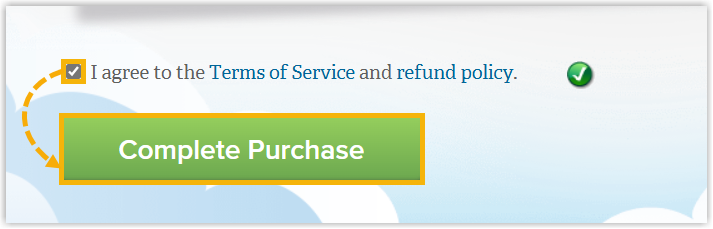
- Select the checkbox to agree to the terms of service
and refund policy, then click Complete
Purchase.
 The cloud server is successfully created. You will be redirected to the server's dashboard, where you can find the server's connection details (public IP address, user name and password).Tip: Be sure to save these connection details securely, as you will need them to connect to the cloud server.
Step 3. Install Yeastar P-Series Software Edition on the Cloud Server
- Open Xshell and click
 to create a new session.
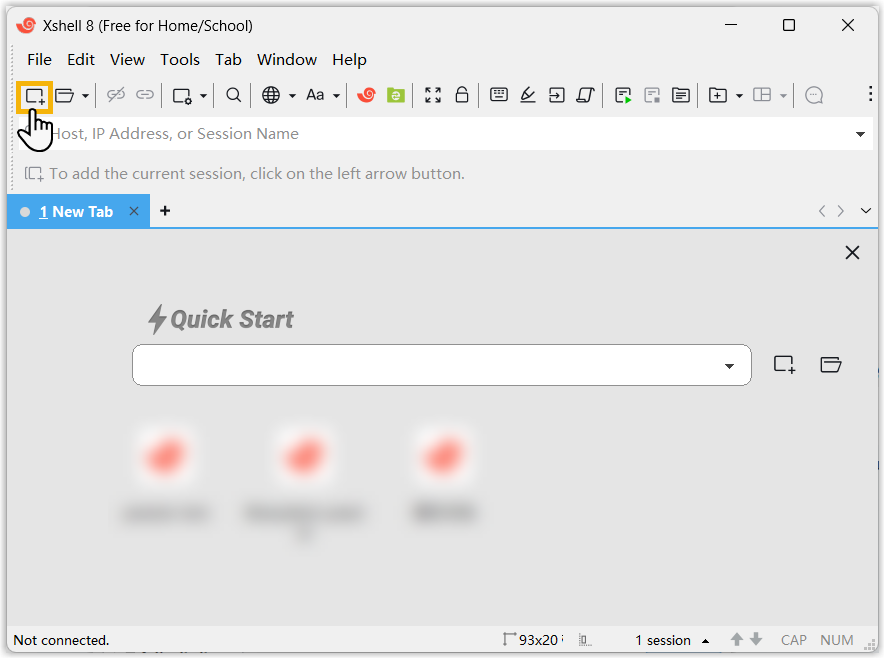
- In the pop-up window, fill in a session name and the cloud server's public
IP address, leave the port as
22, then click Connect.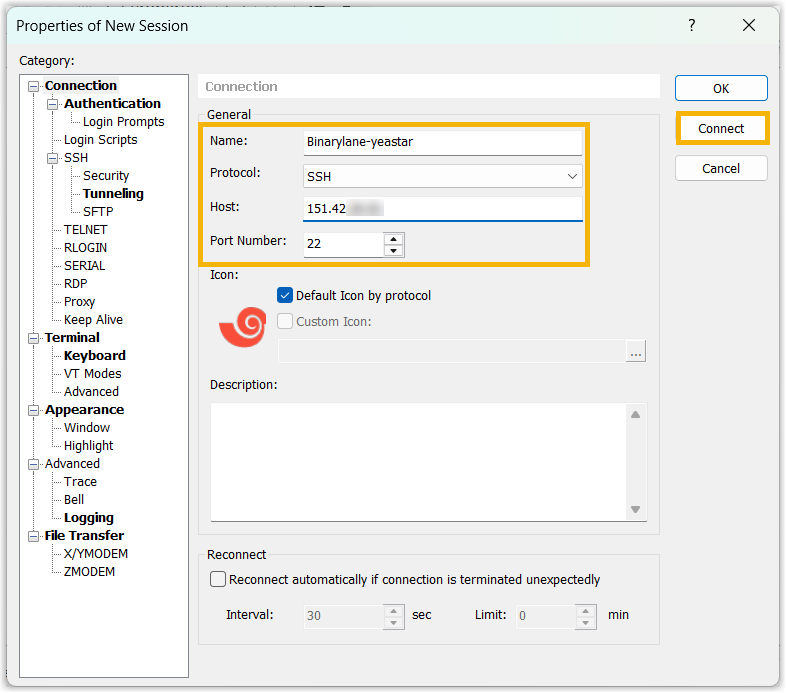
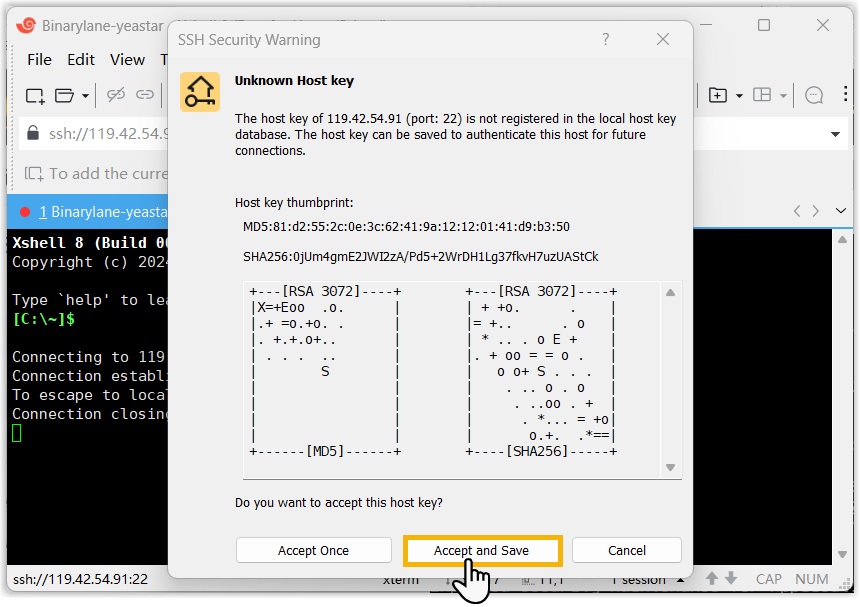
- Click Accept and Save to register the host key of
your IP address to the local host key database.
- Log in to the cloud server via SSH using the user name and password obtained from the cloud server's
dashboard.
- Enter the user name
rootand click OK.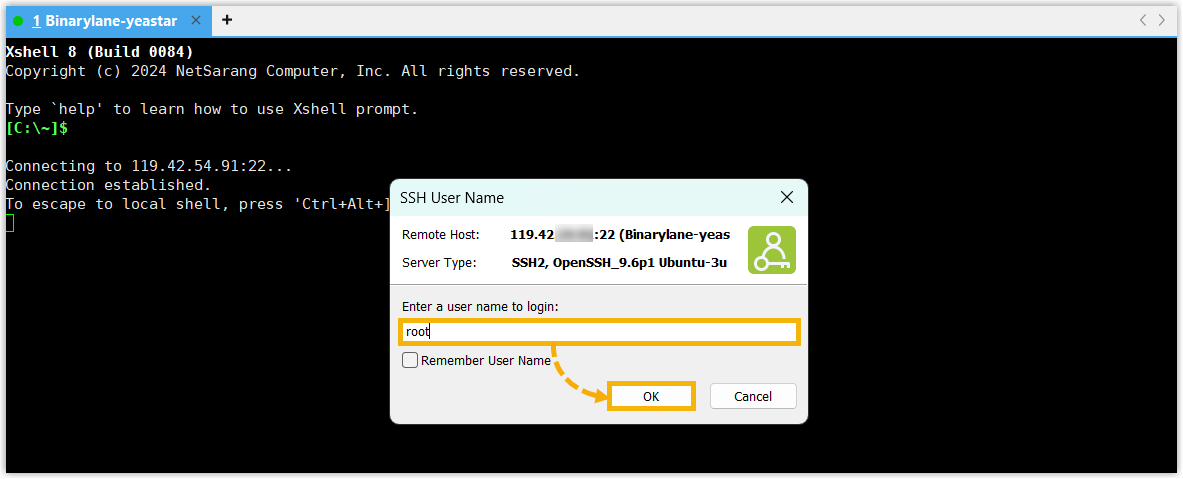
- Enter the associated password and click
OK.
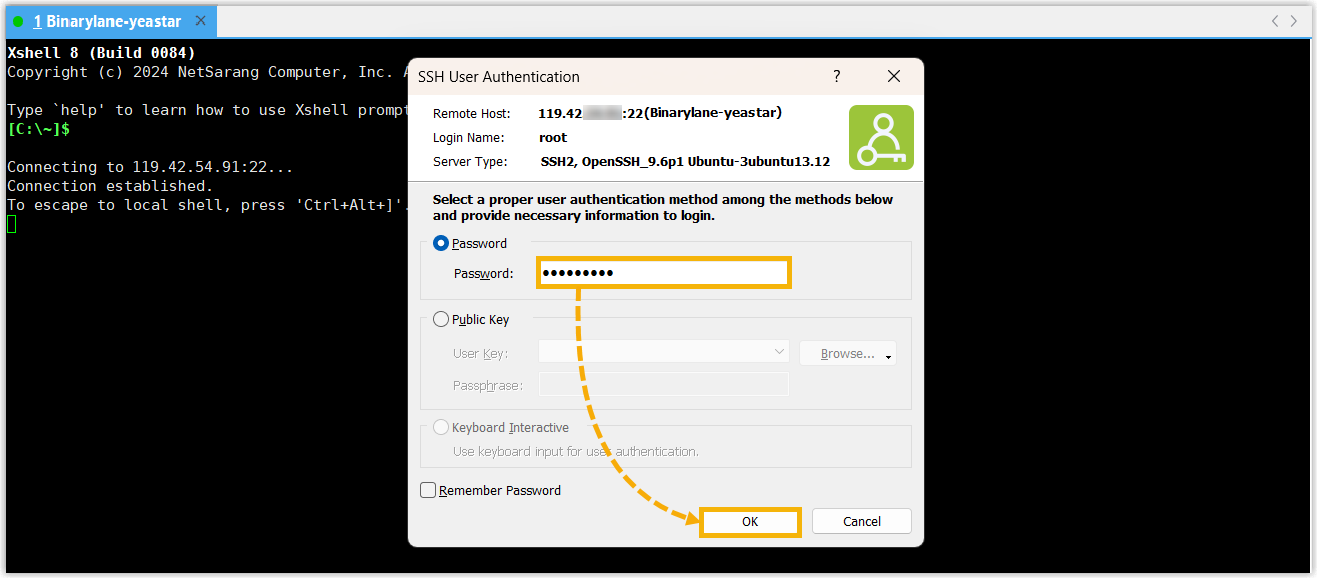
In this example, a
root@yeastar:~#prompt is displayed in the Xshell window after authentication, indicating that you have successfully connected to the cloud server.
- Enter the user name
- Run the following commands sequentially to install Yeastar P-Series Software Edition.

-
Download the Yeastar P-Series Software Edition installation script.
wget https://update-ys2015-alicloud.oss-cn-hongkong.aliyuncs.com/YeastarSupport/pseinstallscripts/binarylane-install-pse.sh -
Grant execute permissions to the script.
chmod +x binarylane-install-pse.sh -
Run the installation script.
./binarylane-install-pse.shOnce the installation begins, the process may take a few minutes to complete.Note: During installation, the cloud server will reboot and SSH will disconnect.
-
Result
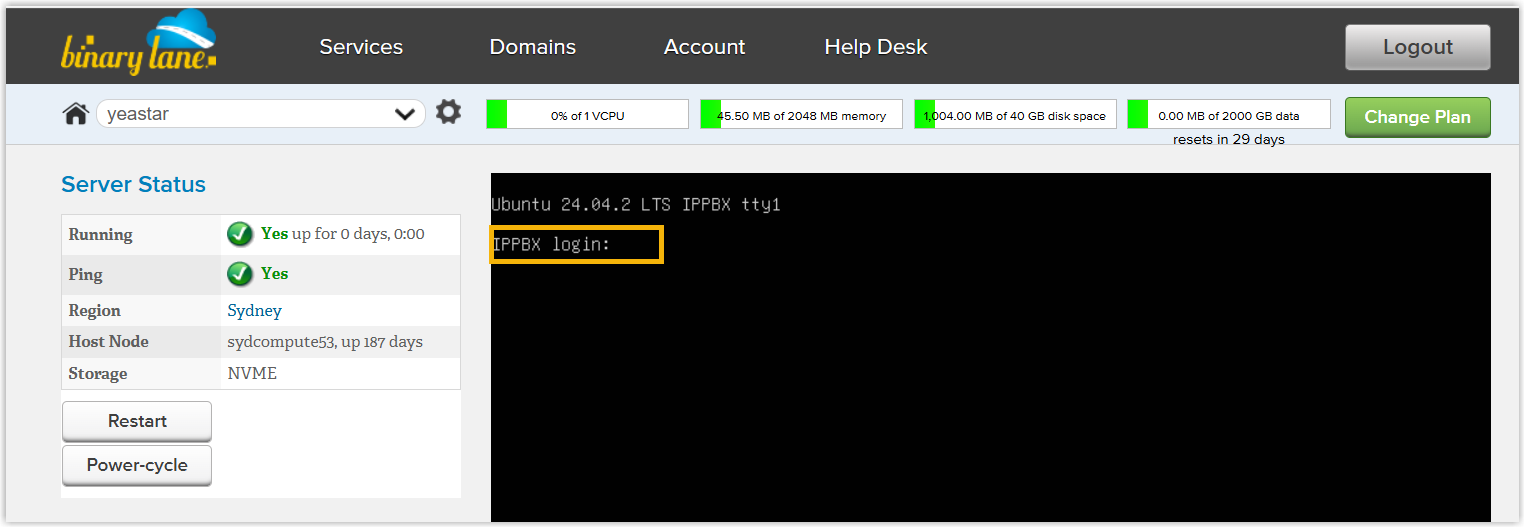
In the cloud server dashboard, a IPPBX login prompt is displayed in
the console window, indicating that Yeastar P-Series Software Edition is installed
successfully.
What to do next
Activate and set up Yeastar P-Series Software Edition to make it ready for use. You can do this using one of the following methods:
- Complete setup via Web GUI using the installation wizard
-
- Open a web browser, enter the cloud server's public IP address
and port 8088 in the address bar, and press
Enter.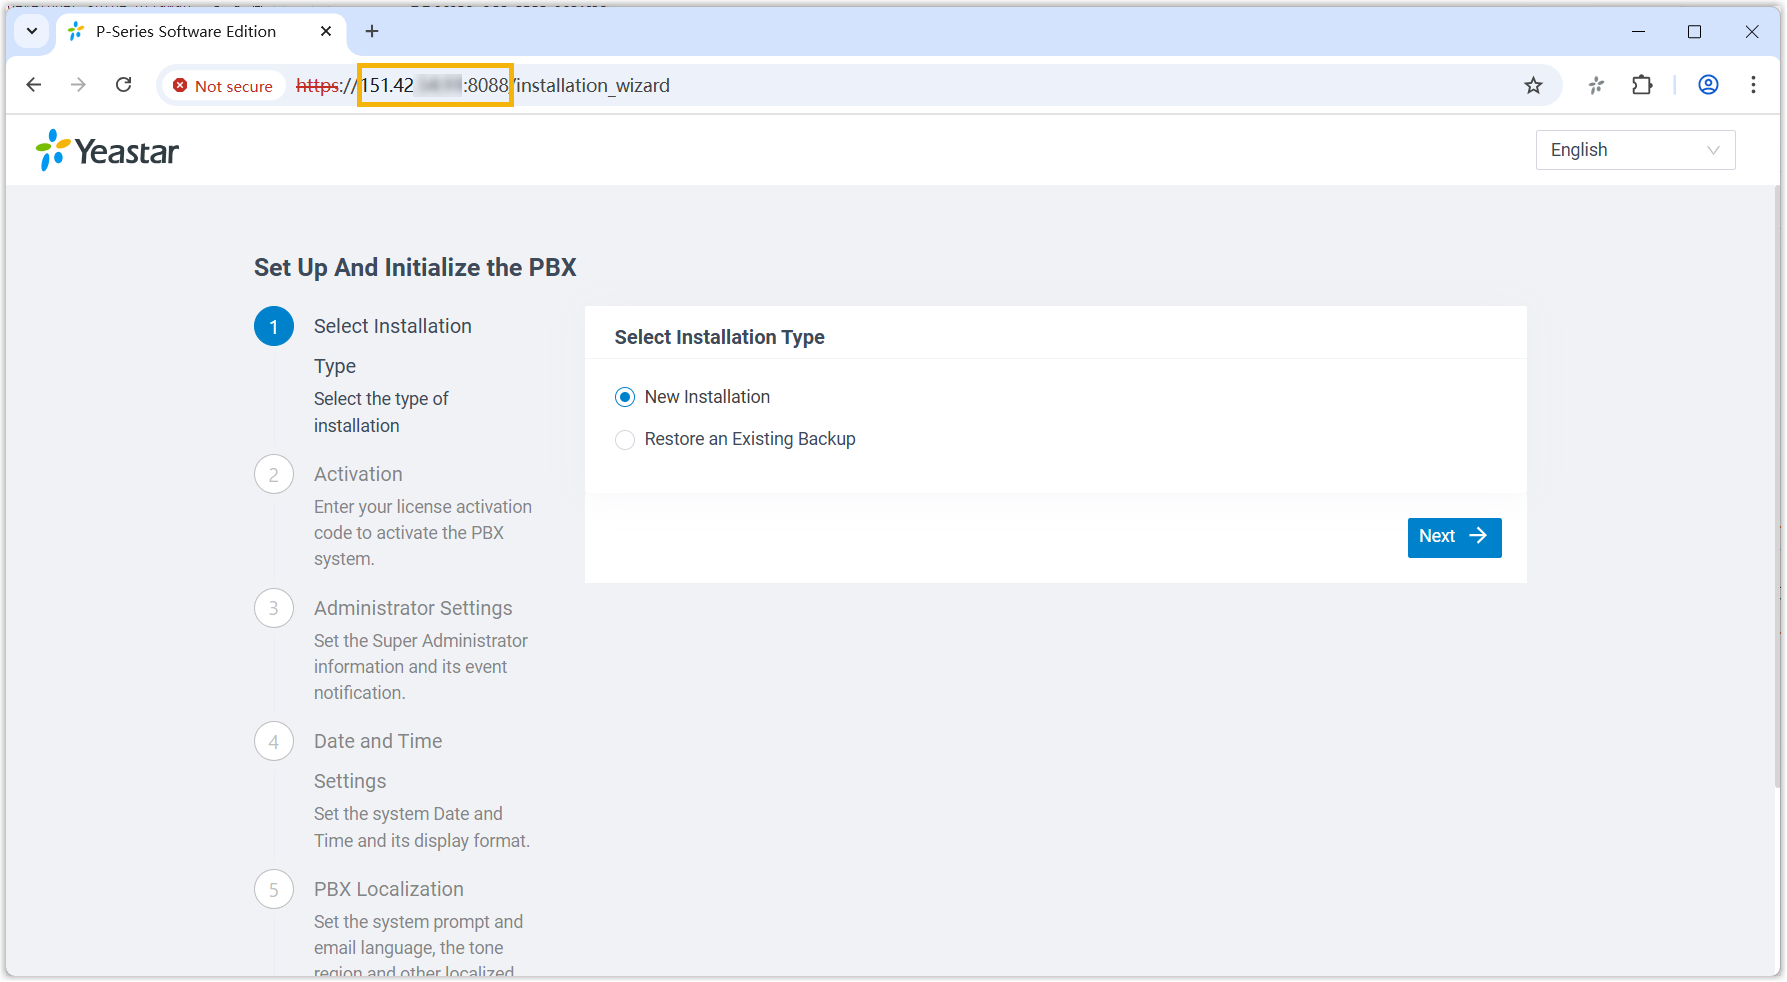
- Activate and initially set up Yeastar P-Series Software Edition following the installation wizard.
- Open a web browser, enter the cloud server's public IP address
and port 8088 in the address bar, and press
- Complete setup via SSH using a prepared XML file
Upload a prepared XML file to the PBX via SSH. This method allows you to complete the initial setup and apply additional supported PBX settings, such as creating extensions, trunks, inbound routes, and more.
- Download the XML configuration file and edit it as needed.
- Upload the XML configuration file to the designated directory and reboot the PBX to take effect.
For more information, see Activate and Set up Yeastar P-Series Software Edition Using XML Configuration File.
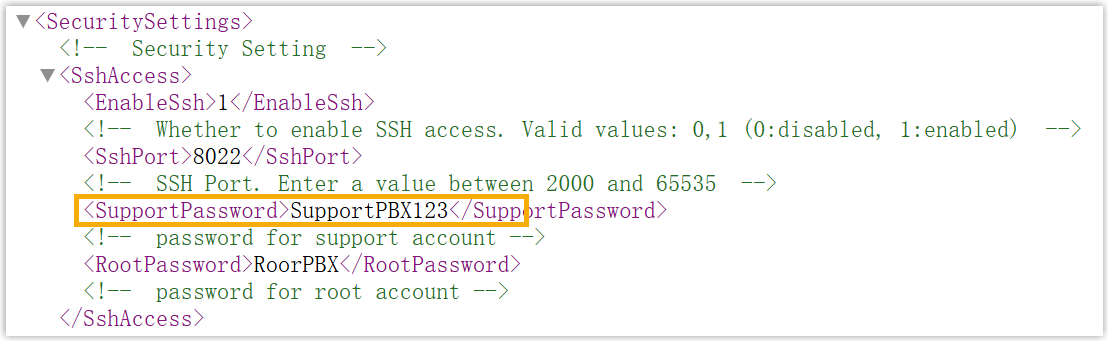
- Root Account: Username is
root, and password is the credential configured in XML configuration file.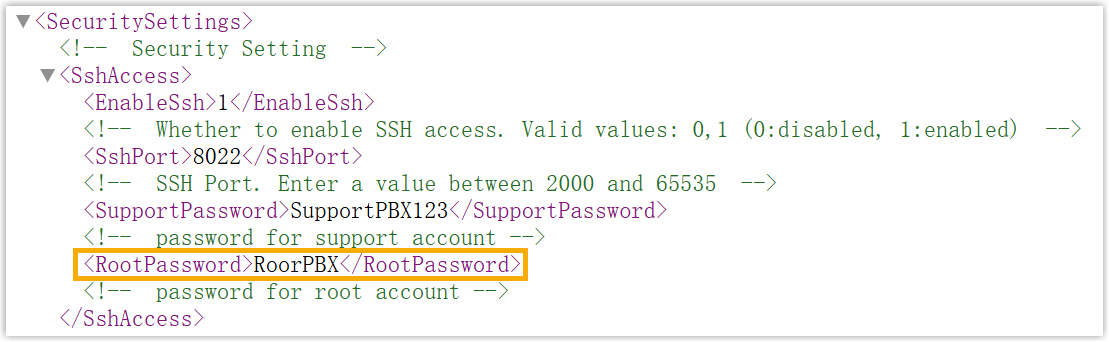
- Support Account: Username is
support, and password is the credential configured in PBX web portal (Path: ) or in XML configuration file.Figure 1. Support password in PBX web portal 
Figure 2. Support password in XML configuration file