Install Yeastar P-Series Software Edition on Google Cloud
You can install Yeastar P-Series Software Edition on Google Cloud Platform directly from the marketplace, enabling quick deployment of Yeastar PBX without manual configuration of the deployment environment.
Step 1. Install Yeastar P-Series Software Edition from Google Cloud marketplace
Create a virtual machine instance on Google Cloud for deploying Yeastar P-Series Software Edition.
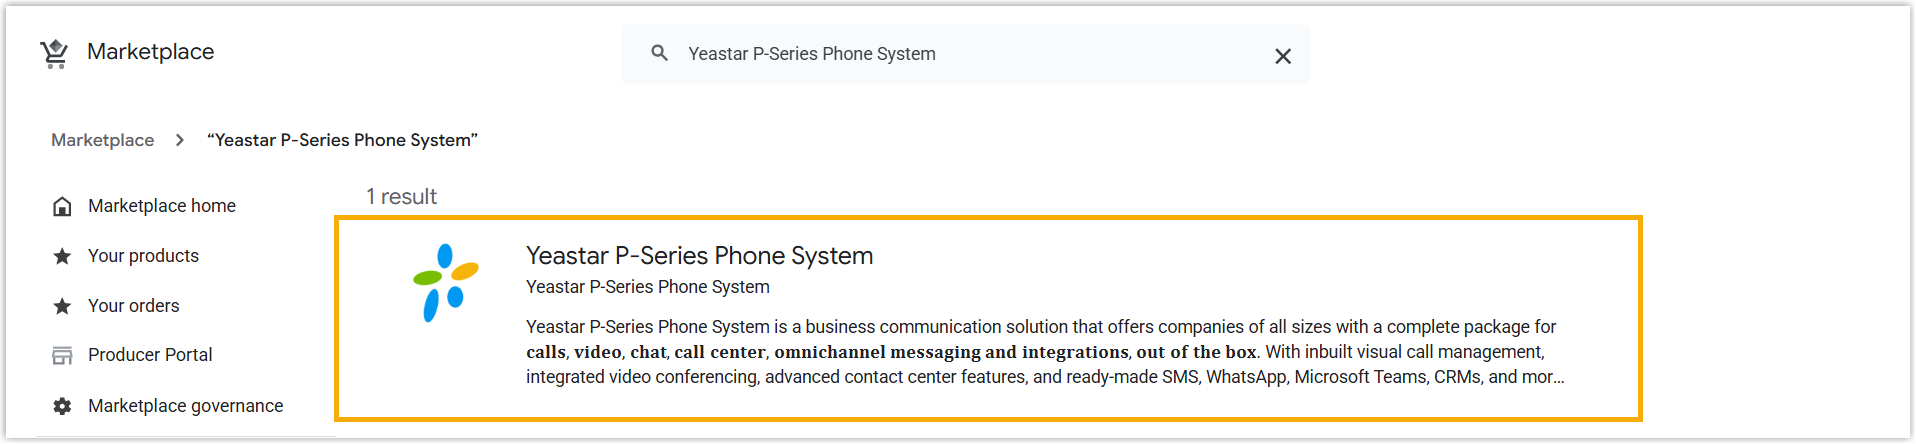
- Access 'Yeastar P-Series Phone System' from Google Cloud Marketplace.
- Log in to Google Cloud Marketplace,
search for Yeastar P-Series Phone
System.

- Click on Yeastar P-Series Phone
System.
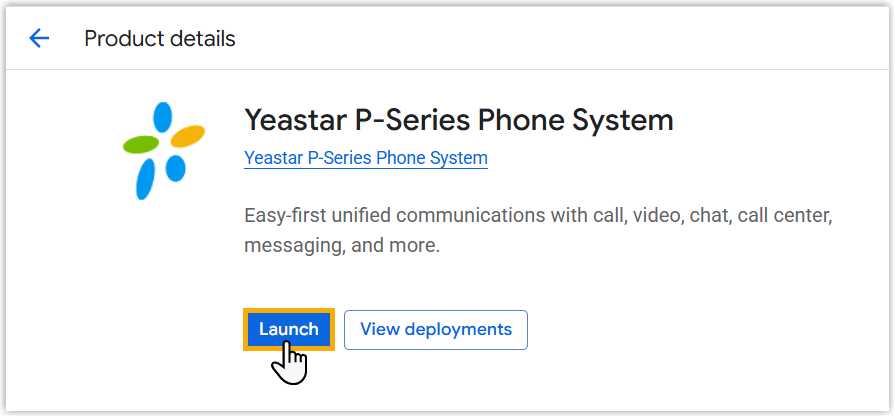
- Click Launch.
- Log in to Google Cloud Marketplace,
search for Yeastar P-Series Phone
System.
- Configure the basic information for this virtual machine instance.
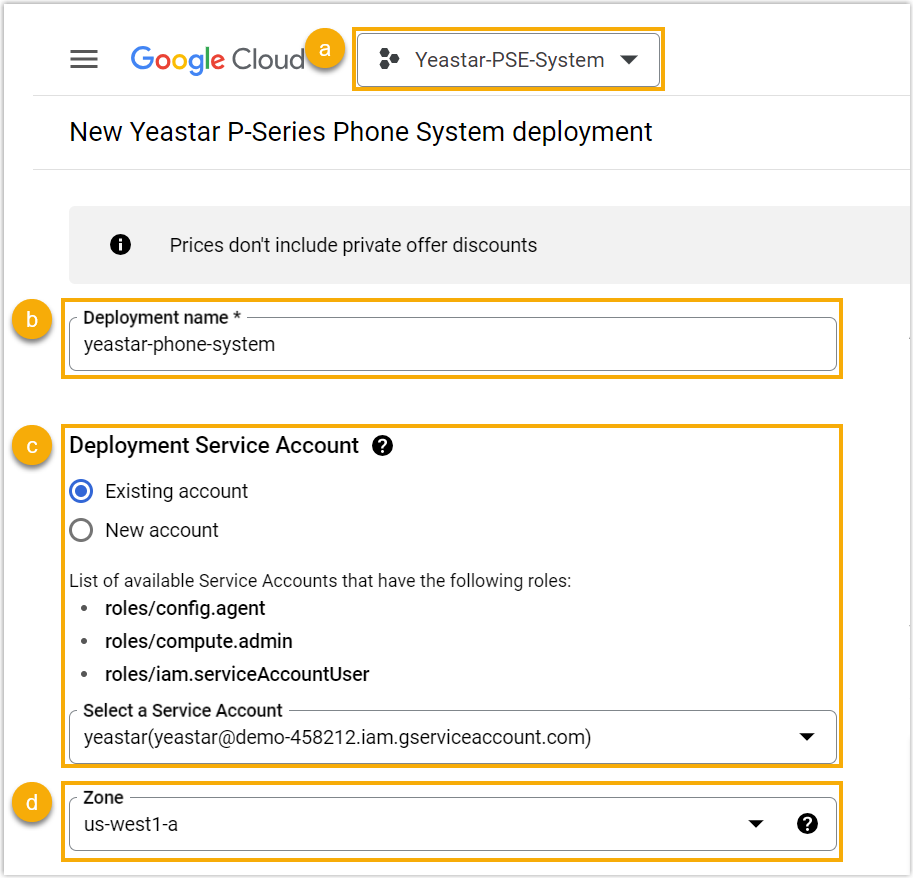
- On the top menu bar, select the desired project to be associated with Yeastar Phone System.
- In the Deployment name field, specify a name to help you identify this instance.
- In the Deployment Service Account section,
specify the Service Account for deployment.
- Existing account: Select an existing Service Account from the drop-down list of Select a Service Account.
- New account: Create a new Service Account.
- In the Zone section, select a region closest to you.
- In the Machine type section, specify the
configuration of the virtual machine instance based on the Extensions
(EXT) and Concurrent Calls (CC) of your PBX system.
Extensions / Concurrent Calls Instructions 1-20 EXT (1-5 CC) 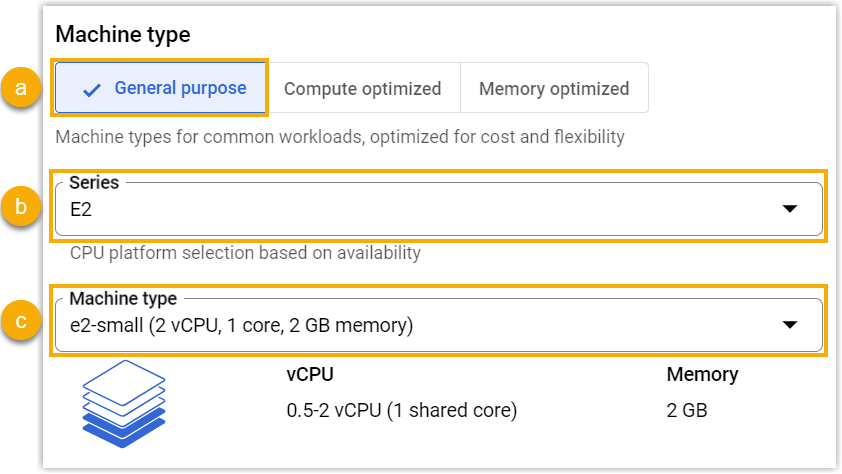
- Select General purpose.
- In the Series drop-down list, select E2.
- In the Machine type drop-down list, select e2-small (2 vCPU, 1 core, 2 GB memory).
21-50 EXT (6-13 CC)
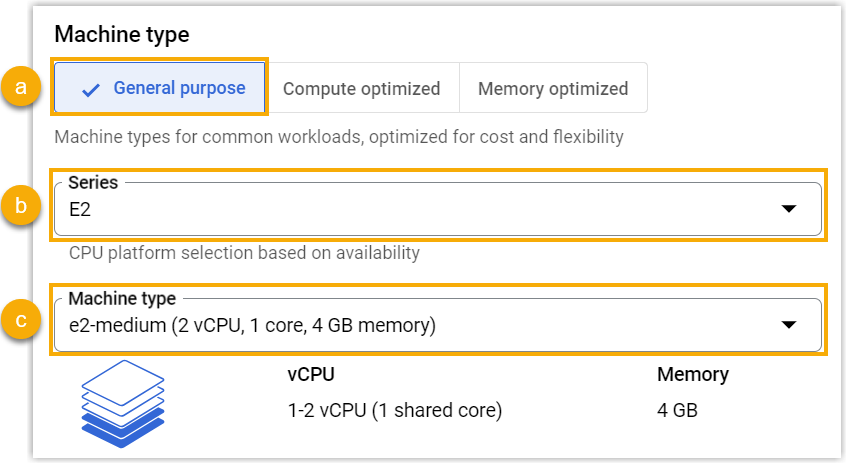
- Select General purpose.
- In the Series drop-down list, select E2.
- In the Machine type drop-down list, select e2-medium (2 vCPU, 1 core, 4 GB memory).
51-250 EXT (14-63 CC) 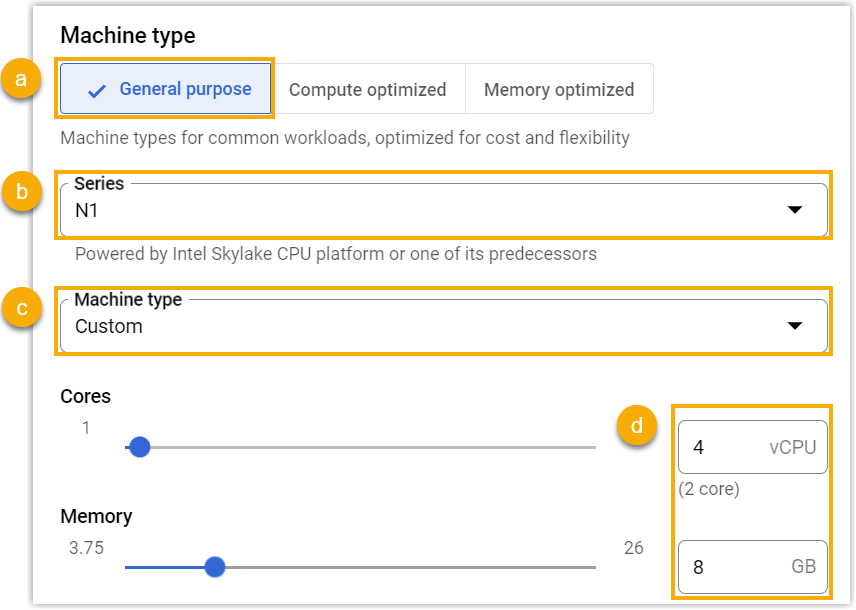
- Select General purpose.
- In the Series drop-down list, select N1.
- In the Machine type drop-down list, select Custom.
- In the Cores and
Memory fields, specify the
number of vCPUs and the size of Memory.
- Cores: 4 vCPU
- Memory: 8 GB
251-500 EXT (64-125 CC) 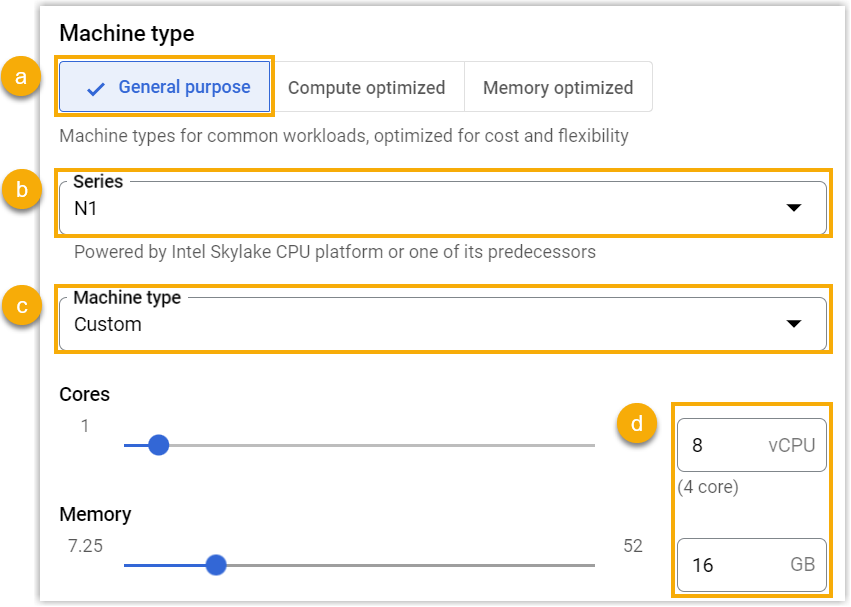
- Select General purpose.
- In the Series drop-down list, select N1.
- In the Machine type drop-down list, select Custom.
- In the Cores and
Memory fields, specify the
number of vCPUs and the size of Memory.
- Cores: 8 vCPU
- Memory: 16 GB
501-1000 EXT (126-250 CC) EXT > 1000 (CC > 250) Contact Yeastar - In the Boot Disk section, set up the storage capacity
for this virtual machine instance.
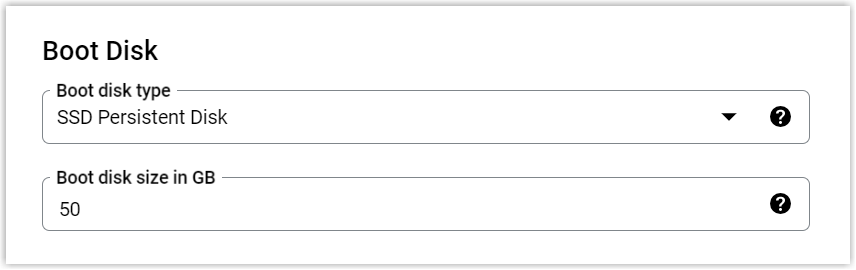
- Boot disk type: Select the desired disk type according to your needs.
- Boot disk size in GB: Specify the storage
capacity based on the Extensions (EXT) and Concurrent
Calls (CC) of your PBX system.
1-20 EXT (1-5 CC)
21-50 EXT (6-13 CC)
51-250 EXT (14-63 CC)
251-500 EXT (64-125 CC)
501-1000 EXT (126-250 CC)
EXT > 1000 (CC > 250)
Storage Call Recording Disabled 50 GB or more
50 GB or more
50 GB or more
100 GB or more
200 GB or more
Contact Yeastar Call Recording Enabled 1 GB of storage holds approximately 1000 minutes of recorded calls. You can set up the storage based on your recording usage.
- In the Networking section, configure the followings
to automatically assign a public IP address for this virtual machine
instance upon creation.
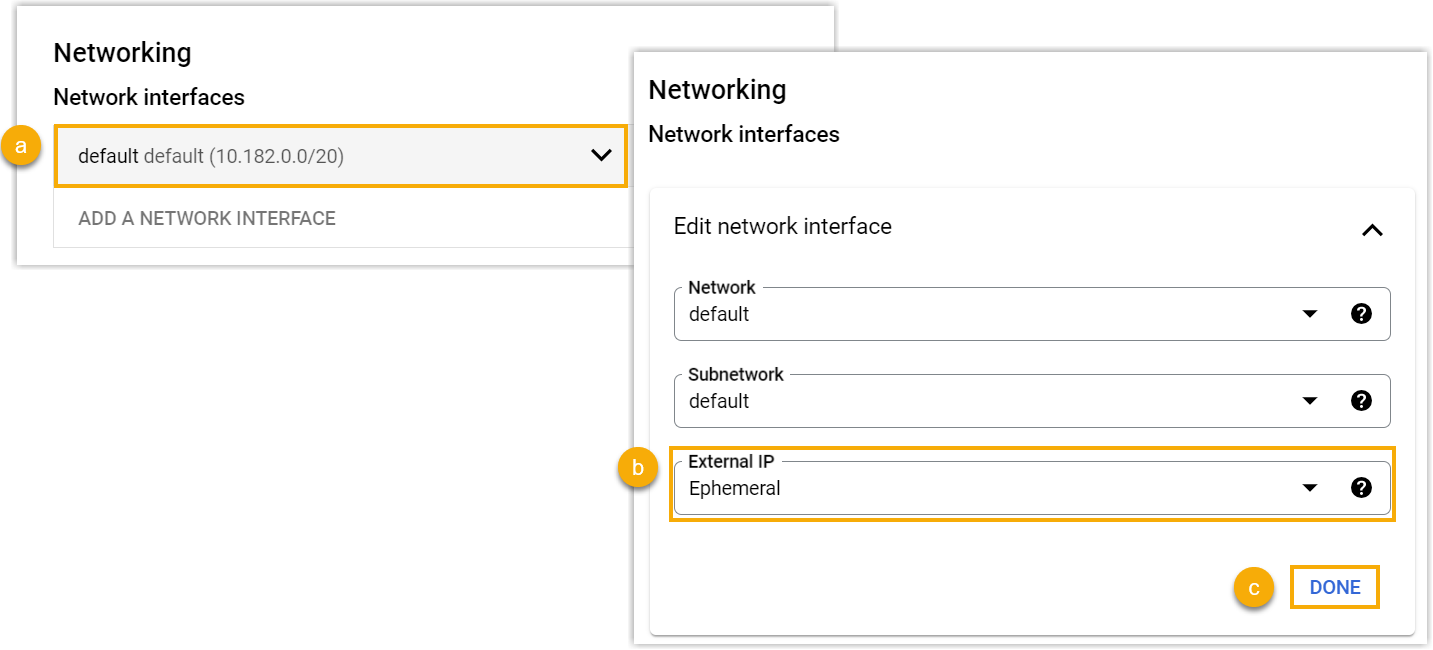
- Click the default toggle.
- In the Network drop-down list, select a VPC network.
- In the External IP drop-down list, select Ephemeral.
- Click Done.
- Retain the default settings for other configuration items, then click
Deploy.
You will be redirected to the deployment page. When the status shows
 , it indicates that the virtual machine
instance is successfully deployed with Yeastar P-Series Software Edition
installed.
, it indicates that the virtual machine
instance is successfully deployed with Yeastar P-Series Software Edition
installed.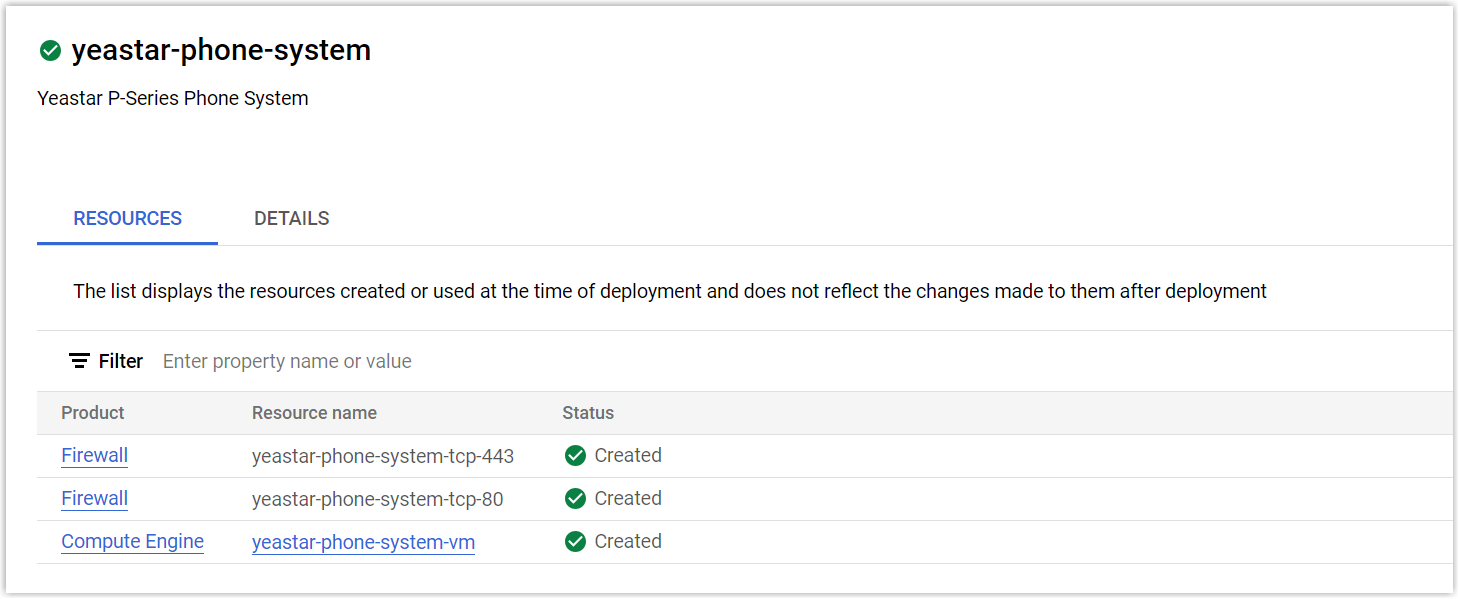
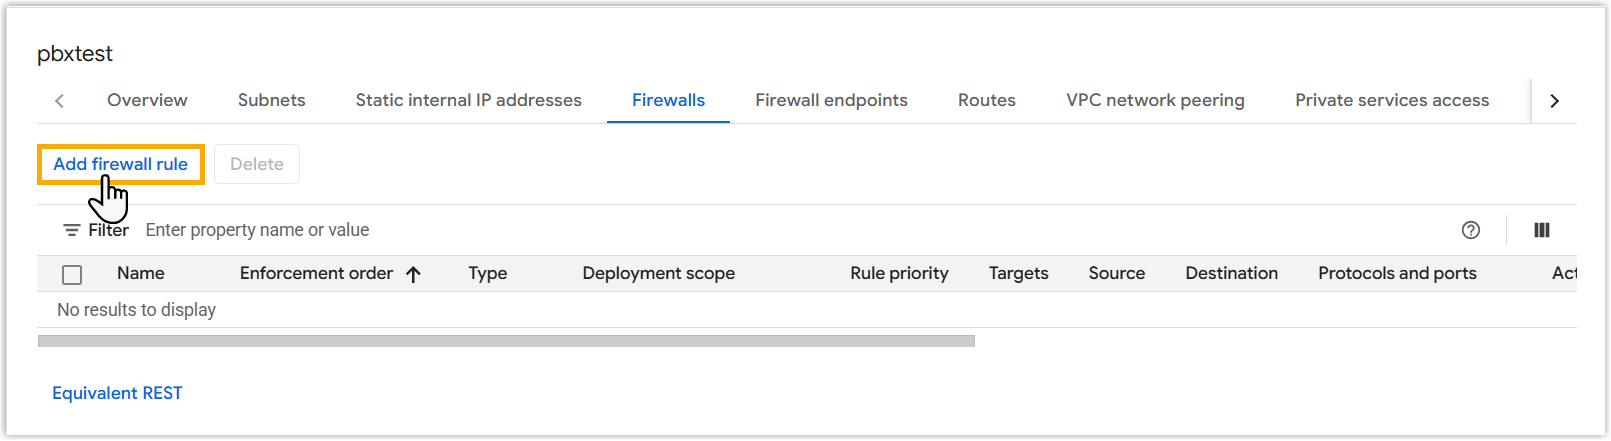
Step 2. Add firewall rules
Add firewall rules to allow incoming connections to the created virtual machine instance in your VPC network.
- At the top search bar, enter VPC networks and select
it from the search results.
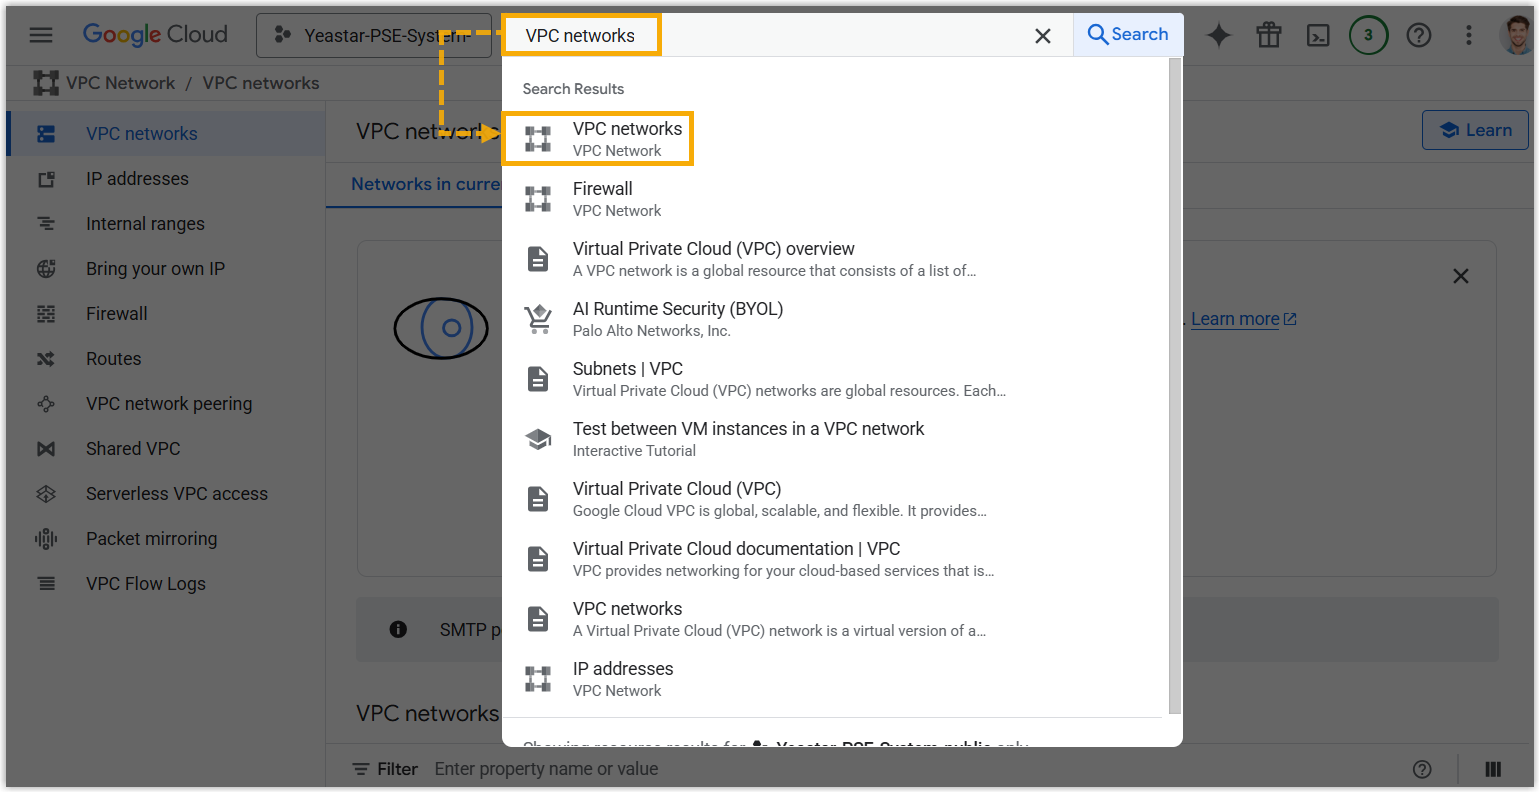
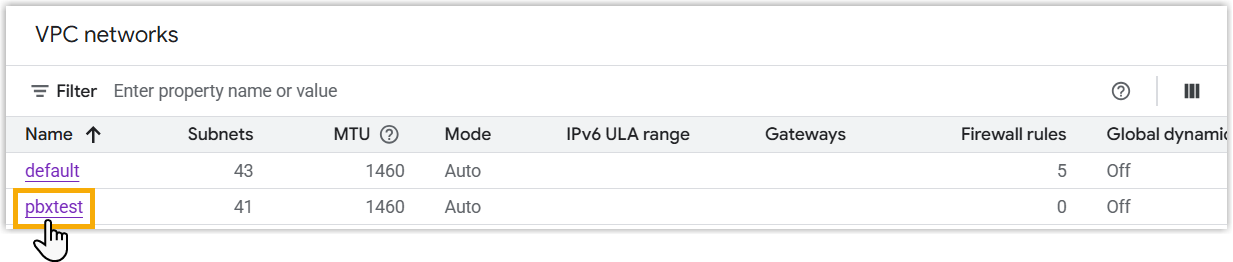
- In the VPC networks section, click the VPC network that
you have selected when creating the virtual machine instance.
- Under Firewalls tab, click Add firewall
rule.
-
Follow the instructions to configure the rule.
Figure Description 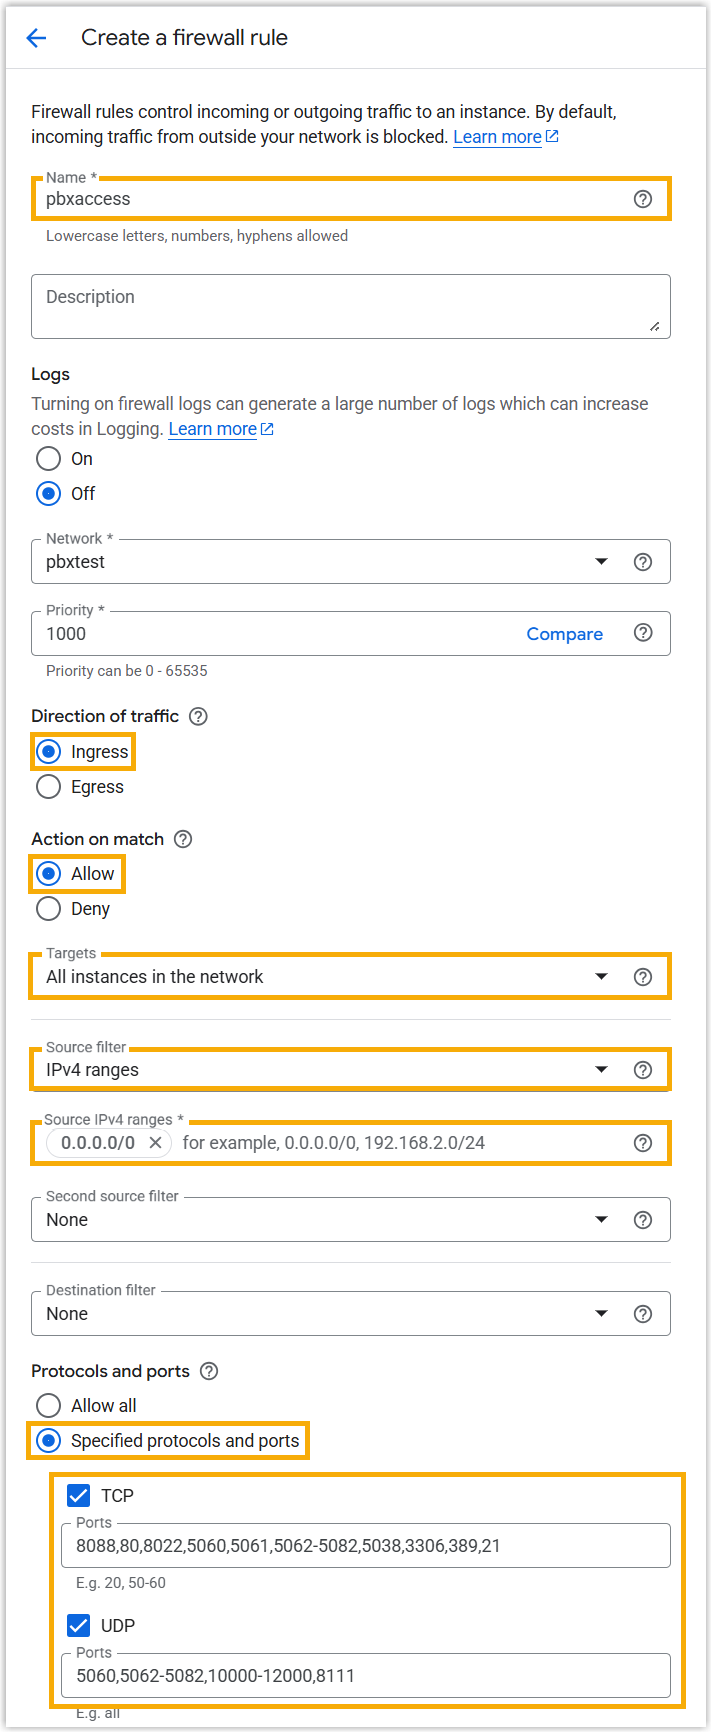
- Name: Enter a name to help you identify the rule.
- Direction of traffic: Select Ingress.
- Action on match: Select Allow.
- Targets: Select All instances in the network.
- Source filter: Select IPv4 ranges.
- Source IPv4 ranges: Enter 0.0.0.0/0.
- Protocols and ports:
Select Specified protocols and
ports, then configure the
followings:
- TCP: Enable this option, then enter 8088,80,8022,5060,5061,5062-5082,5038,3306,389,21.
- UDP: Enable this option, then enter 5060,5062-5082,10000-12000,8111.
-
Click Create.
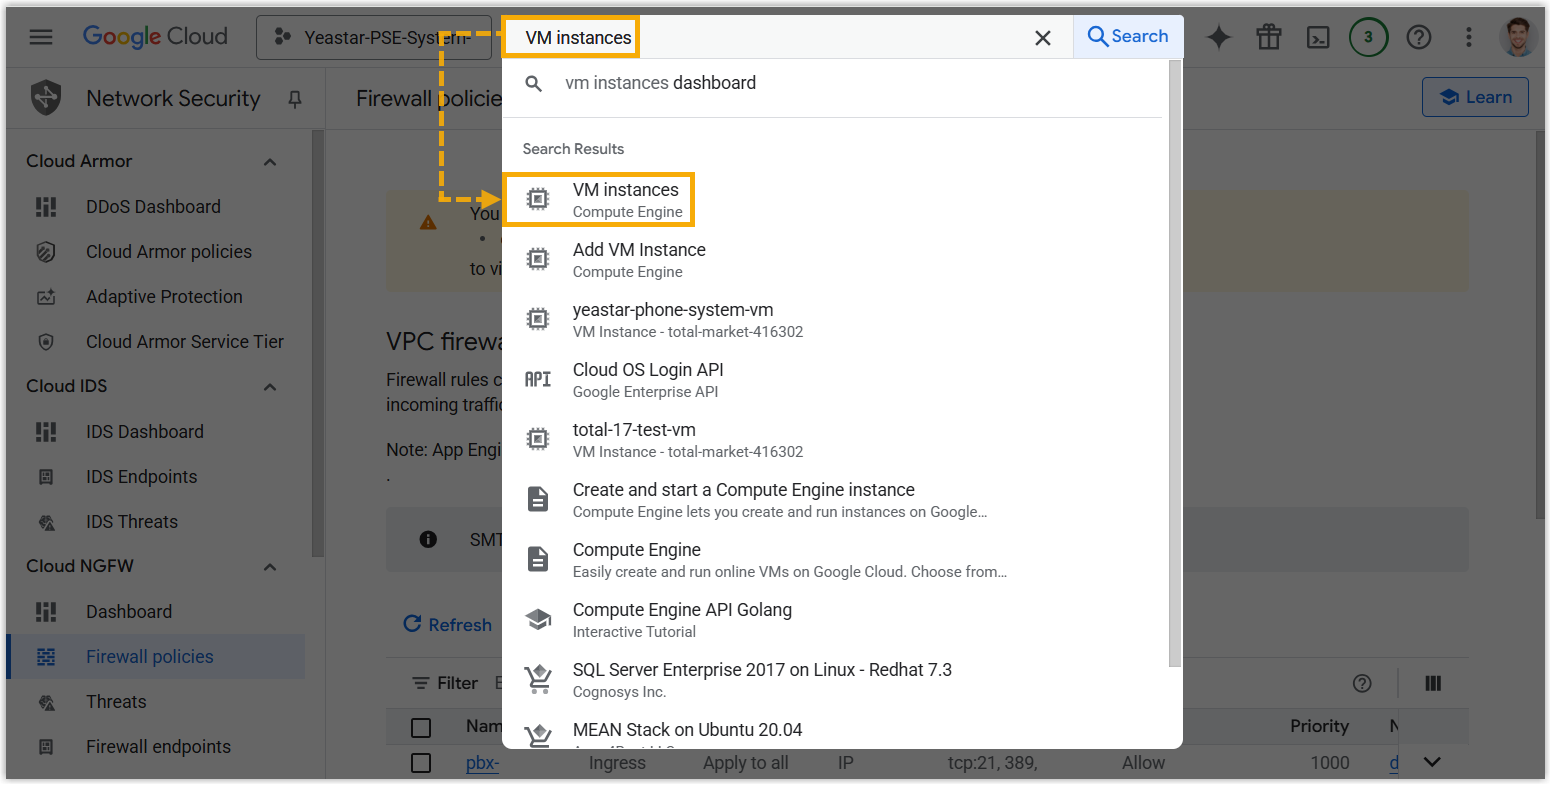
Step 3. Access Yeastar PBX web portal
- At the top search bar, enter VM instances and select it
from the search results.
- On the instances list, find the created virtual machine instance, then copy the
external IP address.
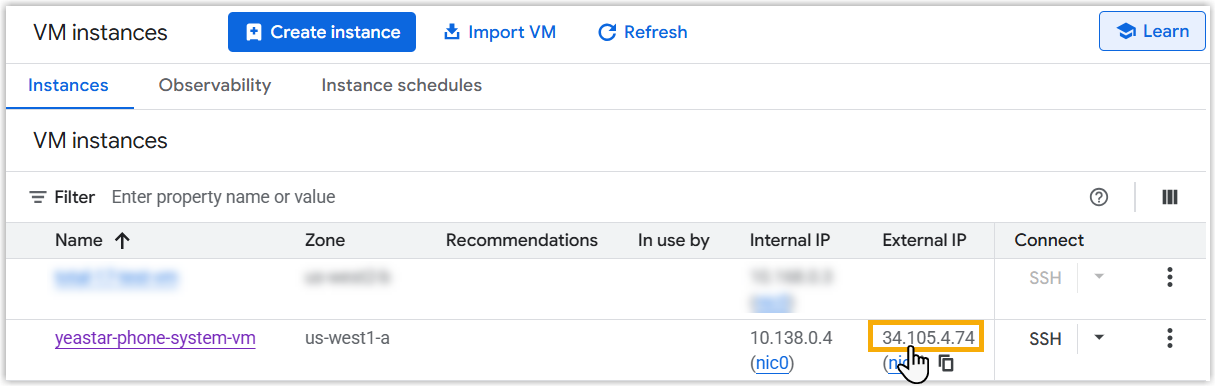
- Open a web browser, paste the public IP address of the PBX and port 8088 in the
address bar, then press
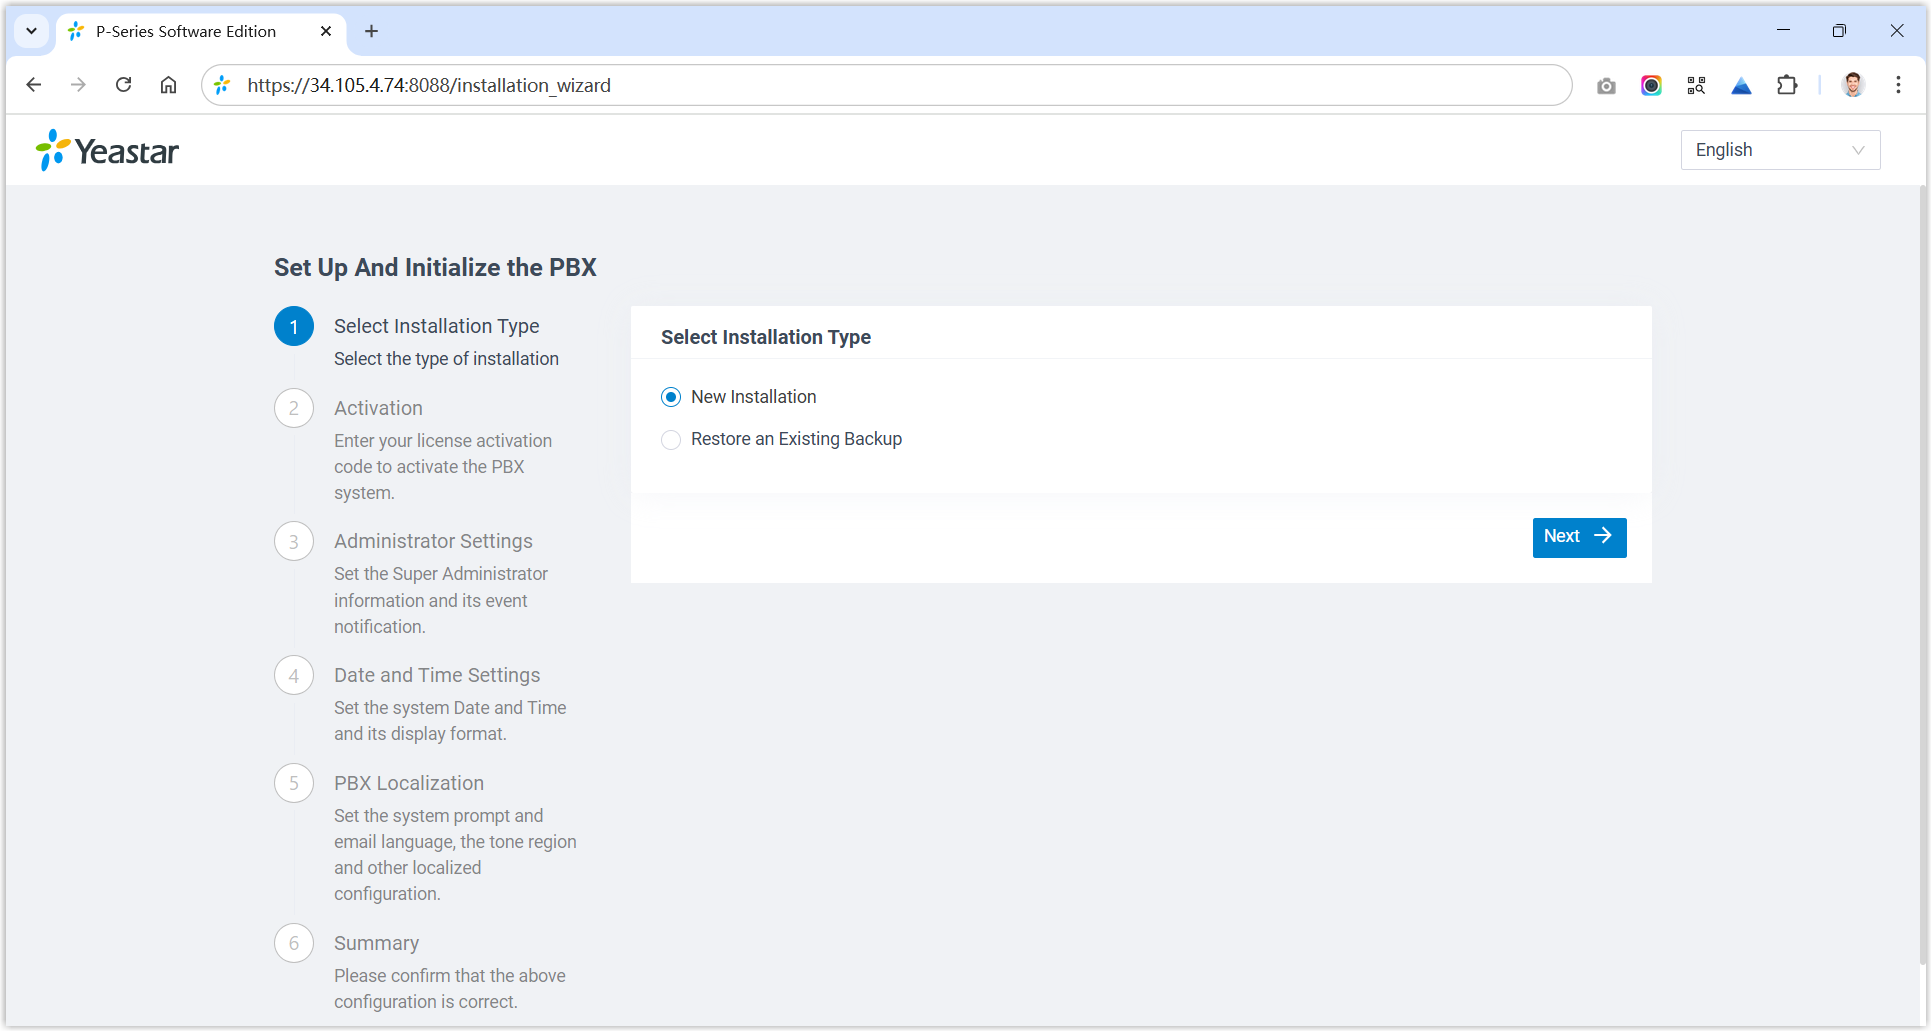
Enter.You will enter the installation wizard of Yeastar P-Series Software Edition.
What to do next
- To make Yeastar P-Series Software Edition ready for use, you need to Activate and Initially Set up Yeastar P-Series Software Edition.
- To ensure remote extensions can register and function properly, and users
can access the PBX via the public URL provided in the system email, you need
to perform one of the following actions:
- Enable Fully Qualified Domain Name (FQDN) for the PBX and allow extensions to use FQDN for remote registration.
- Configure Public IP and Ports on the PBX and enable remote registration for extensions (Path: ).
support and the console
password configured on PBX web portal (Path: ).