Install Yeastar P-Series Software Edition on Infomaniak
You can host and manage Yeastar P-Series Software Edition on Infomaniak using command line and leverage your Infomaniak knowledge to stay in full control of your PBX deployment.
Step 1. Purchase a server
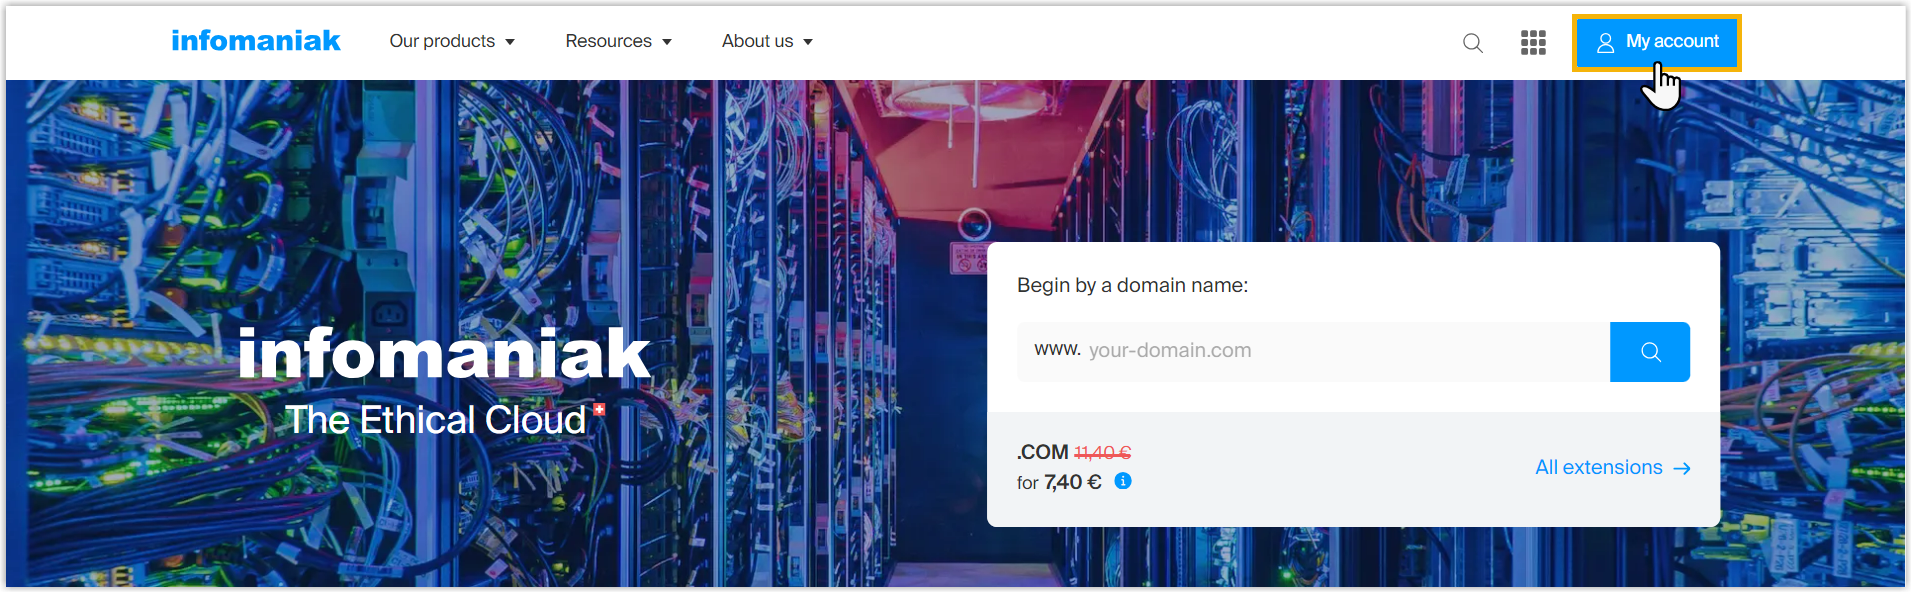
- Access Infomaniak, then click My account at the
top-right corner to log in.
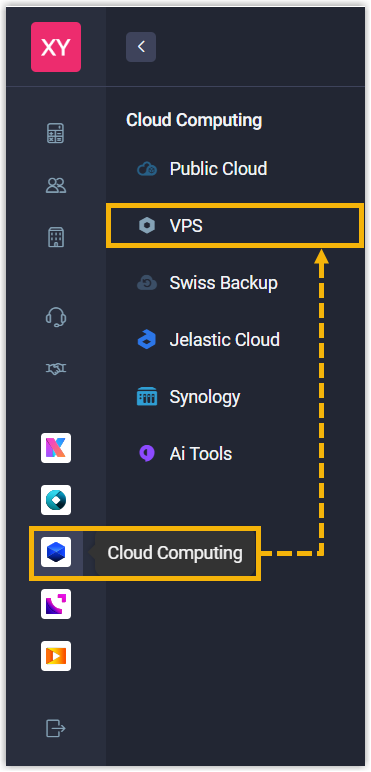
- On the left navigation bar, click Cloud Computing, then
click VPS.
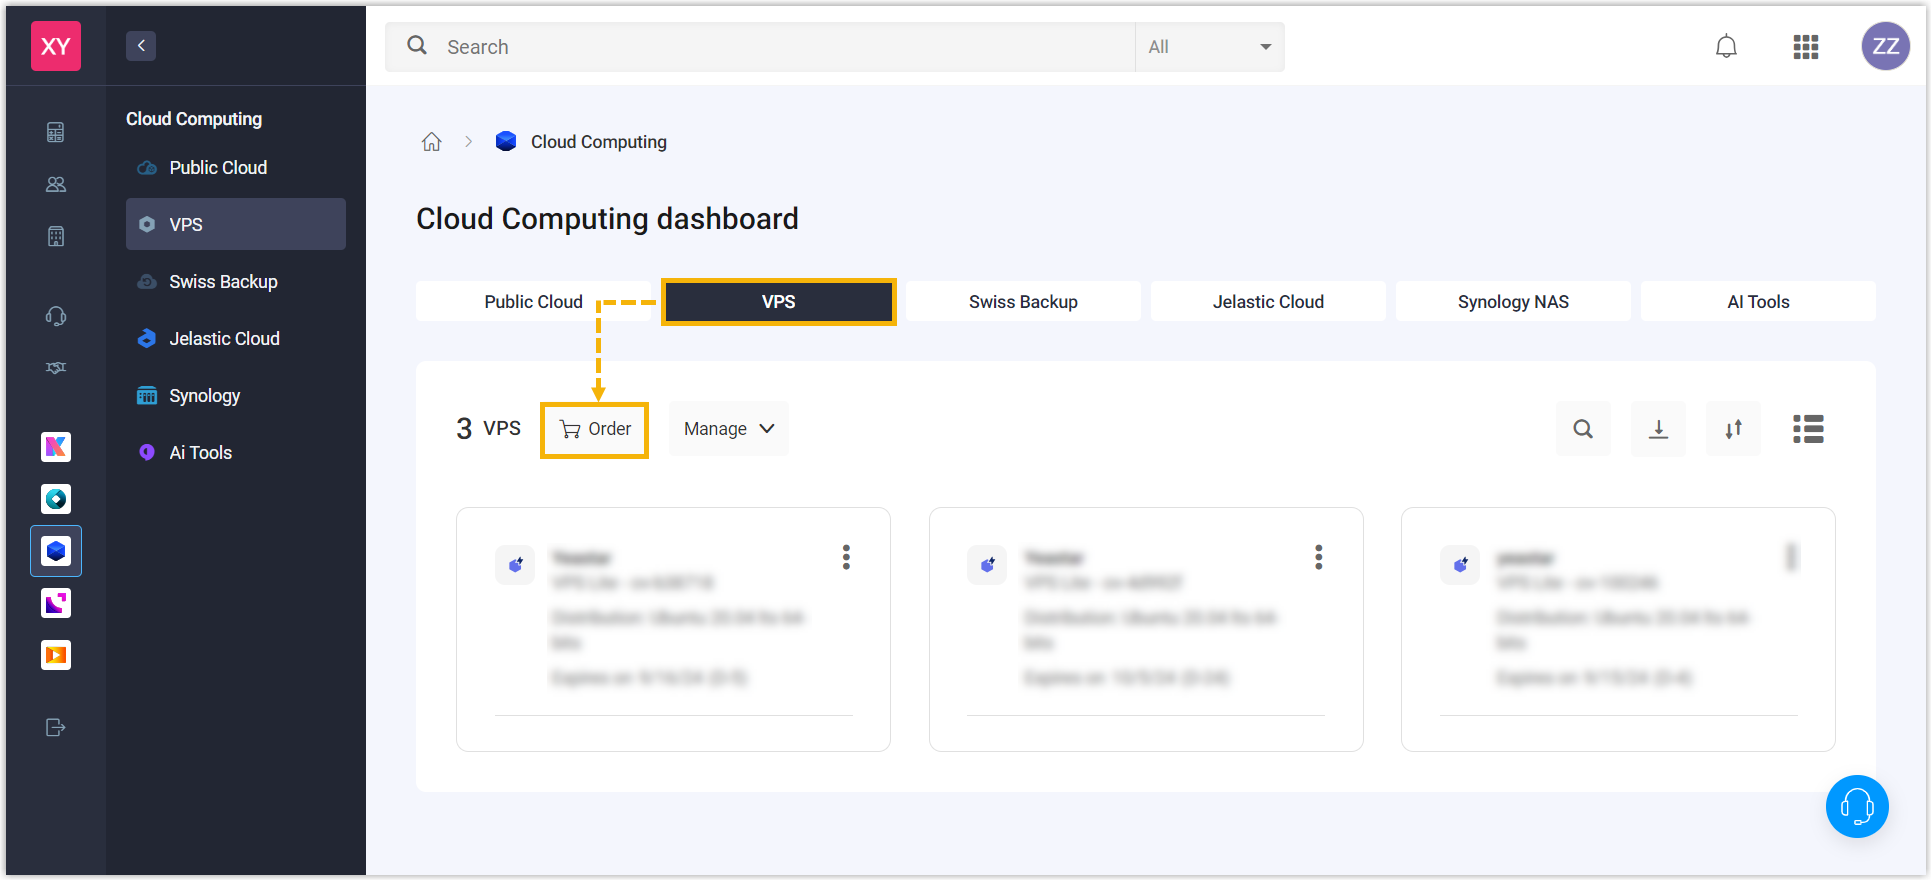
- Under VPS tab, click
Order.
- Choose the desired server type.
In this example, we choose VPS Lite.

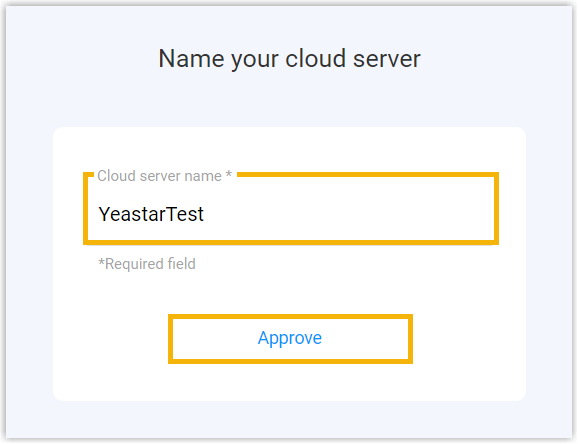
- Enter a name to help you identify the server, then click
Approve.
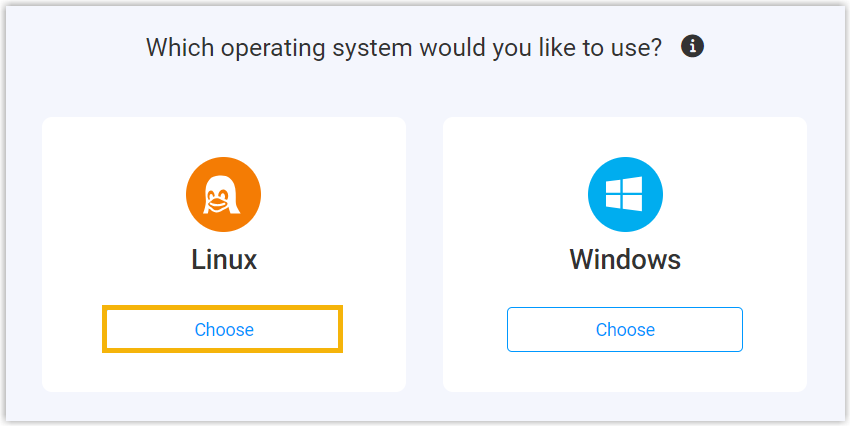
- Choose Linux as the operating system.
- Select the server specifications based on the Extensions (EXT) and
Concurrent Calls (CC) of your PBX system.
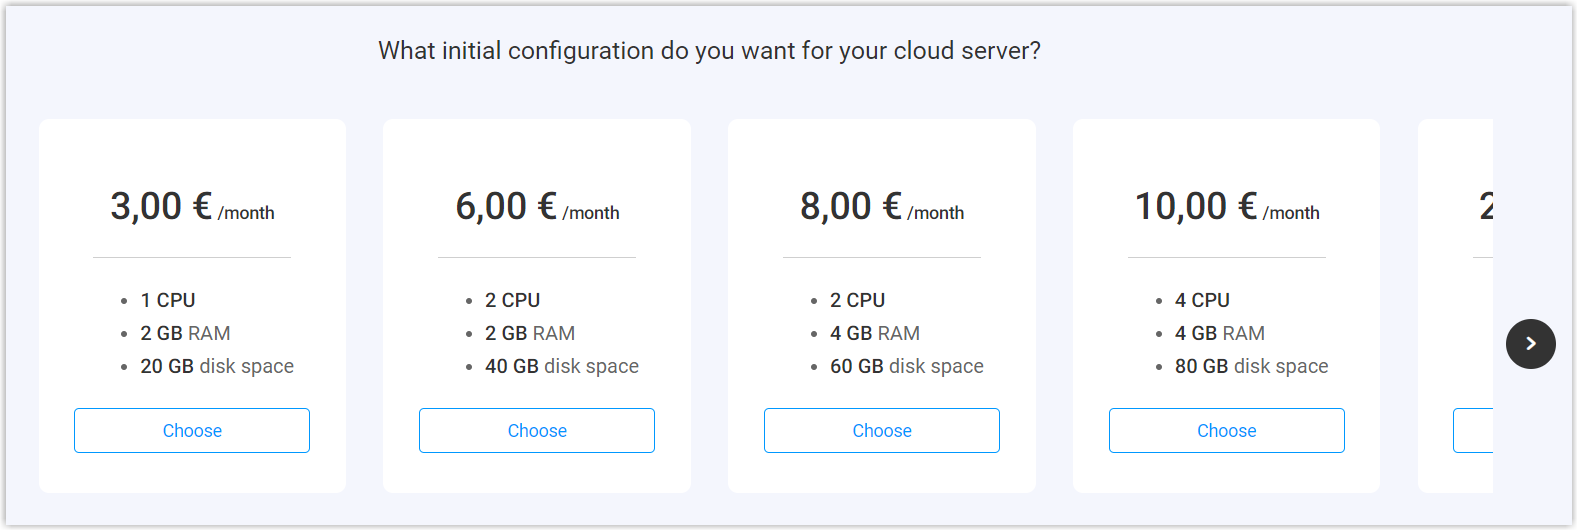
1-20 EXT (1-5 CC)
21-50 EXT (6-13 CC)
51-250 EXT (14-63 CC)
251-500 EXT (64-125 CC)
501-1000 EXT (126-250 CC)
EXT > 1000 (CC > 250)
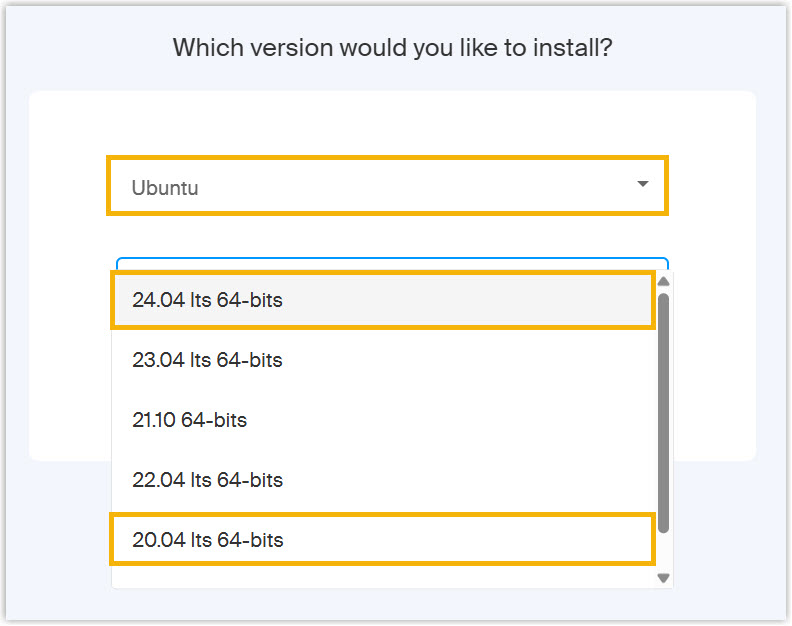
vCPU 2 2 4 6 8 Contact Yeastar Memory 2 GB 4 GB 4 GB 8 GB 16 GB Storage Call Recording Disabled 40 GB 40 GB 50 GB 100 GB 200 GB Call Recording Enabled 1 GB of storage holds approximately 1000 minutes of recorded calls. You can set up the storage based on your recording usage. - Select Ubuntu 24.04 lts 64-bits or Ubuntu
20.04 lts 64-bits, then click
Approve.
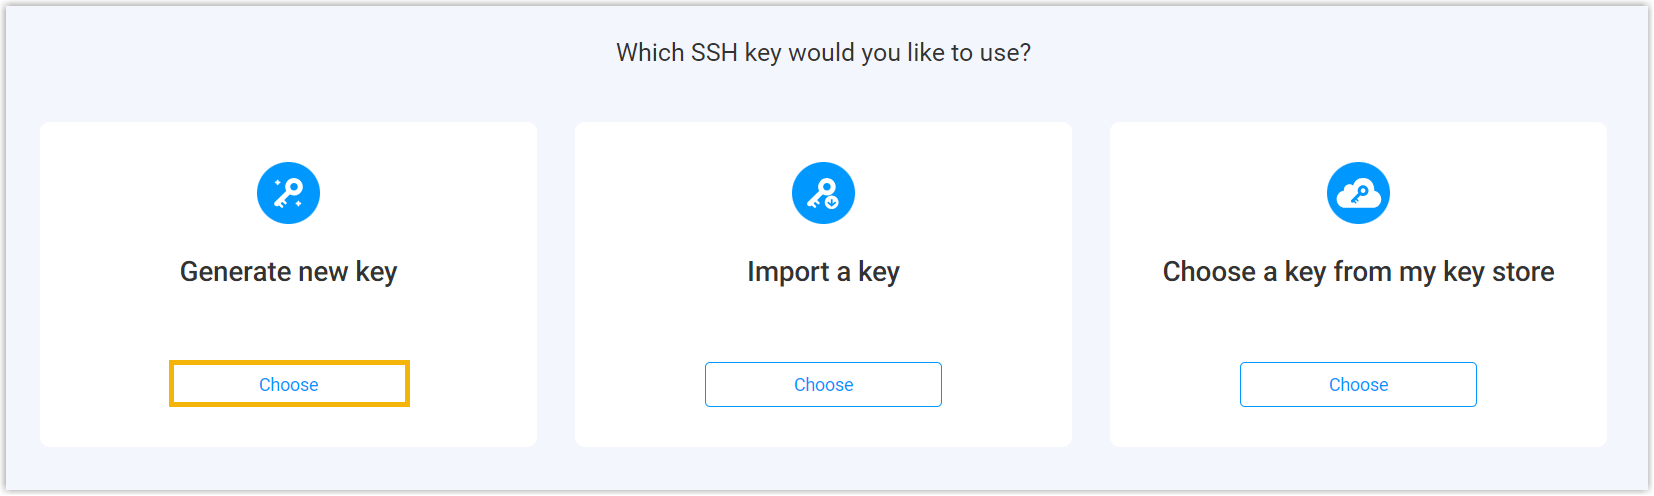
- Choose an SSH key for the server.
In this example, we choose to generate a new key.
- Click Choose on Generate new
key.
- Enter a name to help you identify the key, then click
SAVE.
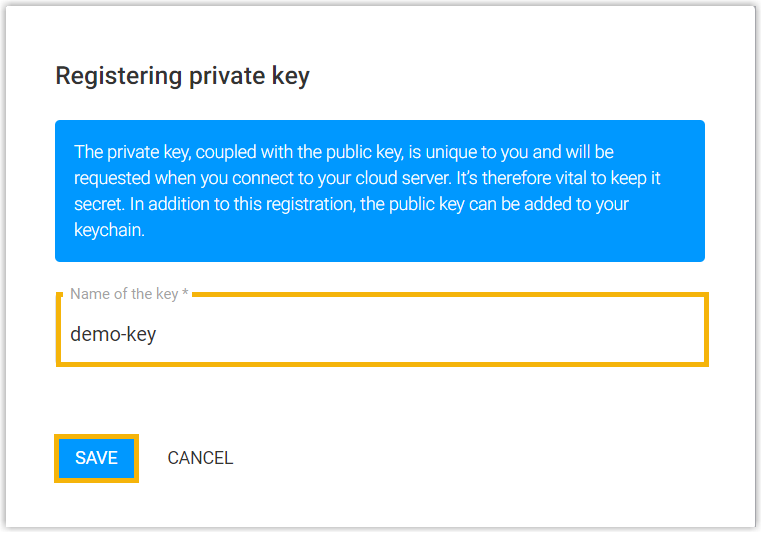
An SSH key pair is generated and displayed on the page; The private key is automatically downloaded to your computer as a
.txtfile.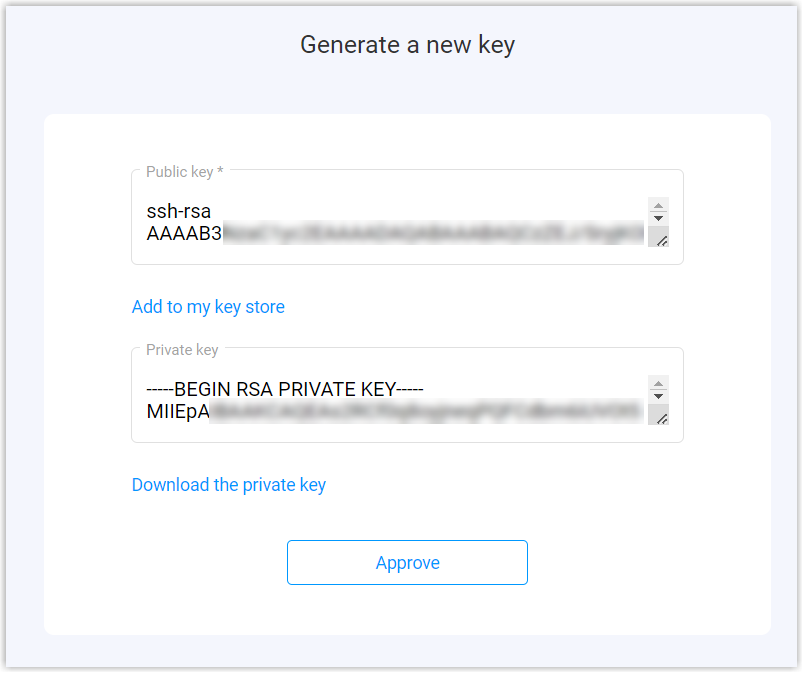
- Click Approve.
- Click Choose on Generate new
key.
- Choose the desired billing cycle.
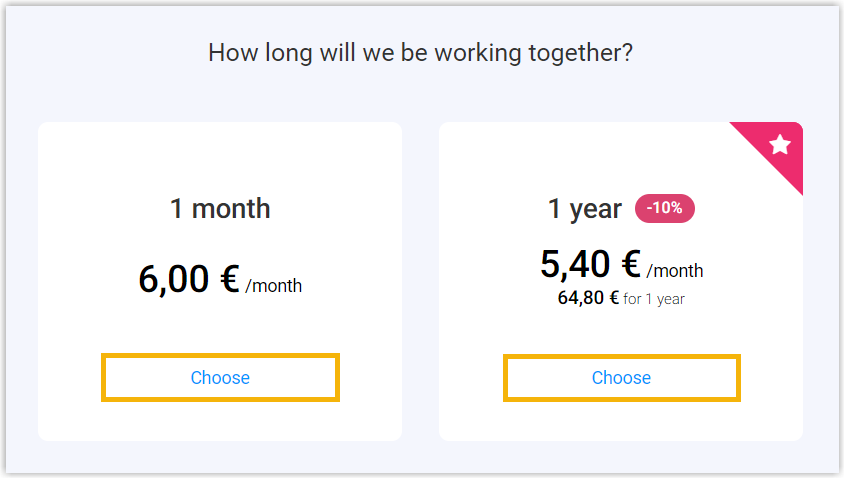
- Proceed to complete payment.
Step 2. Install Yeastar P-Series Software Edition on the server
-
Obtain the IP address of the server.
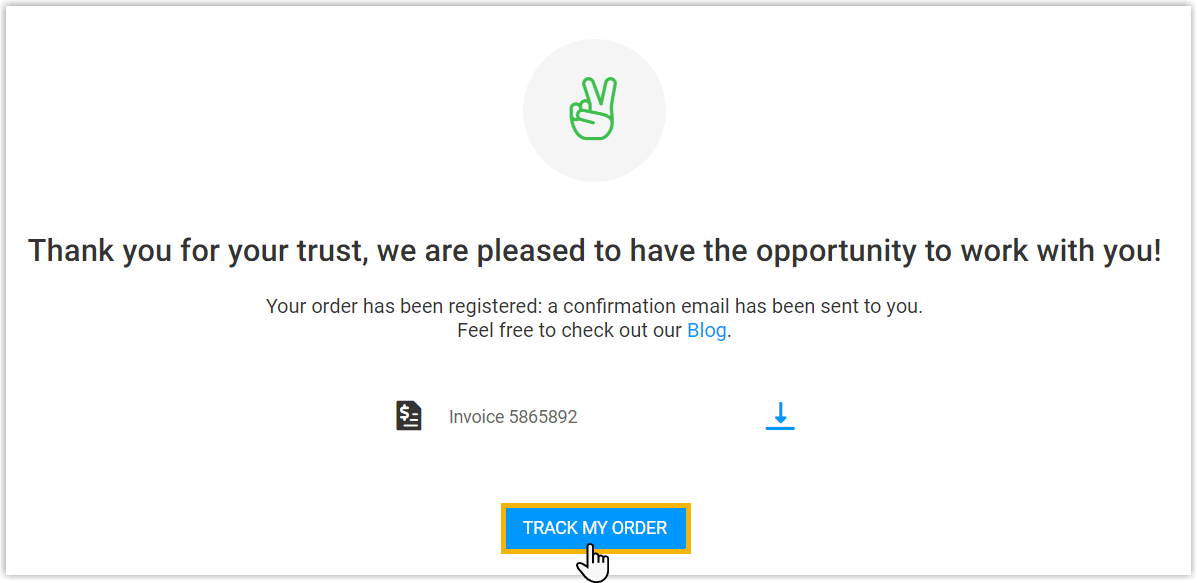
- Click TRACK MY ORDER.
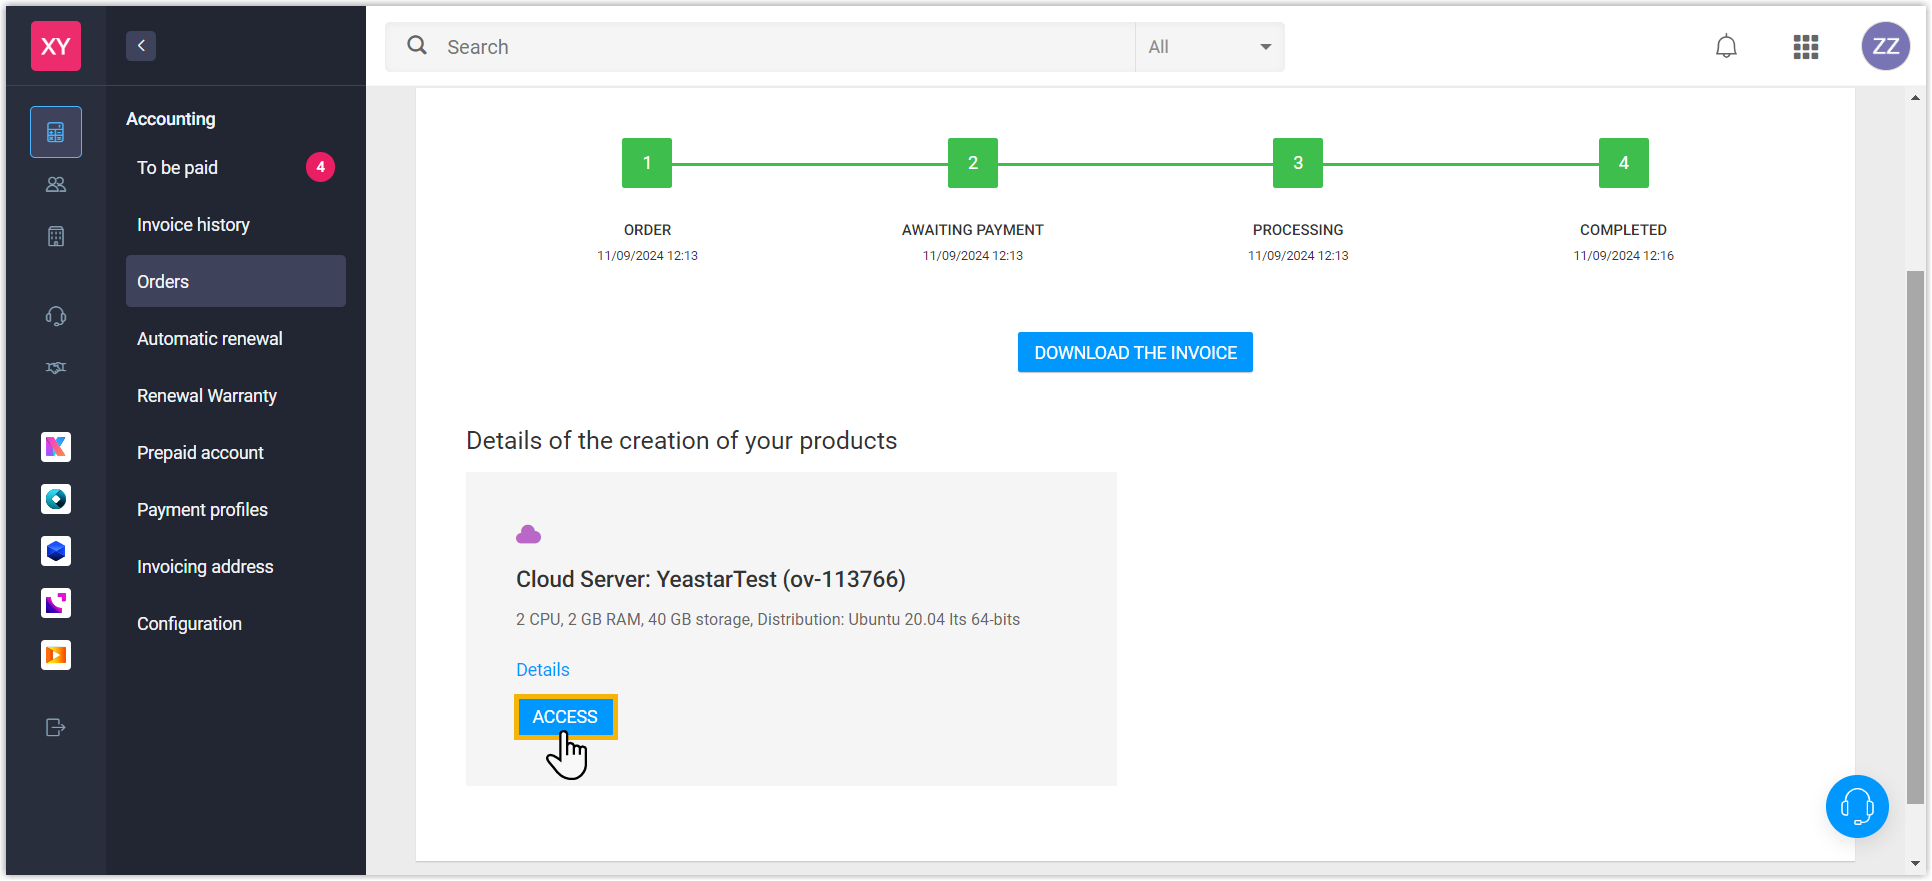
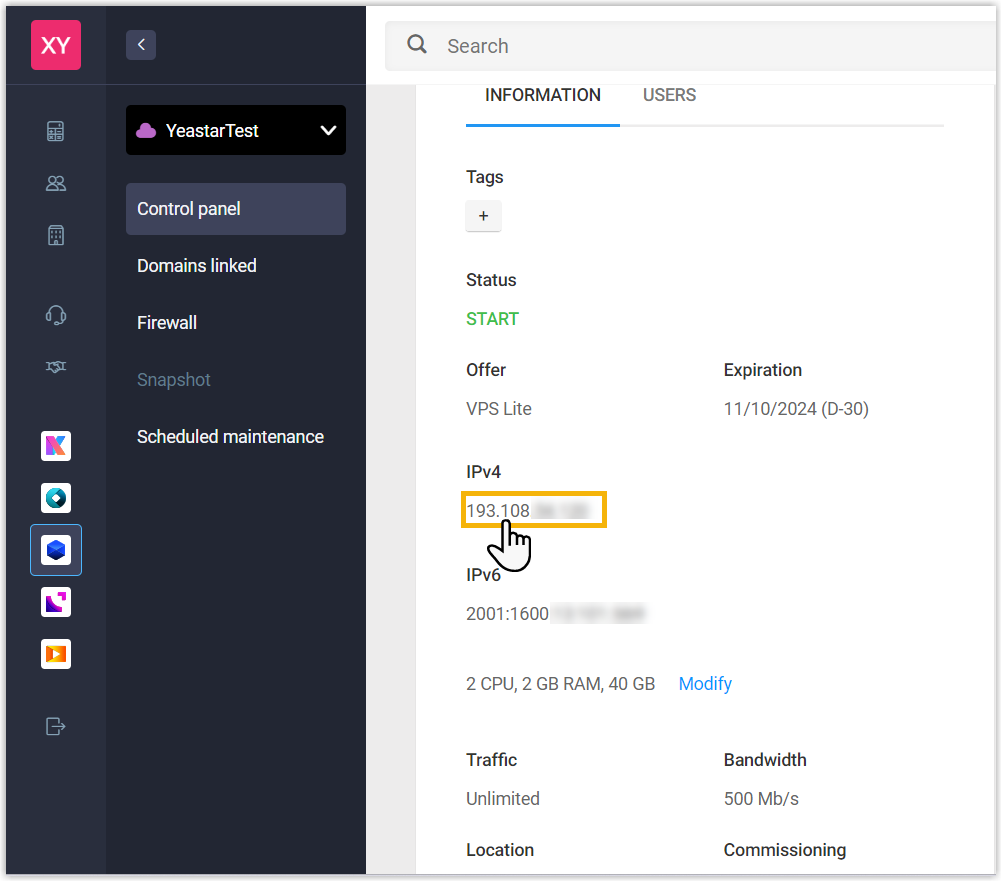
- At the bottom-left corner, click ACCESS.
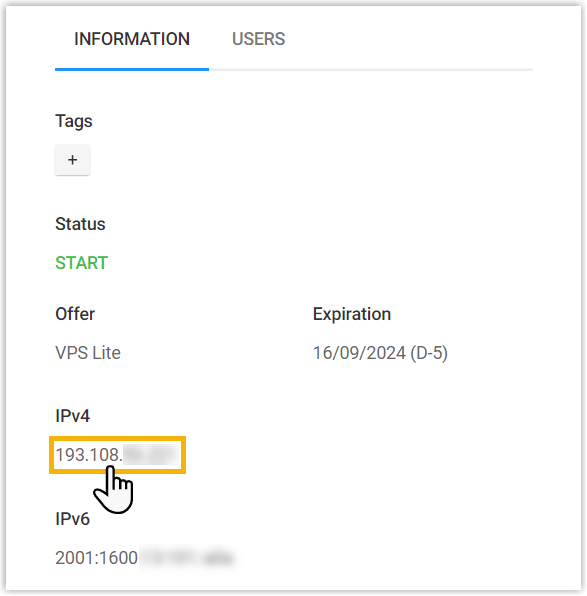
- Under INFORMATION tab, copy and
note down the IPv4 address.
- Click TRACK MY ORDER.
- Connect to the server via SSH.Tip: For more information, see Running a command with root privileges.
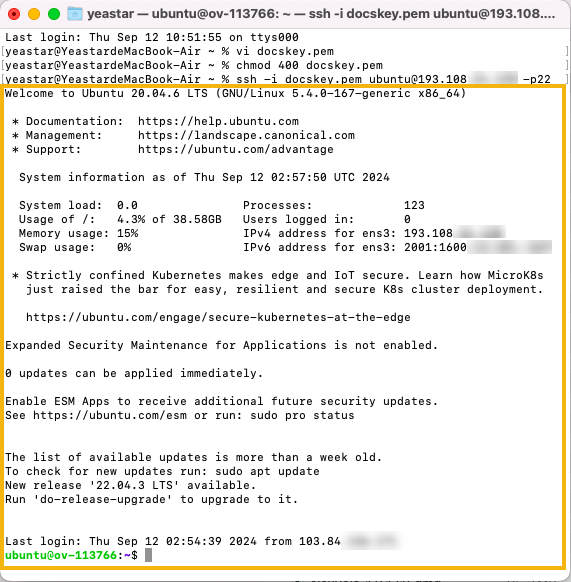
Scenario Instruction Connect to the server via SSH on macOS or Linux In this example, we open Terminal on Mac and run the following commands: 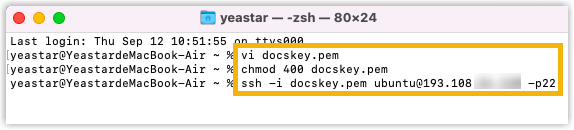
- Run
vi
                                                  {key_filename}.pem
to create a.pemfile and paste the private key. - Run
chmod 400
                                                  {key_filename}.pem
to grant the read permission. - Run
ssh -i {key_filename}.pem
                                                  ubuntu@{ipv4_address_of_the_server}
                                                  -p22
to connect to the server.
If the connection is established, the following result will be printed in Terminal.
Connect to the server via SSH on Windows In this example, we use PuTTYgen to convert the private key file, then open PuTTY to perform the following operations: 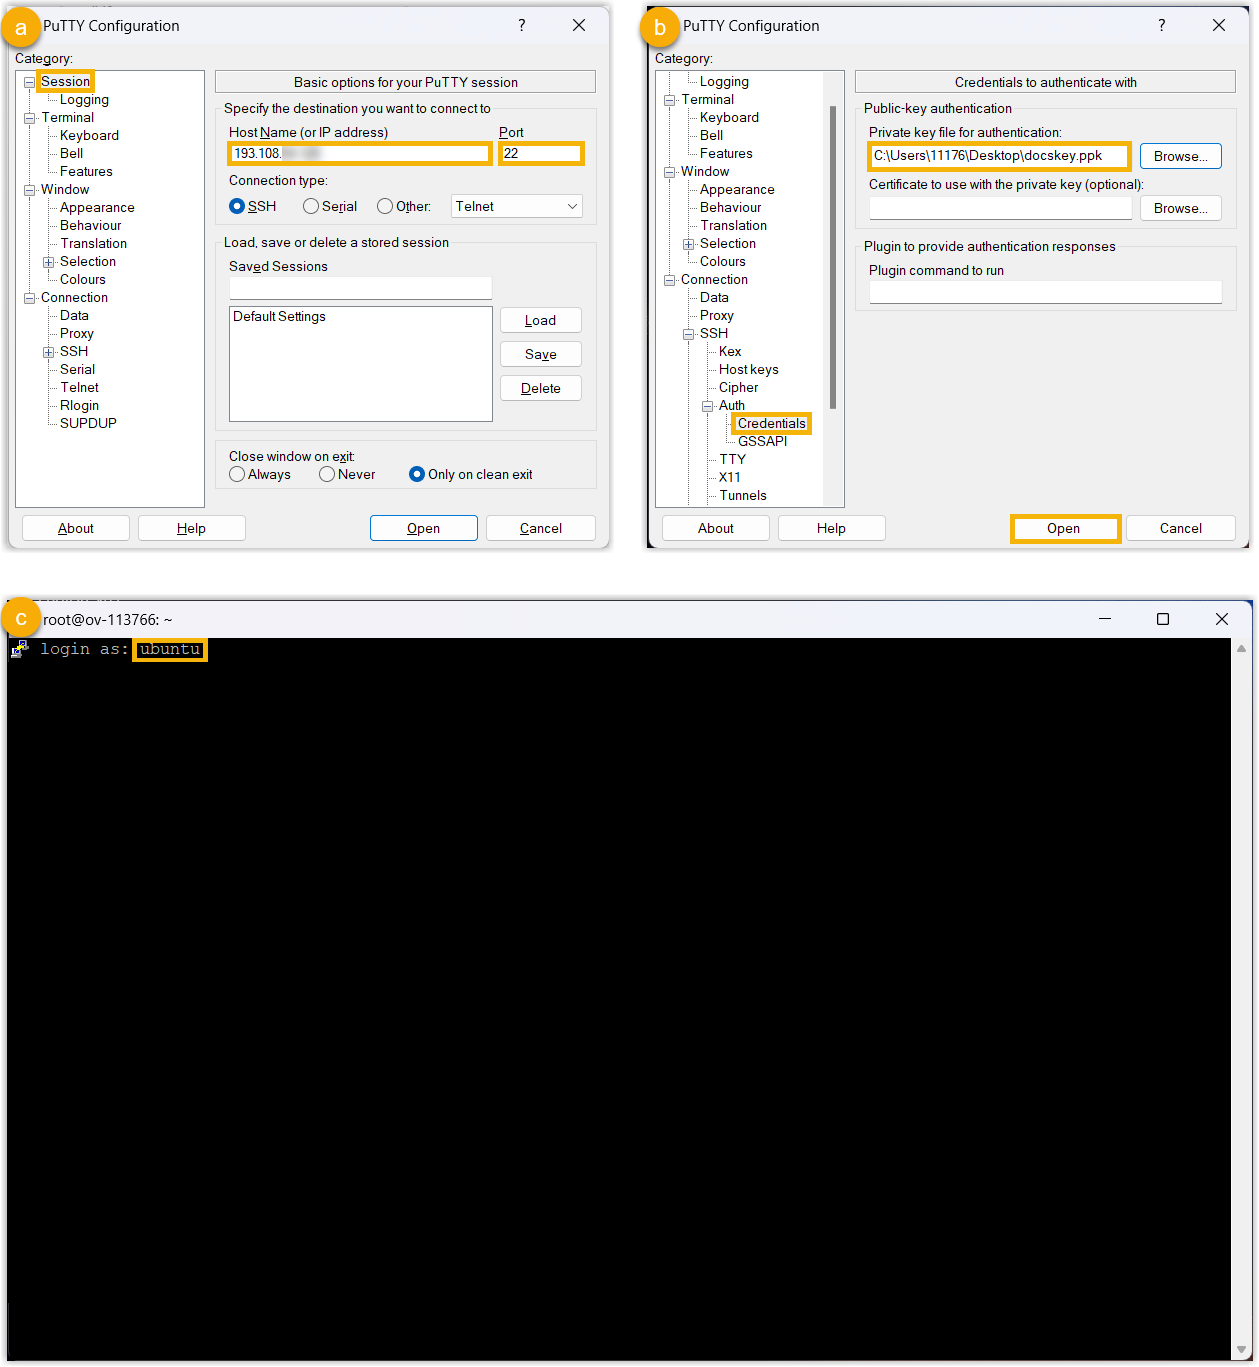
- Enter the server's IPv4 address and port 22.
- Upload the converted private key file.
- Enter
ubuntu.
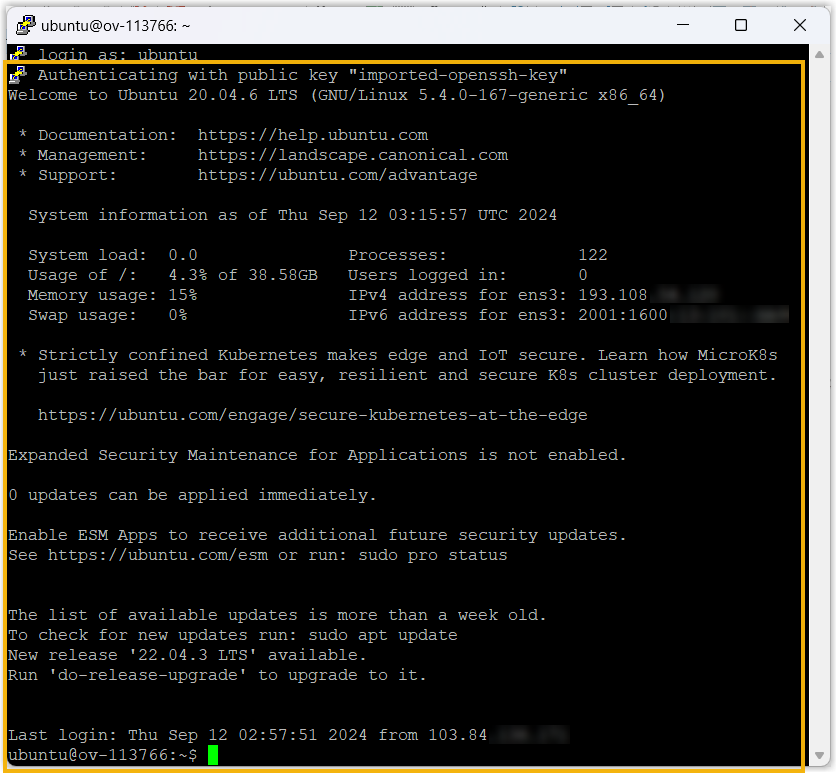
If the connection is established, the following result will be printed in PuTTY.
- Run
- Run commands as an administrator and change root
password.
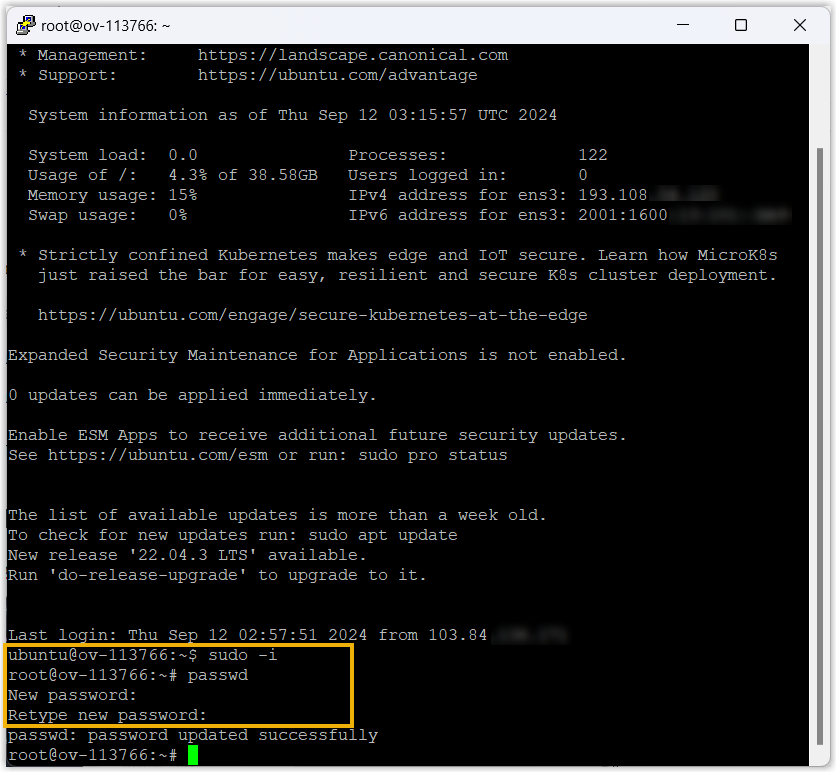
- Run
sudo -ito switch to the root user. - Run
passwdand change the password on the server.
- Run
- Run the following commands to install Yeastar P-Series Software Edition.
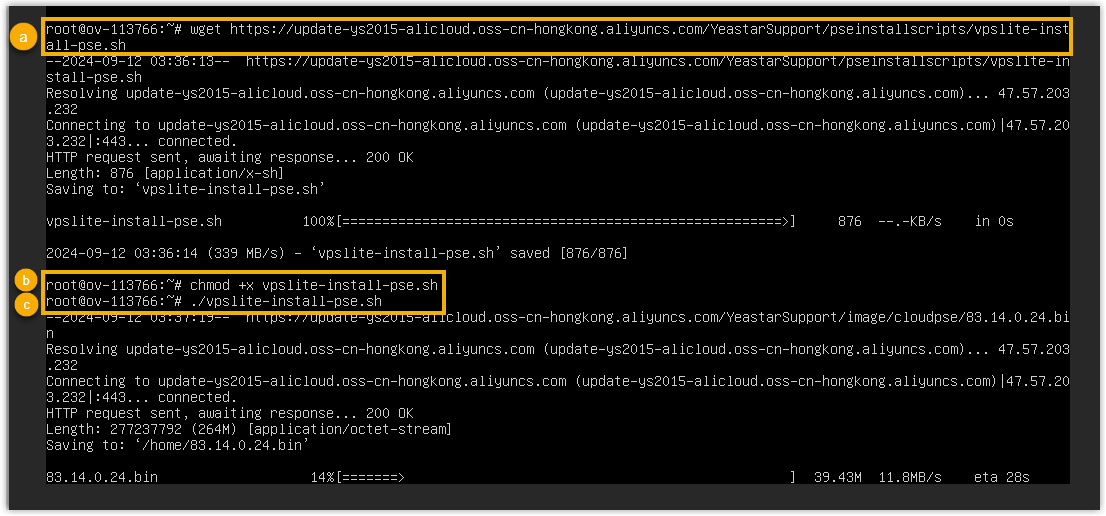
-
wget
                                https://update-ys2015-alicloud.oss-cn-hongkong.aliyuncs.com/YeastarSupport/pseinstallscripts/vpslite-install-pse.sh
chmod +x vpslite-install-pse.sh./vpslite-install-pse.sh
-
- Wait for the installation process to complete.
If a
IPPBX
                            login
prompt is displayed, it indicates that P-Series Software Edition is installed.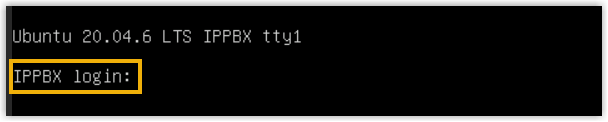
Step 3. Set up firewall
- On Infomaniak, go to the Firewall configuration page of
your server.
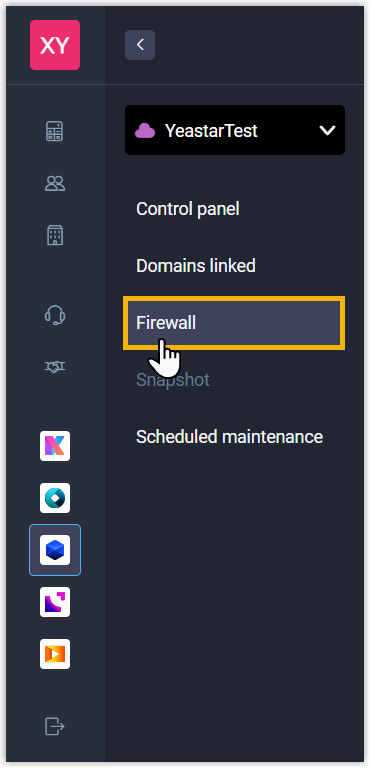
- Add a firewall to open the required ports.
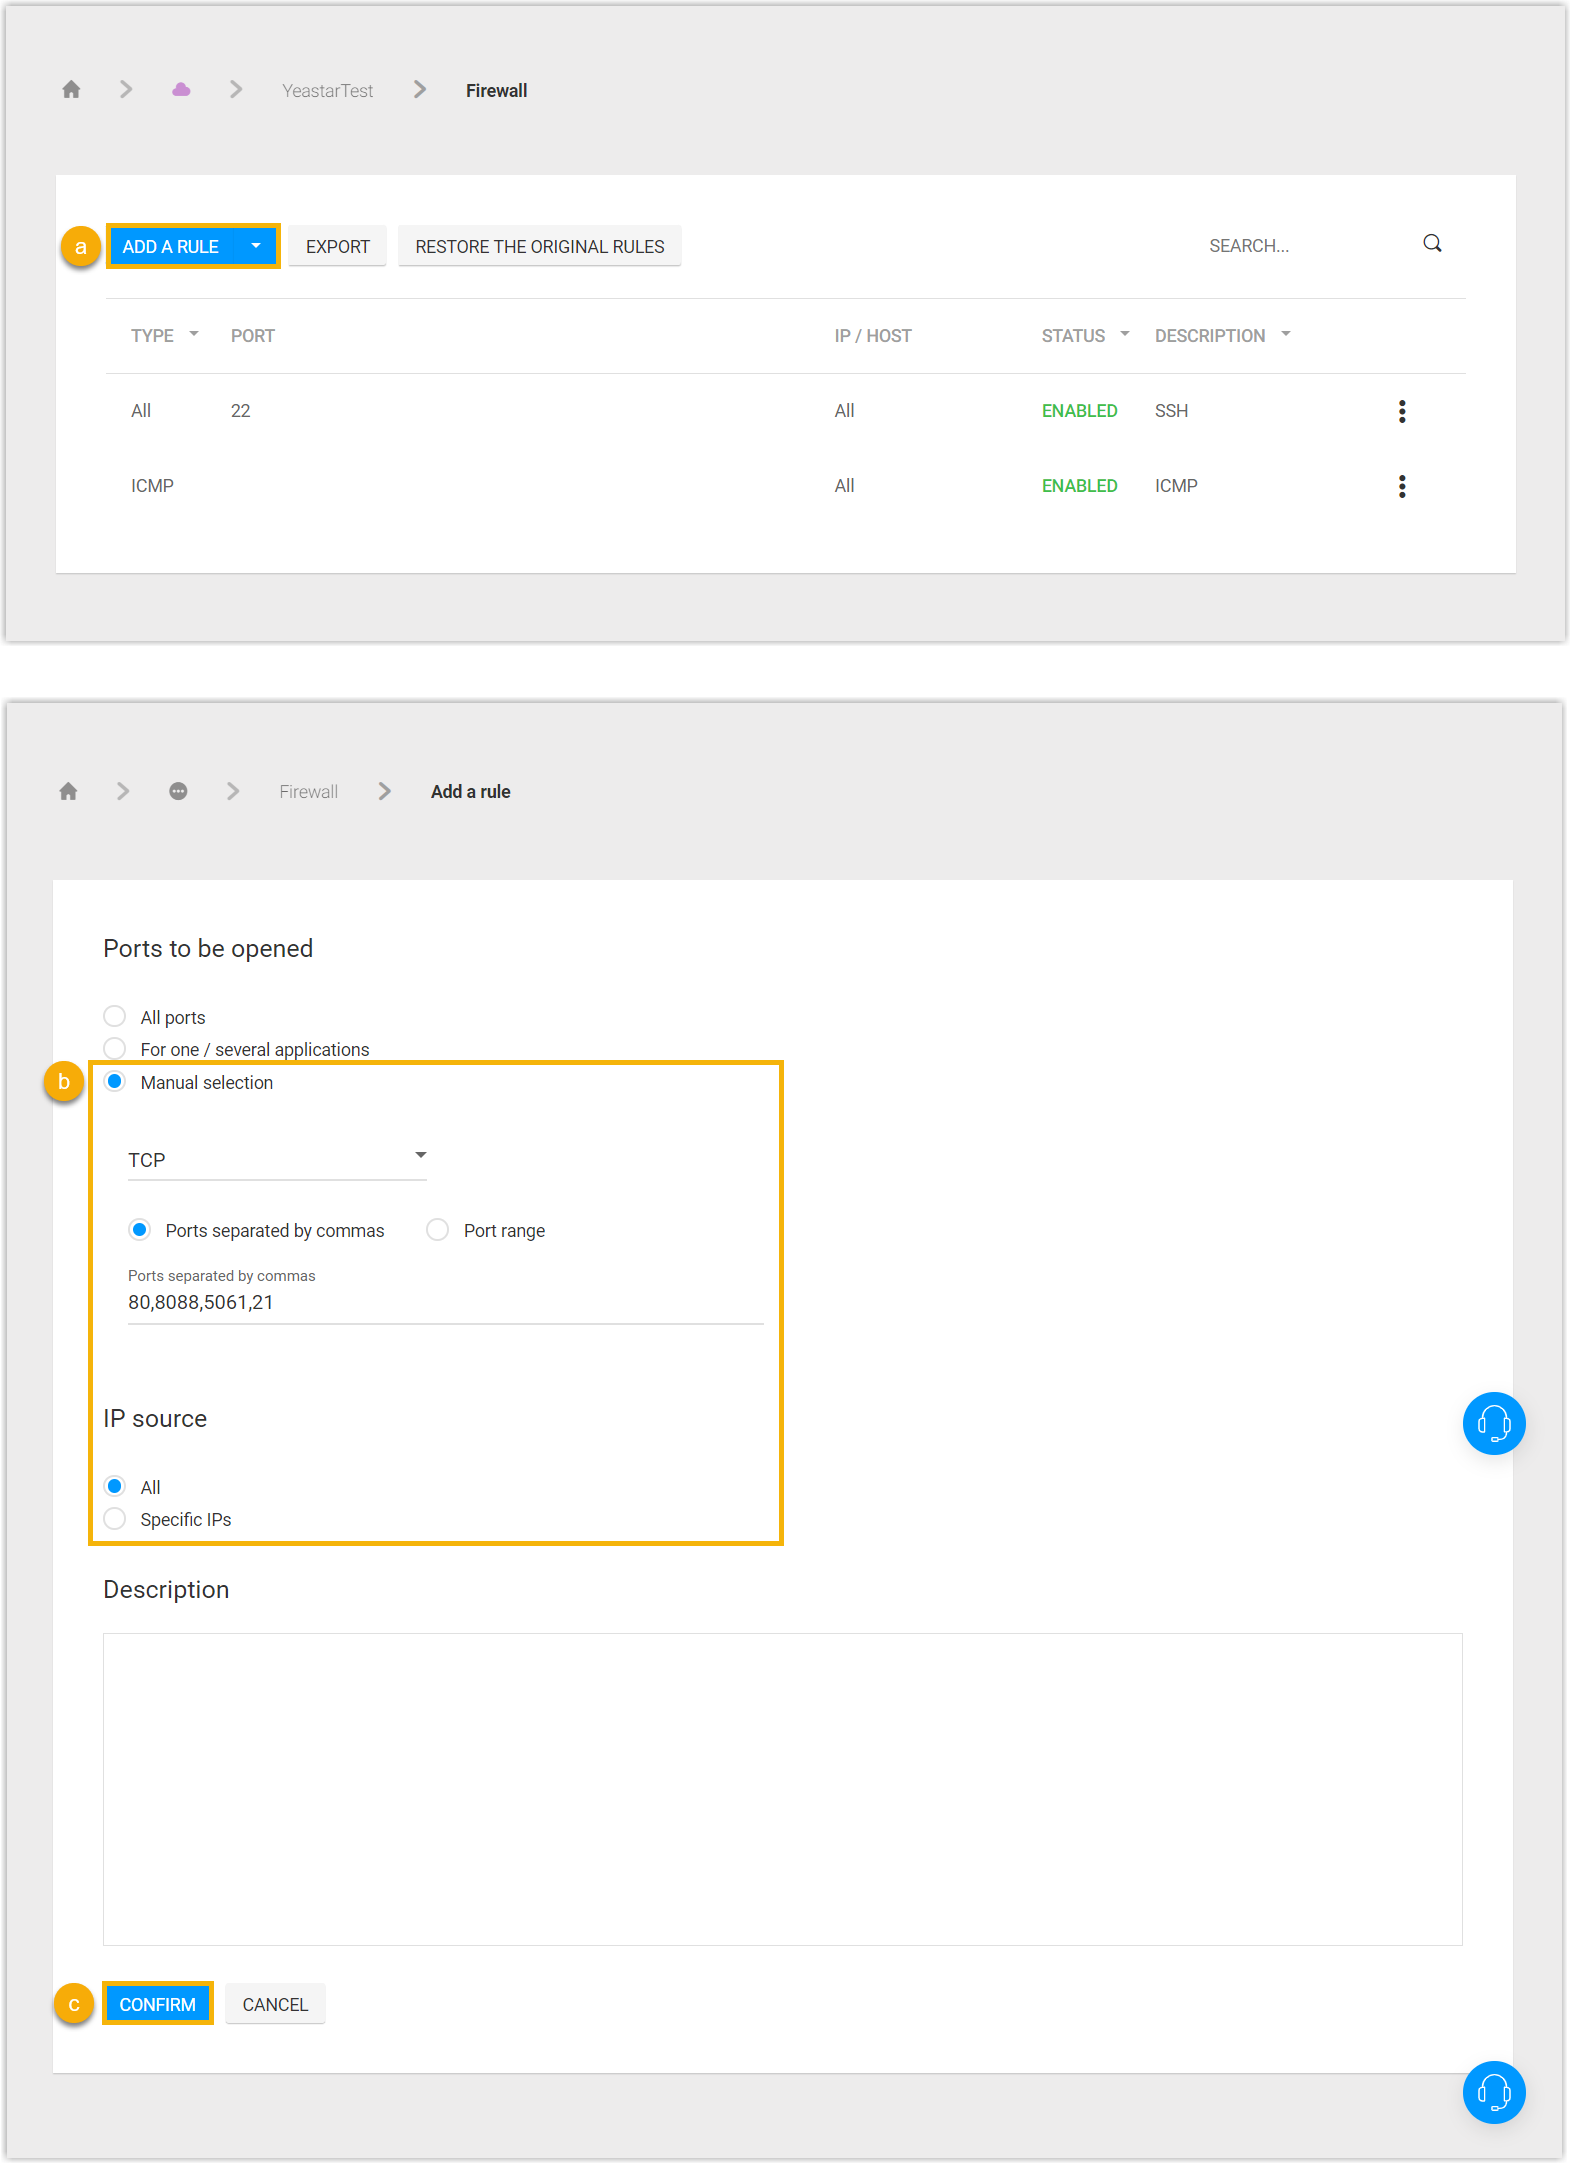
- Click ADD A RULE.
- Open the ports 80,8088,5061,21.
- Click CONFIRM.
Result
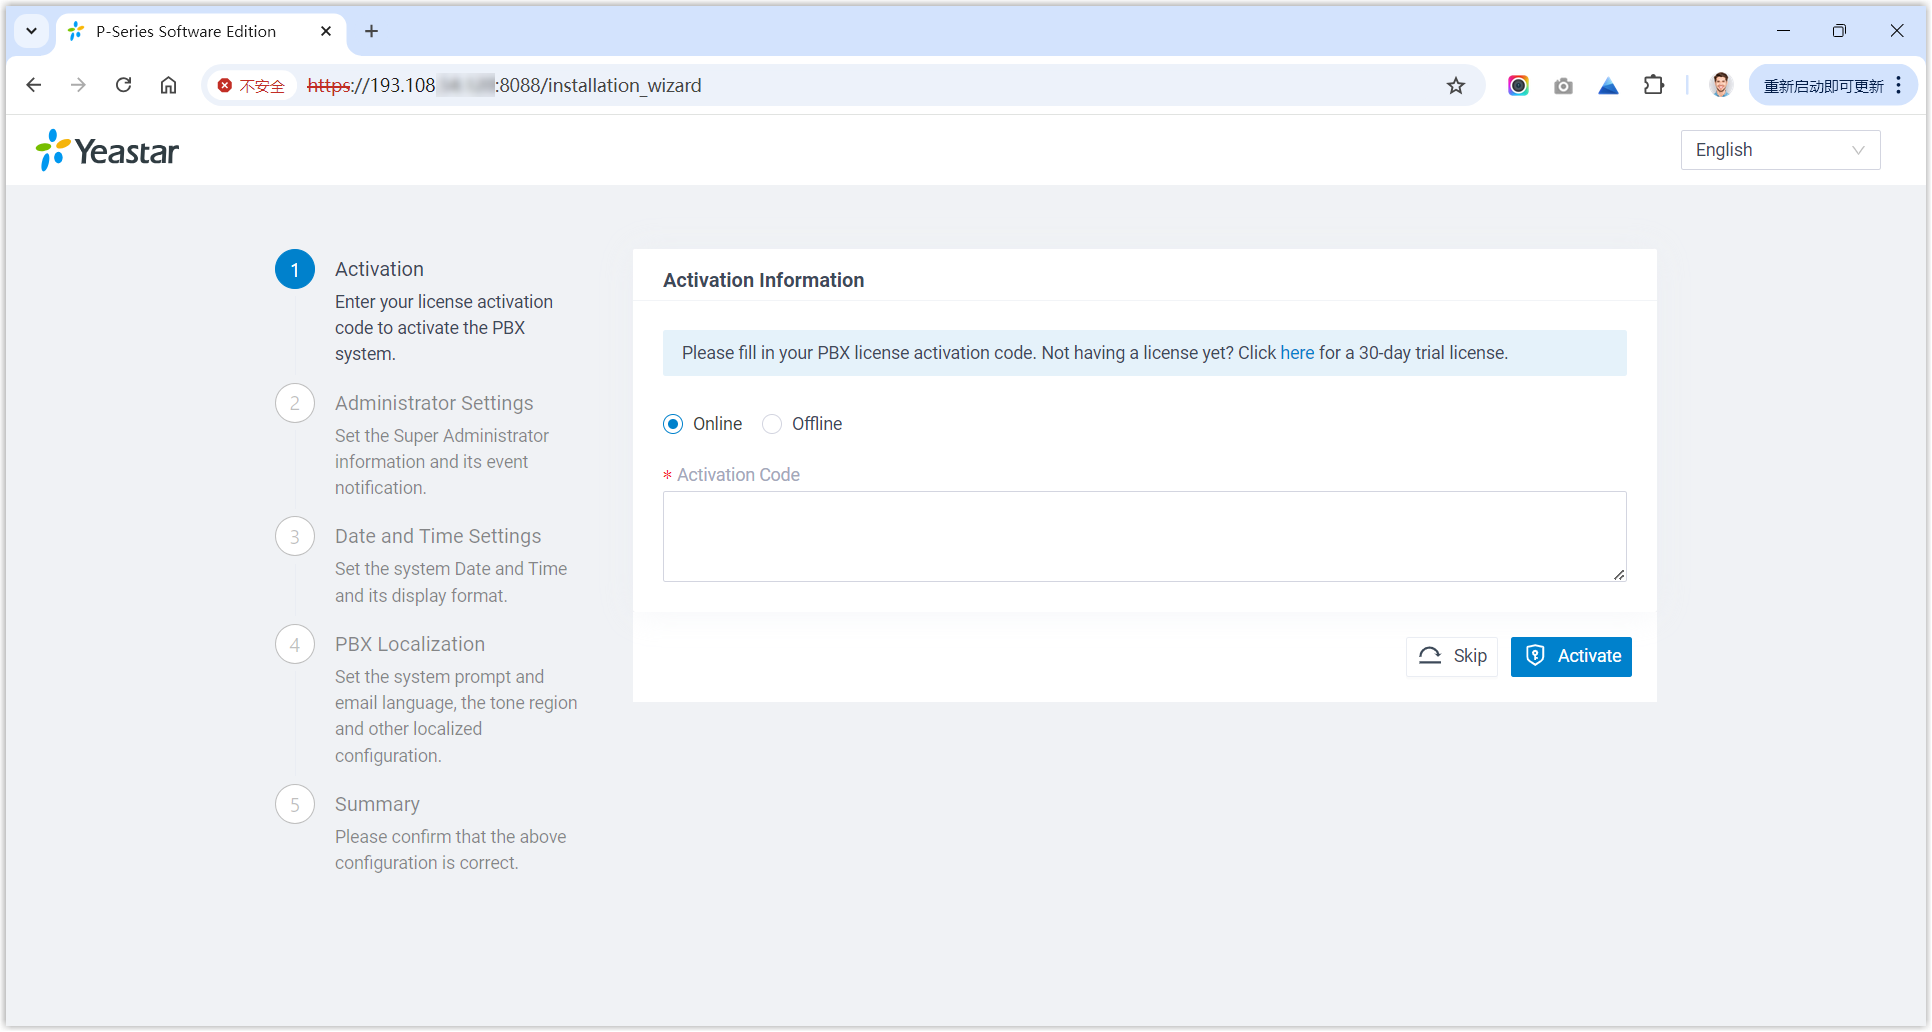
Yeastar P-Series Software Edition is installed successfully and can be accessed.
Open a web browser, enter the PBX's IP address and port in the address bar, and press
Enter.
You will access the PBX web portal and enter the installation wizard of Yeastar P-Series Software Edition.
What to do next
Activate and set up Yeastar P-Series Software Edition to make it ready for use. You can do this using one of the following methods:
- Complete setup via Web GUI using the installation wizard
- Continue with the installation wizard in the Web GUI. This method only supports to complete the settings included in the wizard.
- Complete setup via SSH using a prepared XML file
-
Upload a prepared XML file to the PBX via SSH. This method allows you to complete the initial setup and apply additional supported PBX settings, such as creating extensions, trunks, inbound routes, and more.
- Download the XML configuration file and edit it as needed.
- Upload the XML configuration file to the designated directory and reboot the PBX to take effect.
For more information, see Activate and Set up Yeastar P-Series Software Edition Using XML Configuration File.
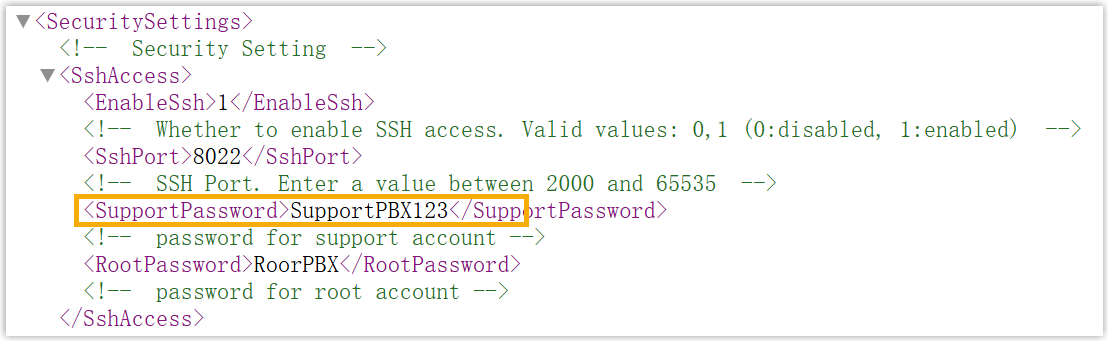
- Root Account: Username is
root, and password is the credential configured in XML configuration file.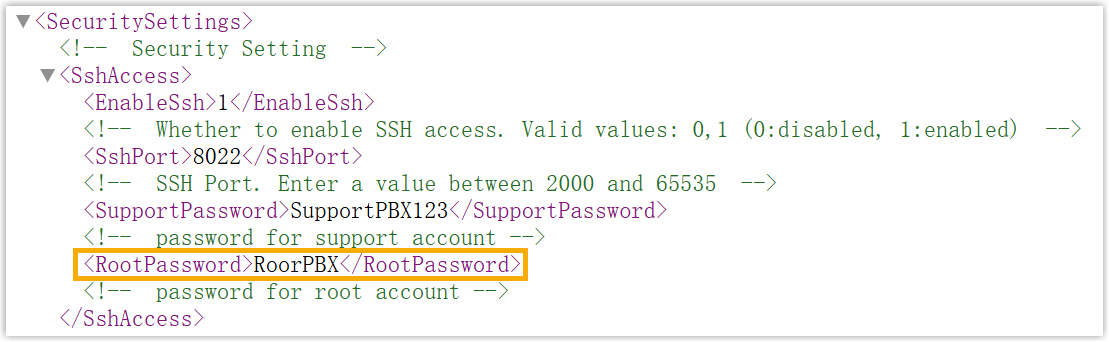
- Support Account: Username is
support, and password is the credential configured in PBX web portal (Path: ) or in XML configuration file.Figure 1. Support password in PBX web portal 
Figure 2. Support password in XML configuration file