Preparation: Write Yeastar P-Series Image to a USB Drive
If you choose to install Yeastar P-Series Software Edition on an on-premise server, you need to write P-Series image to a USB drive in advance. This topic describes how to write P-Series image to a USB drive via Rufus software.
Prerequisites
Download an image file of Yeastar P-Series Software Edition.
| Item | Automatic Installation | Manual Installation | |
|---|---|---|---|
| Image file | Yeastar_P-Series_Software_Edition_ISO_Auto.iso | Yeastar_P-Series_Software_Edition_ISO_Manual_Ubuntu.iso | |
| Boot Mode | BIOS | UEFI / BIOS | |
| Hard Disk | Size | Minimum 1 TB | Minimum 1 TB |
| Partition Method | Automatic | Manual | |
| Partition Rule |
The system automatically partitions a hard disk as follows:
|
You need to manually create the following required
partitions, and then you can create others according to your
needs.
|
|
Procedure
- Format your USB drive with FAT32.
- Open the P-Series image file via Rufus.

- In the Device drop-down list, select your USB drive.
- In the Boot selection section, click SELECT to select the P-Series image.
- Write P-Series image to the USB drive.
- Click START.

- In the pop-up window, click OK.

- Click START.
Result
If the status shows "READY", it indicates that the process of writing image is completed.

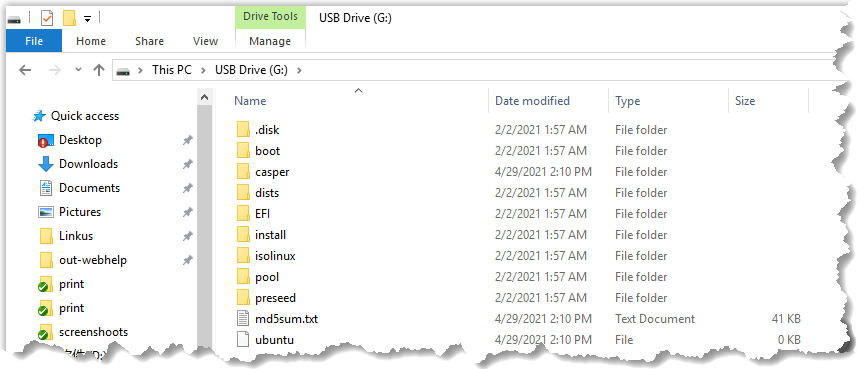
You can check the following files in your USB drive.
What to do next
| Image Type | Supported Boot Mode |
|---|---|
| Automatic Installation | BIOS mode. For more information, see Install Yeastar P-Series Software Edition on Dell Server - BIOS Mode. |
| Manual Installation |
|