Install Yeastar P-Series Software Edition on Microsoft Azure
You can install Yeastar P-Series Software Edition on Microsoft Azure directly from Azure Marketplace, enabling quick deployment of Yeastar PBX without manual configuration of the deployment environment.
Video Tutorial
Procedure
- Access Yeastar P-Series Phone System from Azure
Marketplace.
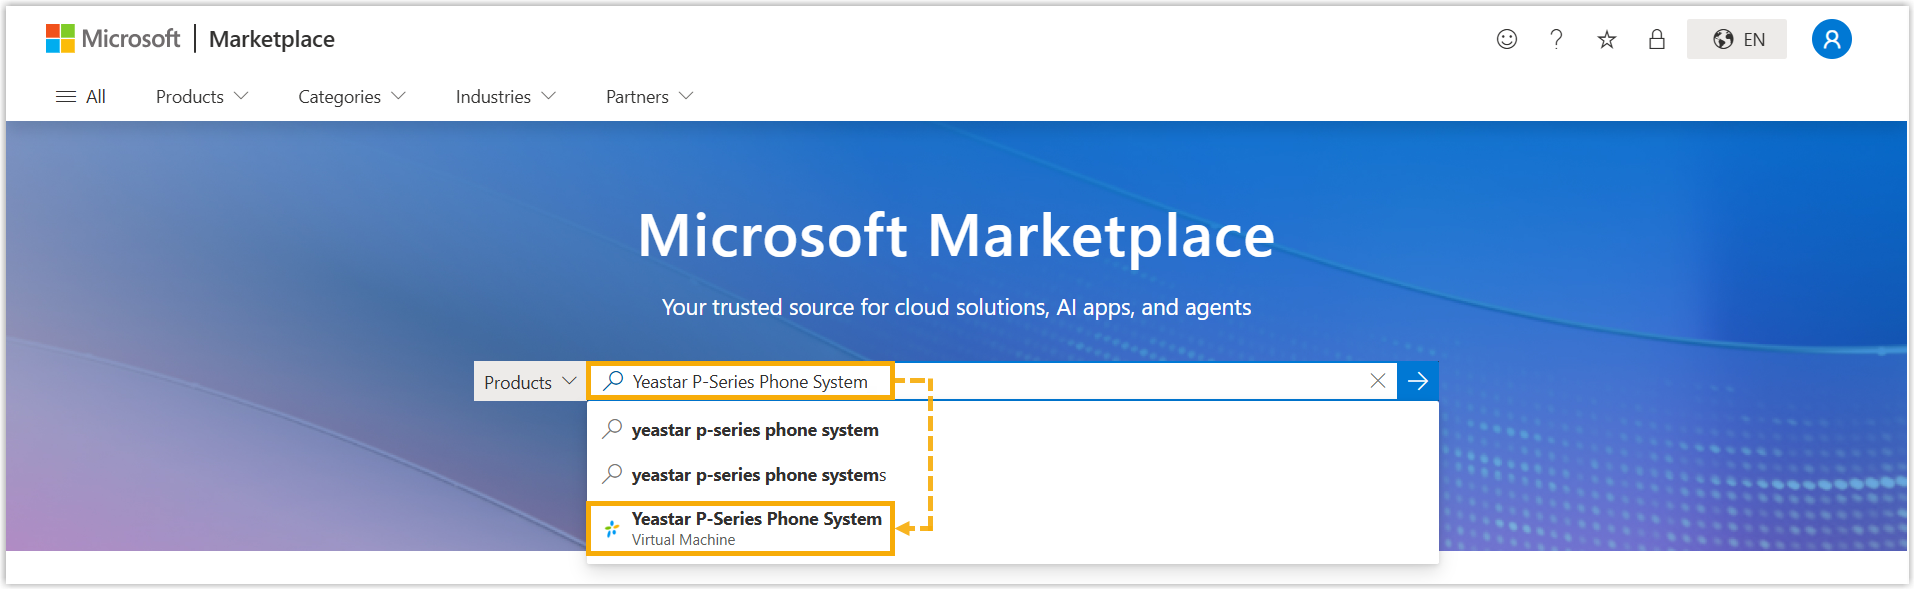
- Log in to Azure Marketplace, search
for Yeastar P-Series Phone System and select
it from search results.
- Click Get It Now.
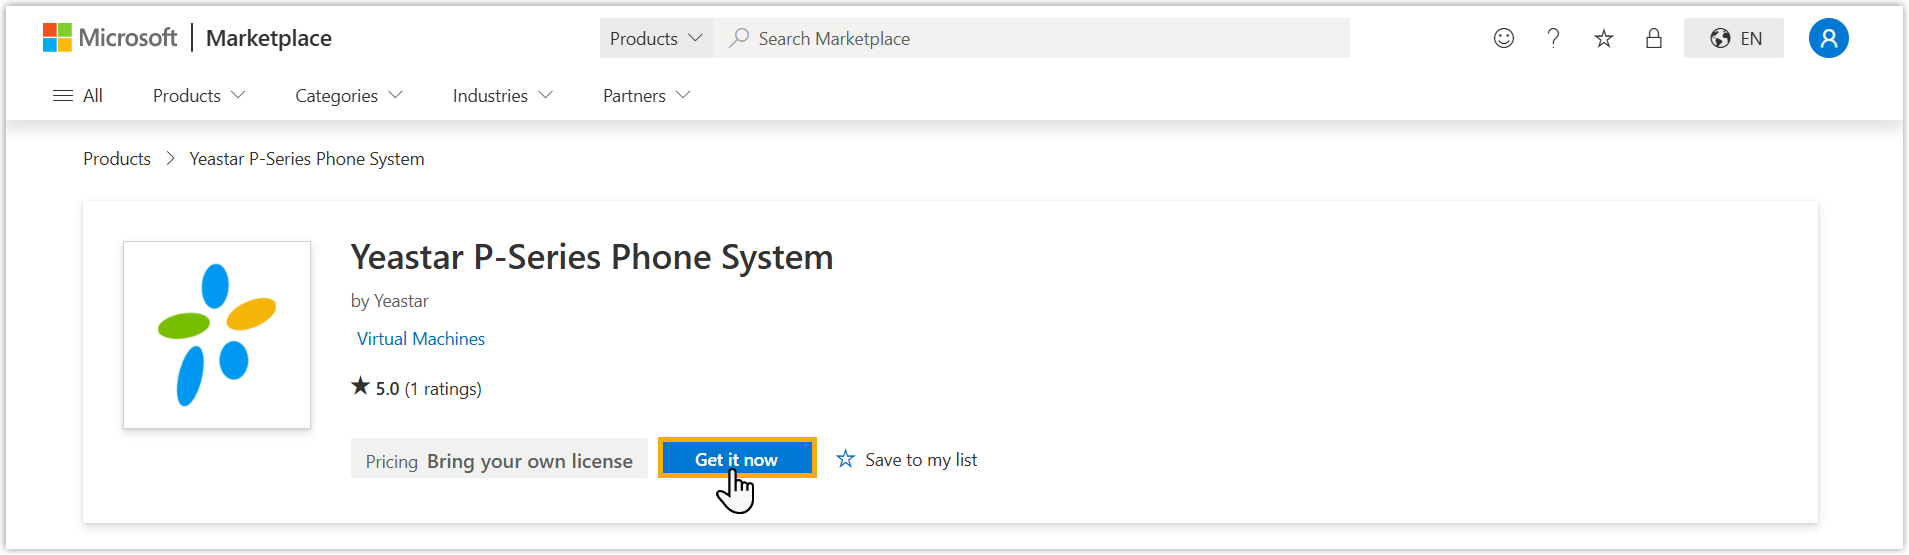
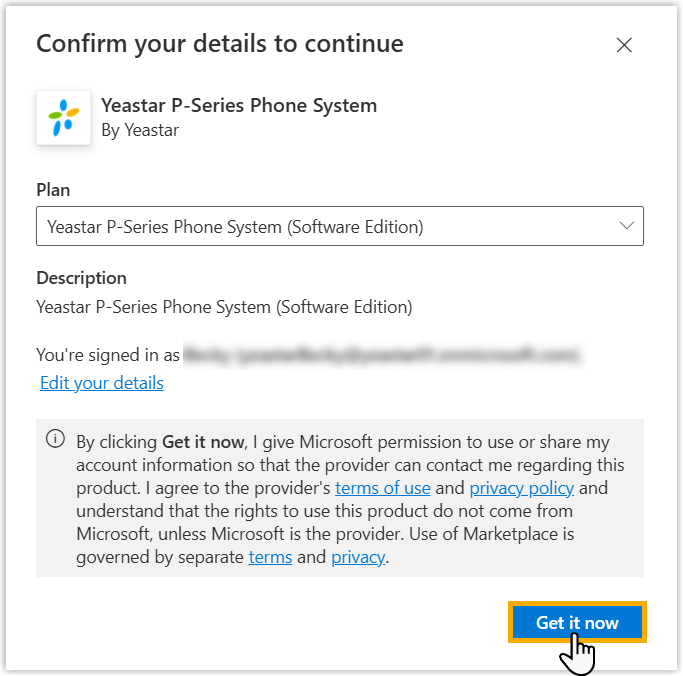
- Click Get it now.
- In the Plan drop-down list, select
Yeastar P-Series Phone System (Software
Edition).
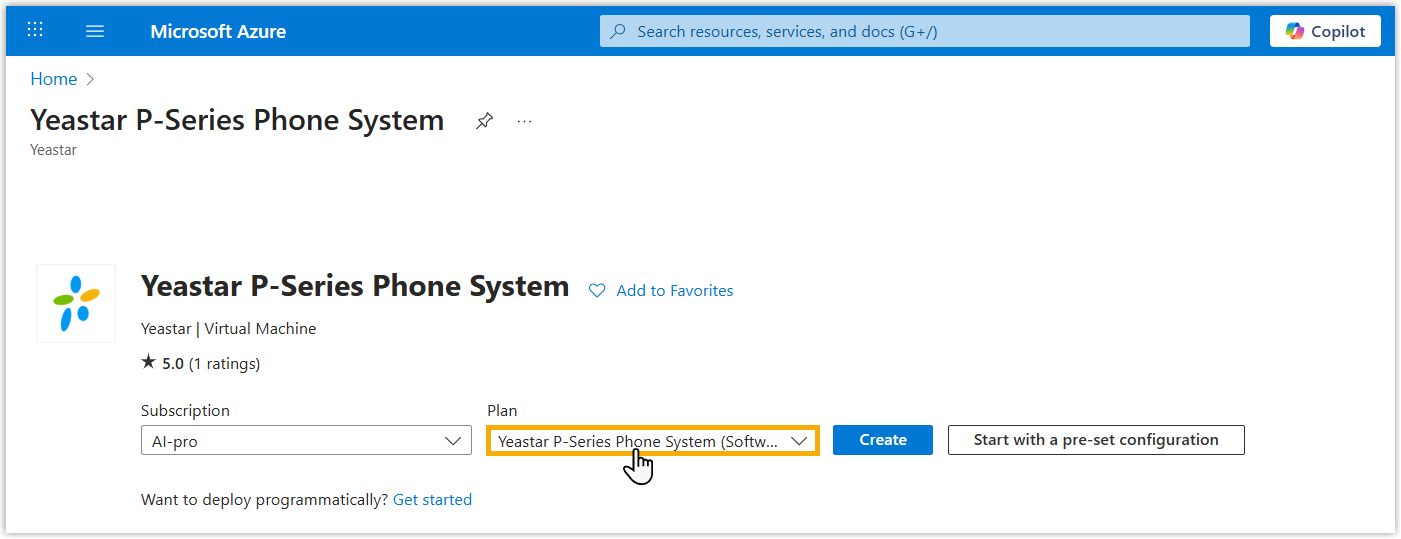
- Click Create to create a virtual machine
instance for installing Yeastar P-Series
Software Edition.
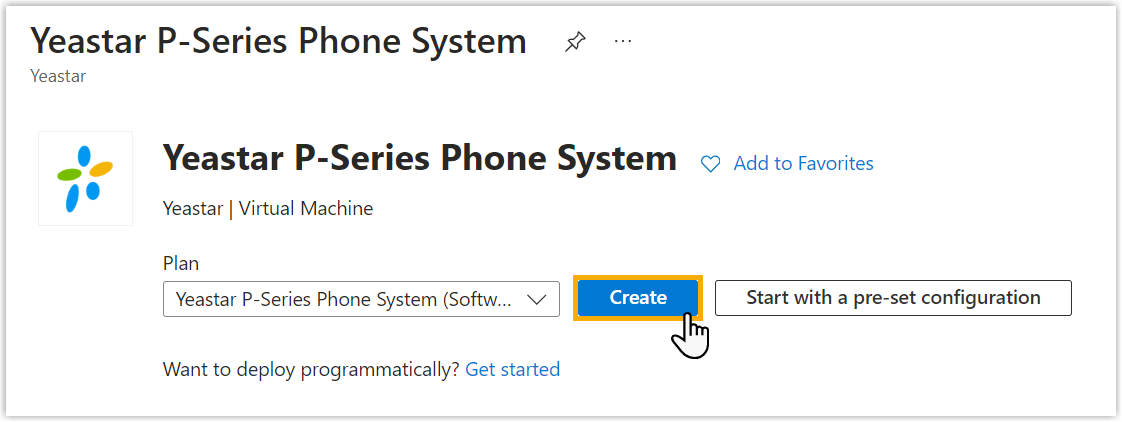
You will be redirected to the Create a virtual machine page.
- Log in to Azure Marketplace, search
for Yeastar P-Series Phone System and select
it from search results.
- In the Basics tab, configure the following
settings.
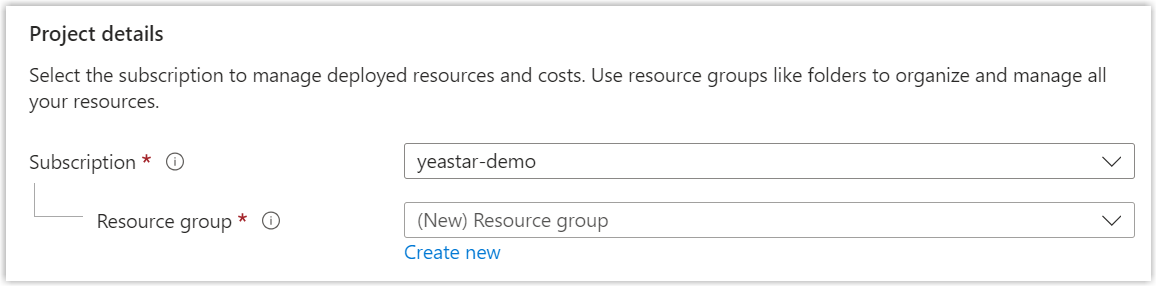
- In the Project details section, select the
desired subscription and resource group.
- In the Instance details section, configure
the instance's basic information, image, and size.
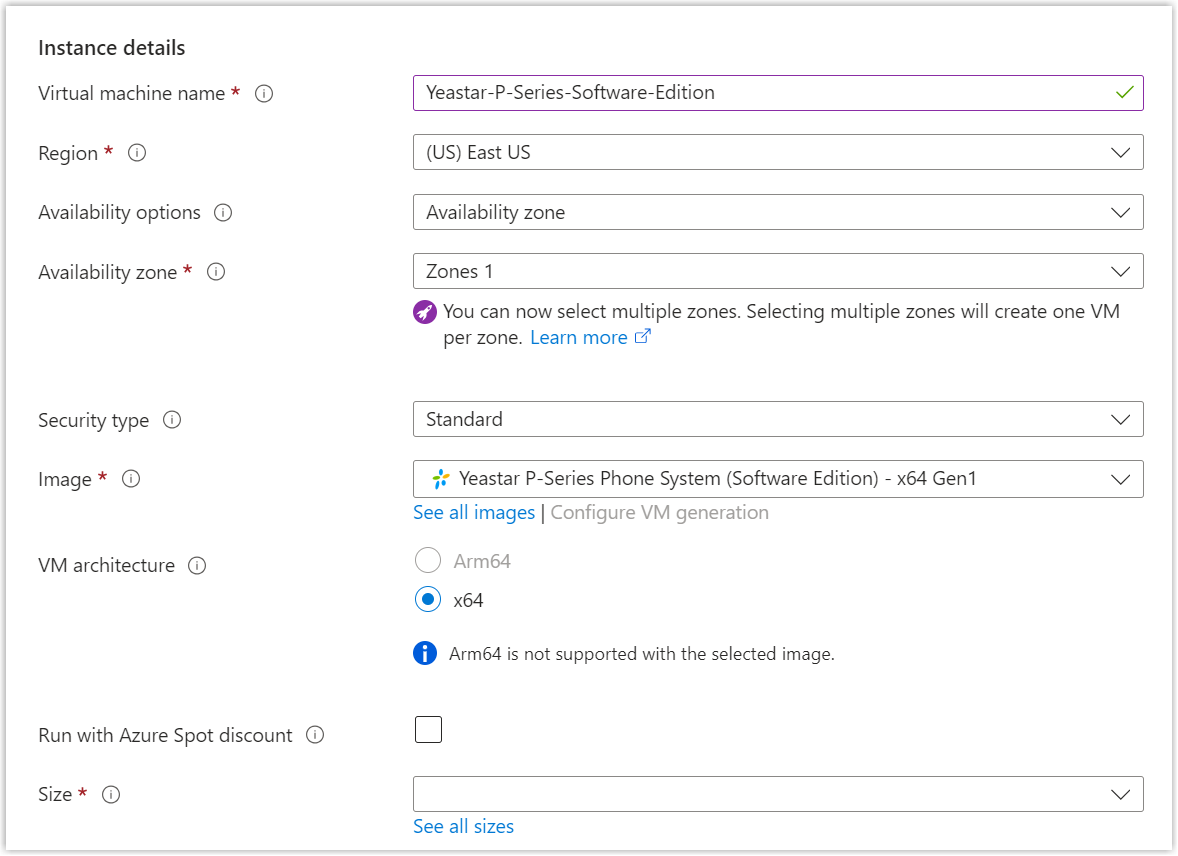
- Virtual machine name: Specify a name
to help you identify this instance.
In this example, enter Yeastar-P-Series-Software-Edition.
- Region: Select a region closest to you.
- Availability options: Select an availability option for this instance and complete the corresponding configuration.
- Security type: Select a security type according to your needs.
- Image: Retain the value of Yeastar P-Series Phone System (Software Edition) -x64 Gen1.
- VM architecture: Retain the value of x64.
- Run with Azure Spot discount: Do NOT select this option.
- Size: Select the server size based on
the Extensions (EXT) and Concurrent Calls (CC)
of your PBX system.
1-50 EXT (1-13 CC)
51-250 EXT (14-63 CC)
251-500 EXT (64-125 CC)
501-1000 EXT (126-250 CC)
EXT > 1000 (CC > 250)
Recommended Server Size B2s B2s D4 v3 D8 v3 Contact Yeastar
- Virtual machine name: Specify a name
to help you identify this instance.
- In the Administrator account section, select
the authentication type and complete the corresponding
configuration.
In this topic, we take Password as an example.

- At the bottom of the page, click Next: Disks .
- In the Project details section, select the
desired subscription and resource group.
- In the Disks tab, configure the storage for the
virtual machine instance.
- In the OS disk section, select the disk size
and disk type.
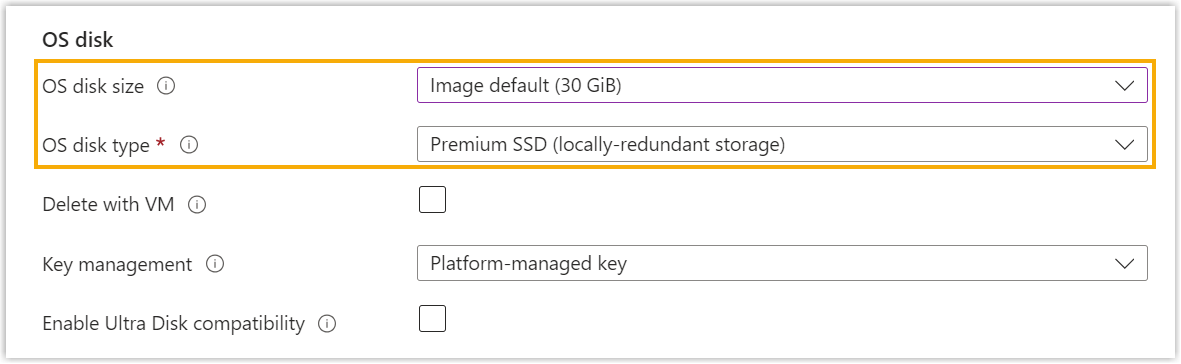
- OS disk size: Select the storage
capacity based on the Extensions (EXT) and
Concurrent Calls (CC) of your PBX system.
1-50 EXT (1-13 CC)
51-250 EXT (14-63 CC)
251-500 EXT (64-125 CC)
501-1000 EXT (126-250 CC)
EXT > 1000 (CC > 250)
Storage Call Recording Disabled 40 GB or higher
50 GB or higher
100 GB or higher
200 GB or higher
Contact Yeastar Call Recording Enabled 1 GB of storage holds approximately 1000 minutes of recorded calls. You can set up the storage based on your recording usage.
- OS disk type: Select the system disk type.
- OS disk size: Select the storage
capacity based on the Extensions (EXT) and
Concurrent Calls (CC) of your PBX system.
- Leave other settings as default or configure them according to your needs.
- In the OS disk section, select the disk size
and disk type.
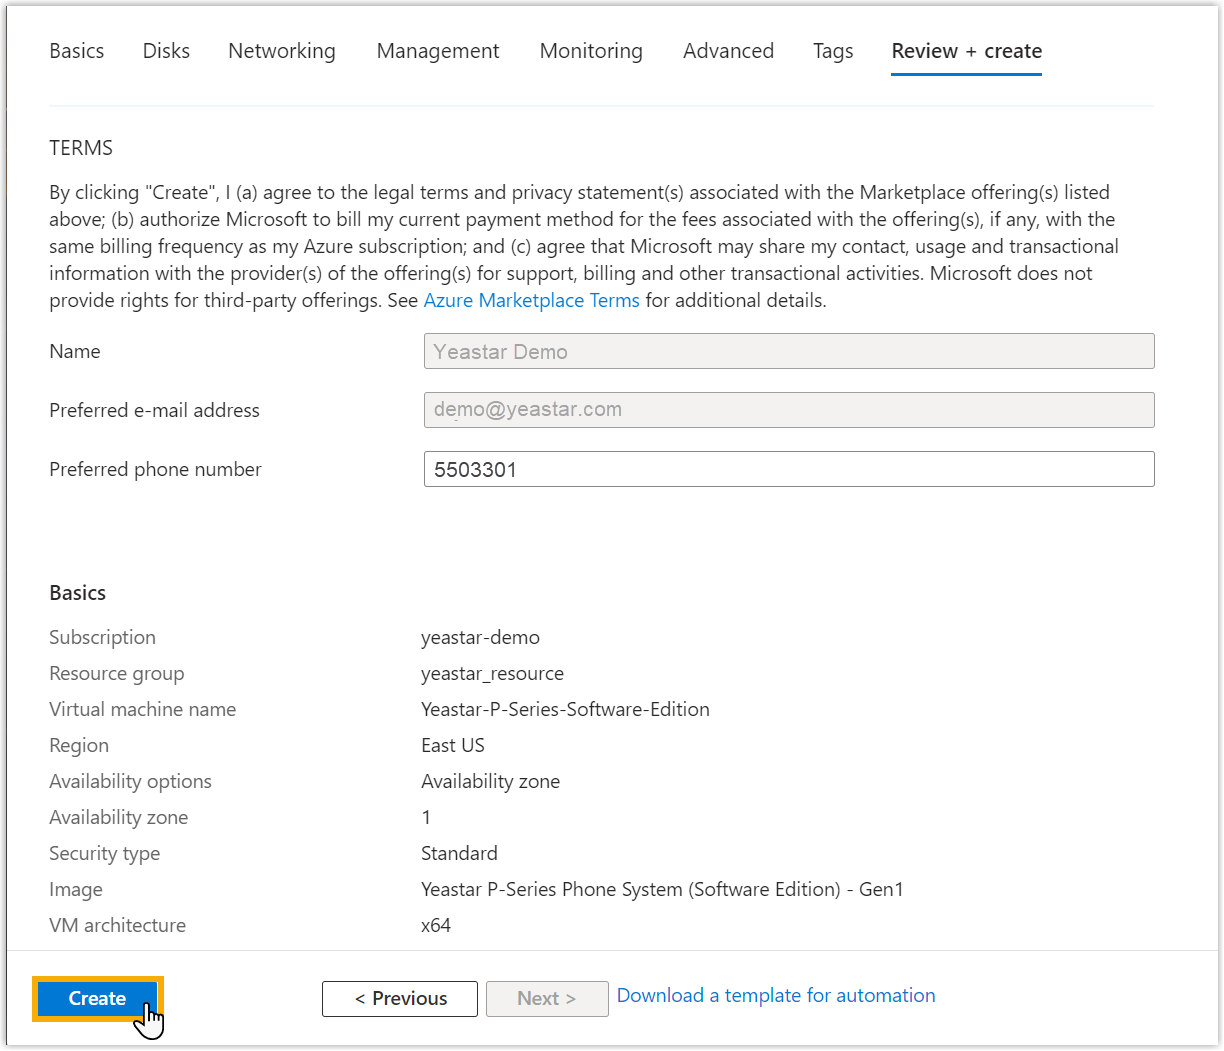
- Optional: Review each tab for other custom configurations.
- At the bottom-left corner, click Review + create.
- Review and confirm the instance details, then click
Create at the bottom-left corner.
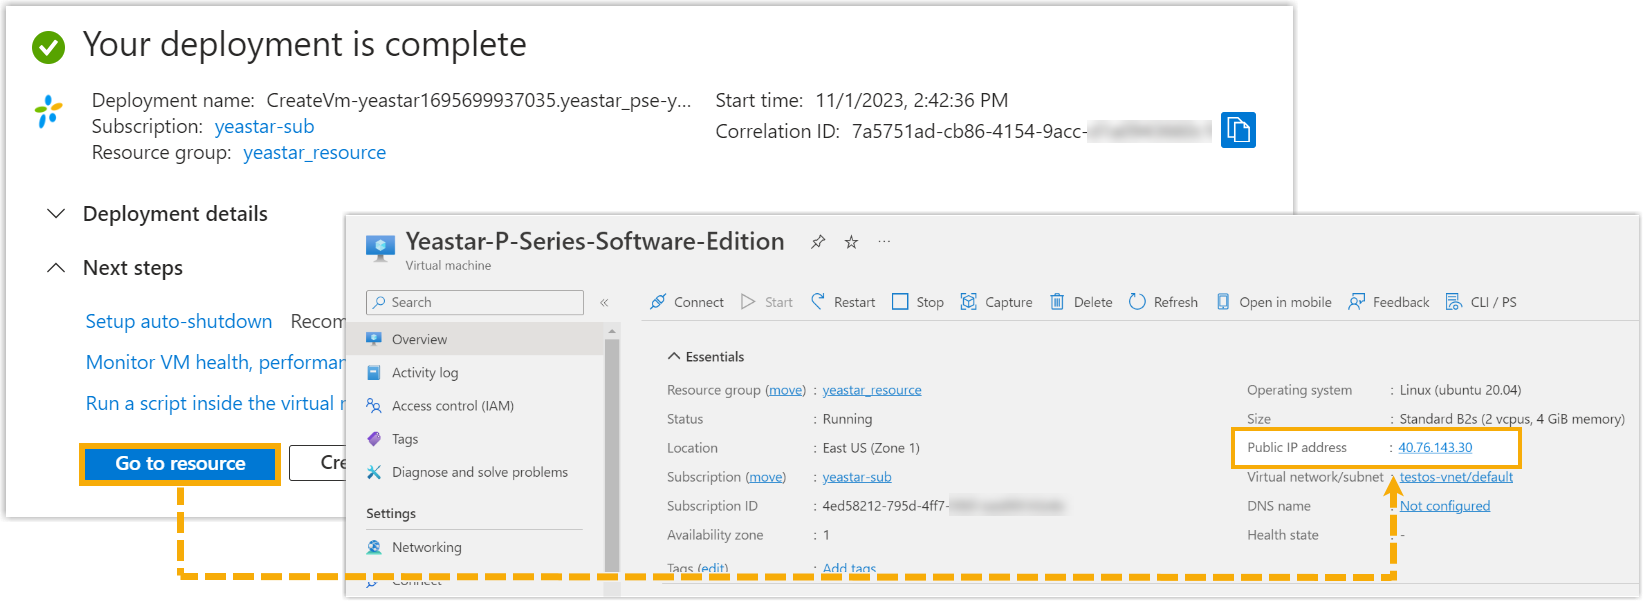
Result
You will be redirected to the instance deployment page. When the page displays Your deployment is complete, it indicates that the virtual machine instance is successfully deployed with Yeastar P-Series Software Edition installed.

What to do next
- Access the PBX web portal by entering the public IP address of Yeastar P-Series Software Editionand port 8088 in
a web browser.Note: You can obtain the PBX's public IP address on of Microsoft Azure.
- Activate and Initially Set up Yeastar P-Series Software Edition.
- Configure Public IP and Ports on the PBX.
-
To register extensions remotely, you need to perform one of the following operations:
- Enable remote registration for extensions (Path: ).
- Enable Fully Qualified Domain Name (FQDN) for the PBX and allow extensions to use FQDN for remote registration.
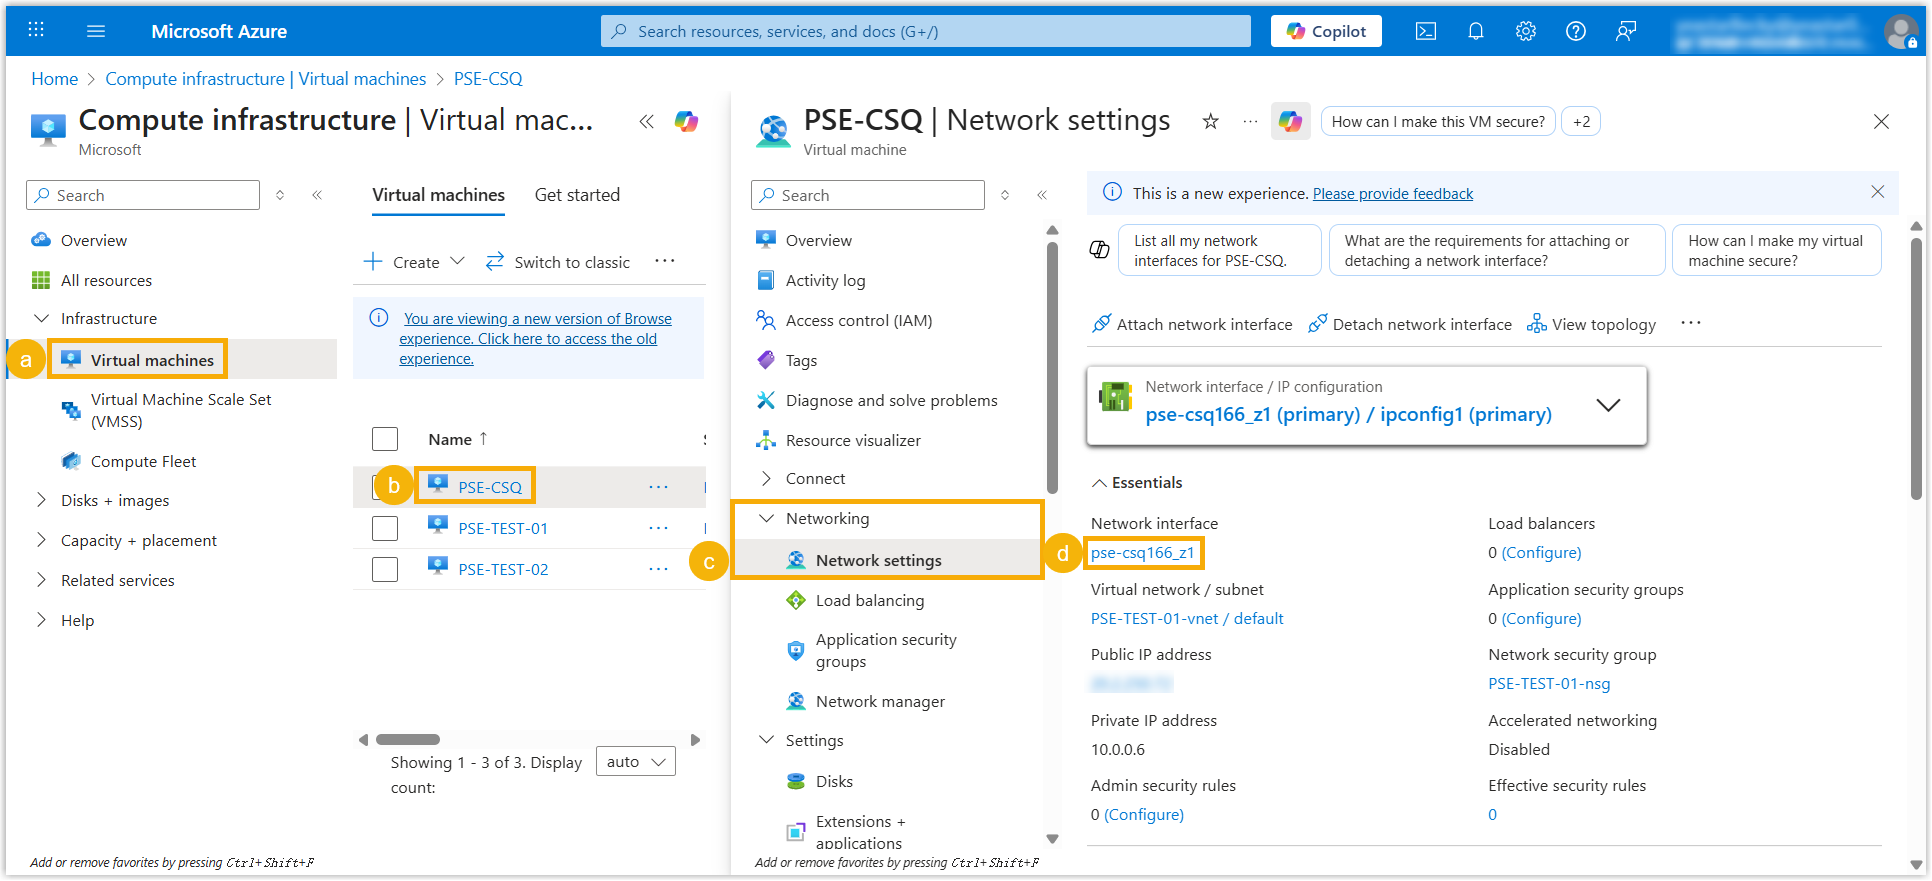
- In case PBX unexpectedly loses connection to SMTP Server or
Activation Server, you can add DNS servers to resolve this
issue.
- Locate and select the network interface of the created virtual
machine (Path: ).
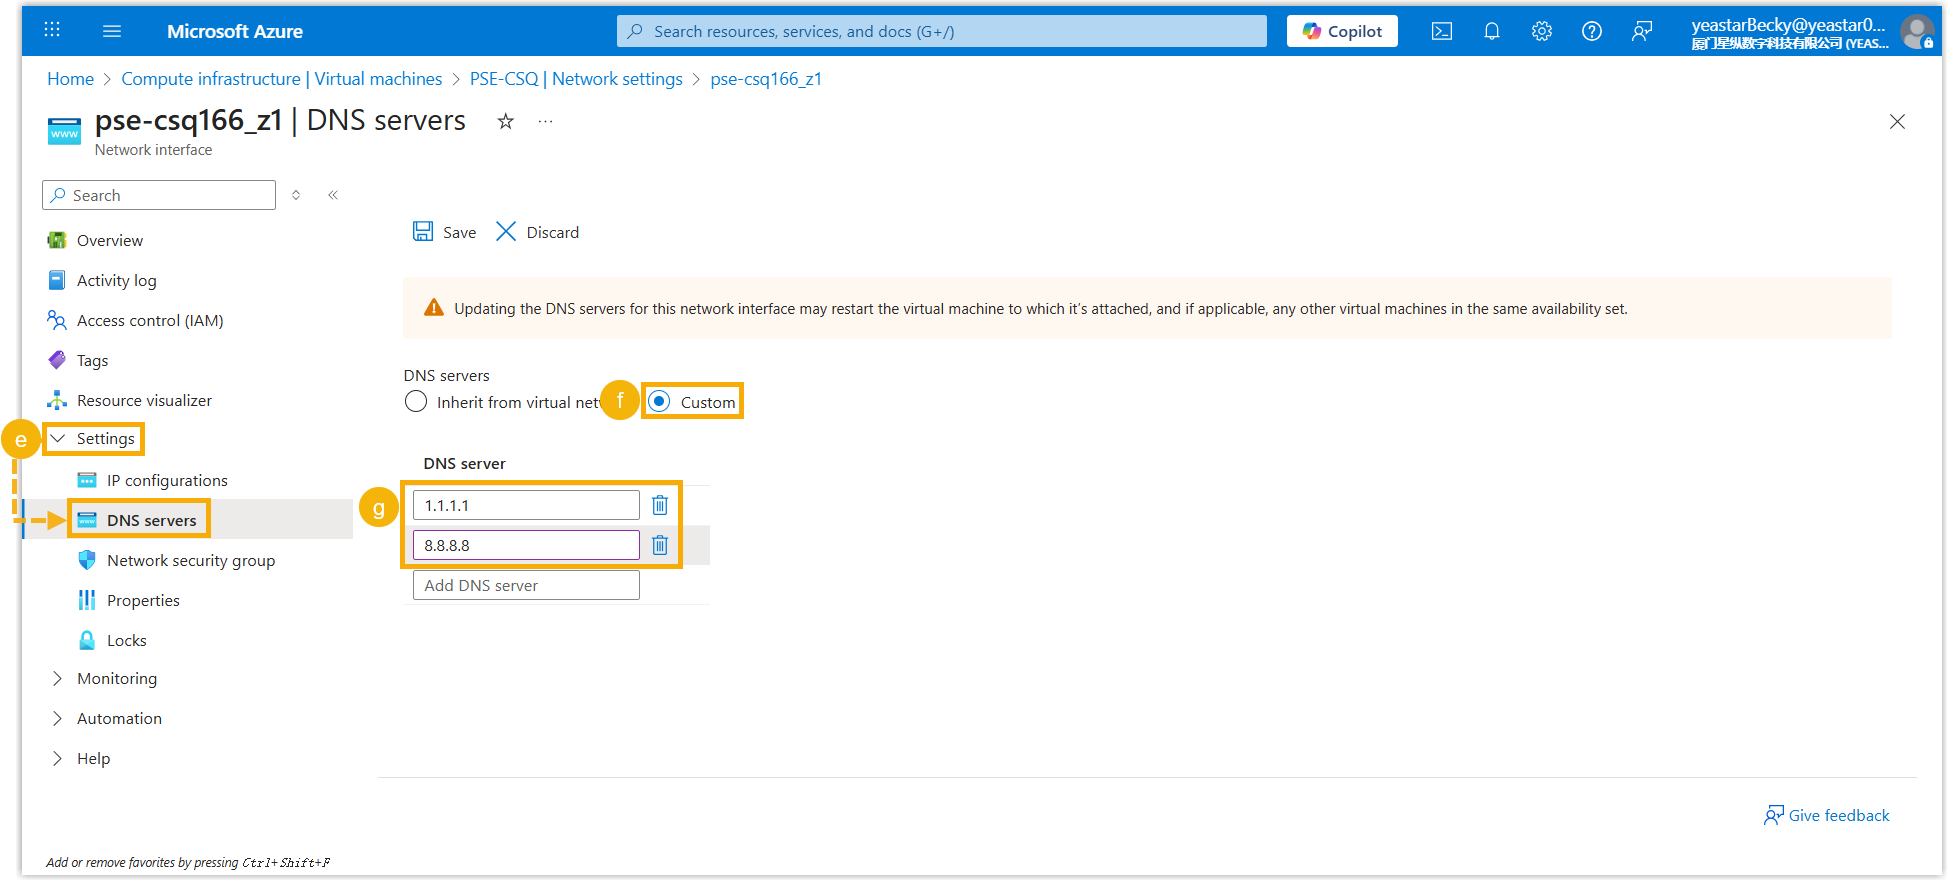
- Add DNS servers 1.1.1.1 and 8.8.8.8 (Path: ).
- Locate and select the network interface of the created virtual
machine (Path: ).
- With Yeastar P-Series Software Edition activated, next time you want to access the
PBX via SSH, you can use the username
supportand the console password configured on PBX web portal (Path: ).