Install Yeastar P-Series Software Edition on Vultr
You can install Yeastar P-Series Software Edition on your Vultr server directly from Vultr Marketplace, enabling quick deployment of Yeastar PBX without manual configuration of the deployment environment.
Video Tutorial
Procedure
- Access 'Yeastar P-Series Phone System' on Vultr
Marketplace, then click Deploy.
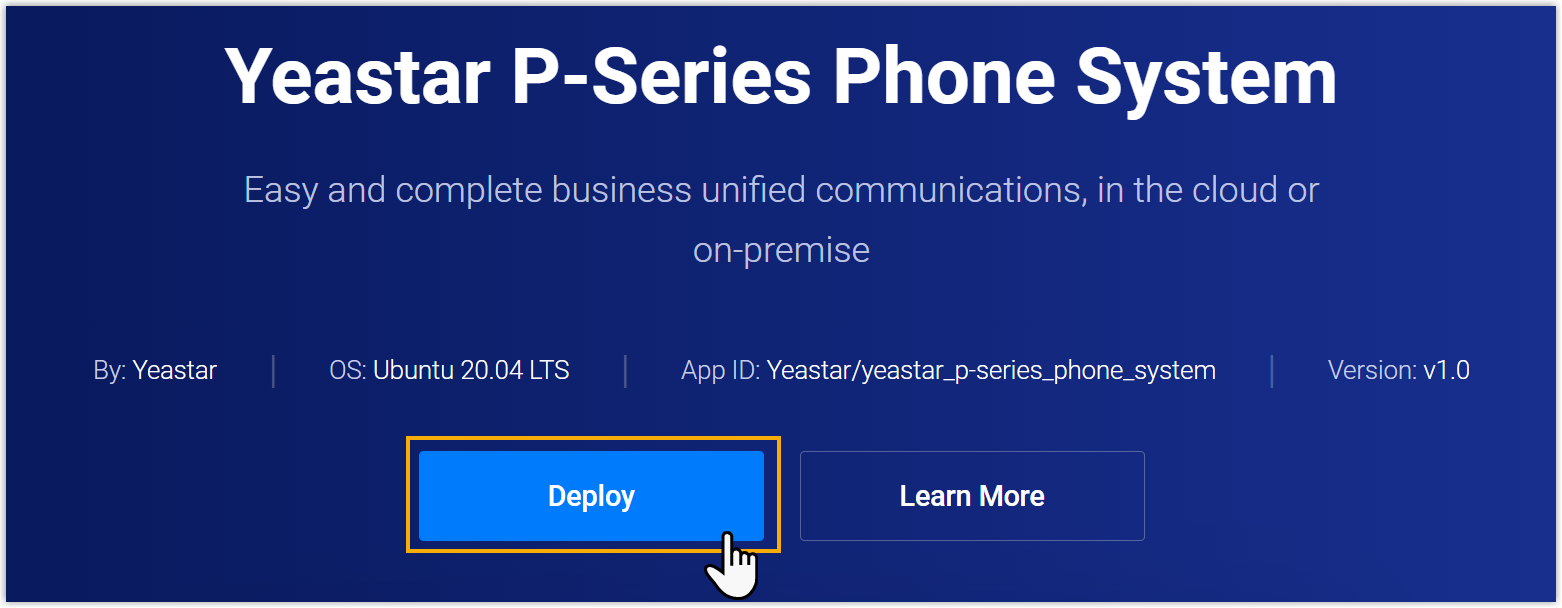
You will be redirected to the server deployment page.
- On the Step 1: Select Location & Plan page,
configure the server type, location, and size.
- In the Choose Type section, select one of the
two server types to install Yeastar P-Series Software Edition.
Server Description 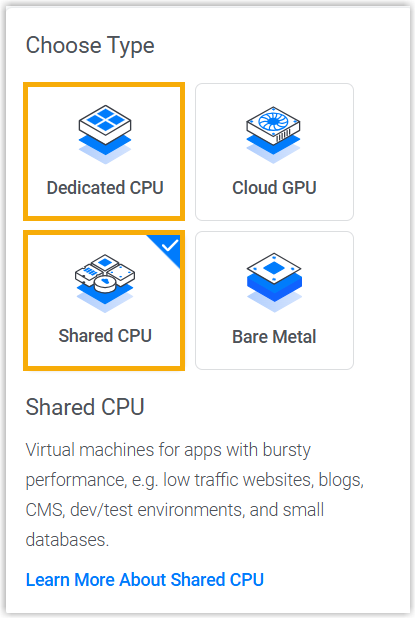
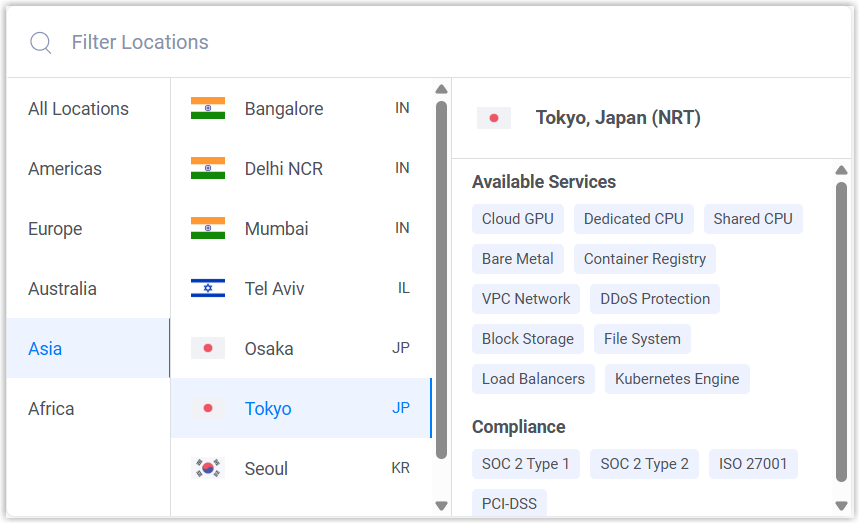
Dedicated CPU A server with dedicated vCPU that offers stable performance but at a higher cost. Shared CPU A server with shared vCPU that is more cost-effective, but may experience performance fluctuations due to shared resources. - In the Filter Locations section, select a
server location closest to you.
- In the Filter Plans section, select server
type and size.
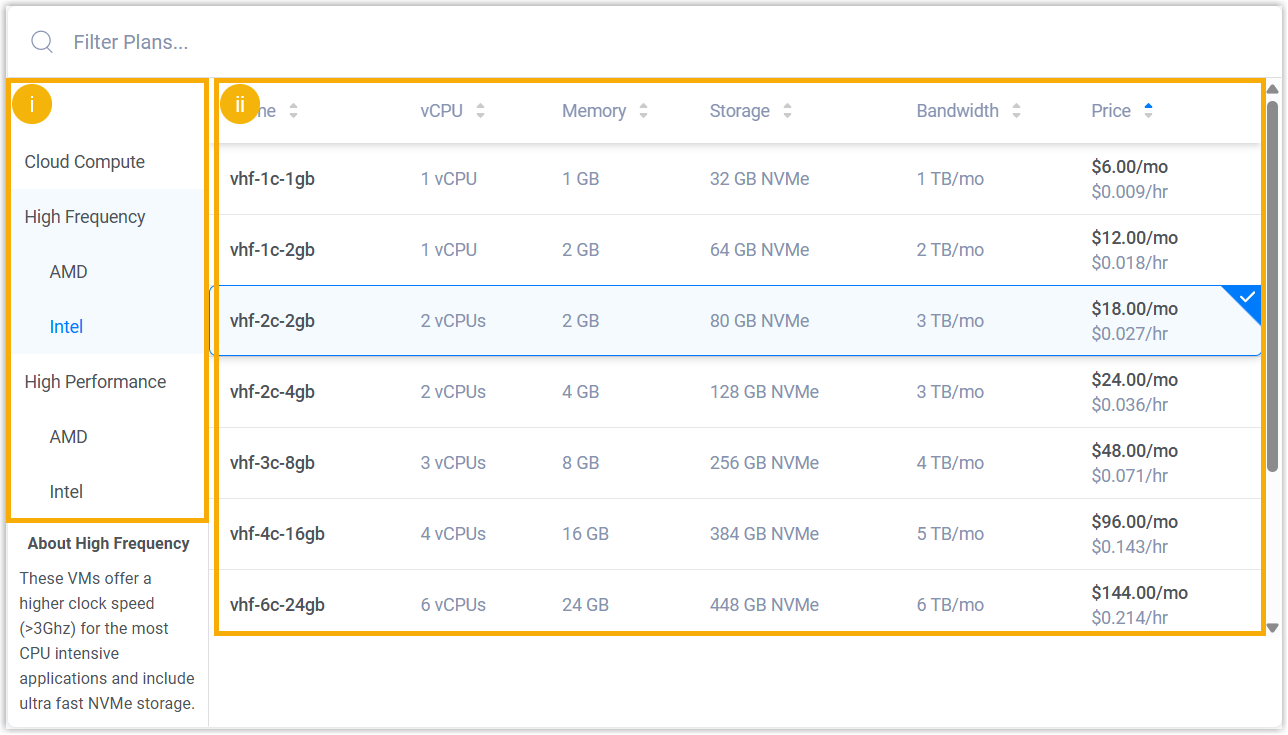
- On the left navigation bar, select a server type.Note: We recommend General Purpose for Dedicated CPU, and Intel for Shared CPU. You can choose a different server type as needed.
- On the right pane, select server size based on the
Extensions (EXT) and Concurrent Calls (CC)
of your PBX system.
1-20 EXT (1-5 CC)
21-50 EXT (6-13 CC)
51-250 EXT (14-63 CC)
251-500 EXT (64-125 CC)
501-1000 EXT (126-250 CC)
EXT > 1000 (CC > 250)
vCPU 2 2 4 6 8 Contact Yeastar Memory 2 GB 4 GB 4 GB 8 GB 16 GB Storage Call Recording Disabled 40 GB or higher
40 GB or higher
50 GB or higher
100 GB or higher
200 GB or higher
Call Recording Enabled 1 GB of storage holds approximately 1000 minutes of recorded calls. You can set up the storage based on your recording usage.
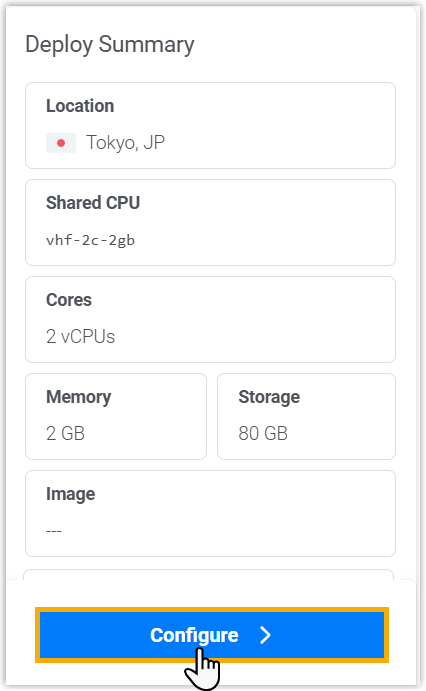
- On the left navigation bar, select a server type.
- At the bottom-right corner, click
Configure.
- In the Choose Type section, select one of the
two server types to install Yeastar P-Series Software Edition.
- On the Step 2: Configure Software & Deploy
Instance page, select the image and configure the server
hostname.
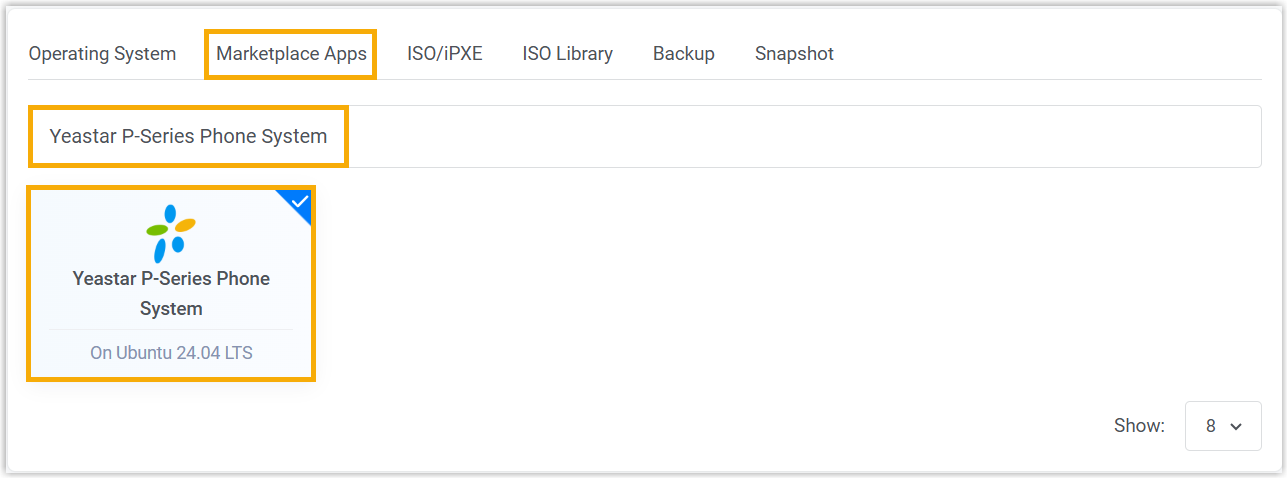
- Under Marketplace Apps tab, search and select
Yeastar P-Series Phone System.
- In the Server 1 Hostname field, enter a name
to help you identify the server.

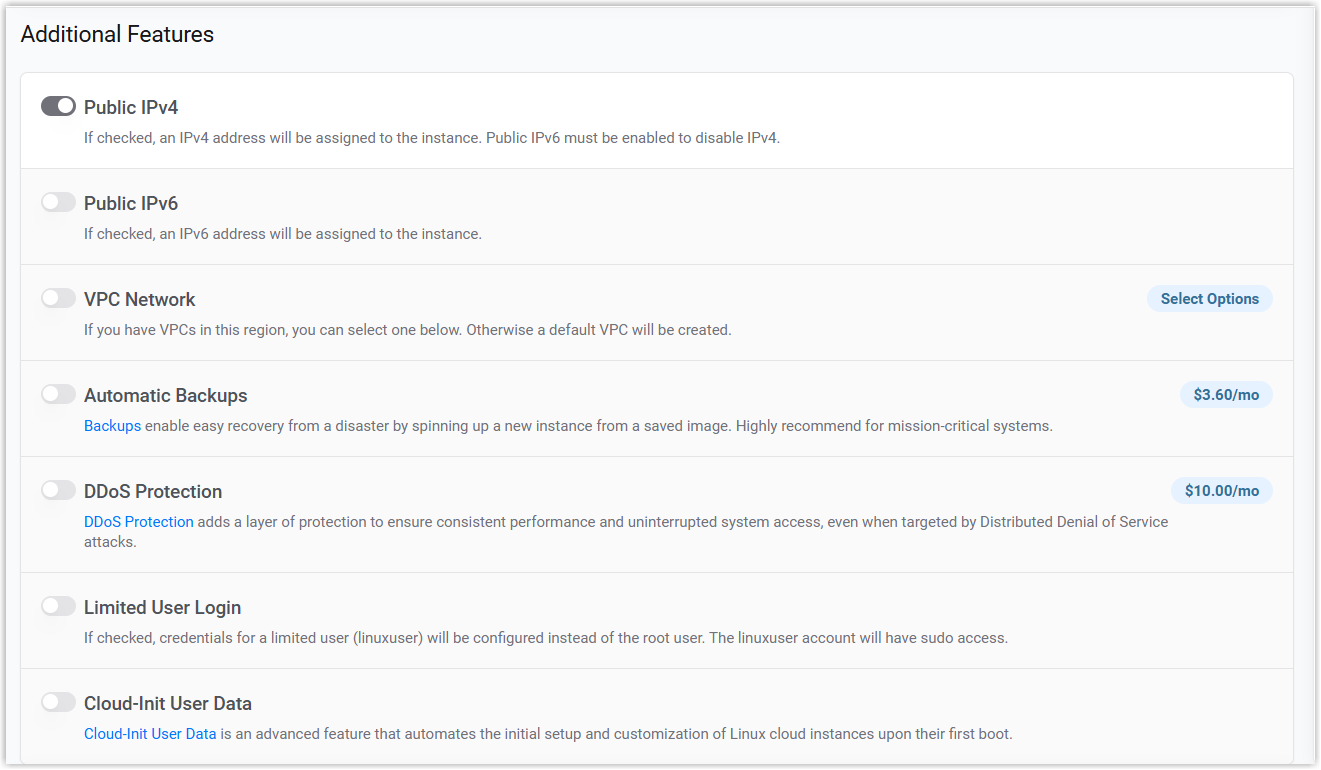
- Optional: Set up additional features according to your
needs.
- Under Marketplace Apps tab, search and select
Yeastar P-Series Phone System.
- At the bottom-right corner, click Deploy.
It takes a few minutes to install Yeastar P-Series Software Edition.
Result
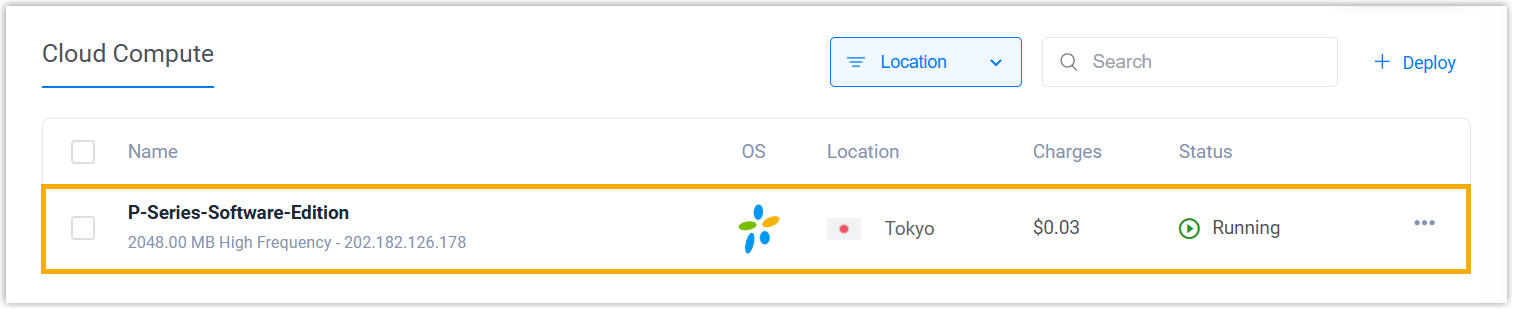
The server status shows Running, indicating that the Vultr server is successfully deployed with Yeastar P-Series Software Edition installed.
Enter.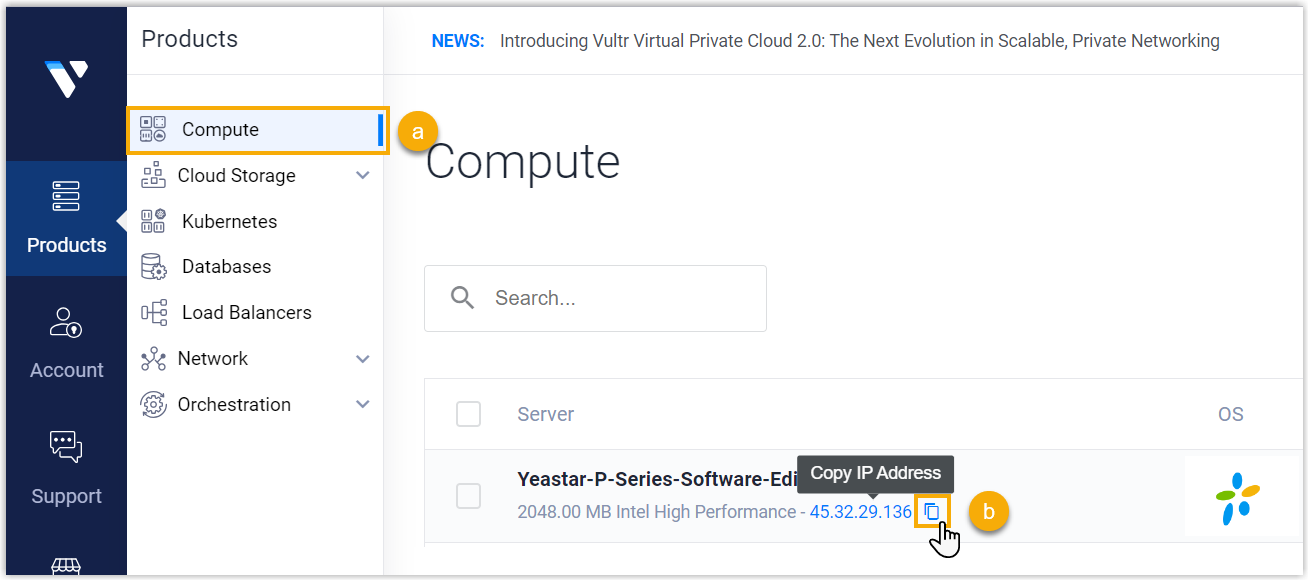
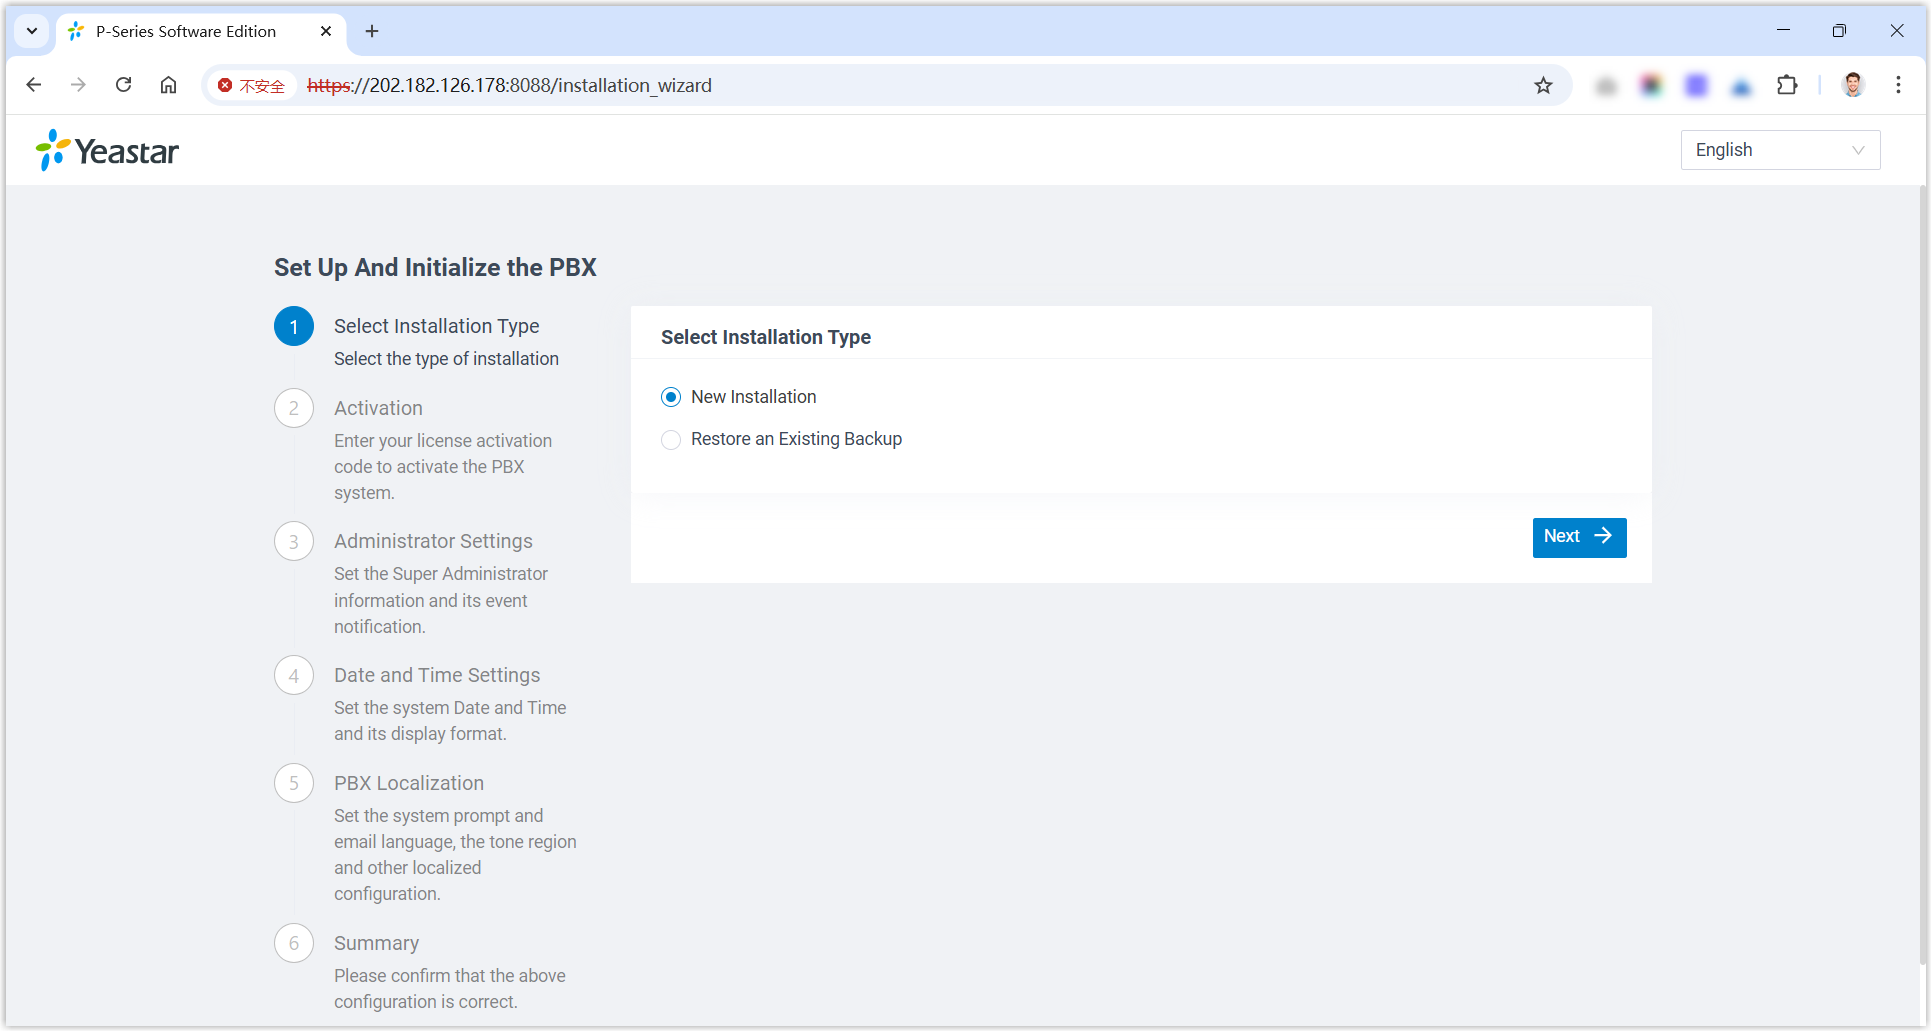
You will access the PBX web portal and enter the installation wizard of Yeastar P-Series Software Edition.
What to do next
-
Activate and set up Yeastar P-Series Software Edition to make it ready for use. You can do this using one of the following methods:
- Complete setup via Web GUI using the installation wizard
- Continue with the installation wizard in the Web GUI. This method only supports to complete the settings included in the wizard.
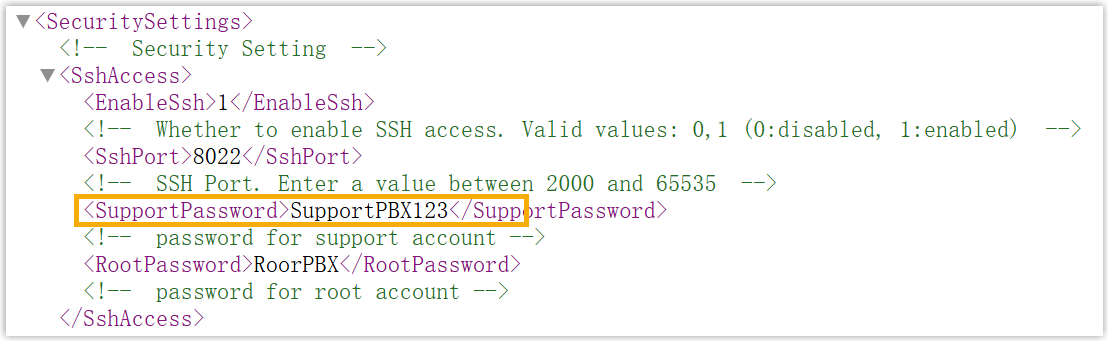
- Complete setup via SSH using a prepared XML file
-
Upload a prepared XML file to the PBX via SSH. This method allows you to complete the initial setup and apply additional supported PBX settings, such as creating extensions, trunks, inbound routes, and more.
- Download the XML configuration file and edit it as needed.
- Upload the XML configuration file to the designated directory and reboot the PBX to take effect.
For more information, see Activate and Set up Yeastar P-Series Software Edition Using XML Configuration File.
- To ensure remote extensions can register and function properly, and users
can access the PBX via the public URL provided in the system email, you need
to perform one of the following actions:
- Enable Fully Qualified Domain Name (FQDN) for the PBX and allow extensions to use FQDN for remote registration.
- Configure Public IP and Ports on the PBX and enable remote registration for extensions (Path: ).
- Root Account: Username is
root, and password is the credential configured in XML configuration file.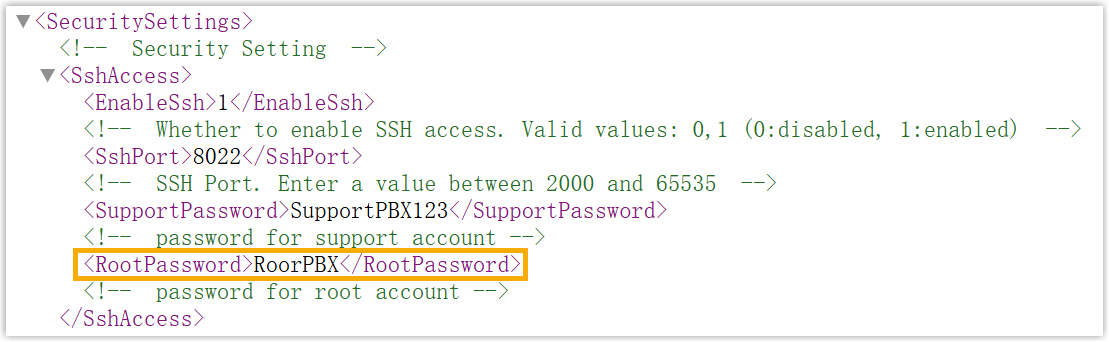
- Support Account: Username is
support, and password is the credential configured in PBX web portal (Path: ) or in XML configuration file.Figure 1. Support password in PBX web portal 
Figure 2. Support password in XML configuration file