Create an Agentless Campaign
Agentless campaign relies on IVR systems or voice prompts, and does not require direct agent involvement. It is commonly used for payment reminders, event notifications, surveys, and simple confirmations. This topic describes how to create an agentless campaign.
Requirements
- The firmware of Yeastar P-Series Software Edition is 83.18.0.59 or later.
- Ensure that your PBX system meets the following requirements to guarantee
uninterrupted call activities. Note: If necessary, expand server resources and contact your service provider for license update.
Item Description Concurrent call capacity The system supports sufficient concurrent calls for the following call activities: - Basic communication: Handles daily inbound calls, outbound calls, and internal calls.
- Outbound Call Center: Exclusively handles outbound calls in campaigns.
Note: It is recommended to reserve 50% of the total concurrent call capacity for daily operations. For the Outbound Call Center, you can adjust the ratio and allocate concurrent call capacity when creating outbound campaigns based on your needs and call volume.Server resource The server resource can support the required volume of concurrent calls. Note: For detailed information about the server requirement based on concurrent call capacity, see System and Server Requirements.Software licensing The license includes a subscription to the Outbound Call Center add-on service.Note: Yeastar provides a 30-day free trial for the service (Path: ), which includes 5 concurrent calls. You can try out the service before subscribing.
Limitations
The limitations of outbound campaigns vary depending on the system's capacity, as shown below:
| Maximum number of Extensions (N) | N ≤ 500 | N > 500 |
|---|---|---|
| Numbers of outbound campaigns | 32 | 128 |
| Numbers of DOD in each campaign | 10 | 10 |
| Maximum number of Concurrent Calls (CC) | CC ≤100 | CC > 100 |
|---|---|---|
| Numbers of contacts in each campaign | 10,000 | 20,000 |
Prerequisites
Before you begin, check if the following resources are ready for a campaign.
| Item | Description |
|---|---|
| IVR | If you want the contacts to be connected to and interact an
IVR system after answering the call, set up an IVR and customize
the desired IVR menu (Path: ). For more information, see Set up an IVR. |
| Prompts | If you want the system to play a voice prompt to the contacts
to deliver the necessary information, prepare a custom prompt
(Path: ). For more information, see Record a Custom Prompt or Upload a Custom Prompt. |
| Contact List | Prepare a list of contact with information such as contact
name and number for the campaign to dial. You can associate a contact list with a campaign in the following methods:
|
| Trunk | Set the trunk through which the campaign calls will be sent
(Path: ). For more information, see Trunk Overview. |
| Outbound Route | Configure an outbound route that determines how campaign
calls are handled and routed based on a set of rules (Path: ). For more information, see Set up an Outbound Route. |
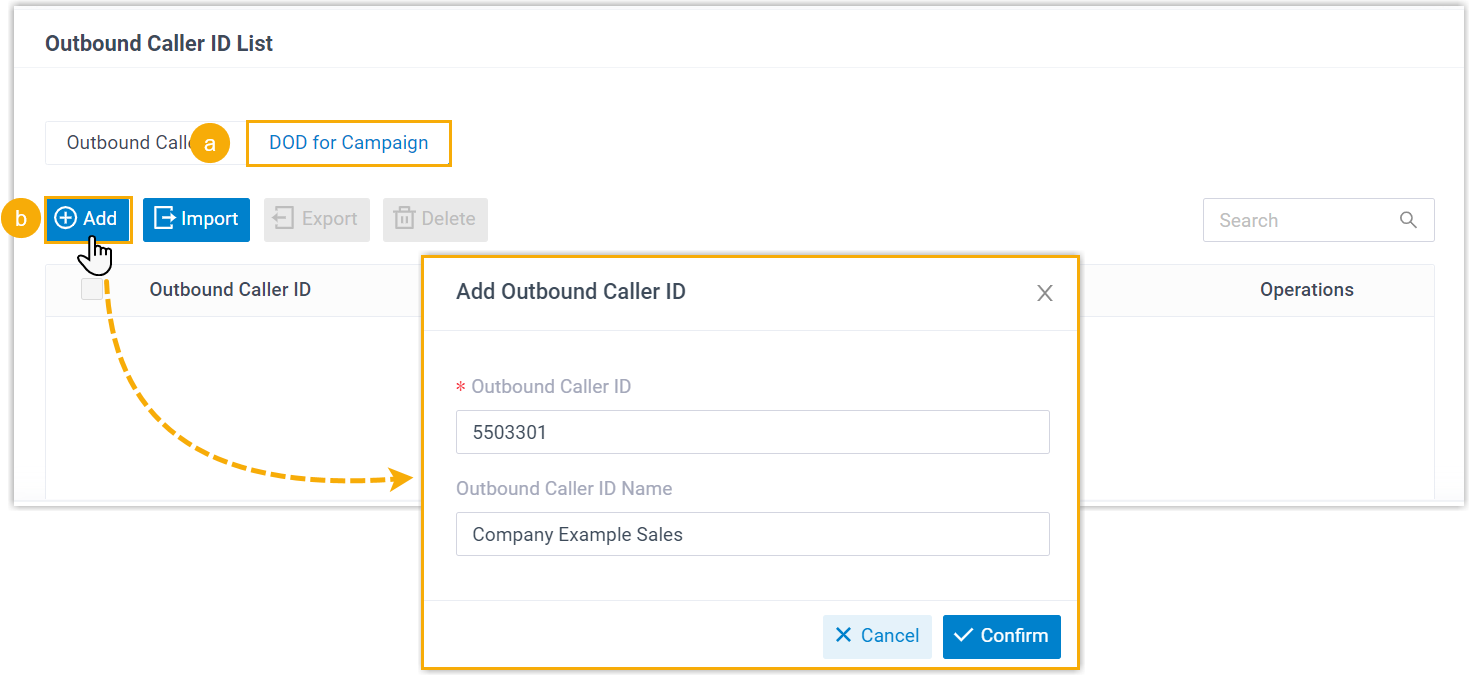
| Outbound Caller ID | Optional. Customize outbound caller ID (DOD) for local
presence on the trunk through which the campaign calls are sent
out (Path: ).
|
Procedure
- Log in to PBX web portal, go to , click Add.
- In the Basic tab, do as follows:
- In the Basic section, enter a name in the Campaign Name field to help you identify the campaign.
- In the Dialing Hours section,
set time schedule for the campaign.
- Campaign Start Time &
Campaign End Time: Set the
start and end time for the campaign.Note: Time options are displayed in your computer's time zone, which may differ from the time zone of the PBX system.
- Dialing Hours: Specify the
business hours when the campaign can initiate outbound calls.
Option Description Business Hours by Default Time Zone If selected, the campaign will initiate outbound calls during the business hours configured in the default time zone (Set in ). Important: Ensure that at least one business hour has been added in the default time zone settings; otherwise, calls cannot be initiated properly.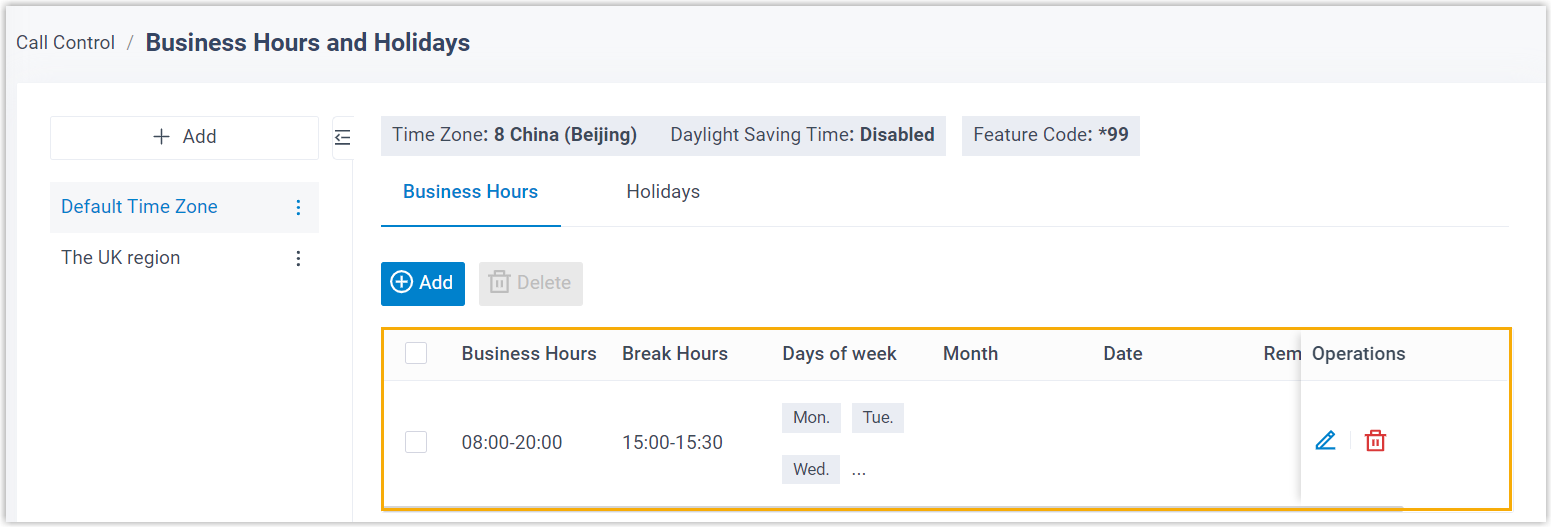
For example, if you set the Campaign Start Time to the current date, and the time is within business hours, the campaign will initiate outbound calls immediately after saving.
Based on Custom Business Hours If selected, you can add the specific business hours and the week of days for the campaign based on the system's default time zone. 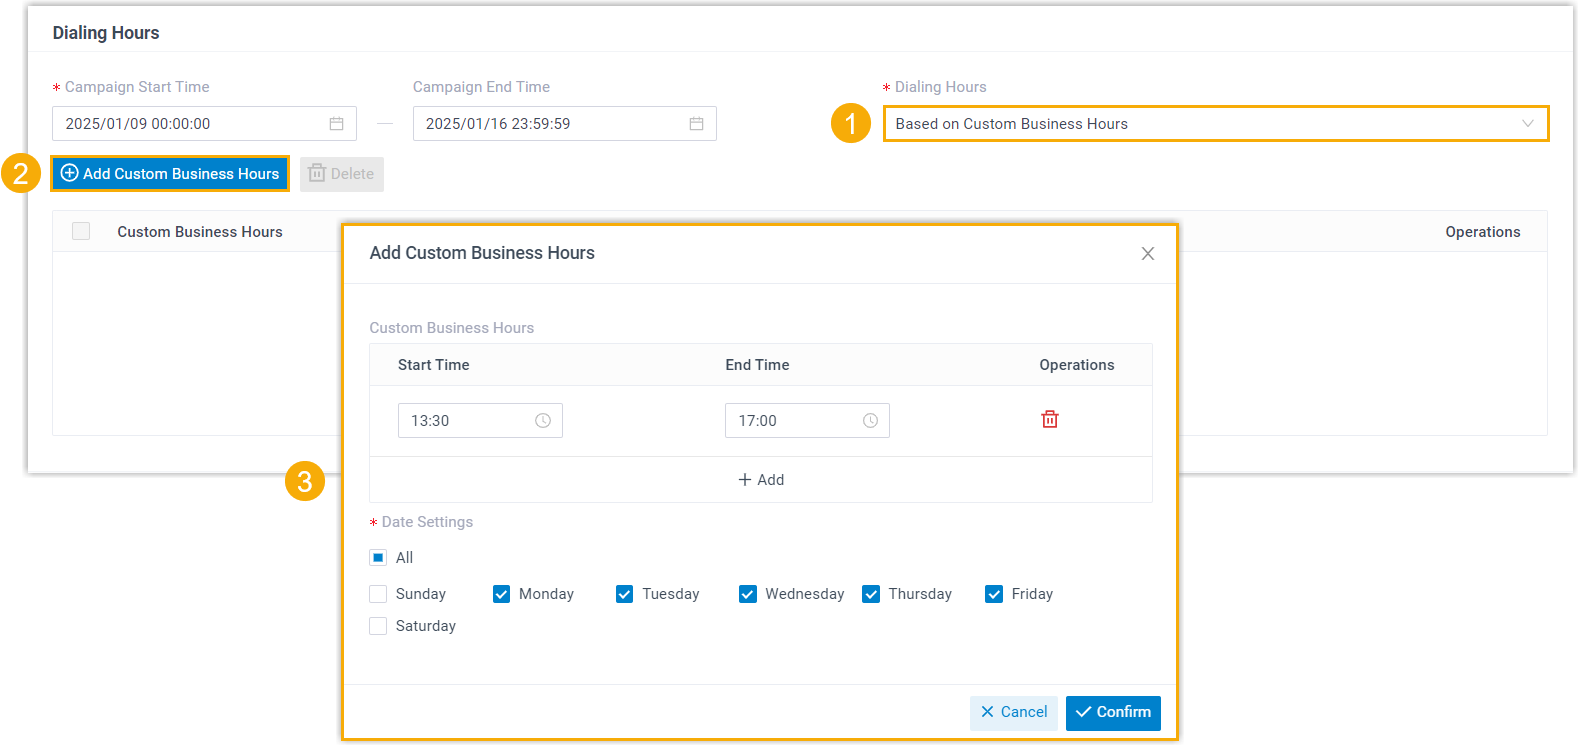
- Campaign Start Time &
Campaign End Time: Set the
start and end time for the campaign.
- Click the Call Rules tab, specify dialer mode and
configure call rules.
- In the Dialer Mode drop-down list, select Agentless.
- Configure the following call rules for the campaign.
Setting Description Maximum Concurrent Calls Specify the maximum number of concurrent calls allowed in the campaign. Note:- The maximum concurrent calls are limited by the trunk's maximum concurrent calls.
- The system supports dialling up to 10 outbound calls simultaneously. Any additional calls will be dialed in groups of 10 until all calls in the campaign are completed.
Ring Timeout (s) Set a number of seconds that the dialer will attempt to call a contact before timing out and considering it as no answer. Destination Select the destination to which the calls will be routed after contacts answer the call. - IVR: If selected,
choose a specific IVR from the
IVR drop-down
list.

- Play Greeting then Hang
Up: If selected, choose the desired
voice prompt from the
Greetings drop-down list,
then set the prompt repeat times in the
Play Times field.

Max Attempts Per Contact Set the maximum number of call attempts per contact. Retry Interval (min.) Set the minimum time interval (in minutes) between consecutive call attempts when retrying to reach a contact. Set DOD Specify Outbound Caller IDs (DOD) for the campaign. If enabled, select the desired outbound caller ID(s) associated with the trunk through which the campaign calls are sent out.Note:- When multiple DODs are selected, they will be used based on the selection order.
- If the feature is not enabled, the outbound caller ID will be determined based on the system's default priority rules.
Prefix If needed, define the digit(s) that will be added at the beginning of a dialed number to match the dial rule of specific outbound routes. Note: This setting is available only when Set DOD is enabled.
- Click the Contacts tab, complete the contact
settings.
- Upload the contacts list by either of the
following methods.
Method Instruction Import To import a contacts list file to the campaign, do as follows:

- Select Import.
- In the Choose a File field, click Upload, then select a CSV file containing the contact details to upload.
Note: The imported contact list is only associated with the outbound campaign and will be removed upon the deletion of the campaign. If necessary, you can store these contacts to a PBX phonebook. For more information see Import Campaign Contacts to a Phonebook.PhoneBooks To directly use the existing contacts stored in a PBX phonebook, do as follows: 
- Select PhoneBooks.
- In the PhoneBooks
drop-down list, select the phonebook where the
desired contacts are stored.Note: If the phonebook has attempt control rule configured, the rule will be displayed. It limits the maximum call attempts per contact/number across all dialer campaigns.
- In the Number Type drop-down
list, select the number type(s) to dial.
The system will automatically attempts to dial the number types based on the selection order, until the call is successfully connected or the number of maximum call attempts is reached.
- In the Contact Sorting section,
specify the sorting criteria to determine the order in which
contacts will be dialed.

- Double check the contact settings as the contact information can NOT be changed after saving.
- Upload the contacts list by either of the
following methods.
- Click Save.
- In the pop-up window, click OK.
Result
- A campaign is created successfully and displayed in the Campaign Management list.
- When it comes to the start time of the campaign, system automatically initiate outbound calls to the specified contacts, and connect the answered calls to the predefined destination.