Purchase P-Series Cloud Edition
Yeastar provides you with the flexibility to deliver cloud-based communication services on demand, only paying for what you use, without the need for excess capacity. Whenever you receive a request from a customer for a P-Series Cloud PBX, you can purchase a PBX instance on Yeastar Partner Portal and then resell it to your customer.
Introduction
Yeastar provides two offerings of cloud PBX instance - Trial Cloud PBX Instance and Commercial Cloud PBX Instance. Refer to the following table for the differences.
For more information, see Obtain Free Trial for YCM White Label Service.
| Item | Trial Cloud PBX Instance | Commercial Cloud PBX Instance |
|---|---|---|
| Subscription Plan | Enterprise Plan |
|
| Value-added Service | – |
|
| Extensions | 10 | Expandable |
| Concurrent Calls | 10 | Expandable |
| Call Recording Capacity | 500 minutes | 500 minutes (expandable) |
| Validity Period | 30 days | Annual subscription or Monthly subscription |
| Price | Free | Paid |
This topic describes how to purchase a commercial P-Series Cloud PBX instance. To obtain a free trial, see Obtain a Free Trial for P-Series Cloud Edition.
Step 1. Go to product purchase page
- Log in to Yeastar Partner Portal, go to Products & Purchase.
- On the product list, click Purchase
on Cloud PBX (PCE Instance).
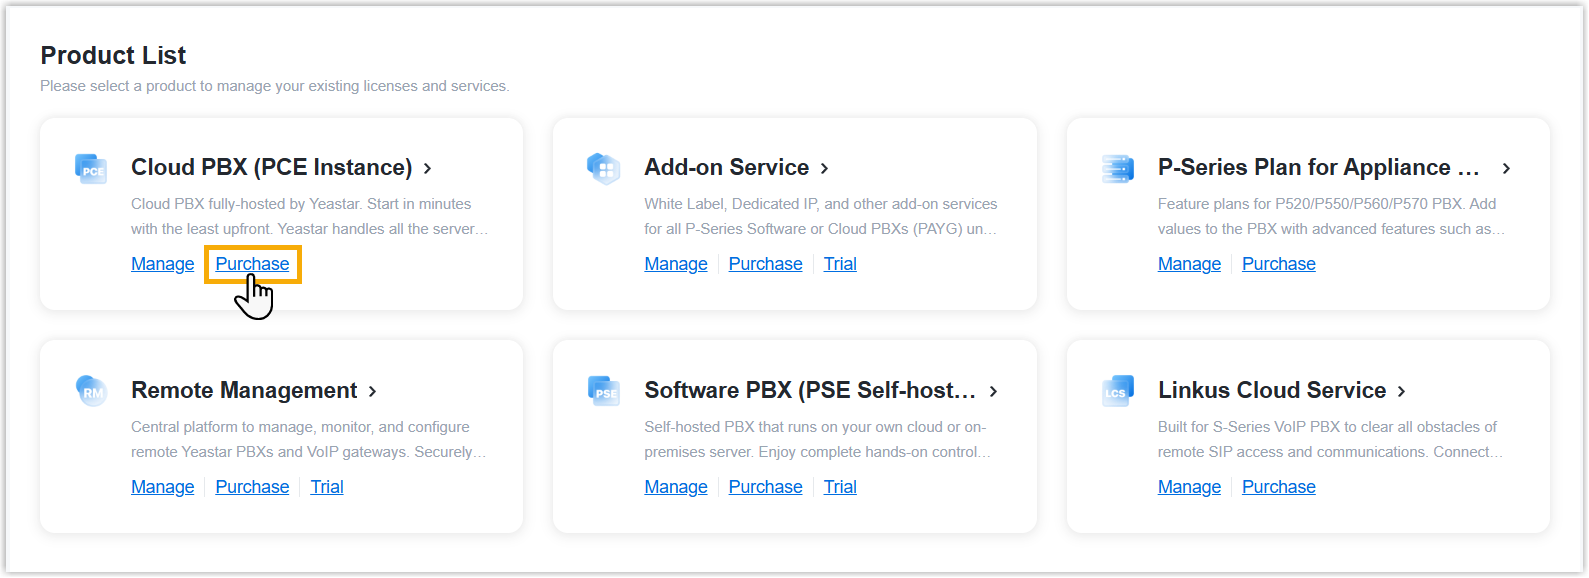
A side panel slides in from the right of the page.
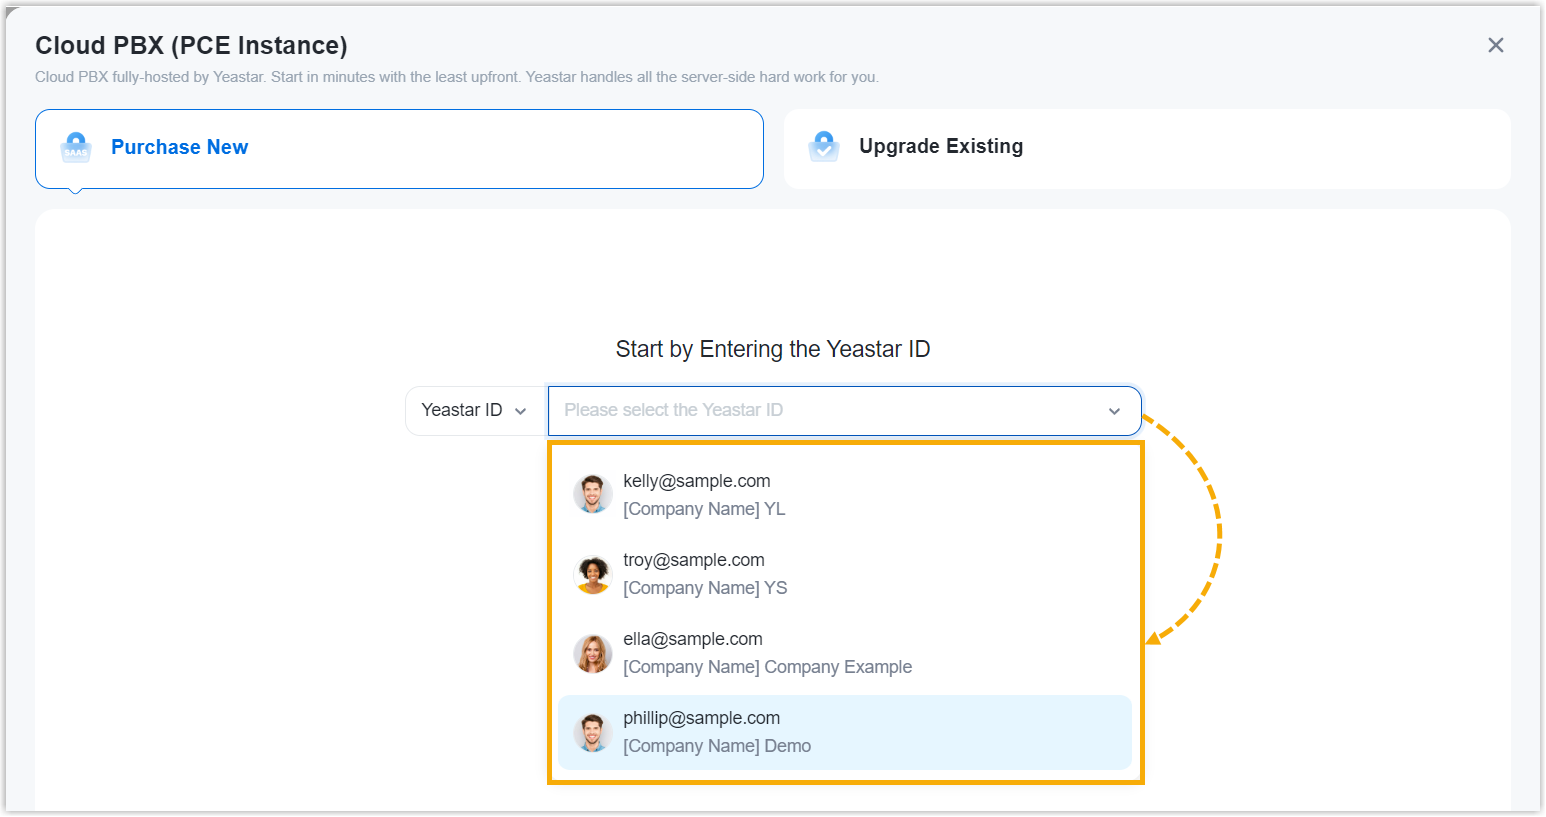
- Search and select the user for whom you want to purchase P-Series Cloud PBX
instance from the drop-down list by filter (Yeastar
ID or Company Name).
Step 2. Select plan and service
- On the right side of the panel, click
Annually or
Monthly.
 Note:
Note:- For Annual Subscription, only 1-year billing cycle is supported.
- For Monthly Subscription, only 1-month billing cycle is supported.
- Click Subscribe of the desired plan.

- On the left plan details section, set up the PBX instance.
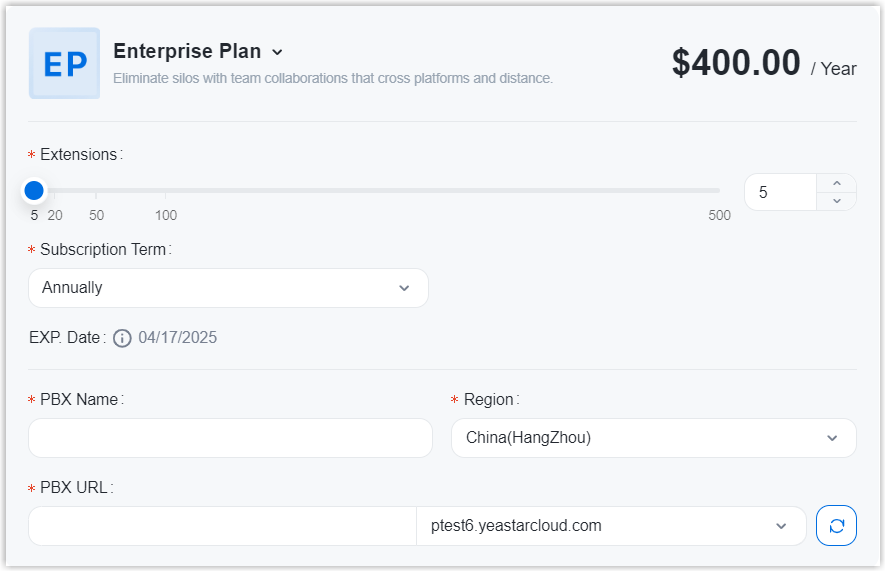
- Extensions: Set the desired number of
extensions.
The minimum value is 5 and the maximum value is 500.
- Subscription Term: Automatically fill in the billing cycle that you have selected above.
- PBX Name: Enter a name to help you identify the PBX instance on Yeastar Central Management.
- Region: Select a region that is the nearest to the customer.
- PBX URL: Enter a prefix in the text
field, then select a suffix from the drop-down list.
This will be the domain name of the PBX instance.
Note:- Only allowed to enter numbers, letters, and hypens
-. - If you have set up a custom domain name on Yeastar
Central Management, but it does not appear in the
drop-down list, you can click
 to refresh the
domain list.
- Only allowed to enter numbers, letters, and hypens
- Extensions: Set the desired number of
extensions.
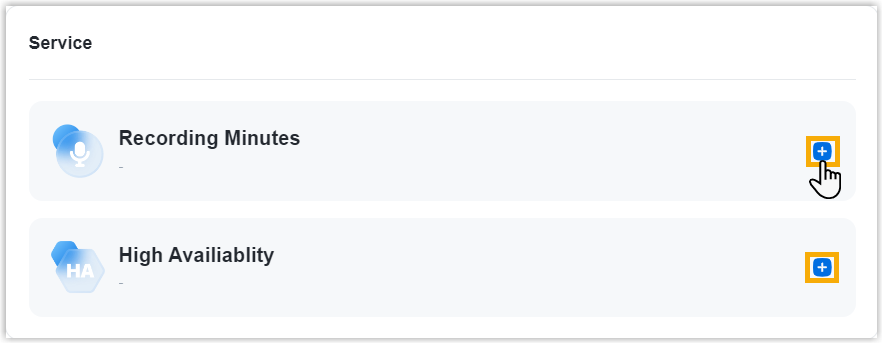
- Optional: On the Service section, click
 to purchase additional recording minutes or subscribe to additional
service as needed.
(Optional) Step 3. Assign the product to another Yeastar ID
- If you prefer to retain access only for yourself, please skip this step.
- This does NOT grant administration permission for the instance within the corresponding Yeastar Central Management.
- Select an existing user from the drop-down list.

-
If desired user doesn't exist, you can click Add Partner to create a new Partner Portal account for the user.Important: Clicking Add Partner will create a new Partner Portal account, and an activation email will be sent to the assigned email address. If you DO NOT want your customer to receive this email, do NOT click Add Partner here.
- On the right Order Summary section, click Checkout.
Step 4. Review the order and check out
- On the left Plan Information section and Service Information section, review the information.
- On the left Billing Information section, review and
edit the billing information as needed.Note:
- The billing information will be displayed on an invoice, which will be generated and sent to the selected billing contact's email address after you complete payment.
- By default, your account information is automatically filled in.
You can change to another billing contact, either by selecting
an existing one from the drop-down list, or by clicking
Add New to add a contact. The billing
contacts are synchronized with the ones that you have set on
Billing Receiver.

- On the right
Checkout section, choose either of the following
ways to check out.
- Pay by PayPal
-
- In the Payment Method section, click PayPal.
- Optional: For Annual Subscription, you can select or unselect the checkbox of Auto Renew to enable or disable the automatic renewal.
- Click PayPal and log in to your PayPal account to complete payment.
- Pay by debit card or credit card
-
- In the Payment Method section, click Debit or Credit Card.
- Optional: For Annual Subscription, you can select or unselect the checkbox of Auto Renew to enable or disable the automatic renewal.
- Click Debit or Credit Card and enter the information required to complete payment.
- Pay offline
-
- In the Payment Method section, click Offline.
- Optional: In the PI Number field, enter the PI number that is provided by Yeastar Sales.
- Click Place Order.
After you submit the order, your account manager or local distributor will contact you actively for the payment.
Result
- You and the user to whom you assign the product will receive a PBX welcome email, which contains activation information, subscription summary, and links of the related configuration guides.
- The billing contact will receive an email containing the order
summary and an invoice. He or she can click on the attached link to view or
download the invoice.Note:
- The attached link is valid in 24 hours and can be used ONCE only.
- You can also view the invoice on Yeastar Partner Portal: .

What to do next
- Activate the PBX instance by following the instructions in the link below:
- Set up the phone system to be accessible to the features supported in the subscription plan or subscription service by following the instructions in the links below: