The Ultimate Guide to Onboard P-Series Cloud Edition
Learn everything you need to know about purchasing and getting P-Series Cloud Edition up and running with minimal effort.
Prerequisites
- You have a Yeastar Partner Portal account.
- You have contacted your Account Manager to top up your account.Tip: With account balance, you can easily make a purchase while benefiting from potential savings - the more you top up, the lower the price per extension.
For example, if you top up $600, the price per extension will be $6 per year; if you top up $1000, the price per extension will be $4 per year.
Step 1. Log in to Yeastar Partner Portal
- Go to the login page of Yeastar Partner Portal.
- Enter the credential of your Yeastar Partner Portal account.
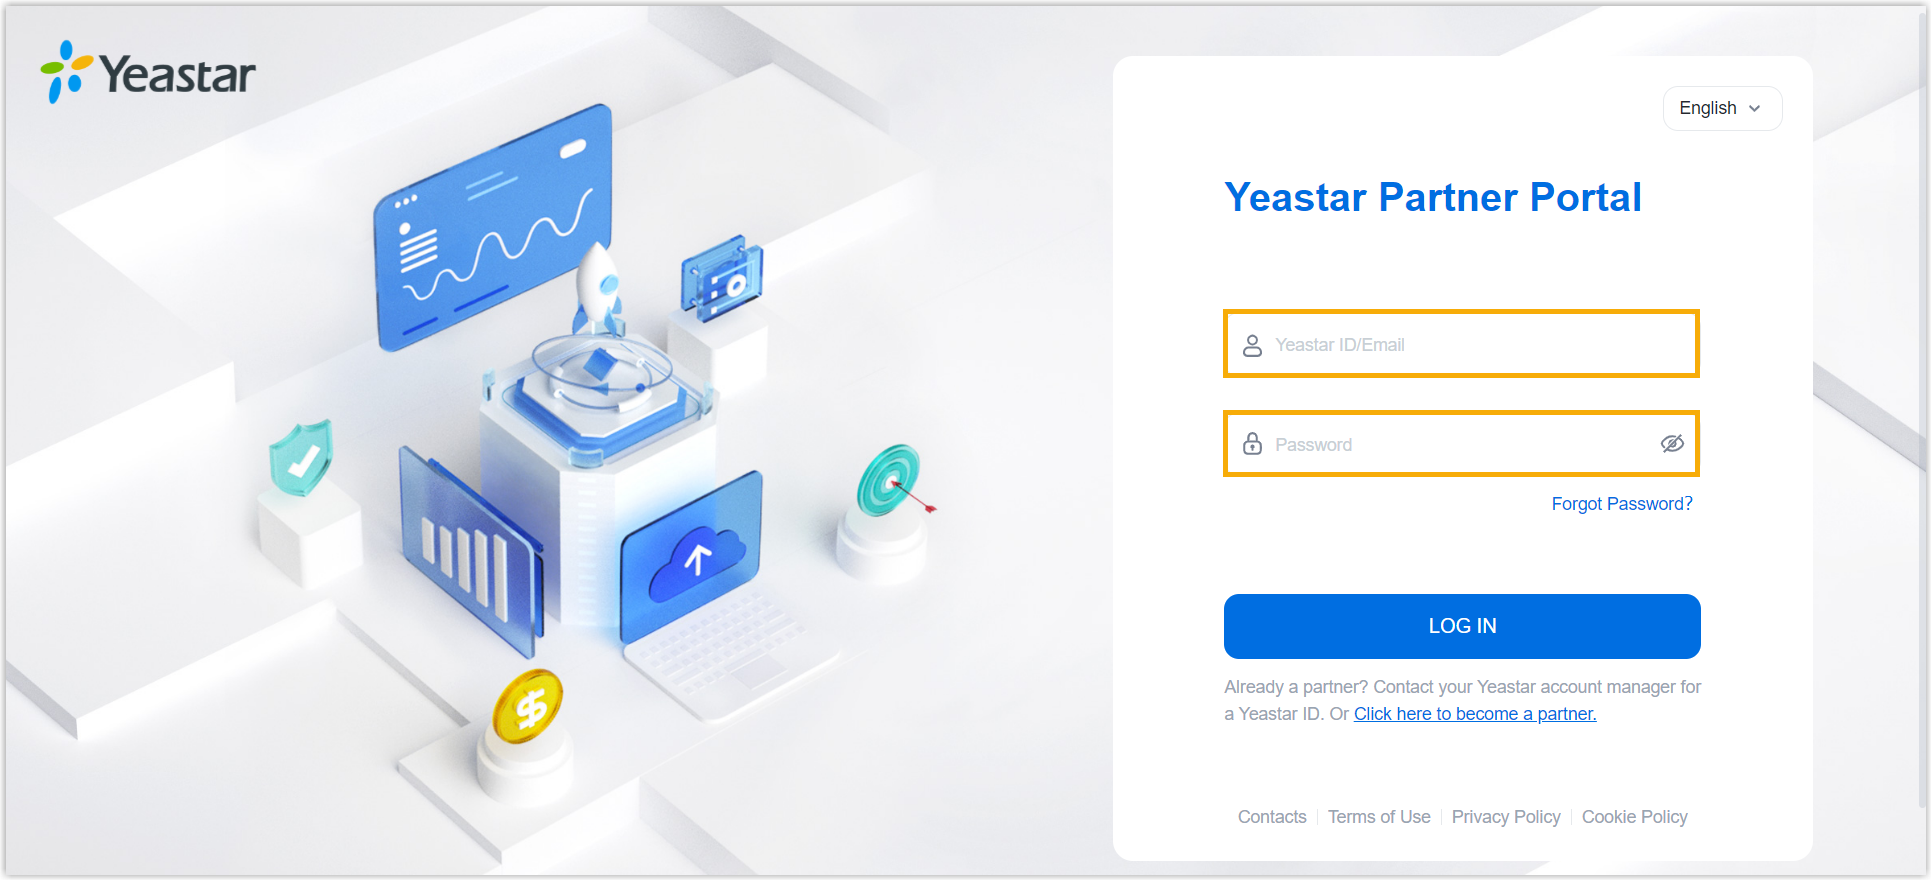
- Click LOG IN.
Step 2. Purchase P-Series Cloud Edition
- Go to the purchase page of P-Series Cloud Edition.
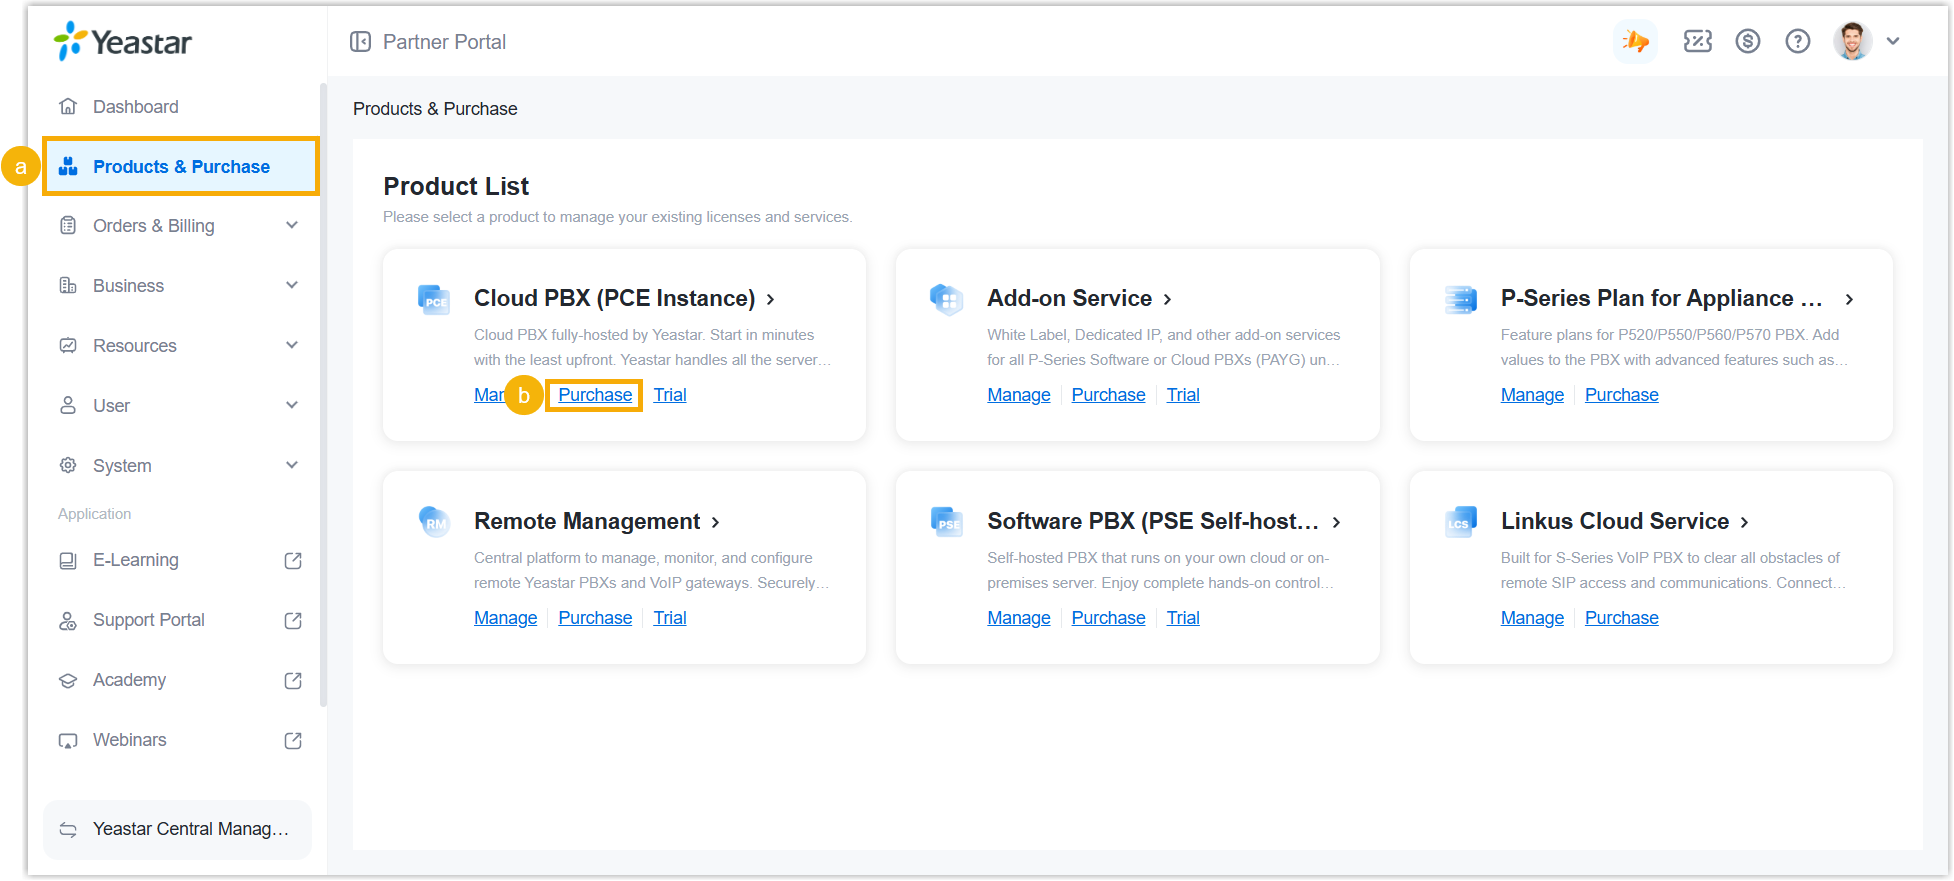
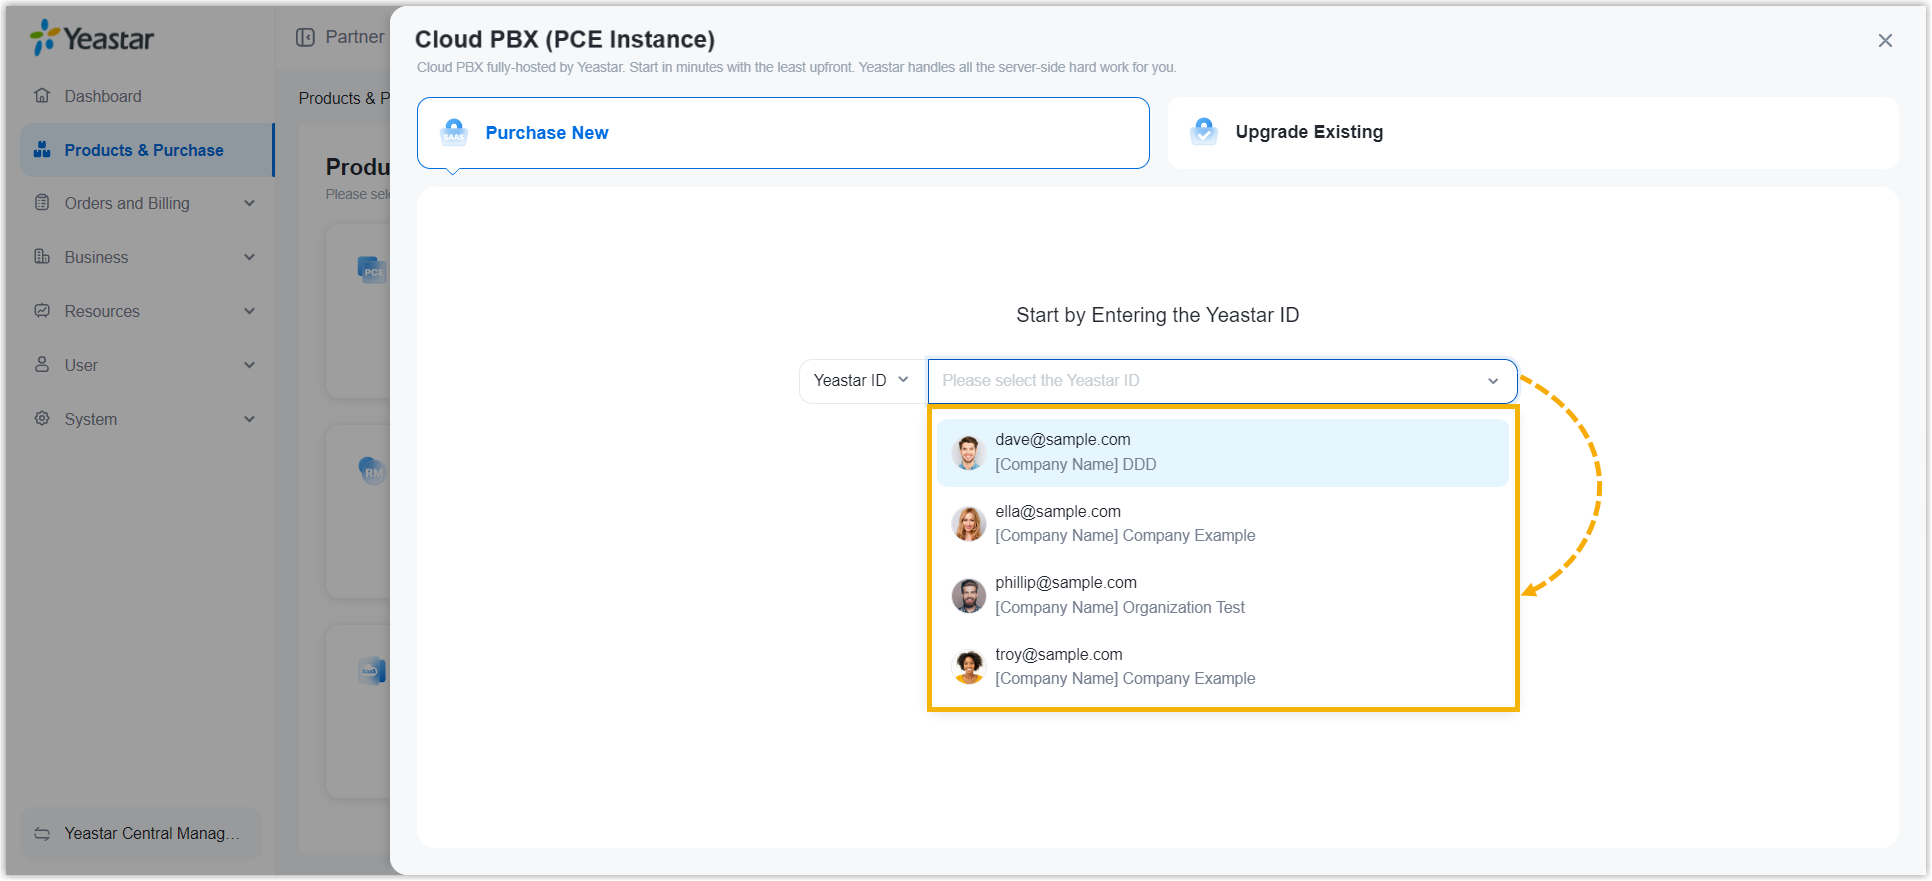
A side panel slides in from the right of the page.
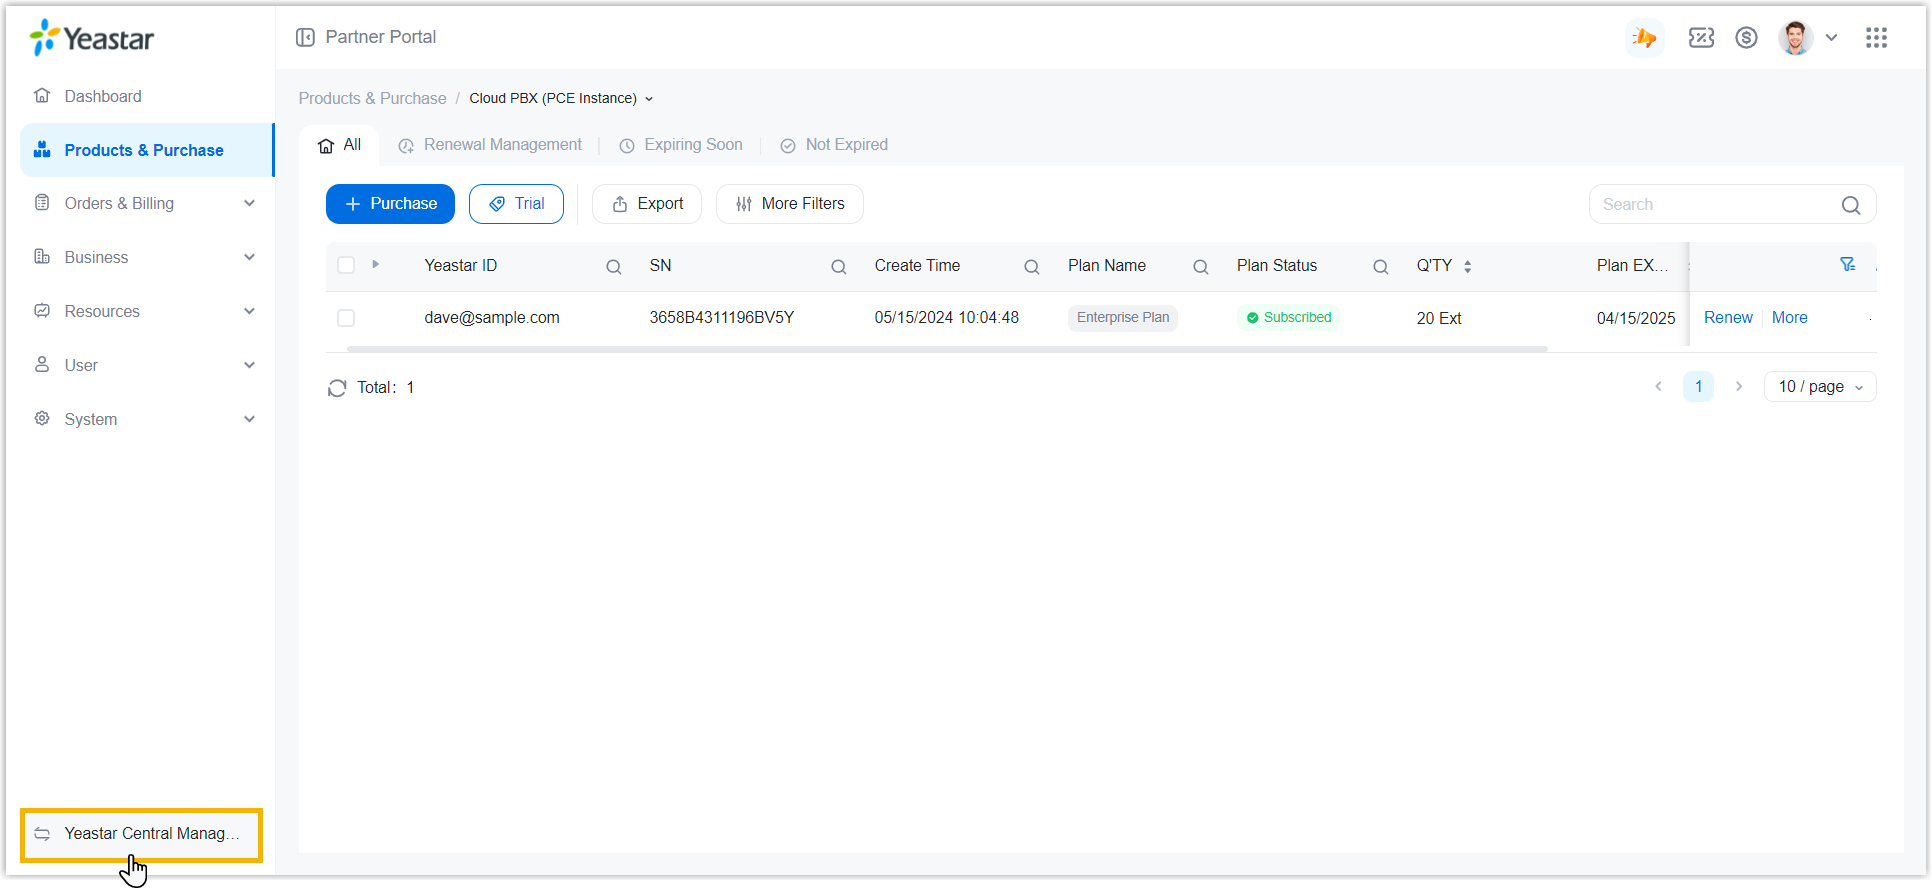
- Select the account for which you want to purchase P-Series
Cloud Edition.
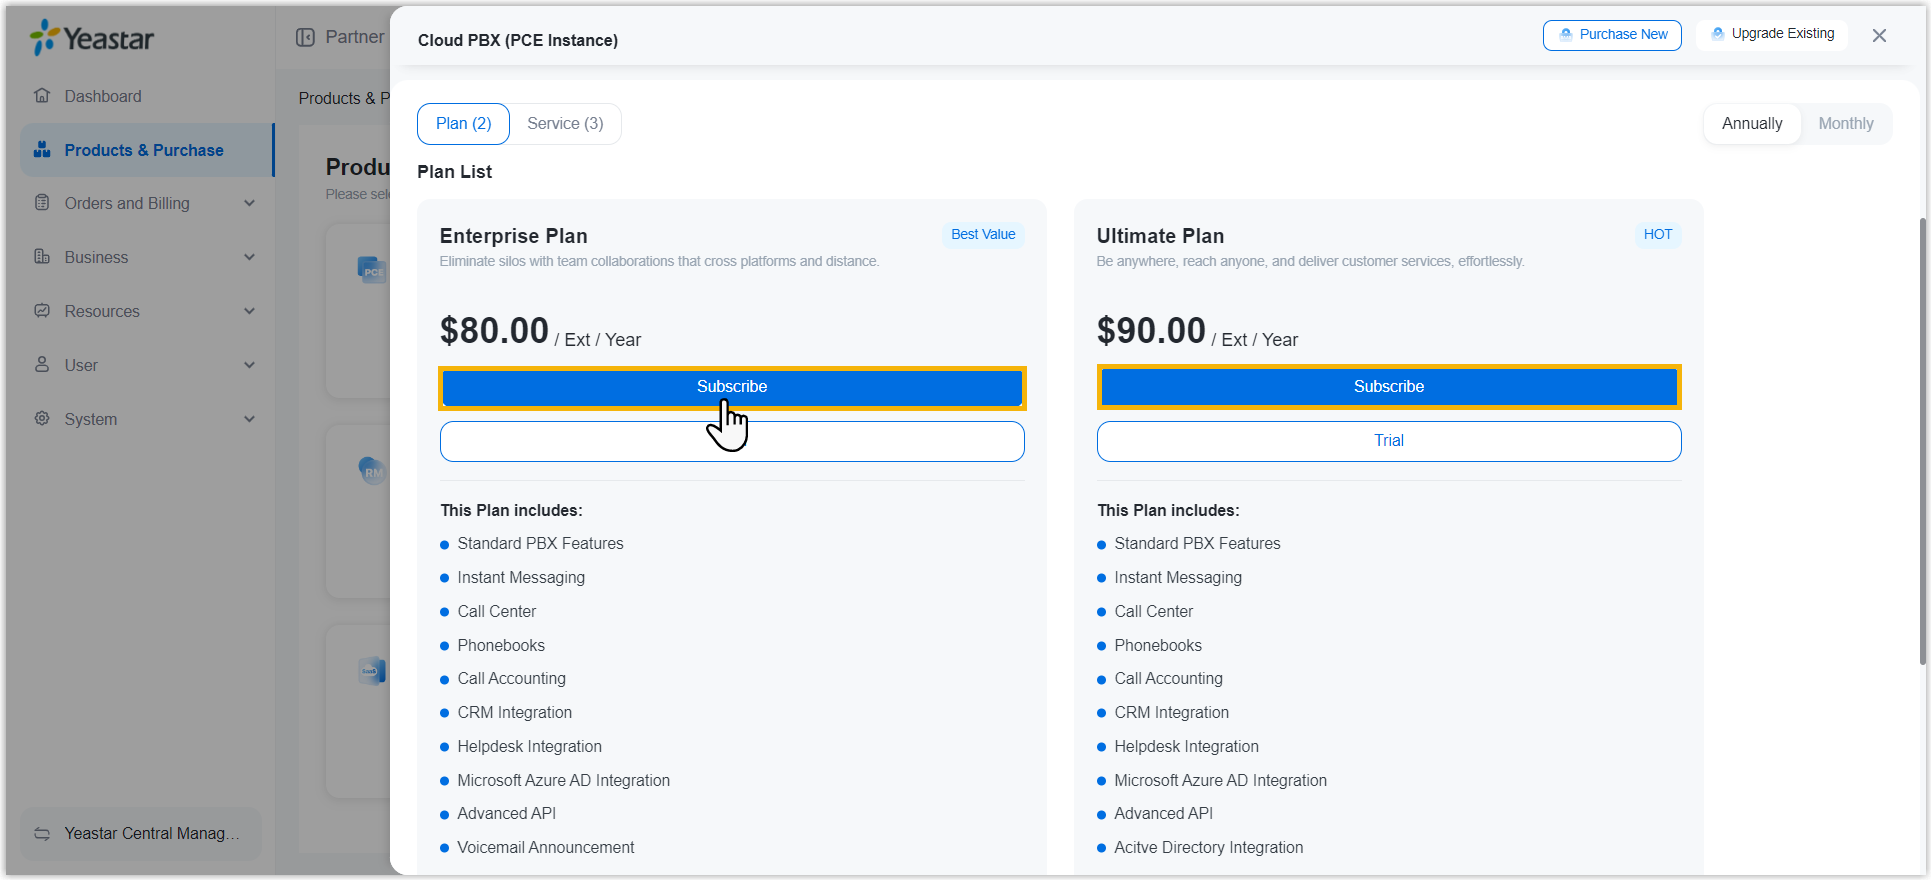
- Select subscription term, subscription plan, and subscription service(s) as
needed.
- On the right side of the panel, click on the
desired subscription term.
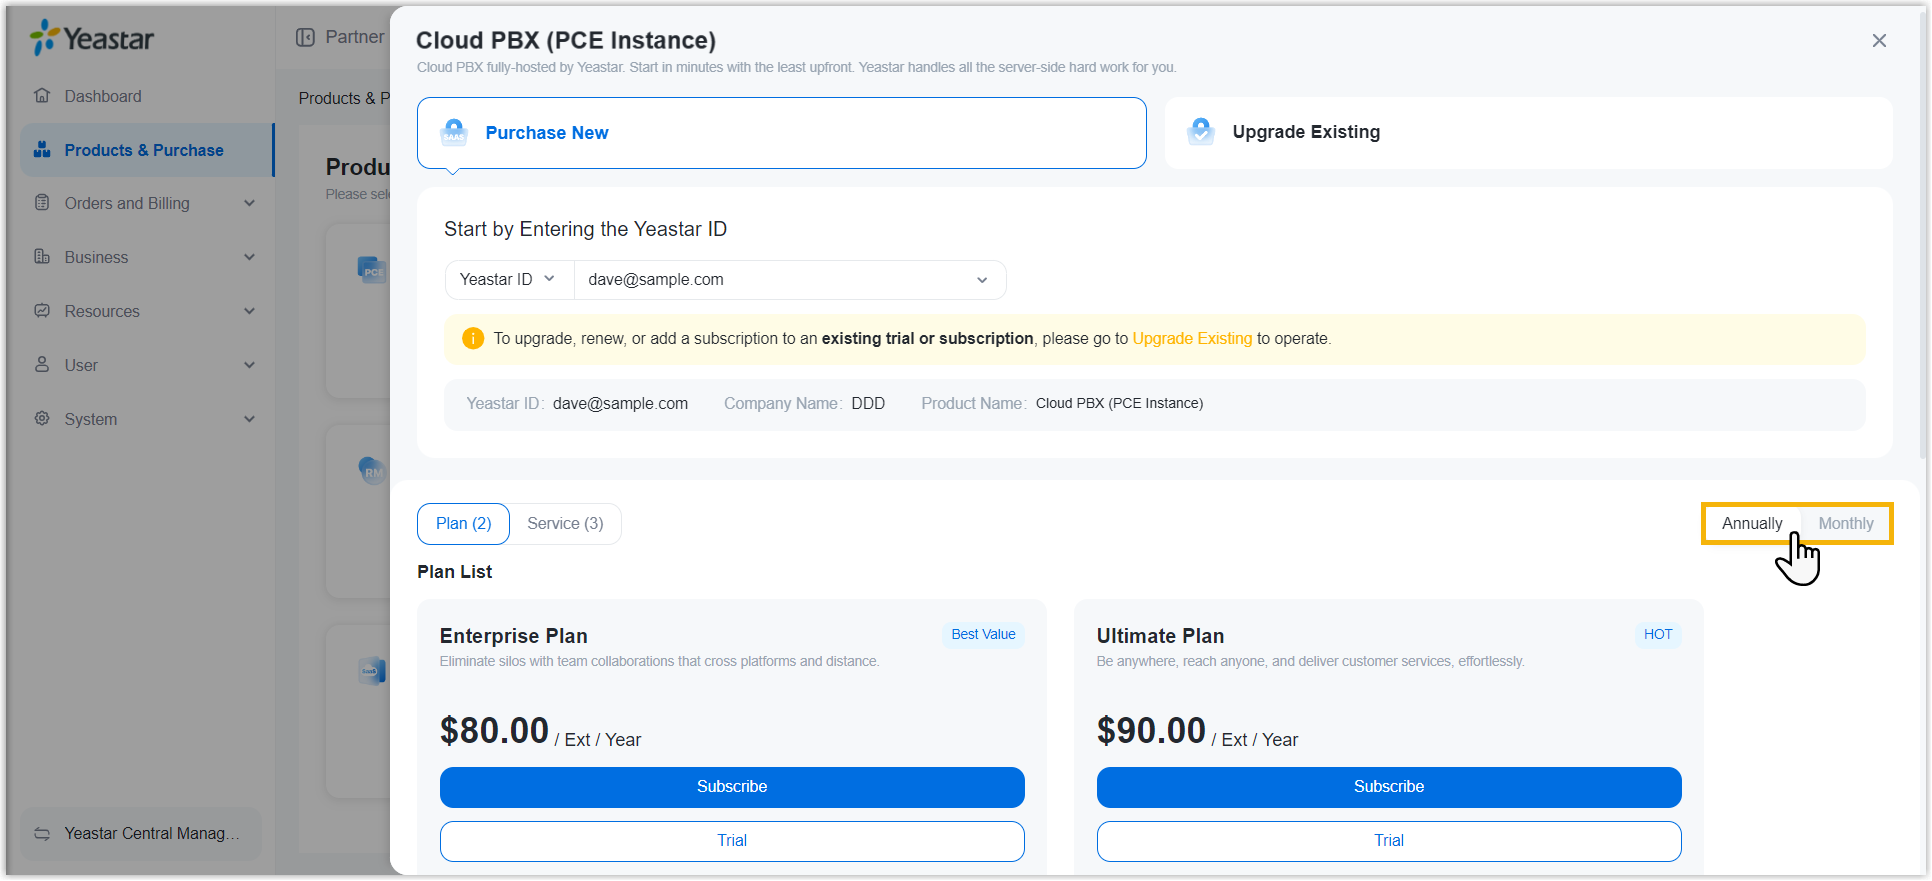 Note:
Note:- For Annual Subscription, only 1-year billing cycle is supported.
- For Monthly Subscription, only 1-month billing cycle is supported.
- Under Plan tab, click
Subscribe of the desired plan.
-
On the left plan details section, set up the PBX instance.
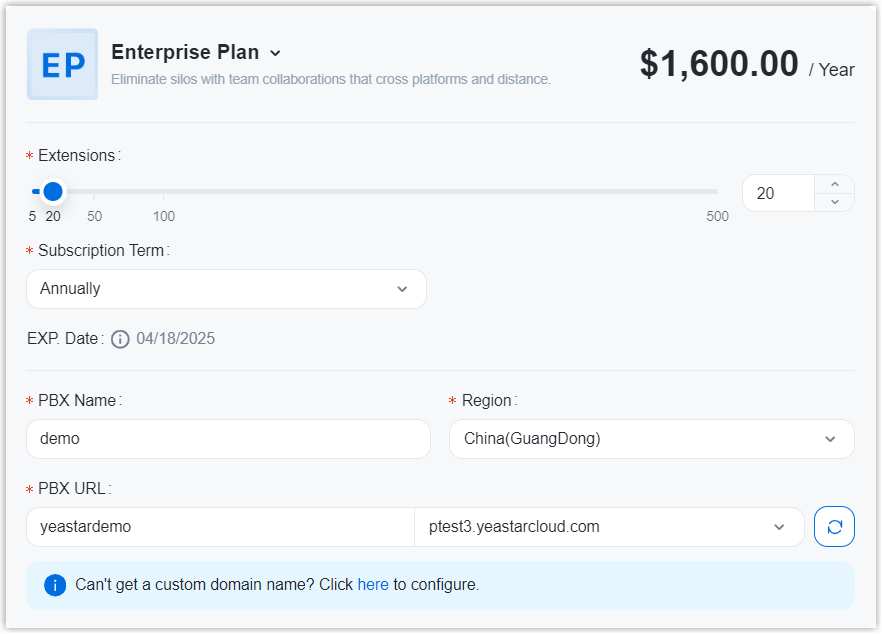
Item Description Extensions Set the desired number of extensions. Valid value: 5- 500
Subscription Term Automatically fill in the subscription term that you have selected. PBX Name Enter a name to help you identify the PBX instance on Yeastar Central Management. Region Select a region that is the nearest to customers. PBX URL Enter a prefix in the text field, then select a suffix from the drop-down list. Note: Only allowed to enter numbers, letters, and hypens-.This will be the domain name of the PBX instance.
- Optional: On the left service section, click
 to purchase additional recording minutes or
subscribe to High Availability service for the PBX instance as
needed.
to purchase additional recording minutes or
subscribe to High Availability service for the PBX instance as
needed.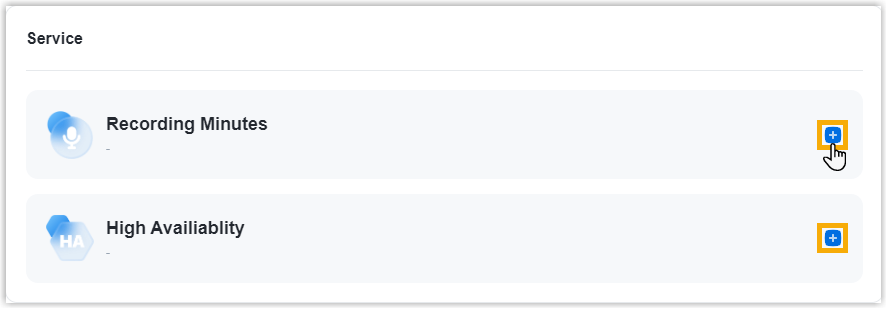 Note:
Note:- A PBX instance has 500-minute recording time for free.
- The expiration date of recording minutes and High Availability service follows the expiration date of the subscription plan.
- On the right side of the panel, click on the
desired subscription term.
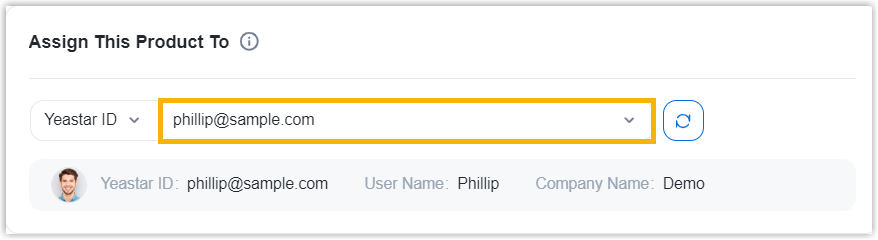
- Optional: On the bottom-left corner of the panel,
assign the PBX instance to a subordinate user.
In this way, the user can see the PBX instance on his or her Yeastar portal and receive PBX activation email.
- On the right of the panel, click Checkout.
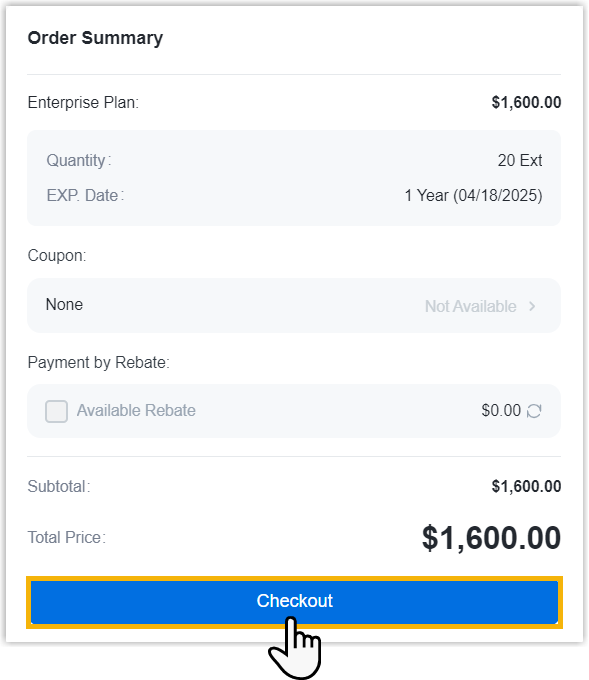
- Review the order information and click Place
Order.
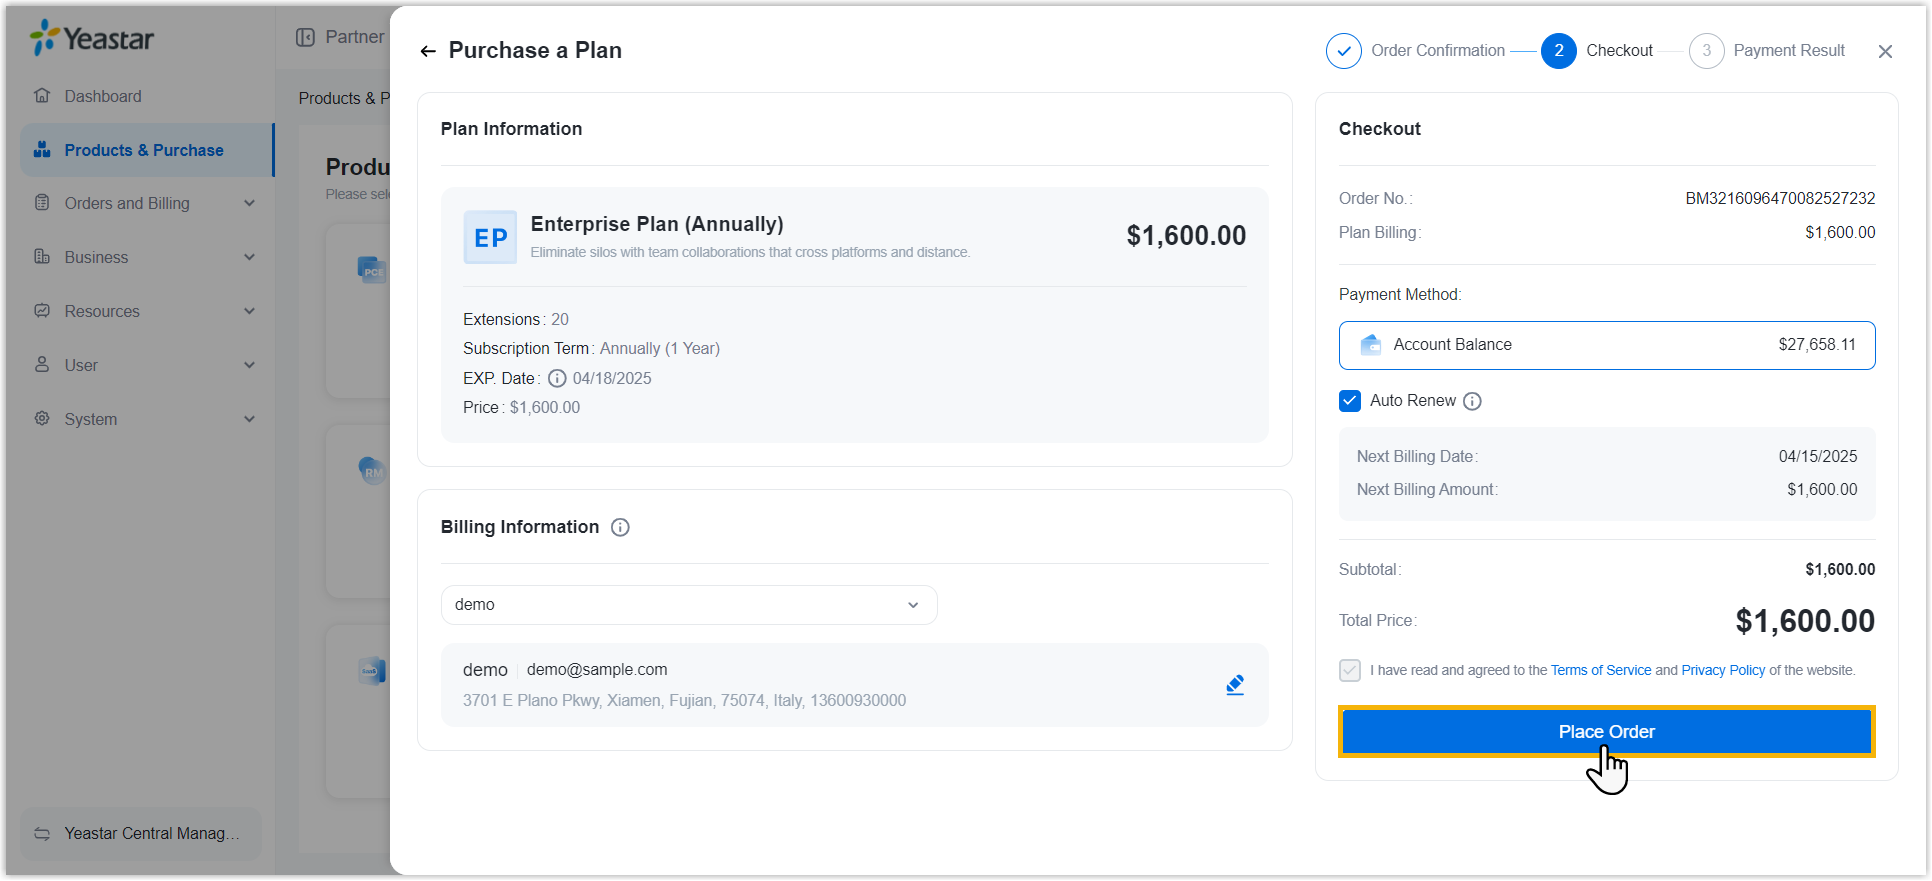 The followings are achieved:
- The order is placed successfully and the amount is deducted from your account balance.
- The P-Series Cloud Edition is created successfully.
- The account for which you purchase the PBX instance and the user to whom you assign the PBX instance will receive PBX activation email.
Step 3. Activate P-Series Cloud Edition
- In the activation email, copy the activation code and click on the
activation URL.
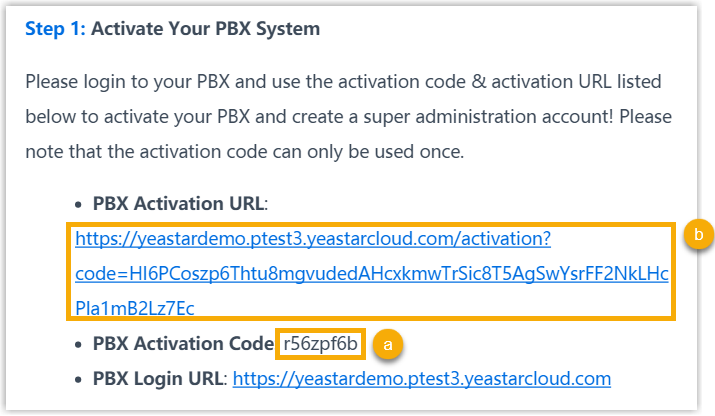
- Enter the activation code and click Confirm.
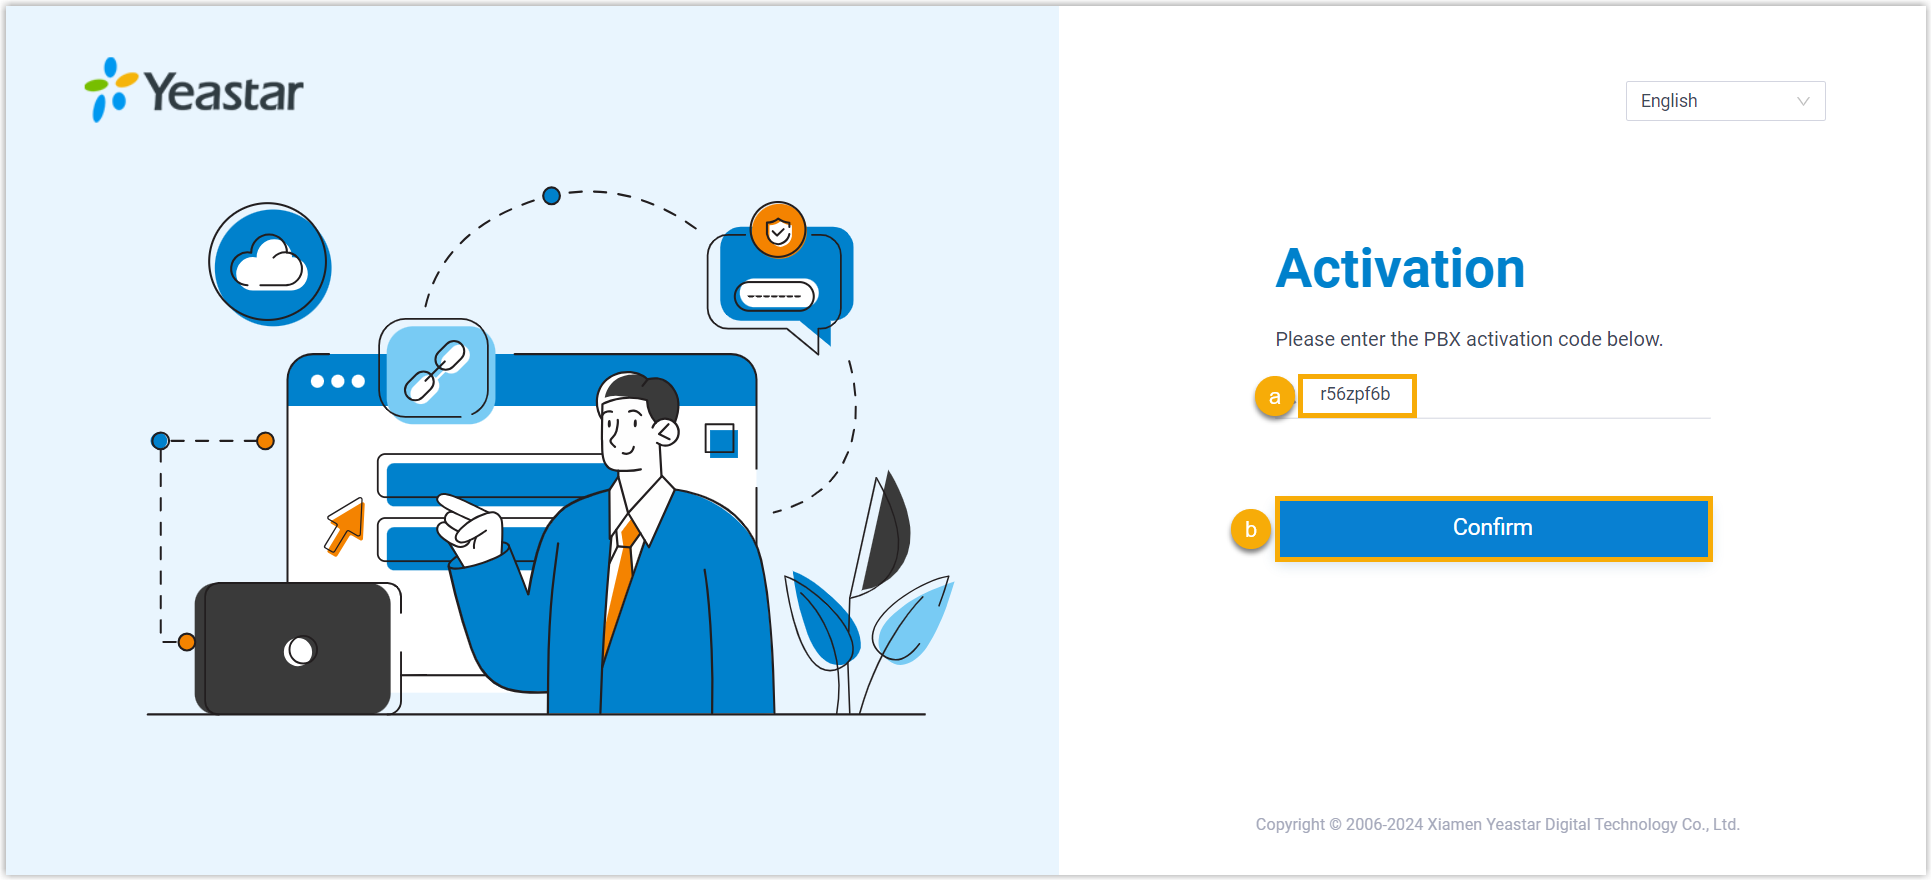
The P-Series Cloud Edition is activated, and you need to finish initial configurations for the system using the Installation Wizard.
For more information, see Initial Setup Using the Installation Wizard.
Step 4. Get PBX system up and running
- Set up Extension, so that extension users can make and receive calls with each other.
- Set up Trunk, so that internal extension users can make and receive calls with external users.
- Set up Inbound Route, so as to route inbound calls from external callers to internal extension users.
- Set up Outbound Route, so as to route outbound calls from internal extension users to external users.
Reference
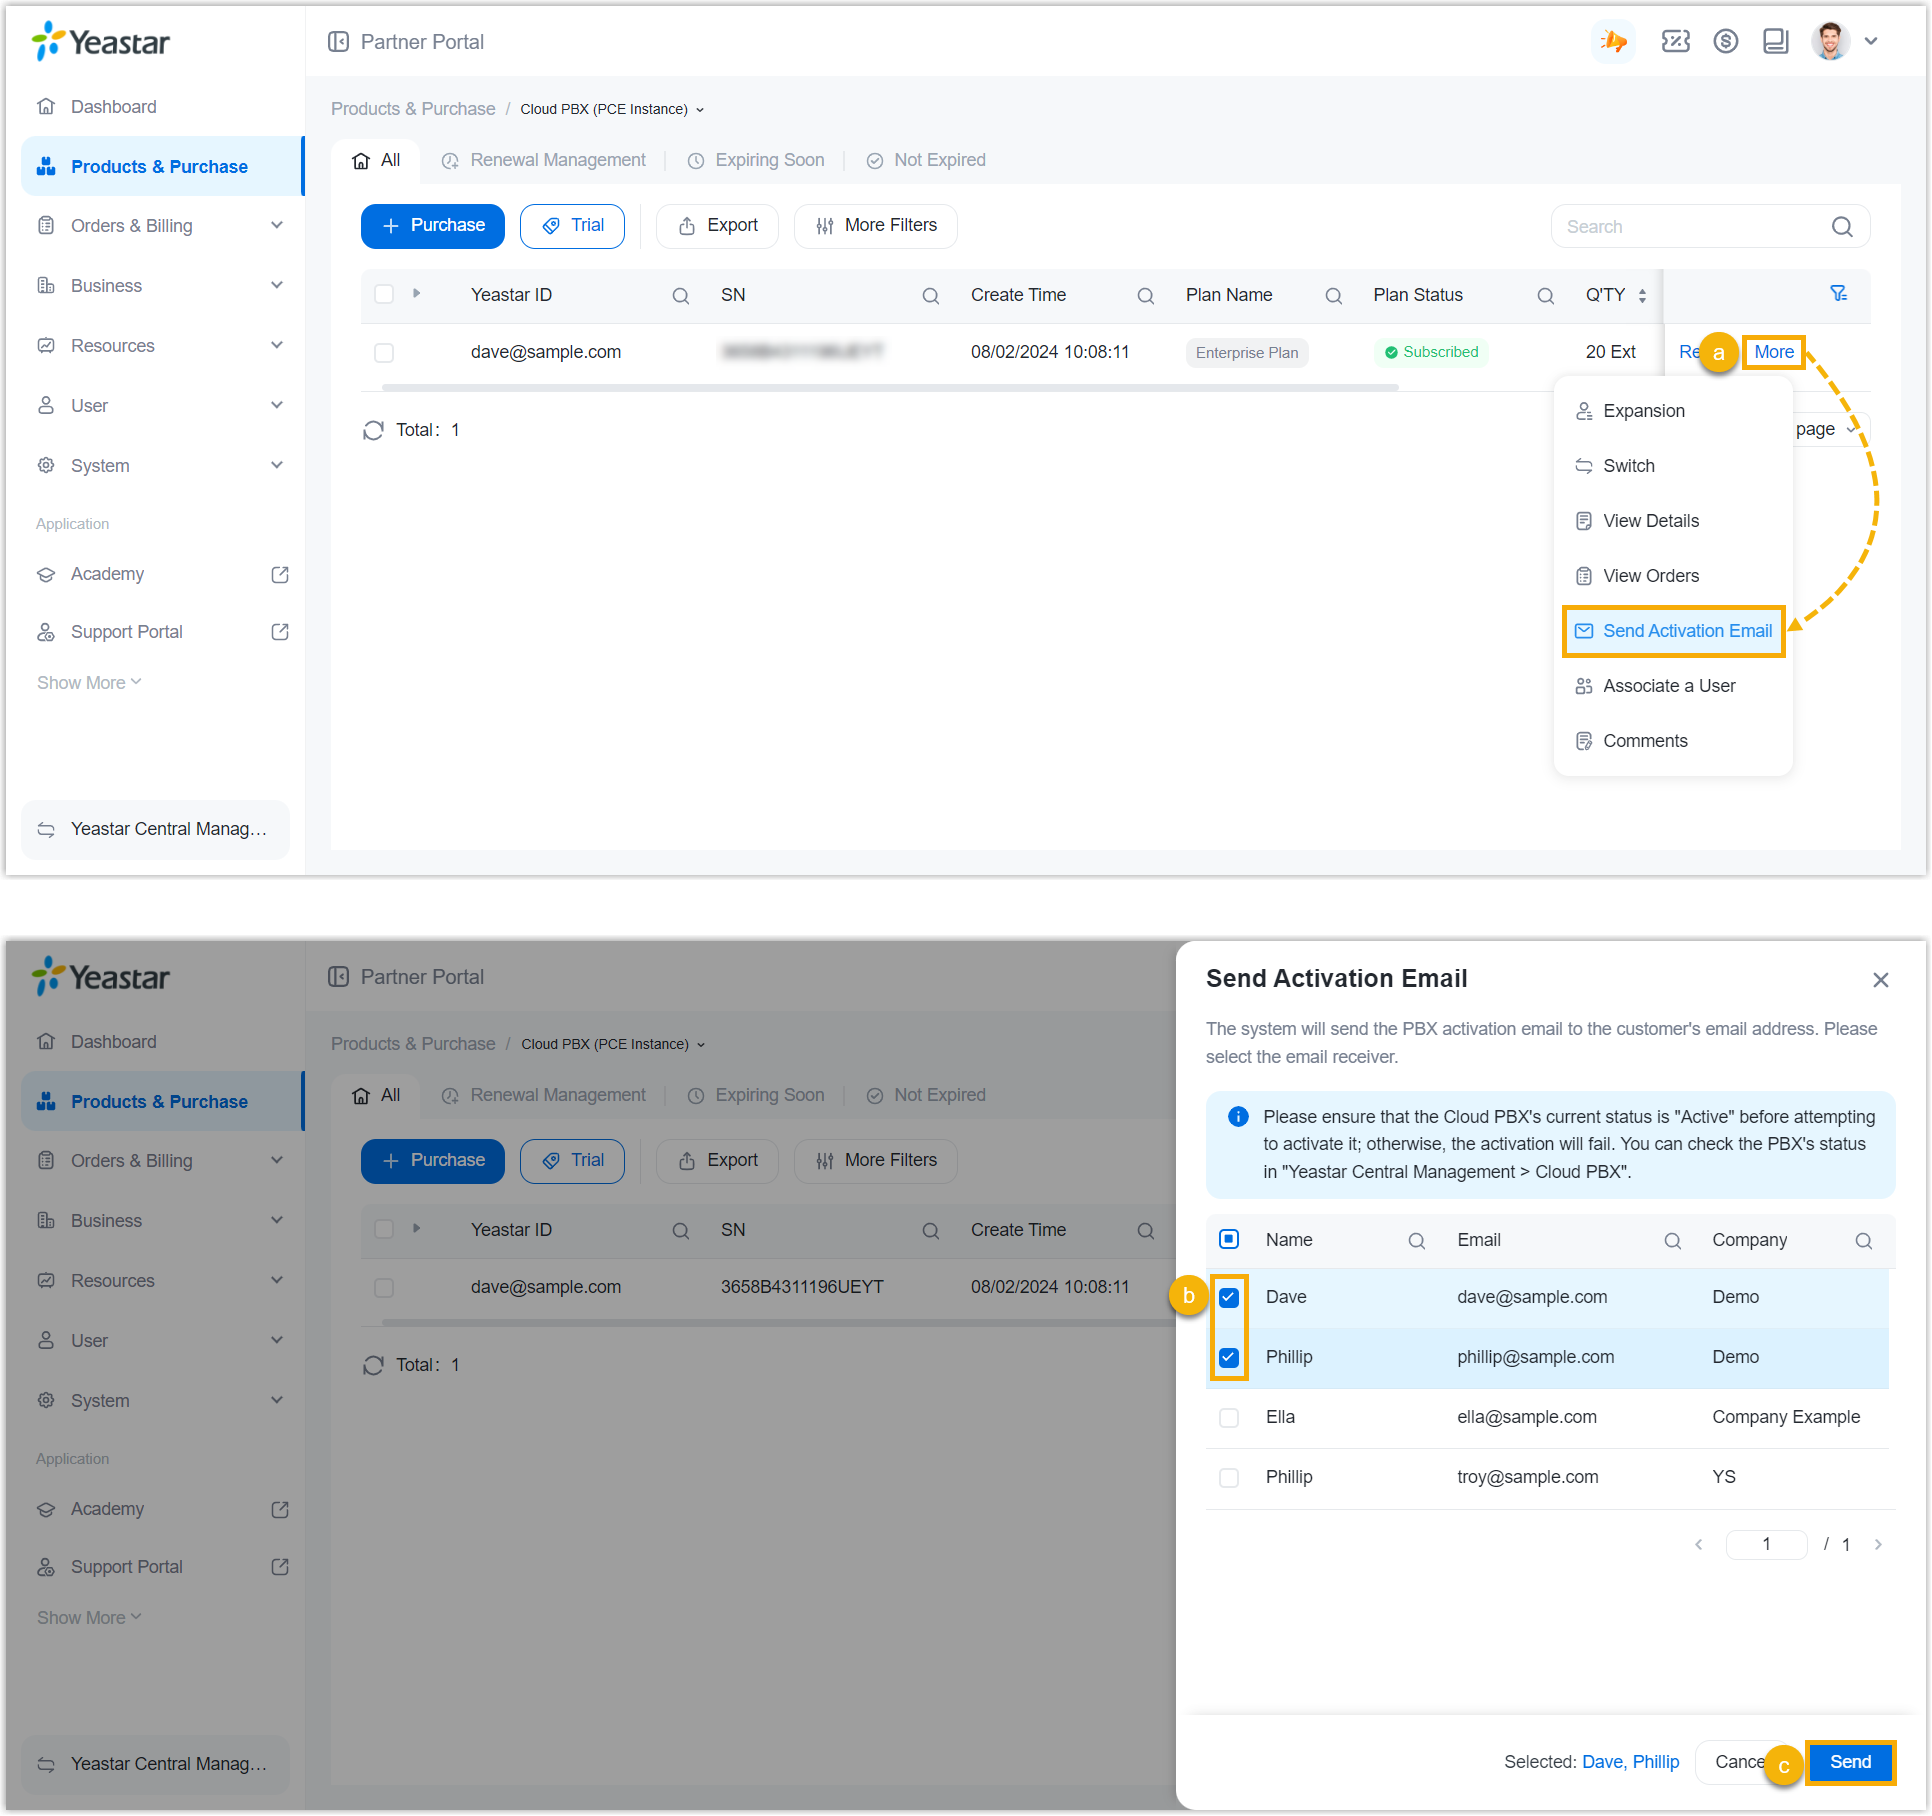
- Resend PBX activation email
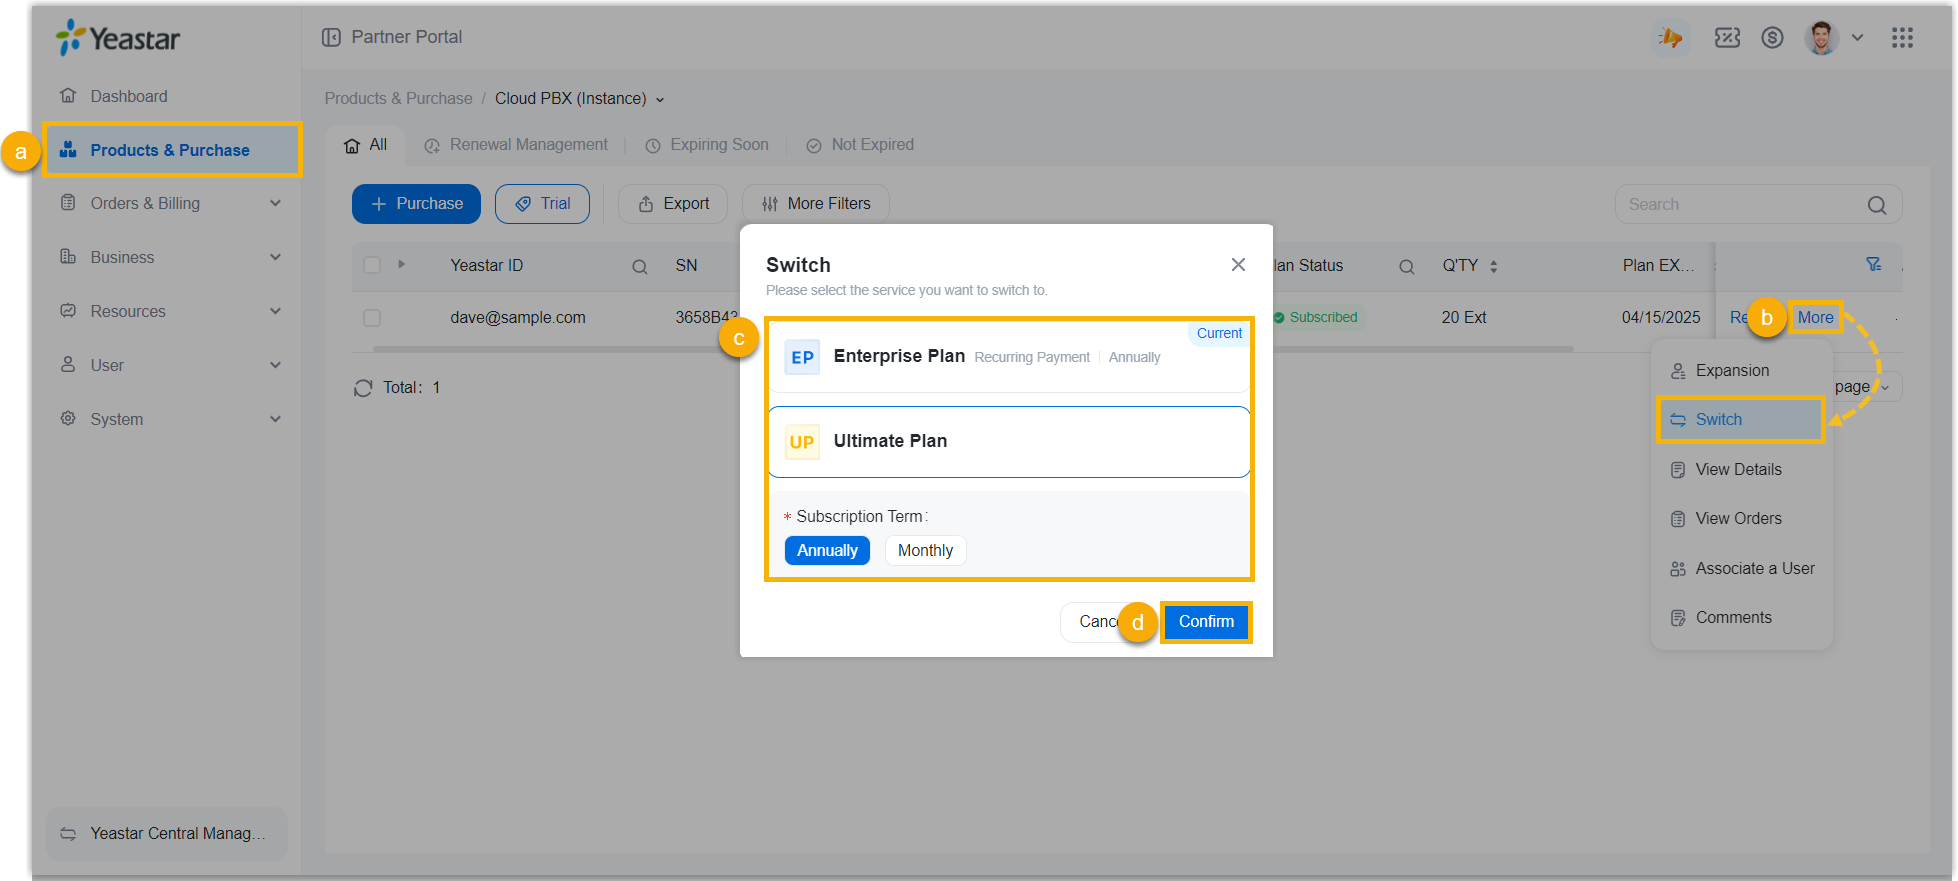
- Switch subscription plan
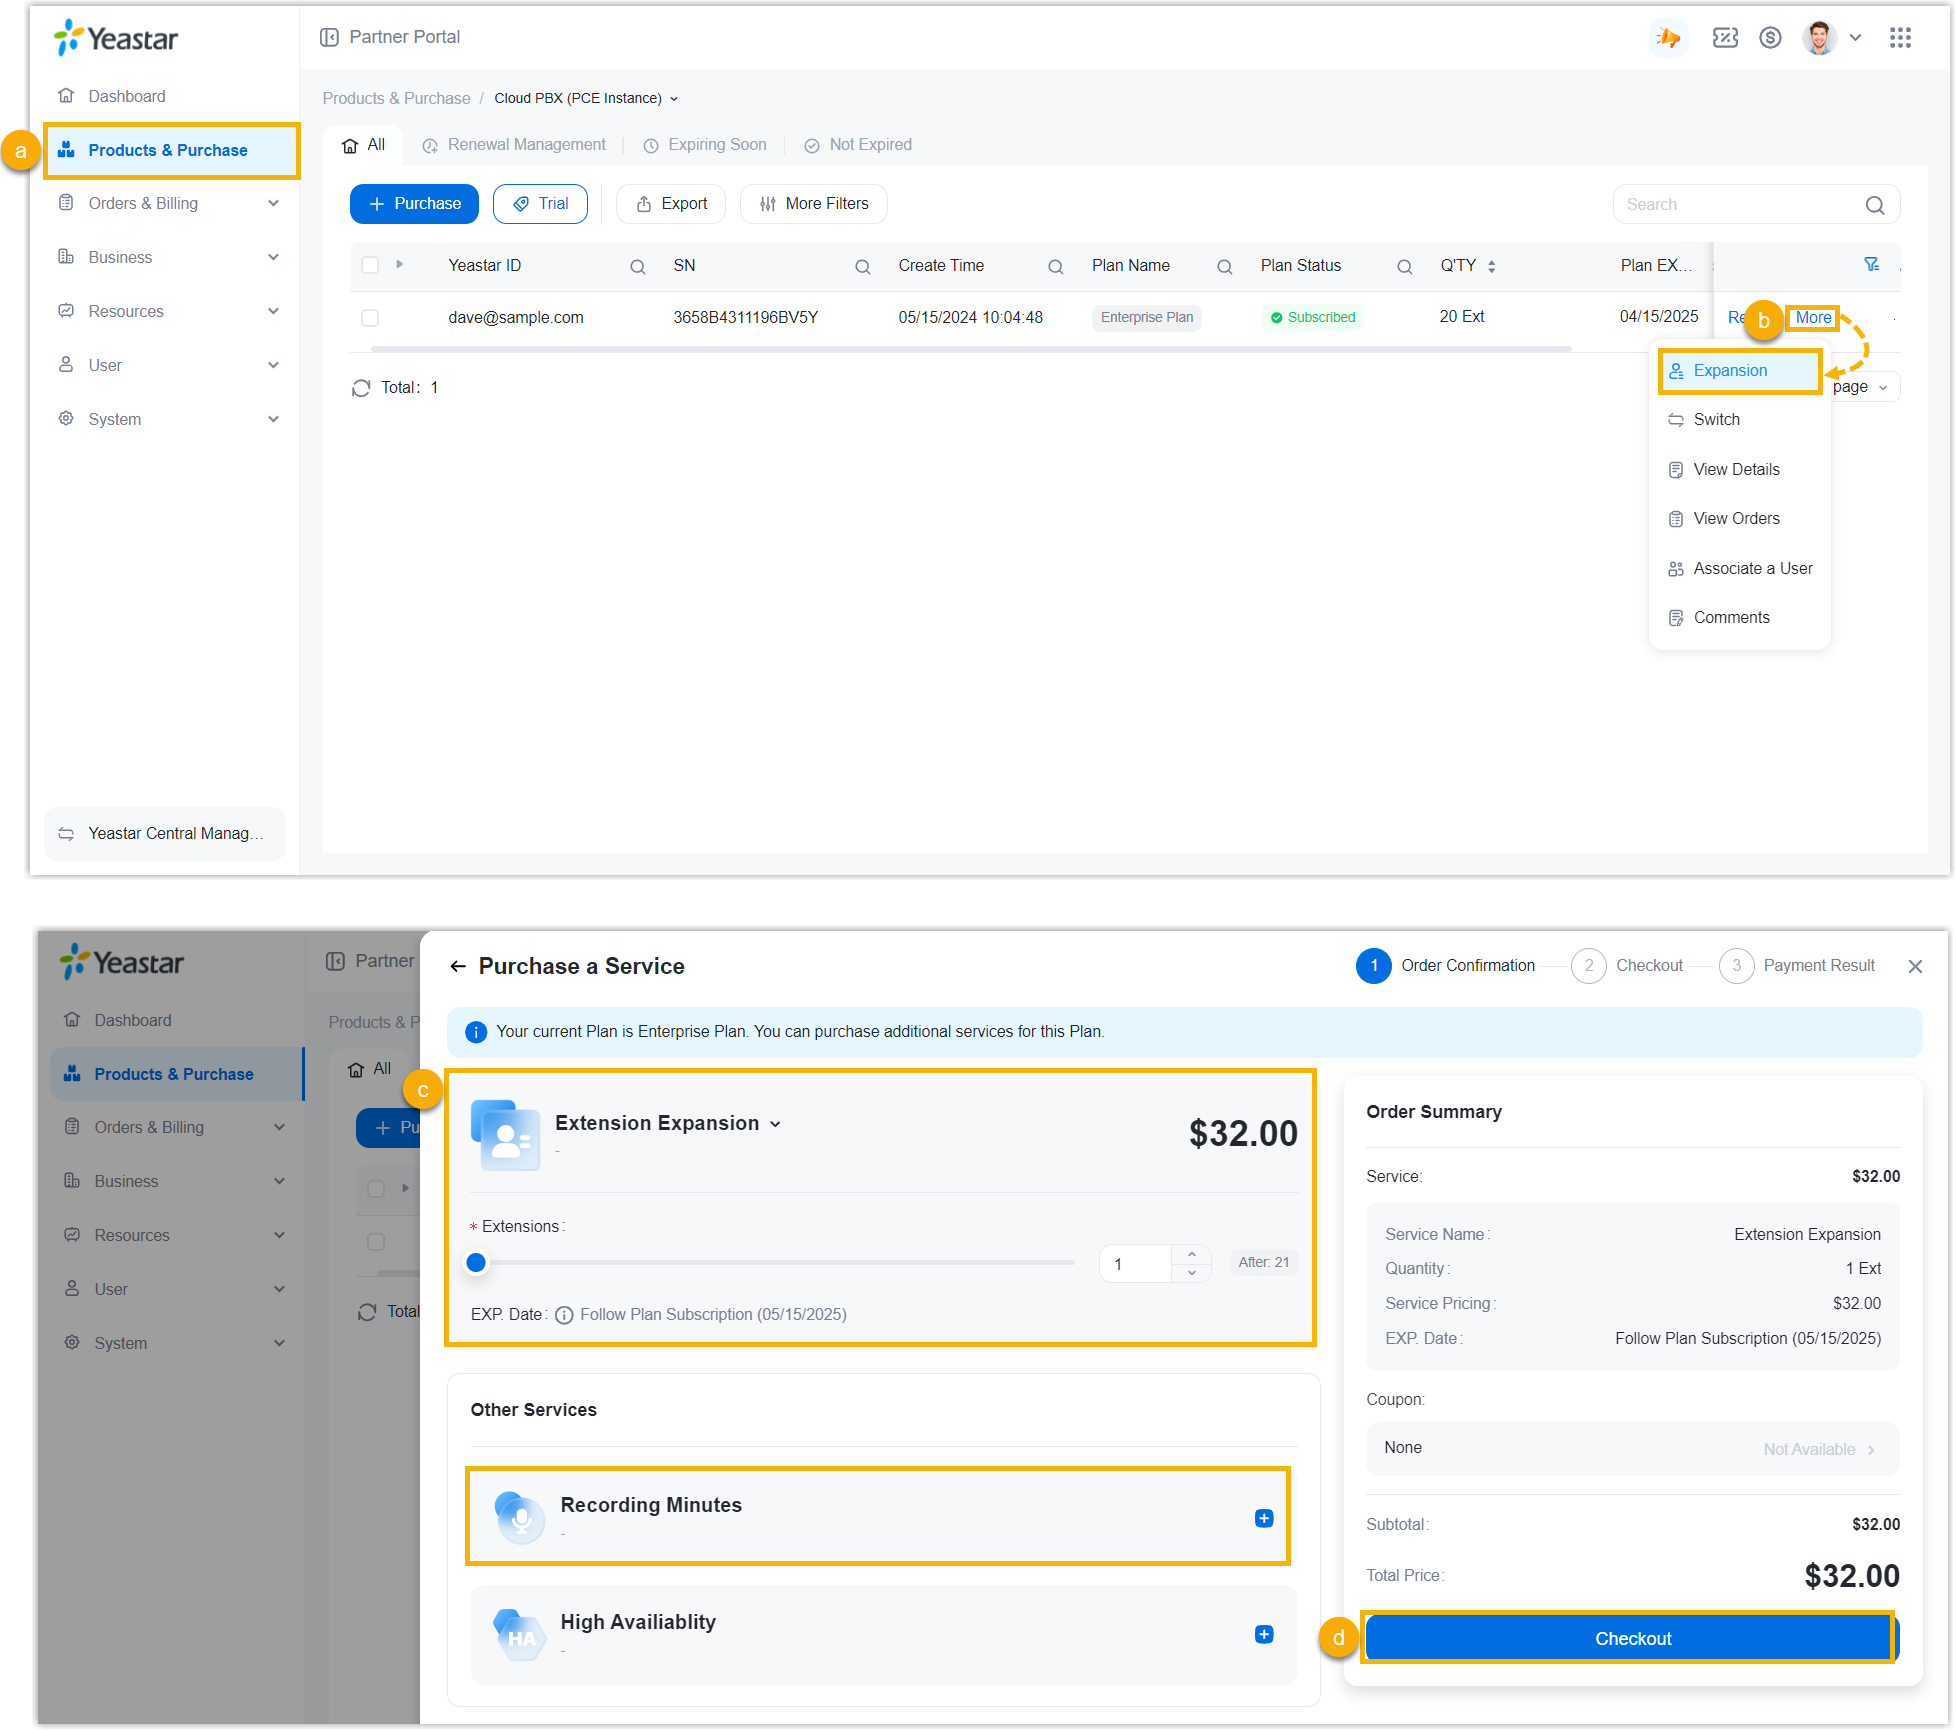
- Expand extensions or call recording minutes
- Subscribe to additional services
-
Figure 1. Subscribe to High Availability Service 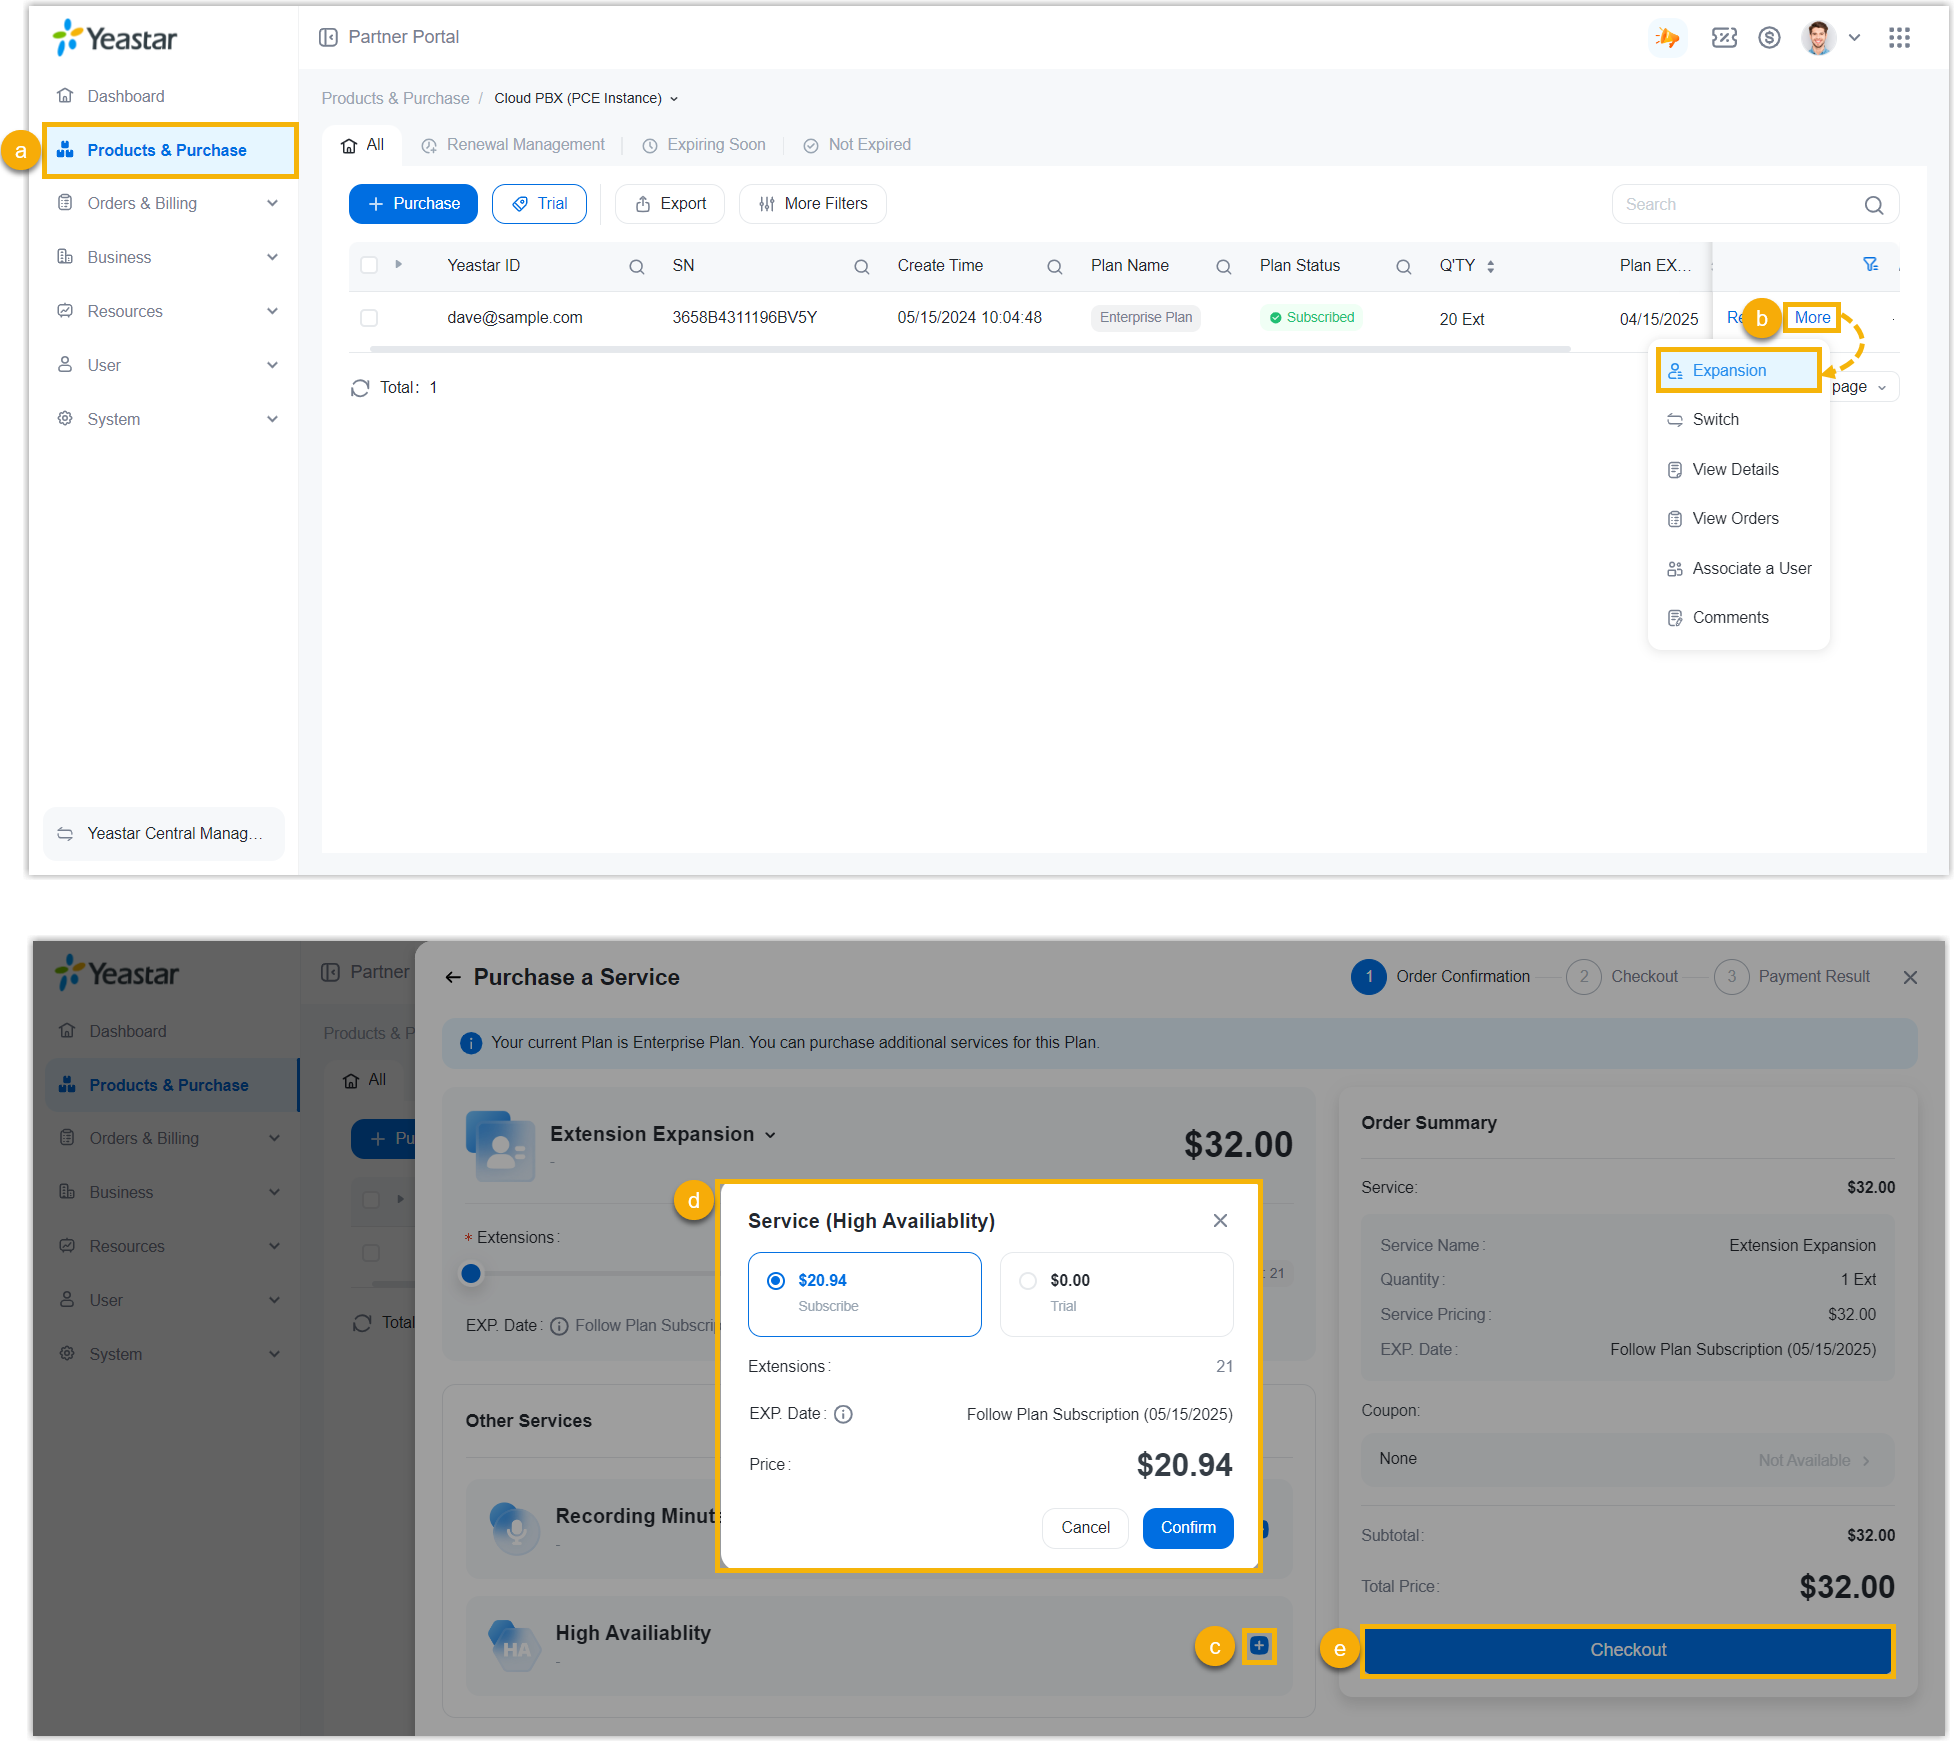
-
Figure 2. Subscribe to White Label, Custom Domain Name, or Dedicated IP service 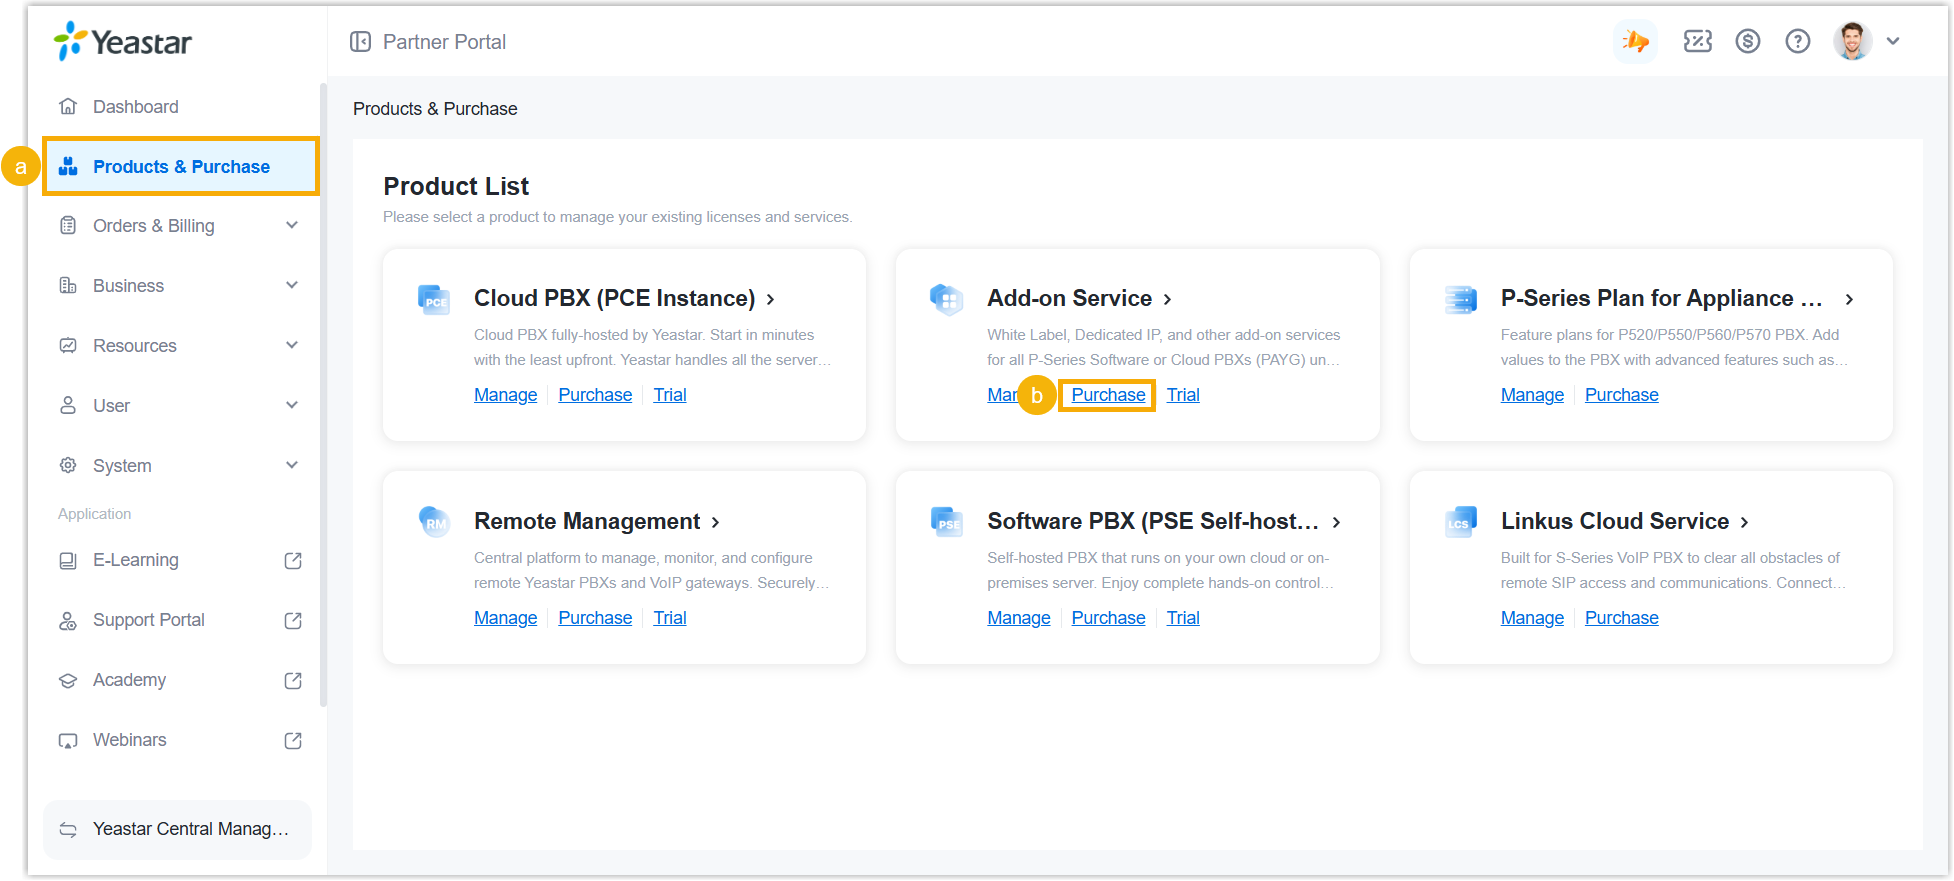
-
Note: If you subscribe to White Label or Custom Domain Name service, you need to configure specific settings on Yeastar Central Management.
- Renew P-Series Cloud Edition
