Install Yeastar P-Series Software Edition on Amazon AWS from Yeastar Partner Portal
As a Yeastar partner, you can deploy Yeastar P-Series Software Edition on Amazon AWS from Yeastar Partner Portal, enabling quick deployment of Yeastar PBX without manual configuration of the deployment environment. This topic describes how to deploy Yeastar P-Series Software Edition on Amazon AWS from Yeastar Partner Portal.
Step 1. Create an access key on AWS
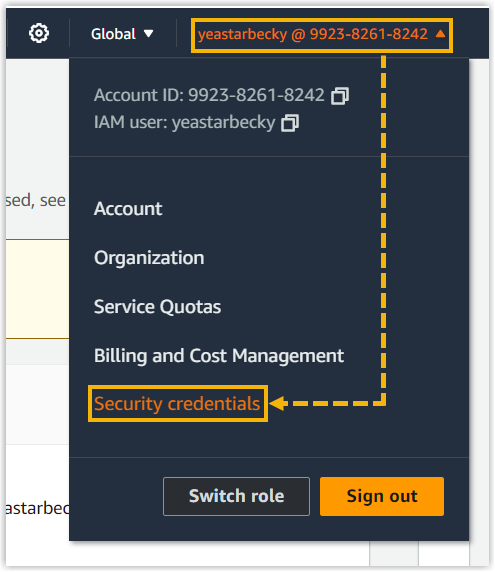
- Log in to AWS Console.
- At the top-right corner, click your account, then select
Security credentials from the drop-down
list.
- In the Access keys section, click
Create access key.

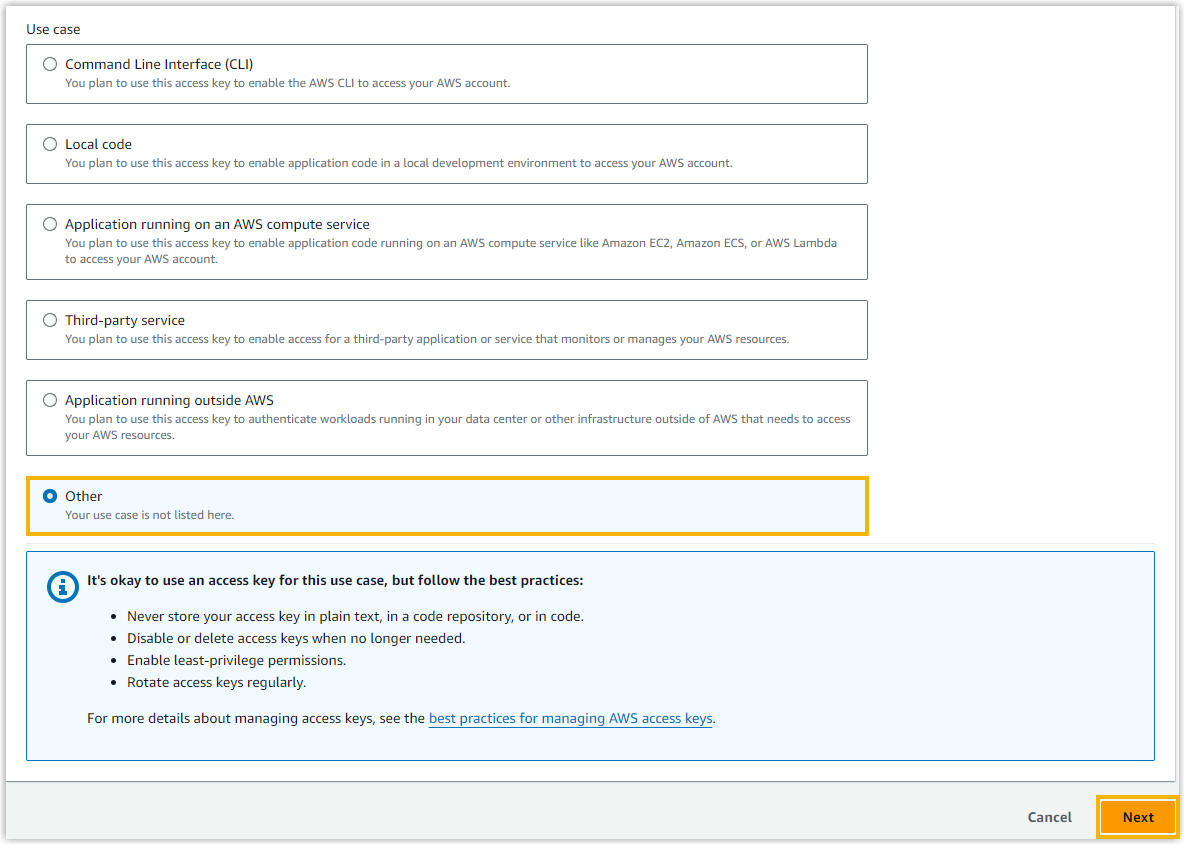
- On the Access key best practices &
alternatives page, select Other, then
click Next.
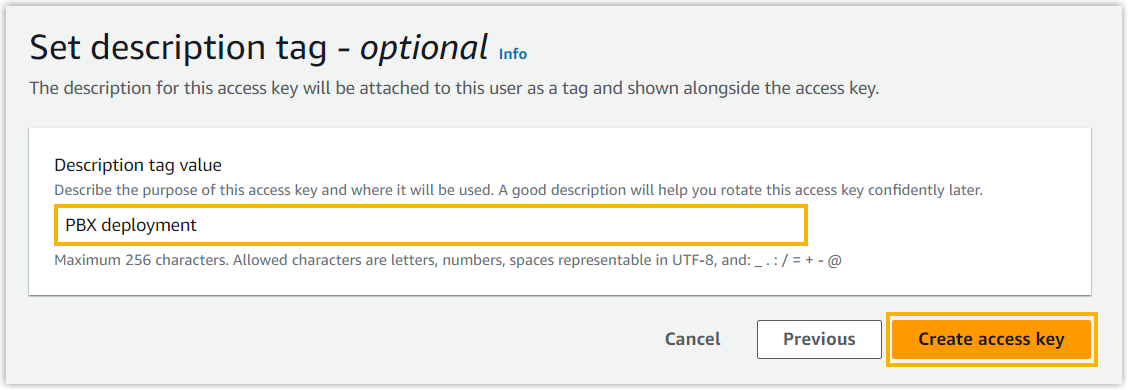
- On the Set description tag - optional
page, enter a description for the access key as needed, then click
Create access key.
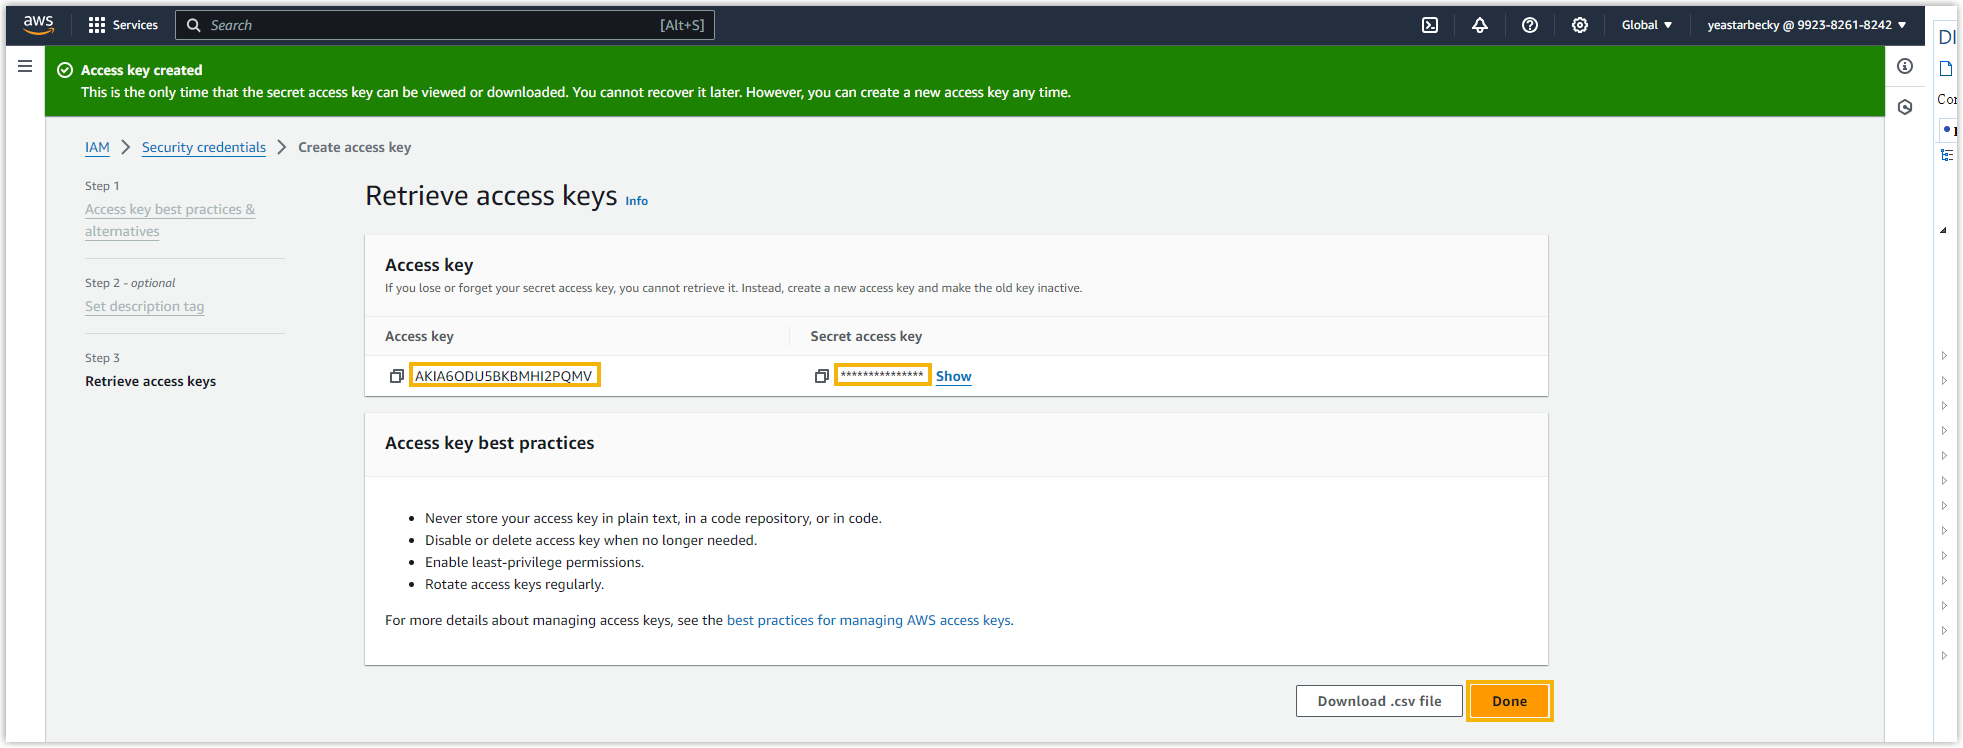
- On the Retrieve access keys page,
copy and note down the values of Access key and
Secret access key, then click
Done.Important: For Secret access key, the value is shown only ONCE, so make sure that you save the credential in a secure location before clicking Done to close the window. We recommend that you click Download .csv file to save the credential file to your computer.

Step 2. Deploy Yeastar PBX on Amazon AWS from Yeastar Partner Portal
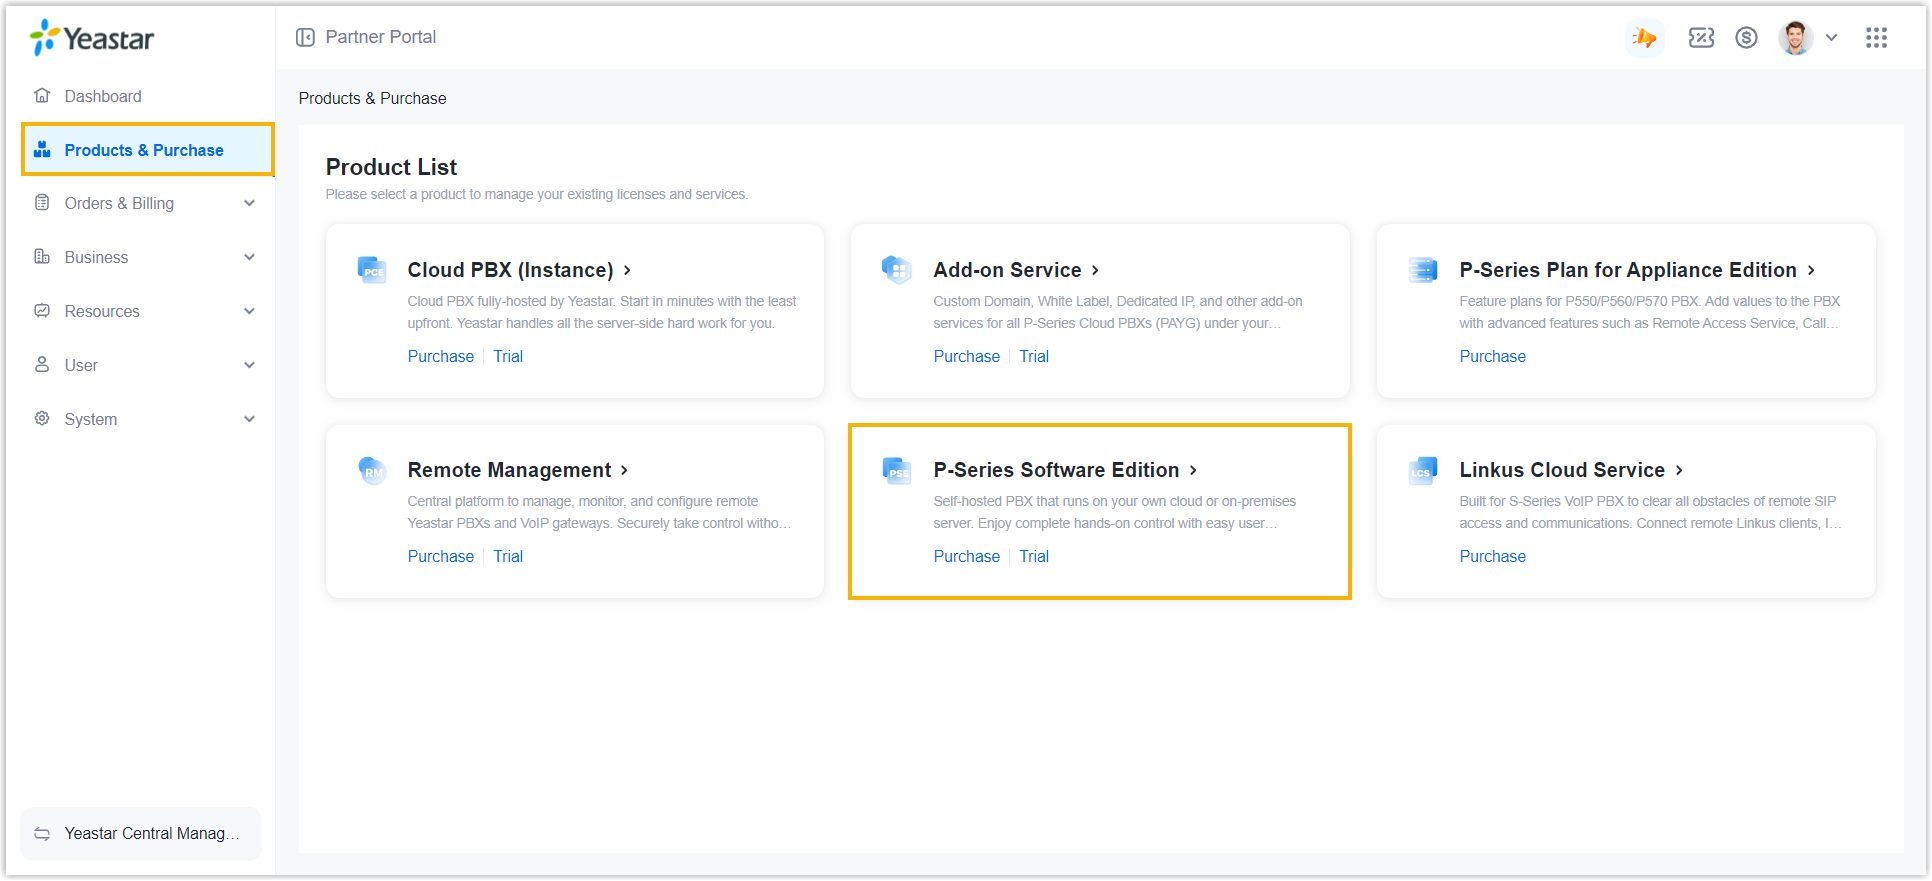
- Log in to Yeastar Partner Portal.
- On the left navigation bar, click Products &
Purchase, then click Software PBX (PSE
Self-hosted).
- In the Activation Status column,
click Install PBX for the desired software
PBX.
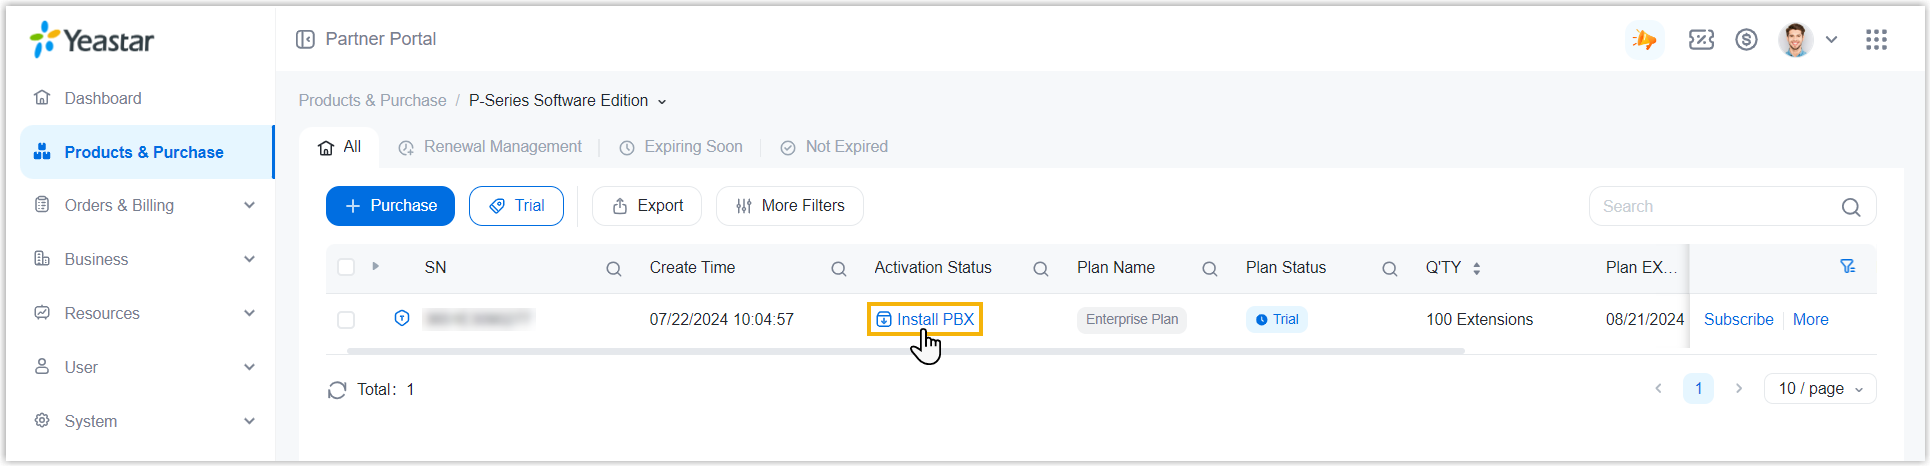
- In the pop-up window, click Amazon AWS.

- On the Authorization page, complete the following
settings to allow Yeastar Partner Portal to communicate with AWS
API.

- Fill in the API credentials that you have obtained from AWS.
- Access Key ID: Enter the access key ID that you have obtained from AWS.
- Secret Access Key: Enter the secret access key that you have obtained from AWS.
- If you want Yeastar Partner Portal to remember the API credentials,
select the checkbox of Remember and maintain the
authorized connection status.
Next time you try to deploy Yeastar PBX on Amazon AWS from Yeastar Partner Portal, you won't have to enter the API credentials again.
- Click Verify.
- Fill in the API credentials that you have obtained from AWS.
- On the Create Instance page, set up the instance,
then click Create and Install.

- Instance Name: Enter a name to help you identify the instance on EC2 console.
- Region: Select the region where you want to deploy the PBX server.
- Instance Type: Select an instance type based
on the Extensions (EXT) and Concurrent Calls (CC) of
your PBX system.
1-20 EXT (1-5 CC)
21-50 EXT (6-13 CC)
51-250 EXT (14-63 CC)
251-500 EXT (64-125 CC)
501-1000 EXT (126-250 CC)
EXT > 1000 (CC > 250)
Recommended Instance Type t3.small t3.medium c5a.xlarge c5a.2xlarge c5.2xlarge Contact Yeastar Note: For some instance types (such as T3, C5, C5a) that do not support instance store volumes, an Amazon EBS volume of 50 GiB (the minimum storage requirement for the installation) will be created and attached to the instance on which PBX is running at launch.
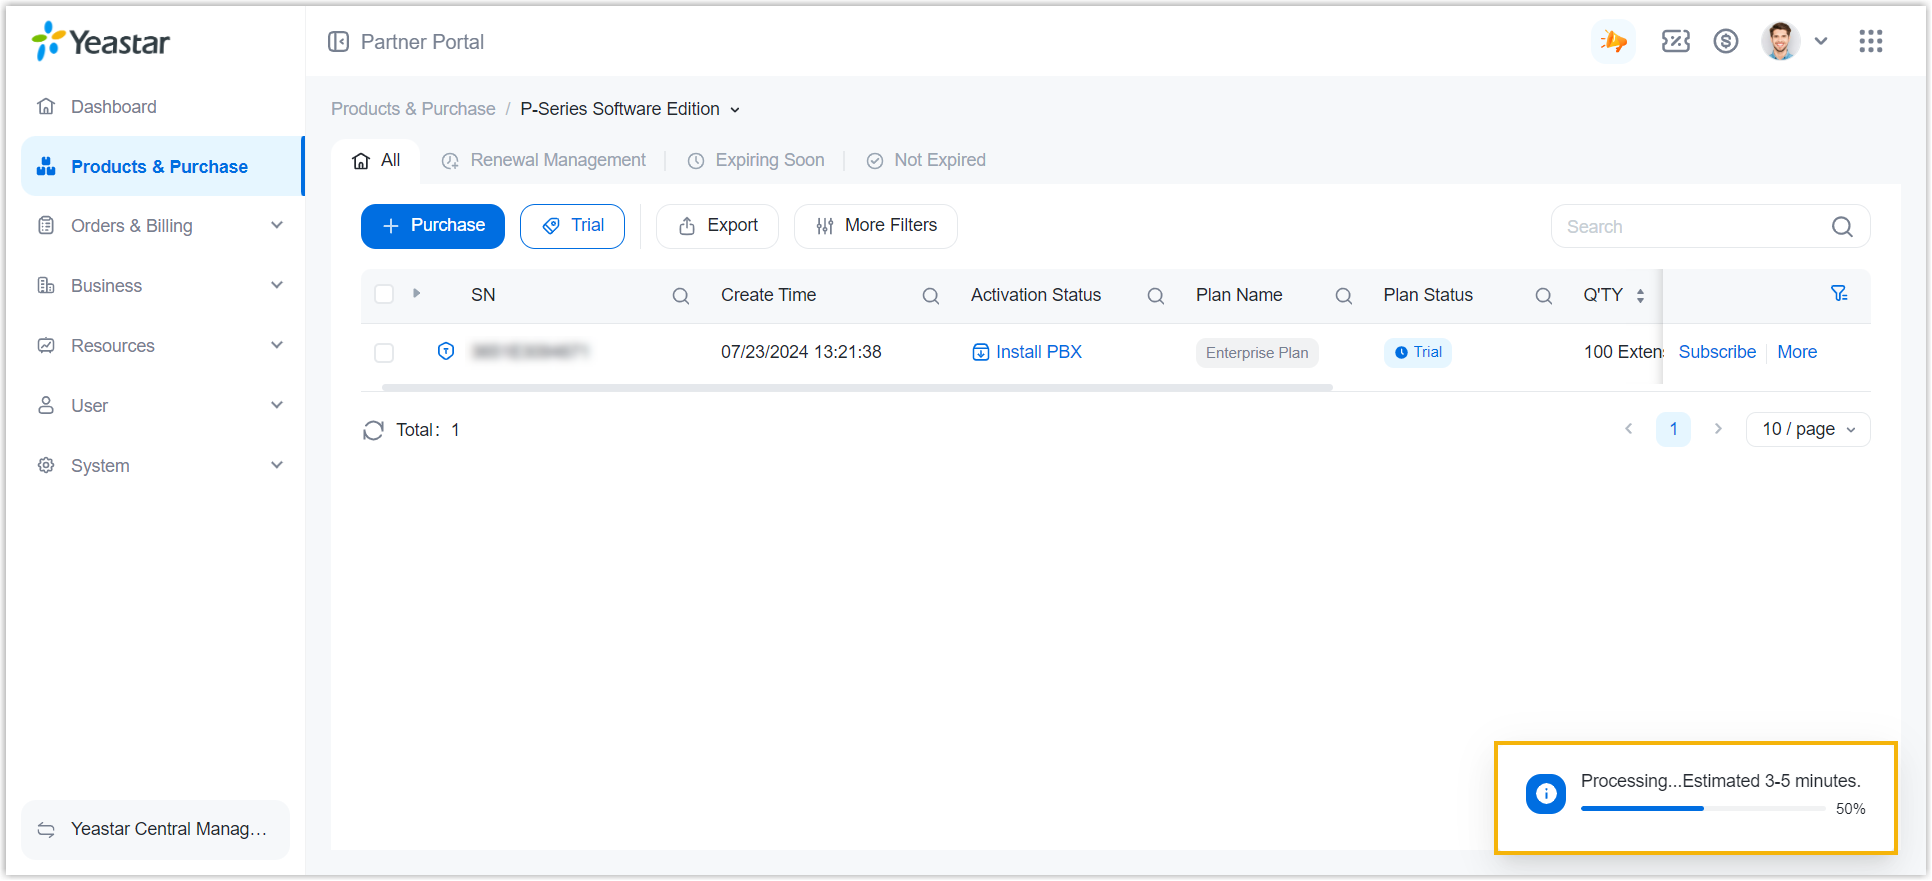
It takes a few minutes to create and install Yeastar P-Series Software Edition on Amazon AWS. You can check the status of the installation process in the progress bar at the bottom-right corner.
Result

What to do next
Use activation code to activate the system.
- On the product list, click
 beside the desired software PBX, then
click Copy to copy the activation code.
beside the desired software PBX, then
click Copy to copy the activation code.
- Open a web browser, enter the activation URL in the address bar, then press
Enter.
- Activate and initially set up the PBX using the Installation Wizard.Note:
- Next time you want to access PBX web portal using web browser,
you can access the public IP of the instance on Amazon EC2
console.

- Next time you want to access the PBX via SSH, you can
use the username
supportand the console password configured on PBX web portal (Path: ).
- Next time you want to access PBX web portal using web browser,
you can access the public IP of the instance on Amazon EC2
console.