Provision Mitel IP Phones with Yeastar P-Series Cloud Edition
This topic takes Mitel 6867i (firmware: 5.0.0.1018) as an example to describe how to provision a Mitel IP phone with Yeastar P-Series Cloud Edition.
Requirements and restrictions
- Requirements
- The firmwares of Mitel IP phone and Yeastar PBX meet the following requirements.
- Restrictions
- The PBX function keys DTMF, Intercom and Park & Retrieve are NOT supported on the provisioned Mitel IP phones.
Scenarios
The provisioning methods and operations vary depending on your provisioning needs, as
the following table shows:
| Scenario | Description |
|---|---|
| Provision a SINGLE Mitel IP phone | In this
scenario,
you can manually add a provisioning link provided by Yeastar PBX
to the phone. In this way, the phone can retrieve configurations
from the PBX using the given link. For more information, see Manually provision a Mitel IP phone. |
| Provision MULTIPLE Mitel IP phones | In this scenario, you can utilize DHCP option 66 to deliver
the provisioning link offered by Yeastar PBX to the IP phones.
In this way, the phones can retrieve configurations from the PBX
using the given link. For more information, see Auto Provision multiple Mitel IP phones. |
Manually provision a Mitel IP phone
- Prerequisites
-
- Make sure that you have downloaded the template for the desired phone model (Path: ).
- RESET the IP phone if it is previously used.
- Gather information of the IP phone, including Vendor, Model, and MAC address.
- Procedure
- Step 1. Add the Mitel IP phone on PBX
- Add the IP phone on PBX. The PBX will generate a configuration file based on the phone's MAC address.
-
- Log in to PBX web portal, go to .
- Click .
- In the IP Phone section, enter the
following phone information.
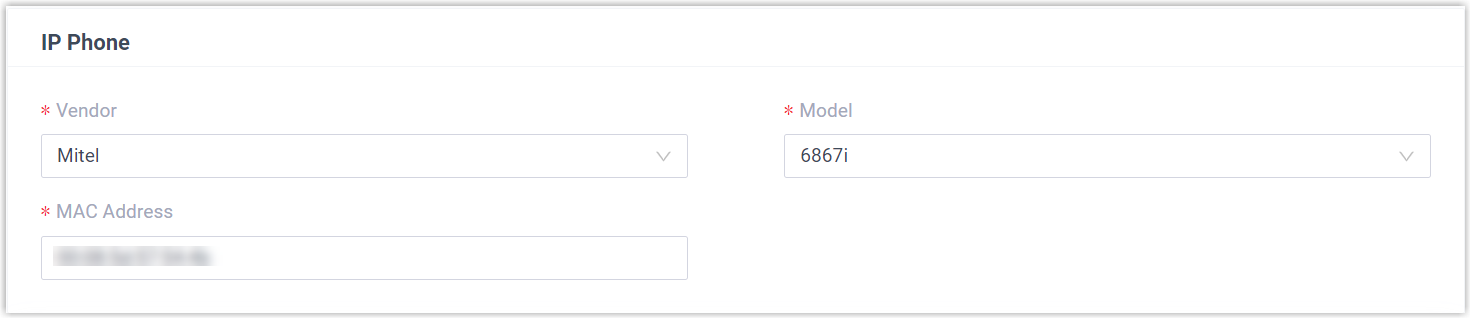
- Vendor: Select Mitel.
- Model: Select the phone model. In this example, select 6867i.
- MAC Address: Enter the MAC address of the IP phone.
- In the Options section, configure the
auto provision settings.

- Template: Select a desired
template from the drop-down list.Note: You can select the default template corresponding to the phone model, or customize your own template. For more information, see Create a Custom Auto Provisioning Template.
- Provisioning Link:
A provisioning link is automatically generated, which
points to the location where the phone's configuration
file is stored.Note: Note down the provisioning link, as you will use it later.
- Template: Select a desired
template from the drop-down list.
- In the Assign Extension section, assign
an extension to the IP phone.
 Tip: If your desired extension is not listed in the drop-down list, it indicates that the extension has been associated with an IP phone.
- To release the extension from the associated IP phone, see Release an Extension from a Provisioned IP Phone.
- To register the extension to the phone without releasing it from the previously associated one, you need to configure the concurrent registration setting for the extension, as the PBX only allows an extension to register with one SIP endpoint by default.
- Click Save.
- Step 2. Configure provisioning server on the Mitel IP phone
- Manually configure provisioning server in the Mitel IP phone's web
interface using the provisioning link provided by the PBX.
- Log in to the web interface of the Mitel IP phone.
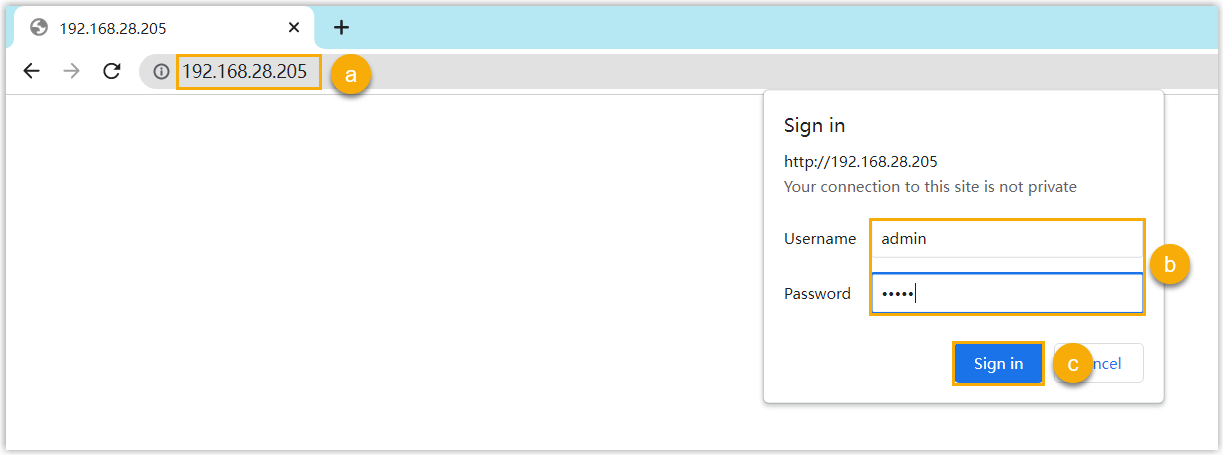
- In the browser's address bar, enter the IP address of the IP phone.
- Enter the username admin and the associated
password.
In this example, enter the default password
22222. - Click Sign in.
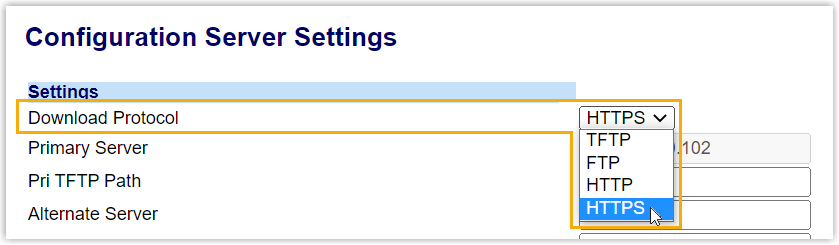
- On the left navigation bar, go to , then complete the following settings:
- In the Download Protocol
drop-down list, select
HTTPS.
- Enter the provisioning link in the corresponding
fields:

- HTTPS Server: Enter the domain name of the PBX. In this example, enter docs.test.yeastarcloud.com.
- HTTPS Path: Enter the HTTPS path provided in the URL. In this example, enter api/autoprovision/gVvUsLADybIdHwPX.
- HTTPS Port: Enter the HTTPS port of the PBX. In this example, enter 443.
- Click Save Settings.
- In the Download Protocol
drop-down list, select
HTTPS.
- Log in to the web interface of the Mitel IP phone.
- Step 3. Turn off certificate validation on the phone
- Some older Mitel phones don’t have certain necessary
certificates, so they would not be able to download
configuration
files from the PBX due to the certification validation issue. In this
case, you have to turn off the certificate validation on the IP phone to
bypass
the authentication between the PBX and the phone.Important: It is strongly recommended that you use a trusted certificate, as disabling server validation may introduce security risks on the network.
-
- On the IP phone web interface, go to , disable Validate
Certificates.
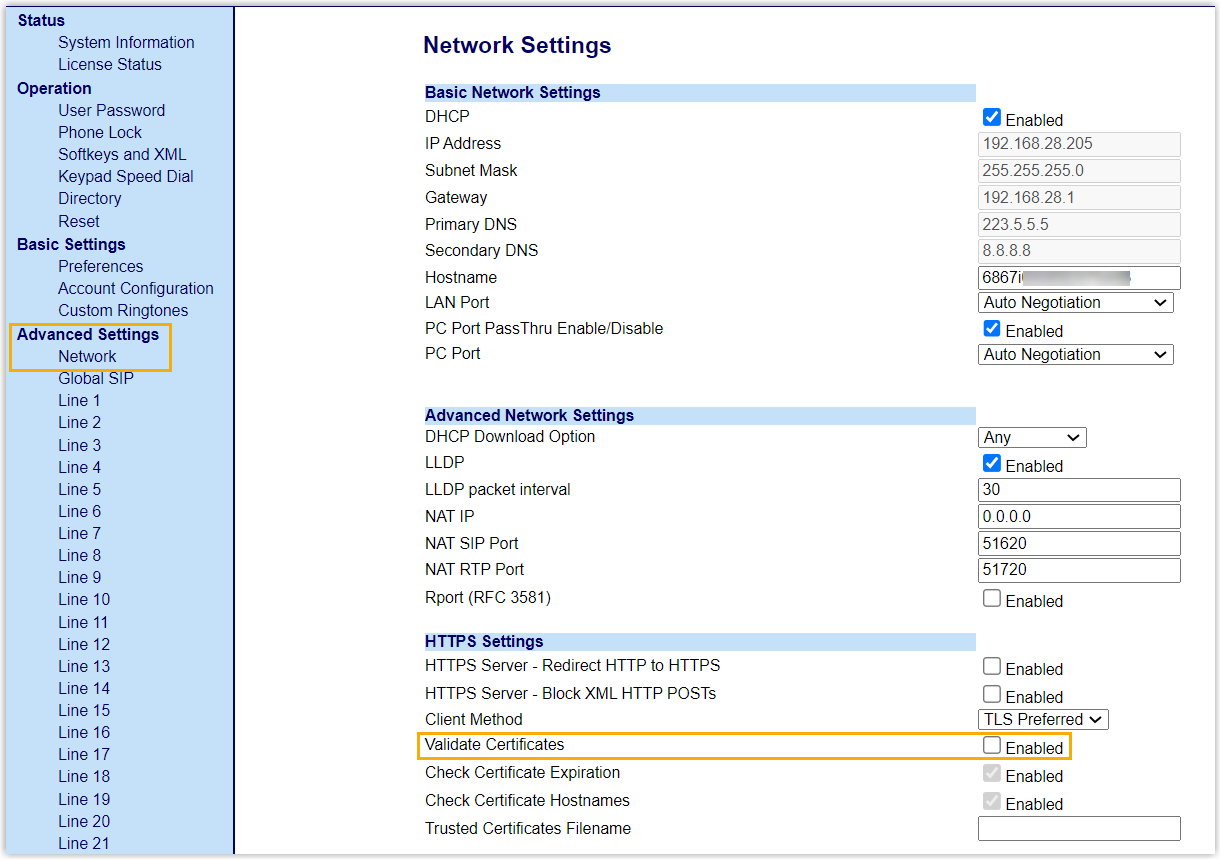
- Click Save Settings.
- Reboot the phone manually.
- On the IP phone web interface, go to , disable Validate
Certificates.
- Result
-
- After the IP phone is rebooted, it automatically downloads the configurations from the PBX and applies the settings.
- The extension is successfully registered on the IP phone. You
can check the registration status on on the PBX web portal.

Auto Provision multiple Mitel IP phones
- Prerequisites
-
- Make sure that there is only one DHCP server in the subnet where the IP phones are deployed, or the IP phones may fail to obtain IP addresses.
- Make sure that you have downloaded the template for the desired phone model (Path: ).
- RESET the IP phone if it is previously used.
- Gather information of IP phone, including Vendor, Model, and MAC address.
- Procedure
- Step 1. Add the IP phone on the PBX
- Add the IP phone on PBX. The PBX will generate a configuration file based on the phone's MAC address.
-
- Log in to PBX web portal, go to .
- Click .
- In the IP Phone section, enter the
following phone information.
- Vendor: Select Mitel.
- Model: Select the phone model. In this example, select 6867i.
- MAC Address: Enter the MAC address of the IP phone.
- In the Options section, configure the
auto provision settings.
- Template: Select a desired
template from the drop-down list.Note: You can select the default template corresponding to the phone model, or customize your own template. For more information, see Create a Custom Auto Provisioning Template.
- Provisioning Link:
A provisioning link is automatically generated, which
points to the location where the phone's configuration
file is stored.Note: Note down the provisioning link, as you will use it later.
- Template: Select a desired
template from the drop-down list.
- In the Assign Extension section, assign
an extension to the IP phone.Tip: If your desired extension is not listed in the drop-down list, it indicates that the extension has been associated with an IP phone.
- To release the extension from the associated IP phone, see Release an Extension from a Provisioned IP Phone.
- To register the extension to the phone without releasing it from the previously associated one, you need to configure the concurrent registration setting for the extension, as the PBX only allows an extension to register with one SIP endpoint by default.
- Click Save.
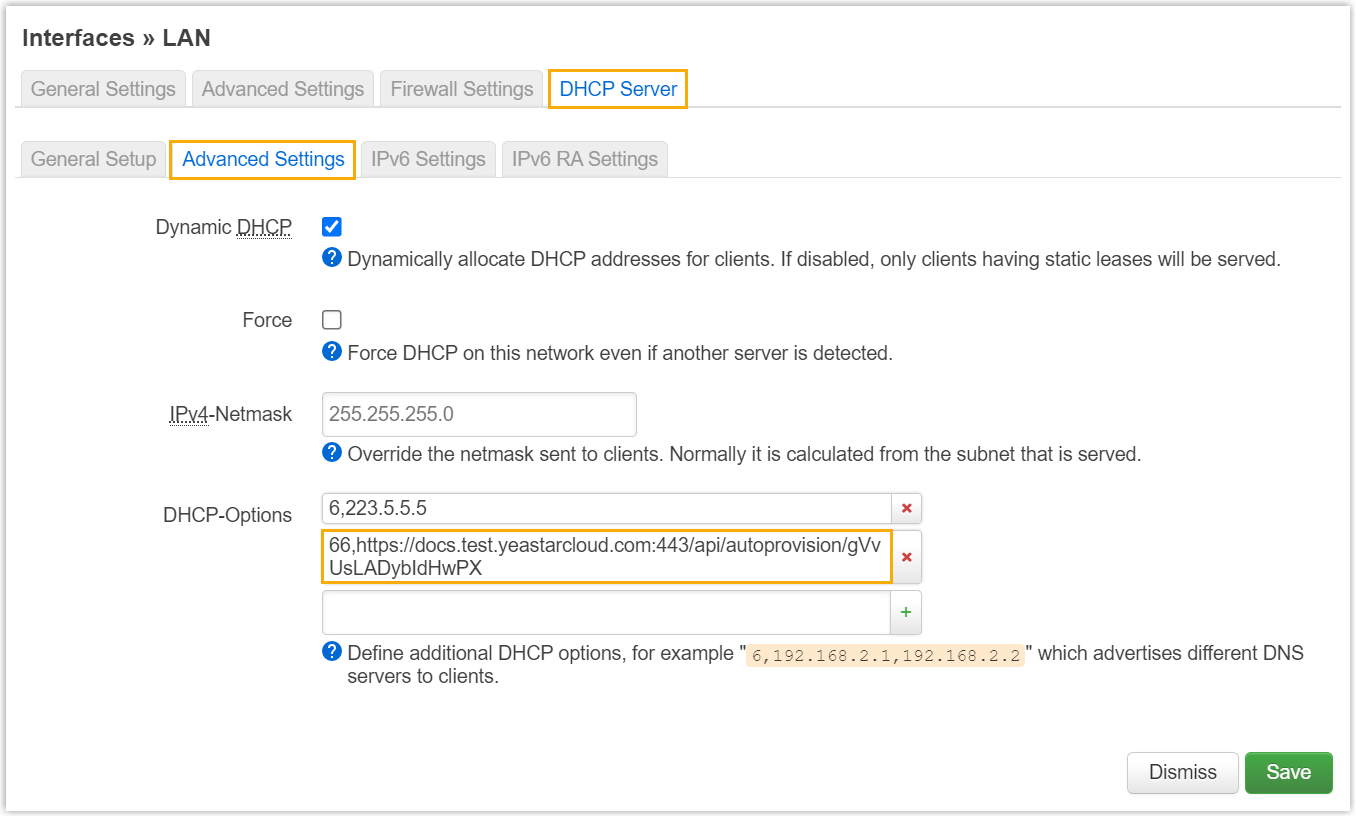
- Step 2. Configure DHCP option 66 on DHCP server
- In the subnet where the IP phone is deployed, use the generated provisioning link to configure option 66 on the DHCP Server.
-
- On PBX web portal, copy the provisioning link from
the phone's detail page.

- On the DHCP server, set up DHCP option 66 with the provisioning
link.
In this example, the configuration is shown below.
- On PBX web portal, copy the provisioning link from
the phone's detail page.
- Step 3. Turn off certificate validation on the phone
- Some older Mitel phones don’t have certain necessary
certificates, so they would not be able to download
configuration
files from the PBX due to the certification validation issue. In this
case, you have to turn off the certificate validation on the IP phone to
bypass
the authentication between the PBX and the phone.Important: It is strongly recommended that you use a trusted certificate, as disabling server validation may introduce security risks on the network.
-
- Log in to the web interface of the Mitel IP phone.
- In the browser's address bar, enter the IP address of the IP phone.
- Enter the username admin and the associated
password.
In this example, enter the default password
22222. - Click Sign in.
- On the IP phone web interface, go to , disable Validate
Certificates.
- Click Save Settings.
- Reboot the phone manually.
- Log in to the web interface of the Mitel IP phone.
- Result
-
- After the IP phone is rebooted, it gets an IP address from the DHCP server, downloads the configurations from the PBX via the provisioning link, and applies the settings automatically.
- The extension is successfully registered on the IP phone. You can
check the registration status on on the PBX web portal.