Provision Mitel DECT System with Yeastar P-Series Cloud Edition
A DECT system consists of two parts, DECT base station and DECT handsets (namely DECT phones). This topic describes how to provision the Mitel DECT base station with Yeastar P-Series Cloud Edition, so that the Mitel DECT handsets can be connected to the PBX via the base station, allowing users to utilize the handsets as PBX extensions to make and receive calls.
Requirements
The firmwares of Mitel DECT base station and Yeastar PBX meet the following requirements.
| Base Station | Version Requirement | PBX Requirement |
|---|---|---|
| RFP 44 | 9.1 or later | 84.18.0.18 or later |
| RFP 45 | 9.1 or later | 84.18.0.18 or later |
| RFP 47 | 9.1 or later | 84.18.0.18 or later |
| RFP 48 | 9.1 or later | 84.18.0.18 or later |
The device model and firmware version of the Mitel DECT system used in this example are shown in the table below.
| Device Model | Firmware Version |
|---|---|
| Mitel DECT base station | |
| RFP 44 | v9.1 |
| Mitel DECT handset | |
| 732d | v9.0.3.33 |
Prerequisites
- You have configured IP address for the DECT base station and are able to access the web interface using the IP address.
- Gather information of the DECT base station, including Vendor, Model, and MAC address.
- Make sure that you have downloaded the template for the desired phone model (Path: ).
Procedure
Step 1. Configure Mitel DECT base station on PBX
On PBX web portal, configure the provisioning settings for the DECT base station, and assign extensions to the DECT handsets.
- On PBX web portal, go to .
- Click .
- In the IP Phone section, enter the following
information.
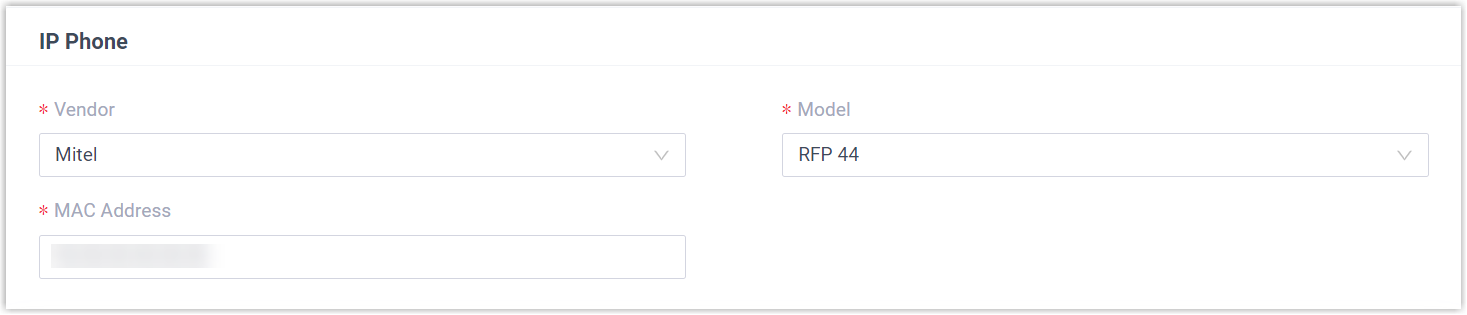
- Vendor: Select Mitel.
- Model: Select the device model. In this example, select RFP 44.
- MAC Address: Enter the MAC address of the DECT base station.
- In the Options section, configure the following
settings.

- Template: Select a desired
template from the drop-down list.Note: You can select the default template corresponding to the phone model, or customize your own template. For more information, see Create a Custom Auto Provisioning Template.
- Provisioning Link:
A provisioning link is automatically generated, which
points to the location where the phone's configuration
file is stored.Note: Note down the provisioning link, as you will use it later.
- Template: Select a desired
template from the drop-down list.
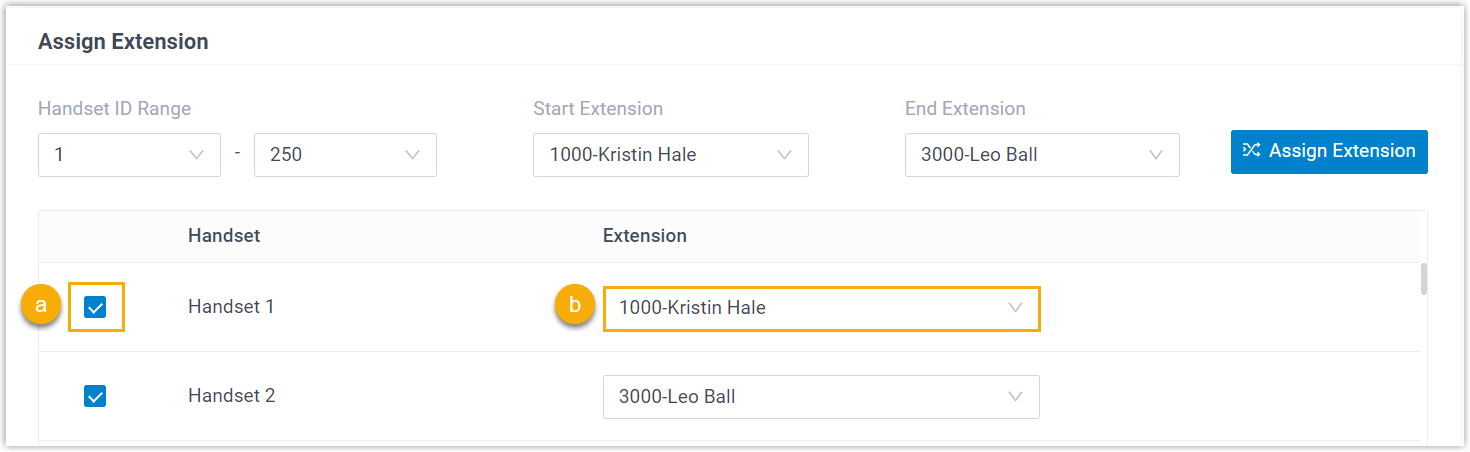
- In the Assign Extension section, assign extensions
for the DECT handsets.
- To assign extensions one by one, select the checkbox of the
corresponding handset, then select the desired extension in the
Extension drop-down list.
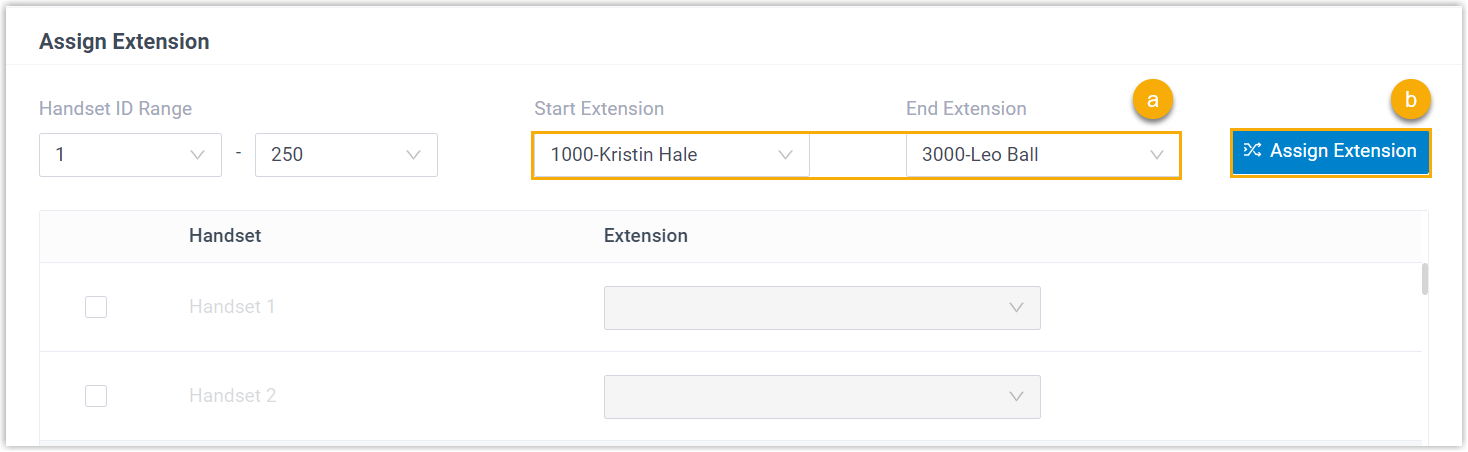
- To assign extensions in bulk, set the extension range in
Start Extension and End
Extension, then click Assign
Extension.
Tip: If your desired extension is not listed in the drop-down list, it indicates that the extension has been associated with an IP phone.- To release the extension from the associated IP phone, see Release an Extension from a Provisioned IP Phone.
- To register the extension to the phone without releasing it from the previously associated one, you need to configure the concurrent registration setting for the extension, as the PBX only allows an extension to register with one SIP endpoint by default.
- To assign extensions one by one, select the checkbox of the
corresponding handset, then select the desired extension in the
Extension drop-down list.
- In the Preference section, select a time zone in the Time Zone drop-down list.
- Complete other settings according to your needs.
- Click Save.
Step 2. Configure provisioning URL on Mitel DECT base station
Manually configure provisioning URL for the Mitel DECT base station using the provisioning link provided by the PBX.
- Log in to the web interface of the Mitel DECT base station.
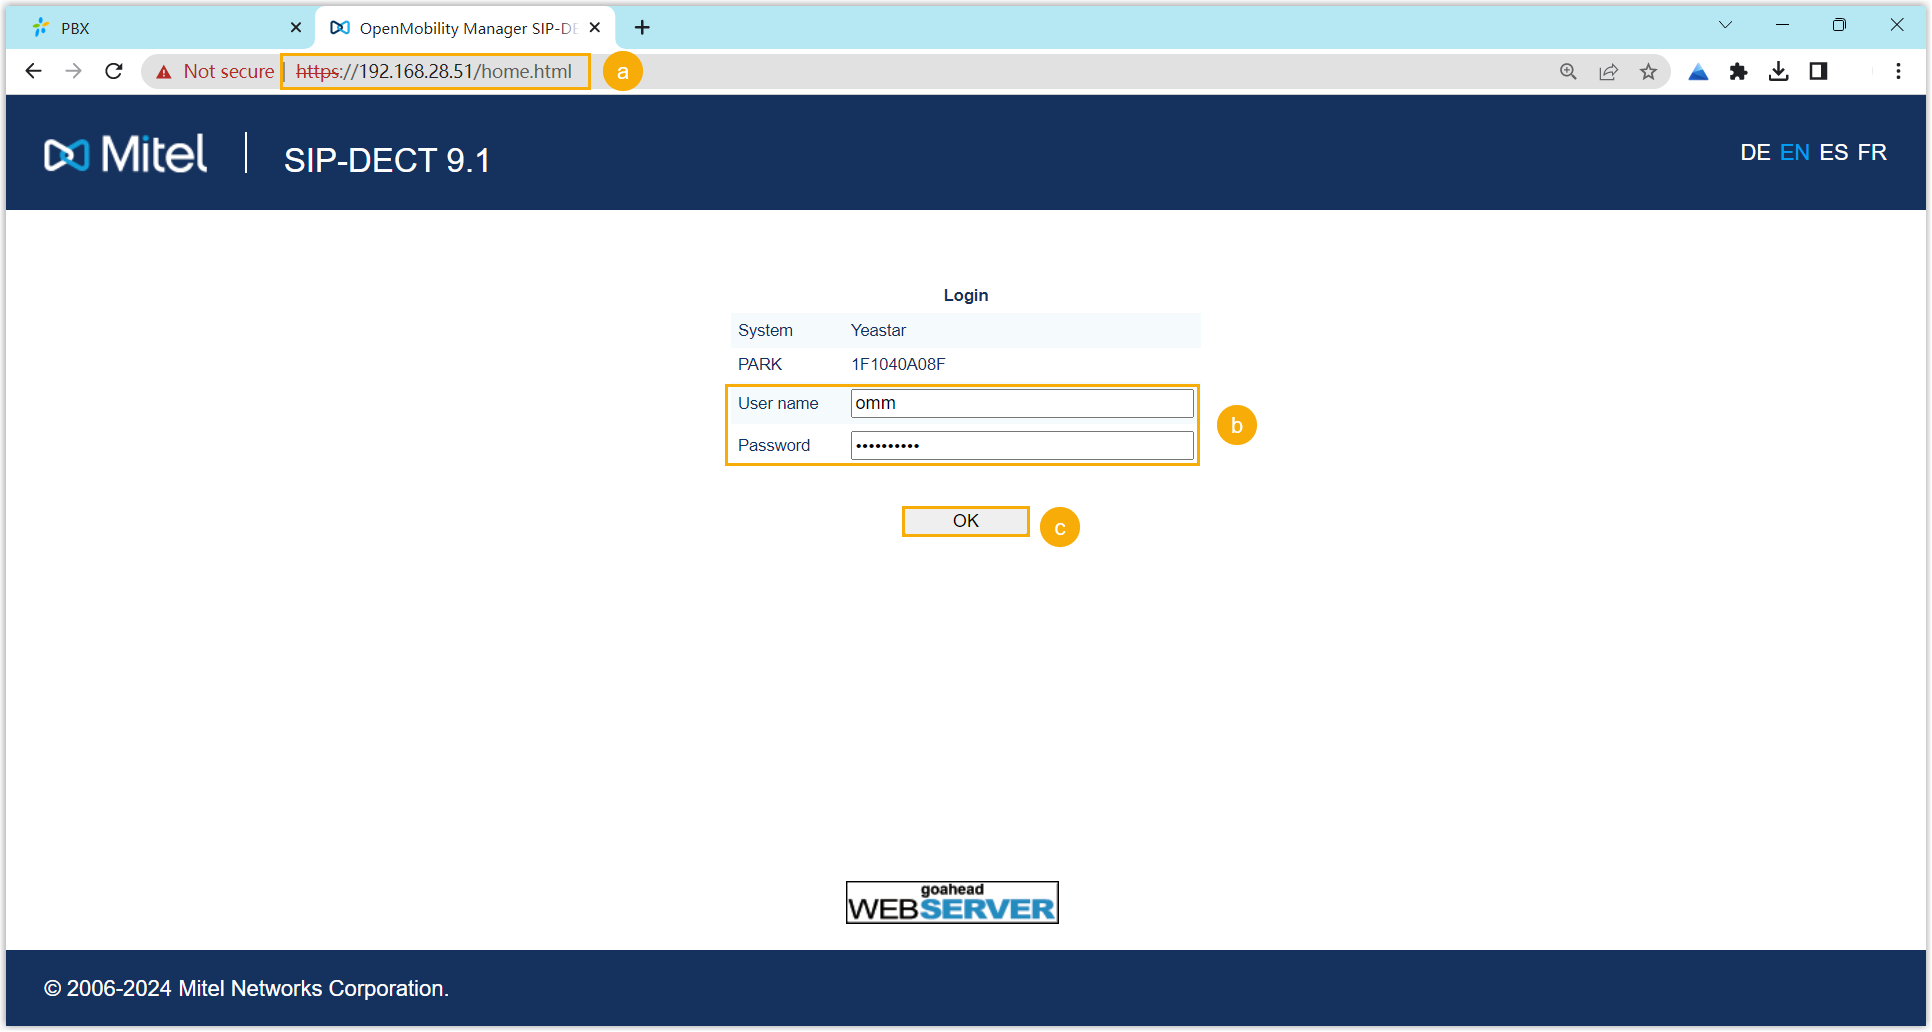
- In the browser's address bar, enter the IP address of the DECT base station
- Enter the username and the associated password.
- Click OK.
- On the top menu, select the checkbox of Advanced to
show the advanced settings.

- At the left navigation bar, go to .
- In the Provisioning URL section, do as follows:
- Select the checkbox of Active.
- Complete the following settings with the provisioning link obtained from the
PBX.
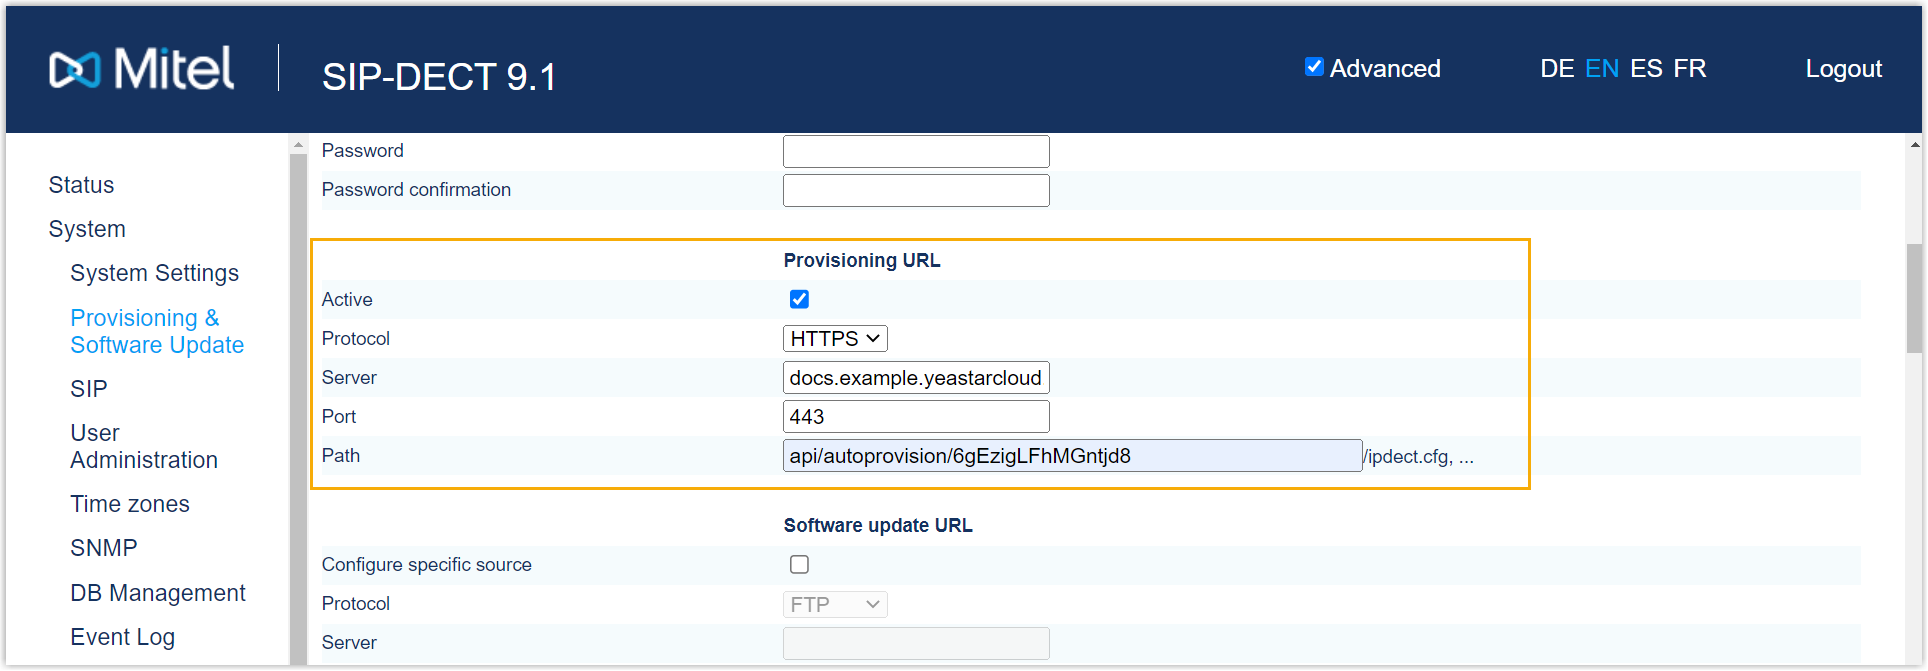
- Protocol: Select HTTP or HTTPS according to the prefix of the link.
- Server: Enter the server address (IP address or domain name).
- Port: Enter the server port.
- Path: Enter the file path (e.g.
api/autoprovision/6gEzigLFhMGntjd8).
- At the top of the configuration page, click OK.
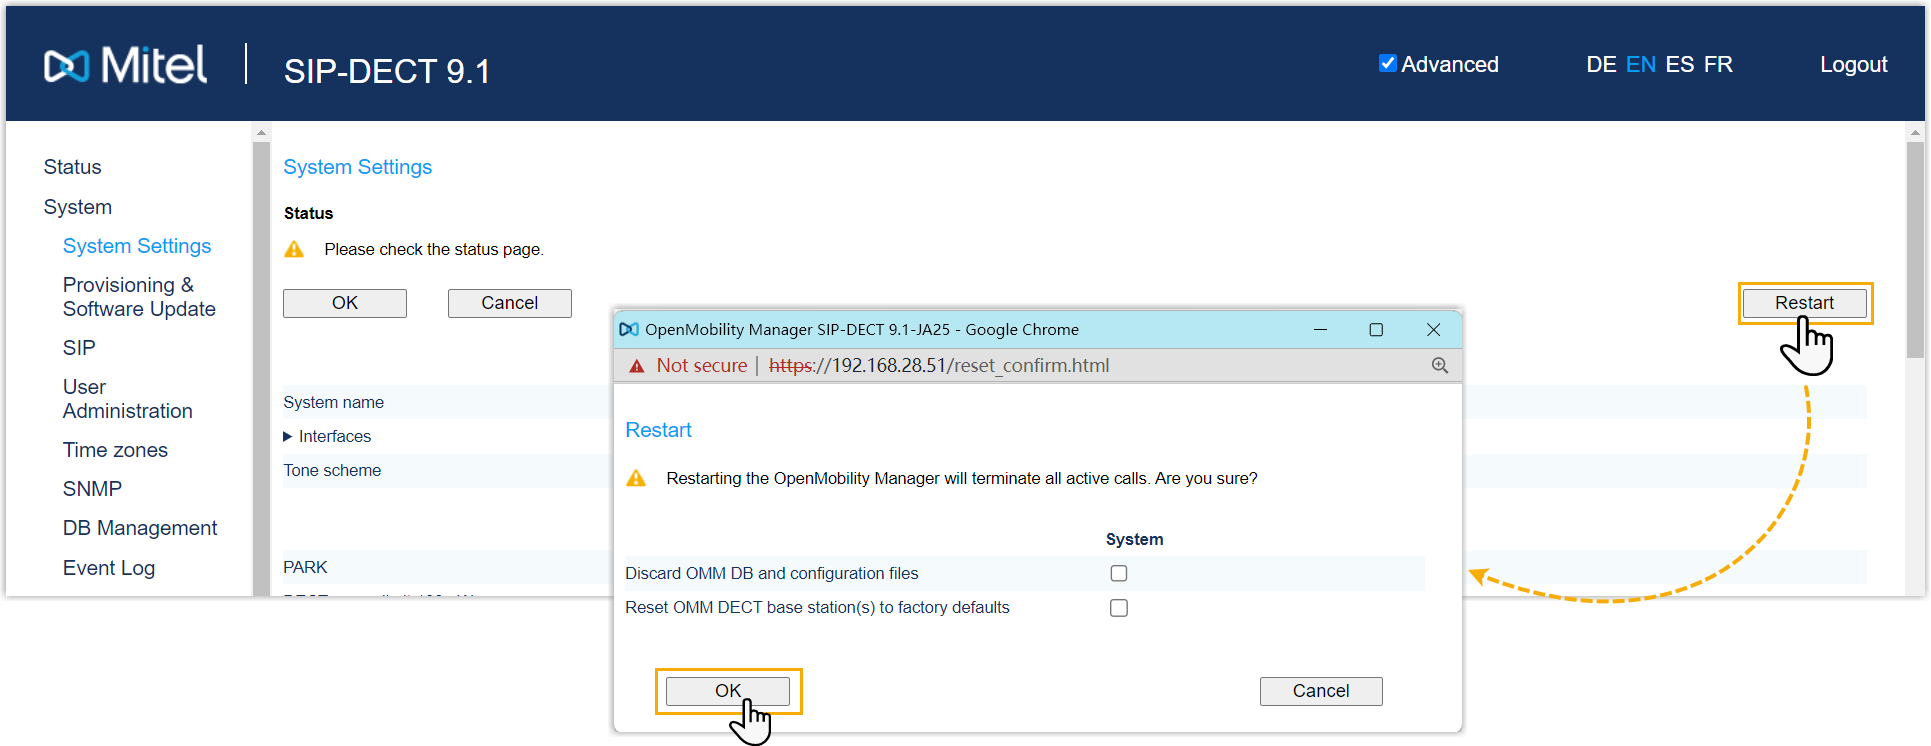
- Go to , click Restart and
OK to trigger provisioning.
After restarting and waiting for a few minutes, the subscription status on will display
 , indicating that the base
station has successfully downloaded configuration file from the
PBX.
, indicating that the base
station has successfully downloaded configuration file from the
PBX.
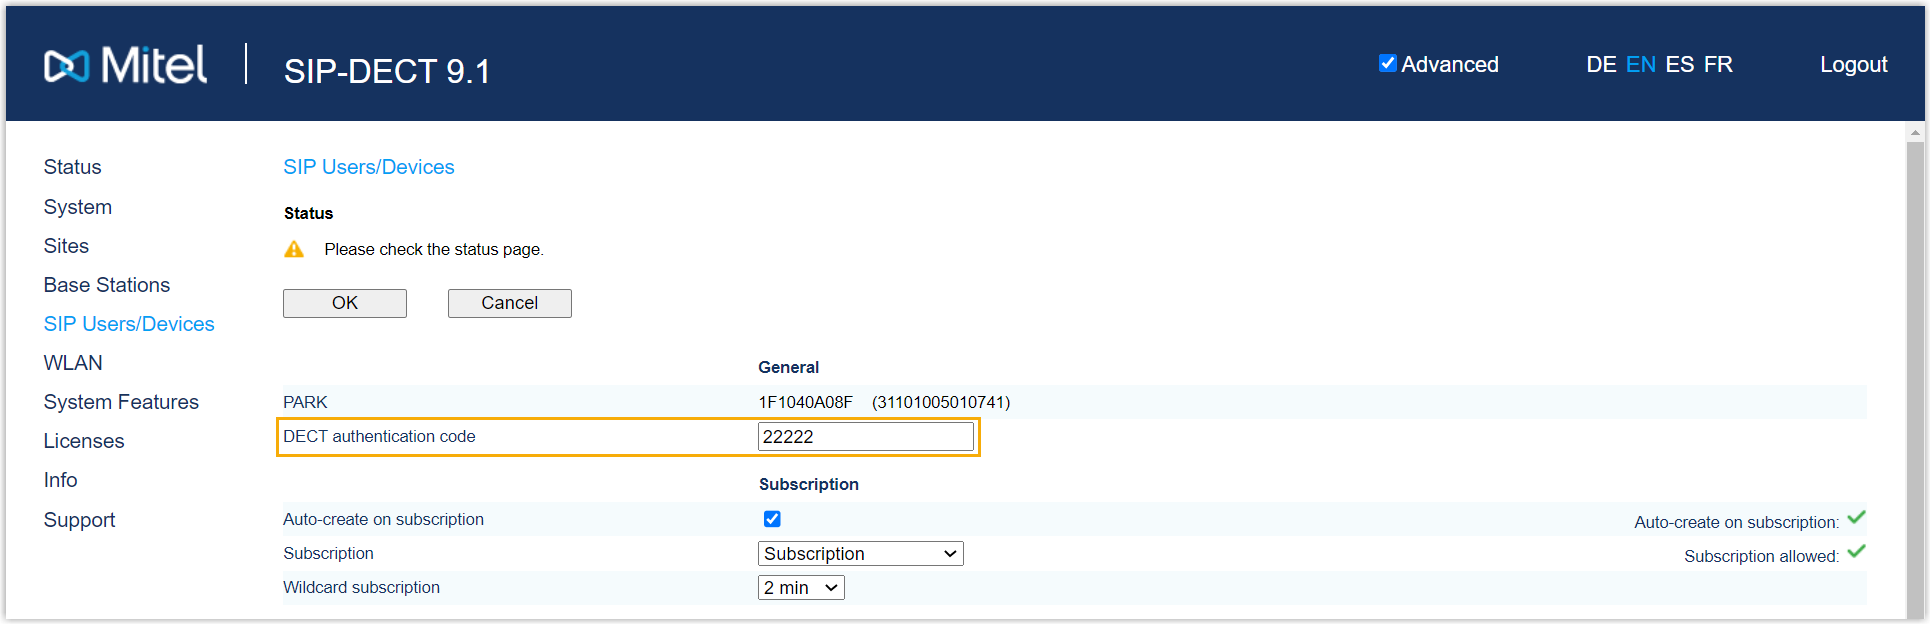
- In , set an authentication code and note it down.
This authentication code will be used later when registering the handset to the base station.
Step 3. Register a Mitel DECT handset to the DECT base station
Subscribe to the DECT base station and log in to the DECT handset, so that the DECT handset can be used as a PBX extension.
- Subscribe to the DECT base station.
- On the handset, go to
 > System > Subscription.
The DECT handset starts to search for a base station. When it finds the base station, there is a prompt asking you to enter an authentication code.
- Enter the authentication code, then press
Next and Ok.
The DECT handset prompts "success", indicating that the handset has successfully subscribed to the base station.
- On the handset, go to
- Log in to the DECT handset.
- On the handset, press Log in.
- In the Number page, enter the extension number assigned to the handset, then press Ok.
- In the User login page, enter the extension number again, then press Ok.
Result
- The handset is successfully subscribed to the DECT base station, and
associated with the assigned PBX extension via the base station.
- On the web interface of DECT base station, you can check the
subscription status of the handset on .

- On PBX web portal, you can check the registration status of the
extension on .

- On the web interface of DECT base station, you can check the
subscription status of the handset on .
- The registered DECT handsets can be used as extensions to make and receive calls.