Auto Provision Gigaset DECT System with Yeastar P-Series Cloud Edition
A DECT system consists of two parts, DECT base station and DECT handsets (namely DECT phones). This topic describes how to provision Gigaset DECT base station with Yeastar P-Series Cloud Edition, so that the Gigaset DECT handsets can be connected to the PBX via the base station, allowing users to utilize the handsets as PBX extensions to make and receive calls.
Requirements
The firmwares of Gigaset DECT base station and Yeastar PBX meet the following requirements.
| Base station | Version Requirement | PBX Requirement |
|---|---|---|
| N870 IP PRO | 2.38.1 or later | 84.5.0.86 or later |
| N670 IP PRO | 2.38.1 or later | 84.5.0.86 or later |
| N610 IP PRO | 2.52.0 or later | 84.5.0.86 or later |
The device model and firmware version of the Gigaset DECT system used in this example are shown in the table below.
| Device Model | Firmware Version |
|---|---|
| Gigaset DECT base station | |
| N870 IP PRO | v2.38.1 |
| Gigaset DECT handset | |
| S650H PRO | v114.074.04 |
| SL750H PRO | v116.074.04 |
Prerequisites
- Ensure there is only one DHCP server in the same subnet as the Gigaset DECT system (base station and handset) to assign IP for the base station; otherwise, the base station would fail to obtain an IP address.
- Make sure that you have downloaded the template for the desired phone model (Path: ).
- Gather information of the Gigaset DECT base station, including Vendor, Model, and MAC address.
Step 1. Add the Gigaset DECT base station on PBX
Add the DECT base station on PBX. The PBX will generate a configuration file based on the device's MAC address.- Log in to PBX web portal, go to .
- Click .
- In the IP Phone section, enter the following
information.
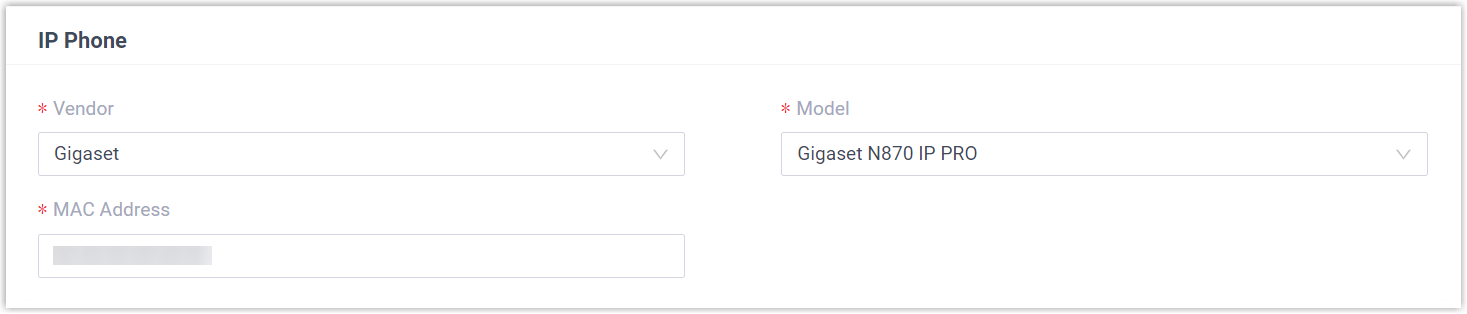
- Vendor: Select Gigaset.
- Model: Select the device model. In this example, select Gigaset N870 IP PRO.
- MAC Address: Enter the MAC address of the DECT base station.
- In the Options section, configure the following
settings.

- Template: Select a desired
template from the drop-down list.Note: You can select the default template corresponding to the phone model, or customize your own template. For more information, see Create a Custom Auto Provisioning Template.
- Provisioning Link: A provisioning link is automatically generated, which points to the location where the phone's configuration file is stored.
- Template: Select a desired
template from the drop-down list.
- In the Assign Extension section,
assign extensions for the DECT handsets.
- To assign extensions one by one, do as follows:

- In the Handset Mode drop-down list,
select the mode via which you want to associate the
handsets.
- Fixed Number Mode: Associate the handset with a specific extension number.
- IPUI Mode: Associate the handset using its unique IPUI codes.
- Select the checkbox of the desired handset.
- In the Extension drop-down list, select the desired extension.
- If you use IPUI mode, enter the IPUI code of the handset in the IPUI field.
- In the Handset Mode drop-down list,
select the mode via which you want to associate the
handsets.
- To assign extensions in bulk, do as follows:
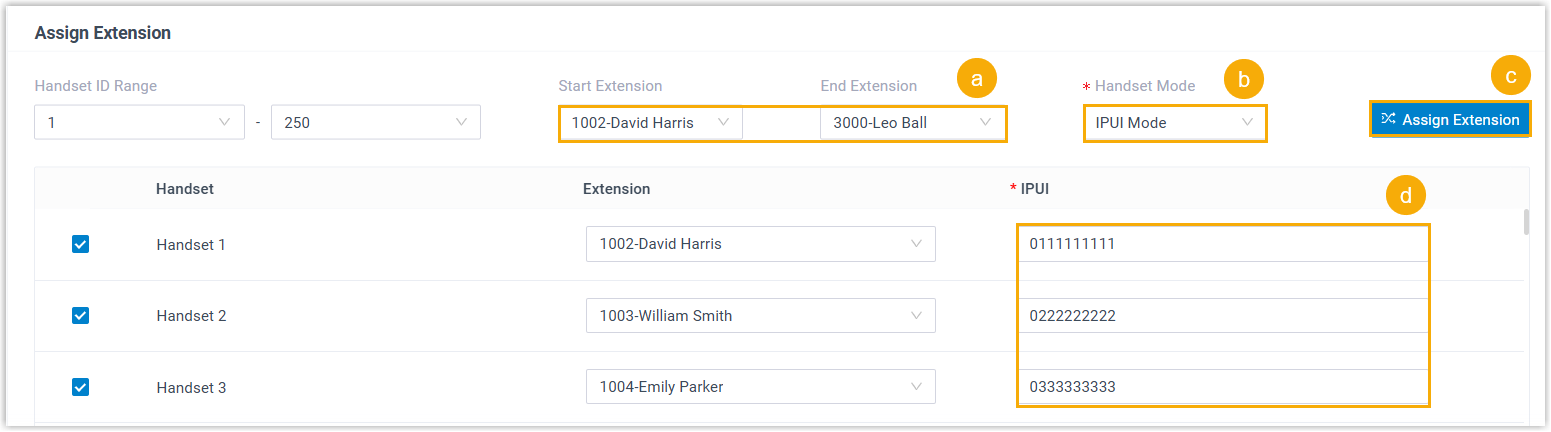
- In the Start Extension and End Extension drop-down lists, set the extension range.
- In the Handset Mode drop-down list,
select the mode via which you want to associate the
handsets.
- Fixed Number Mode: Associate the handsets with specific extension numbers.
- IPUI Mode: Associate the handsets using their unique IPUI codes.
- Click Assign Extension.
Handsets are automatically enabled and assigned with the specified extensions in sequence.
- If you use IPUI mode, enter the IPUI codes of the handsets in the IPUI field.
Tip: If your desired extension is not listed in the drop-down list, it indicates that the extension has been associated with an IP phone.- To release the extension from the associated IP phone, see Release an Extension from a Provisioned IP Phone.
- To register the extension to the phone without releasing it from the previously associated one, you need to configure the concurrent registration setting for the extension, as the PBX only allows an extension to register with one SIP endpoint by default.
- To assign extensions one by one, do as follows:
-
Optional: Configure other settings according to your needs.
- Click Save.
The DECT base station is added to the PBX, and displayed in the Auto Provisioning phone list; The PBX will send an event notification of RPS Request Success.
Tip: You can click in front of the DECT base station to see
the extensions assigned to the DECT handsets.
in front of the DECT base station to see
the extensions assigned to the DECT handsets.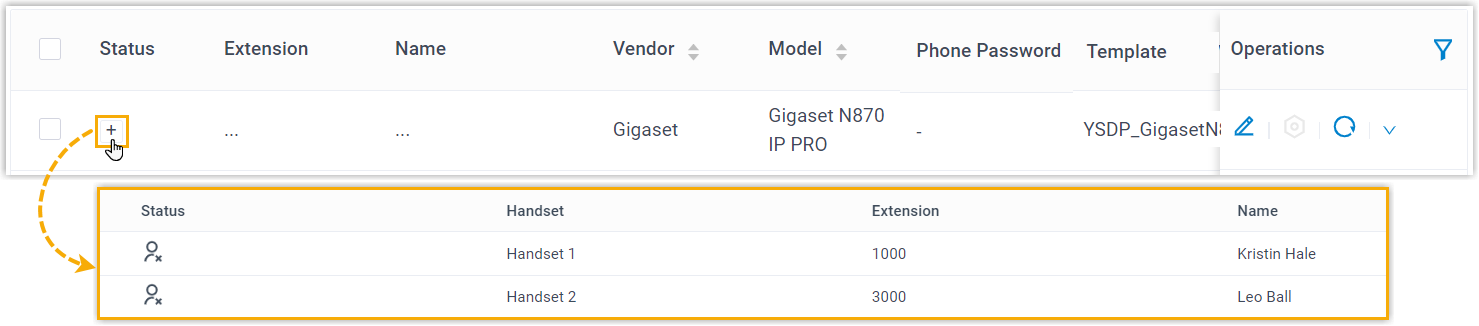
Step 2. Enable dynamic IP setting for Gigaset DECT base station
- Press and hold the device button for at least 10 seconds until both LEDs
switch off, then release the button.
The device is now in programming mode.
- Short press the device button until both LEDs become blue, then release the
button.
The device role is switched to Integrator/DECT Manager with dynamic IP setting enabled.
- Press and hold the device button until both LEDs turn red, then release the
button.
The base station is reset, and it takes several minutes for the device to boot up with the selected device role; After booted up, the device gets an IP address from the DHCP server and automatically downloads configurations from the PBX.
Step 3. Register the Gigaset DECT handsets to the DECT base station
- Log in to the web interface of DECT base station.
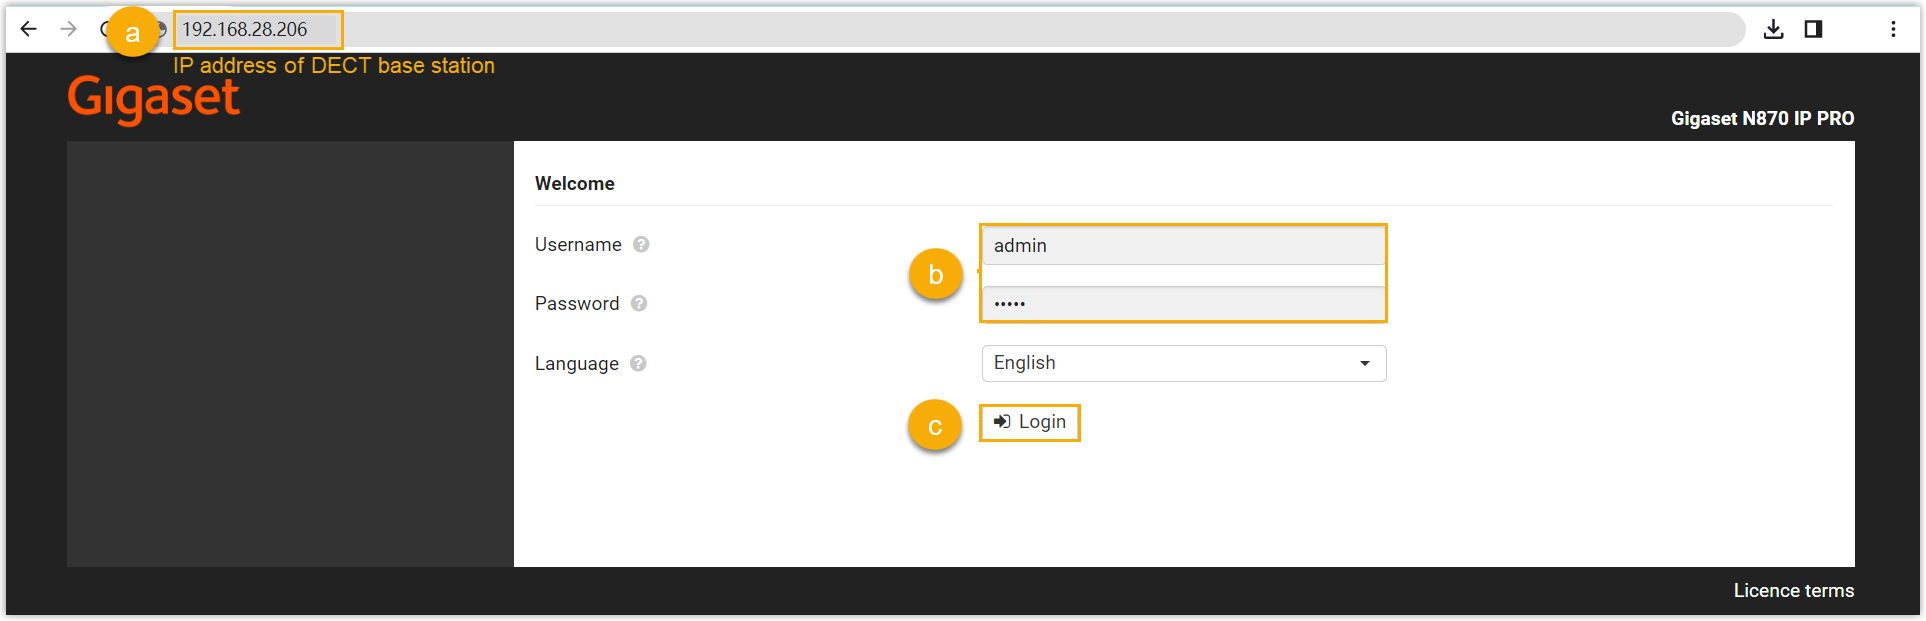
- In the browser's address bar, enter the IP address of the base station.
- Enter the username
adminand the default passwordadmin. - Click Login.
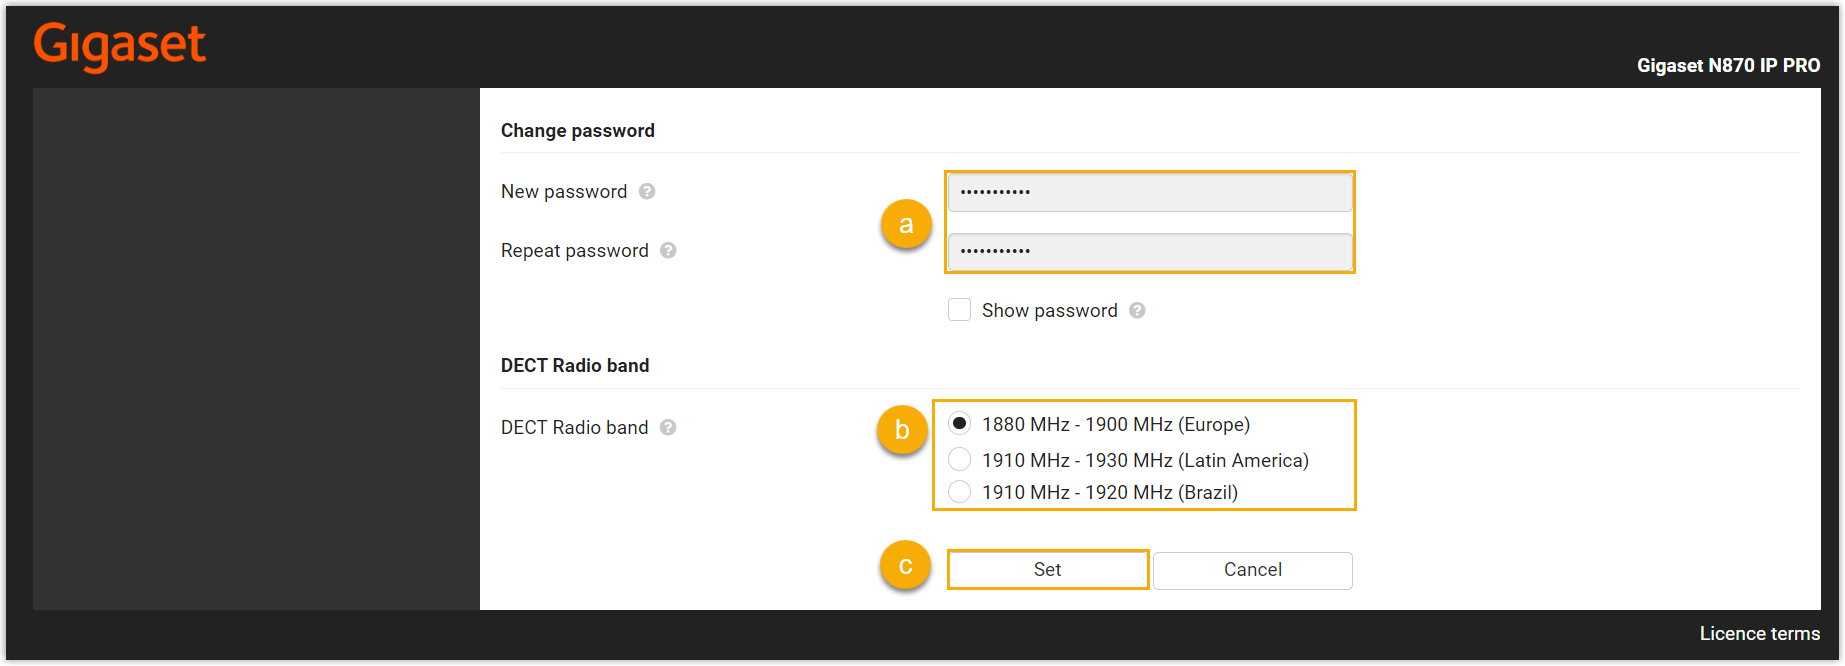
- Change the default password, select a radio frequency band, then click
Set.Note: For the DECT radio band, select the radio frequency band used in your region.
You are redirected to the web interface of the DECT base station.
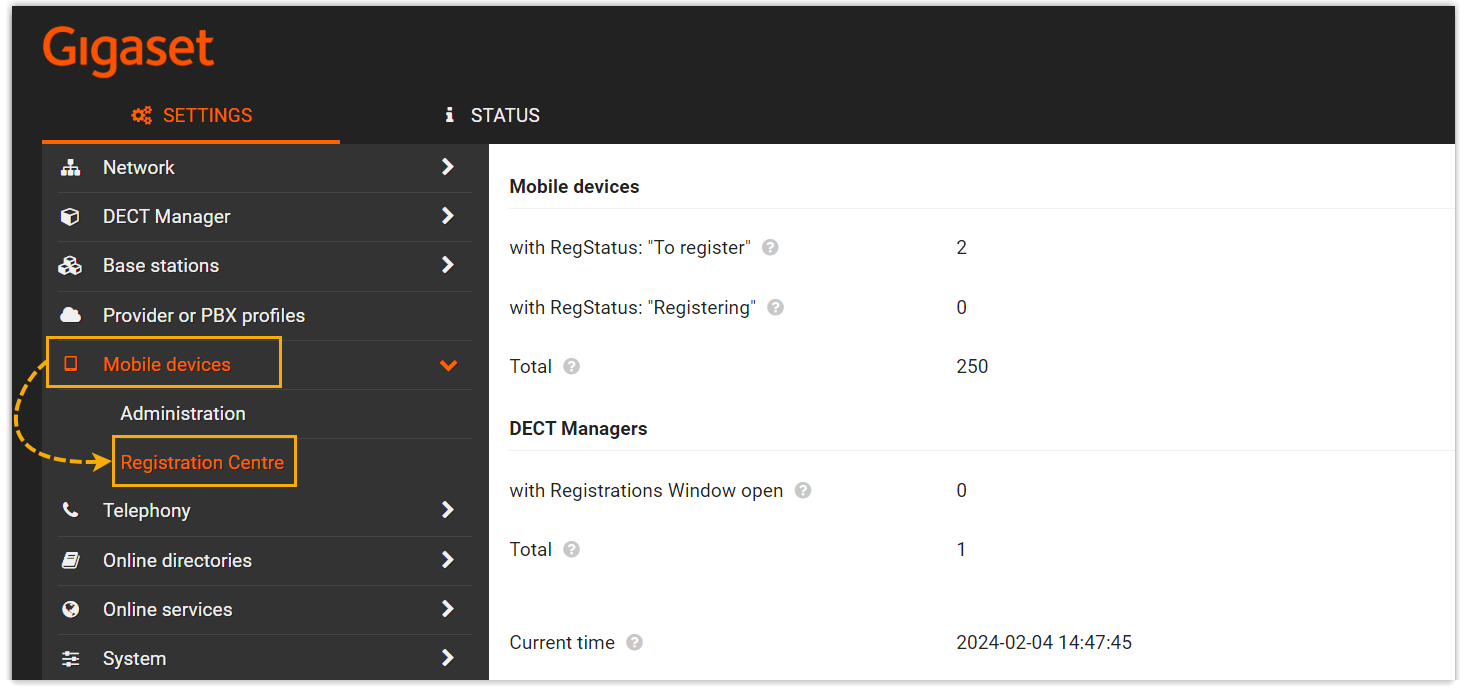
- Under the SETTINGS tab, go to , click
 to edit a handset with an extension
assigned.
to edit a handset with an extension
assigned.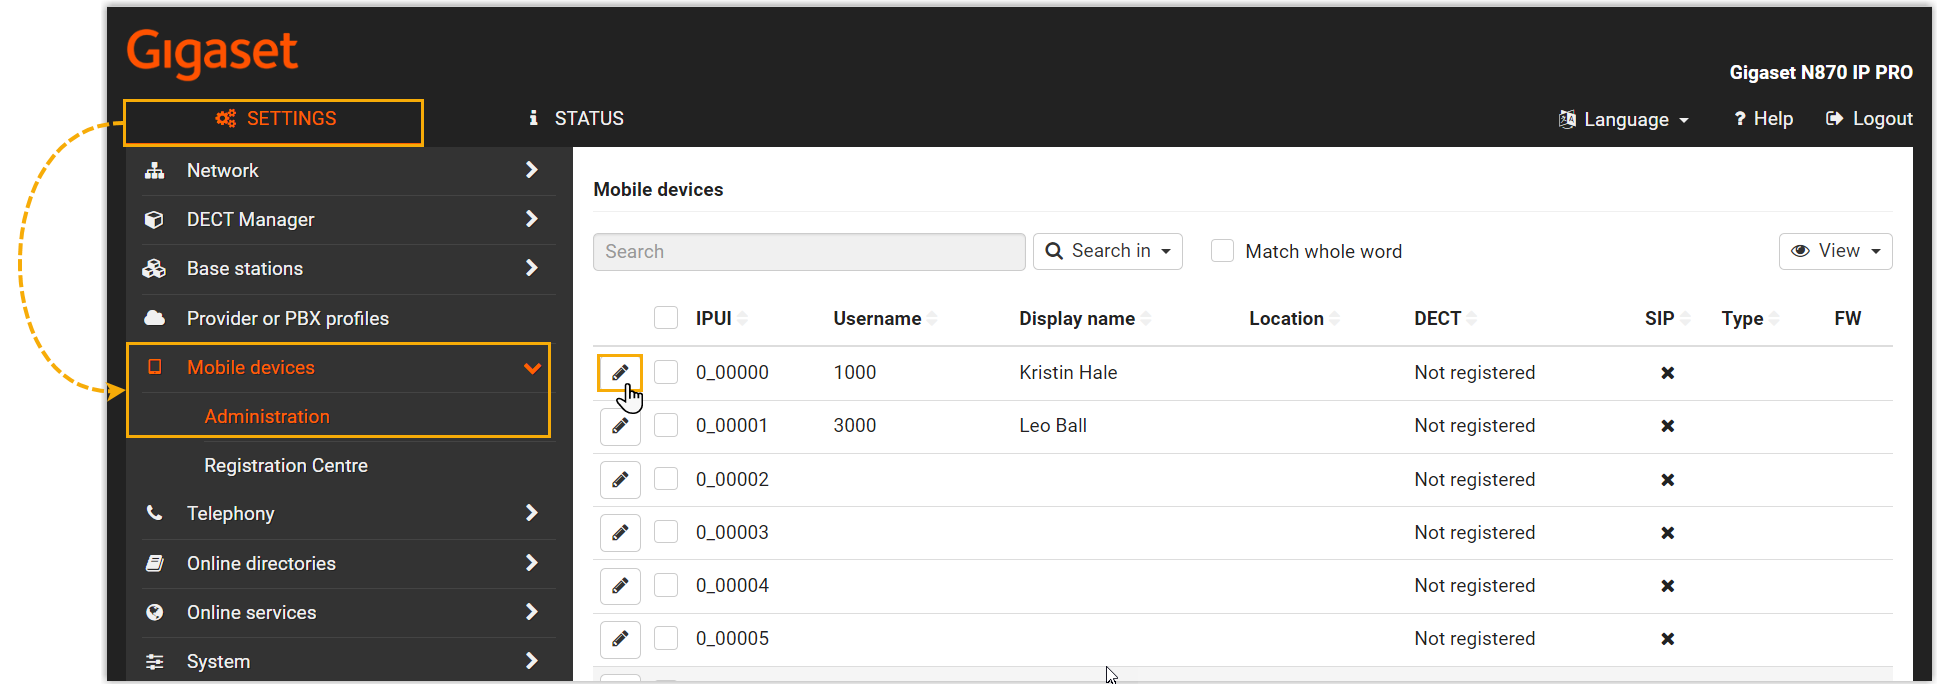
- In the RegStatus drop-down
list, select To register.
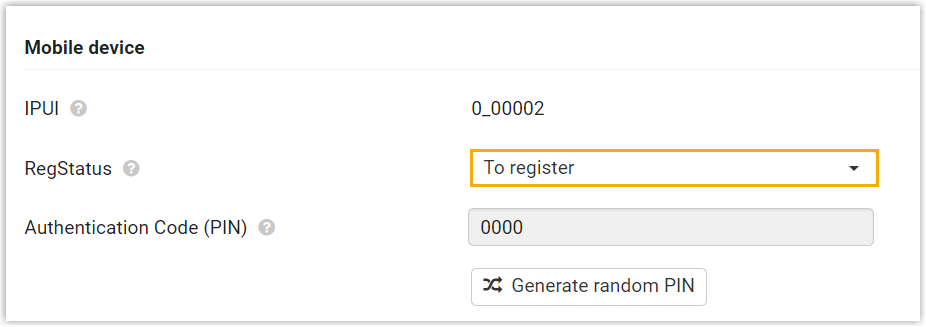
- In the Authentication Code
(PIN) field, set and note down a PIN code, which
will be used on handset later for registration.
In this example, use the default PIN code
0000.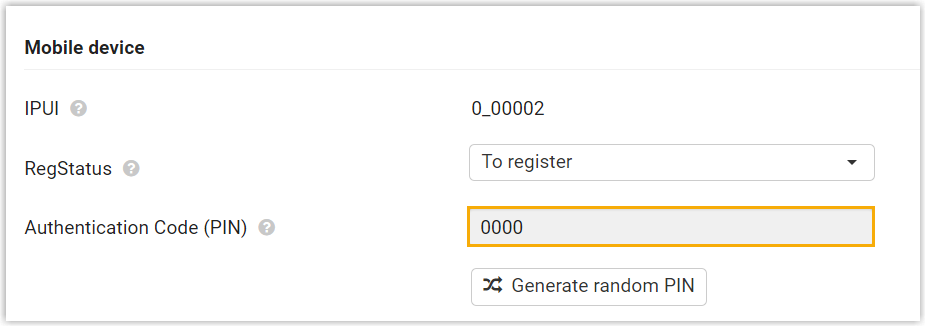
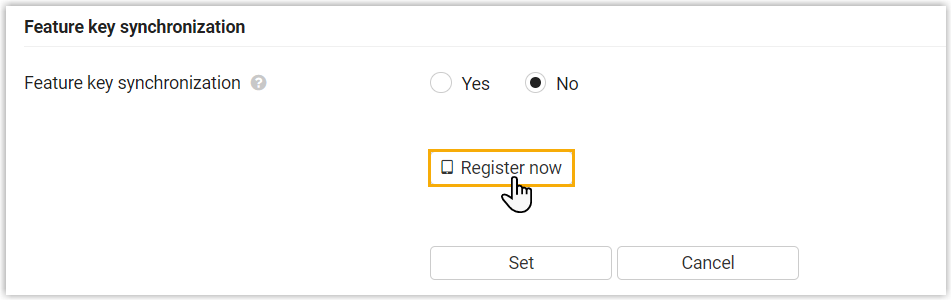
- Scroll down to the bottom, click
Register now.
- In the RegStatus drop-down
list, select To register.
- Repeat the above steps to edit other handsets with extensions assigned until all the handsets are in To register status.
- Go to , complete the following settings.
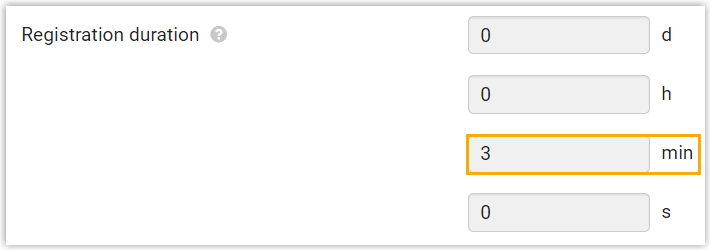
- In the Registration duration section, set how
long the DECT base station should stay in registration mode.
In this example, keep the default value (3 minutes).
- In the Registration start time section,
enable the registration mode of DECT base station.
- To start registration right now, click Start
now.

- To schedule a time to start registration, set a time in the
Registration start time field,
then click Set at the bottom of the
page.

In this example, click Start now.
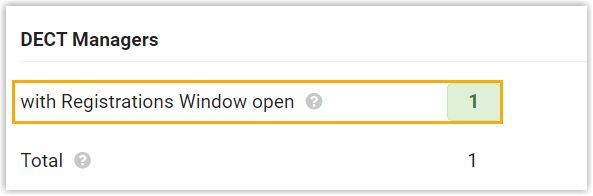
The with Registrations Window open field displays 1, indicating that the DECT base station is in registration mode at the given time duration.
- To start registration right now, click Start
now.
- In the Registration duration section, set how
long the DECT base station should stay in registration mode.
- Confirm registration on DECT handset.
- On the handset, go to .
The DECT handset starts to search for a base station that is in registration mode. When it finds the base station, there is a prompt asking you to enter a system PIN.
- Enter the PIN code obtained from the base station, and press OK.
- On the handset, go to .
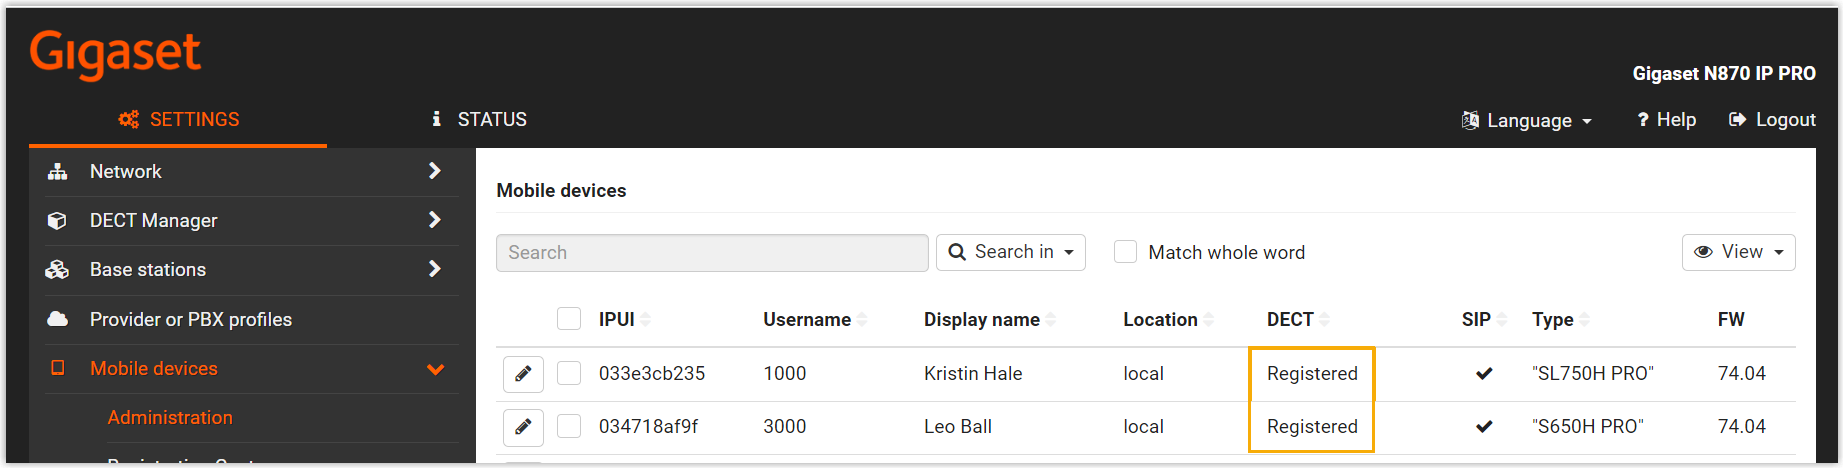
Result
-
The handsets are successfully registered to the DECT base station, and associated with the assigned PBX extensions via the base station.
- On the web interface of DECT base station, you can check the
registration status of the handsets on .
- On PBX web portal, you can check the registration status of the
extensions on .

- On the web interface of DECT base station, you can check the
registration status of the handsets on .
- The registered DECT handsets can be used as extensions to make and receive calls.