Manually Provision an IP Phone
This topic takes the Grandstream GRP2602 IP phone with a firmware version of 1.0.3.67 to describe how to manually provision an IP phone.
Note: This topic describes how to provision an IP phone and assign a
user's extension to the phone. If you want to set up a hot desking phone via auto
provisioning, see Set up a Hot Desking Phone.
Supported IP Phones
This topic can be applied to the Grandstream IP phones listed in Auto Provisioning - Supported Devices.
Prerequisites
- Make sure that you have downloaded the template for the desired phone model (Path: ).
- Gather information of IP phone, including Vendor, Model, and MAC address.
- RESET the IP phone if it is previously used.
Procedure
Step 1. Add phone's MAC address on the PBXStep 1. Add phone's MAC address on the PBX
- Log in to PBX web portal, go to .
- Click Add to add the IP phone to PBX.
- In the IP Phone section, configure phone information
as follows:
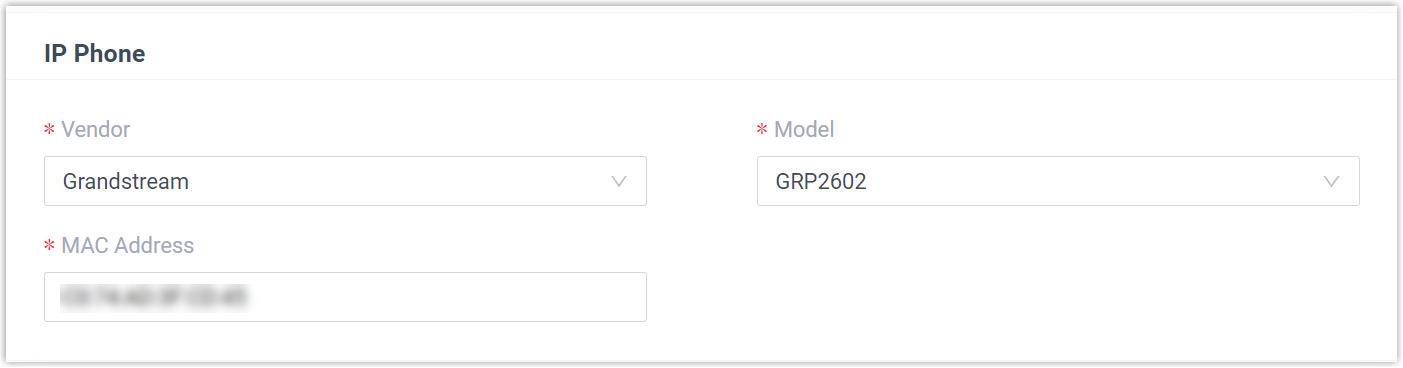
- Vendor: Select a phone vendor. In this example, select Grandstream.
- Model: Select a phone model. In this example, select GRP2602.
- MAC Address: Enter the MAC address of the IP phone.
- In the Options section, configure the auto provision
settings.
- Template: Select a desired template from the
drop-down list.Note: The template provides configurations except extension assignment. You can select the default template corresponding to the phone model, or customize your own template.
For more information, see Create a Custom Auto Provisioning Template.
- Provisioning Link: A provisioning server URL
is generated automatically and displayed on the web page.Note: Note down the generated provisioning link, as you will use it later.
- Template: Select a desired template from the
drop-down list.
- In the Assign Extension section, assign an extension
to the IP phone.Tip: If your desired extension is not listed in the drop-down list, you can check if the extension has been associated with other IP phone or gateway.
- To release the previous phone or gateway, see Release an Extension from a Provisioned IP Phone/Gateway.
- To associate an extension with multiple IP phones, see Allow Multiple Registrations for One Extension Number.
- Click Save.
A configuration file for the IP phone is generated in the PBX.
Step 2. Configure provisioning server address on the phone
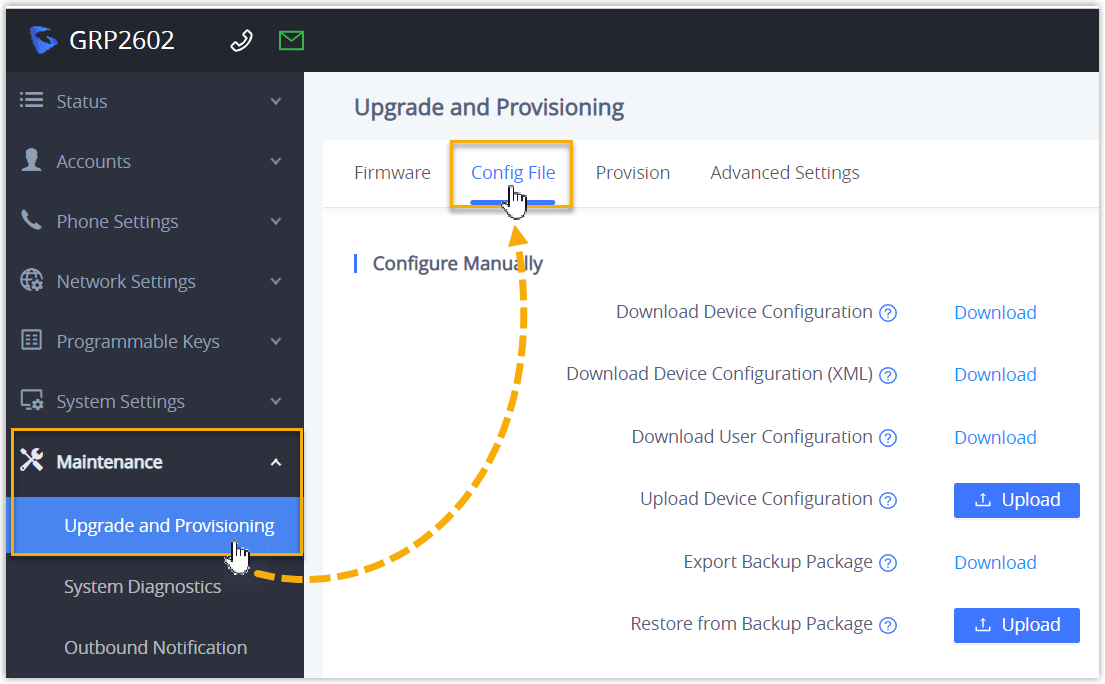
- Log in to the IP phone web page by the IP address.
- On the left navigation bar, go to .
- In the Configure via Network section, complete the
following settings.
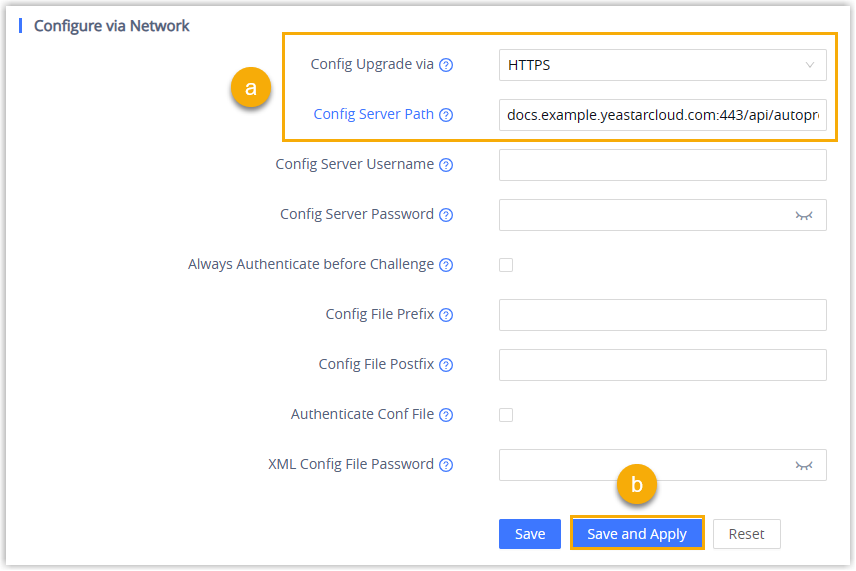
- Enter the information of the provisioning server.
- Config Upgrade via: Select HTTPS.
- Config Server Path: Paste the
provisioning link obtained from PBX.Note: You should remove the prefix
https://before pasting the link into the field.
- Click Save and Apply.
- Enter the information of the provisioning server.
Result
- You can check the extension registration status of provisioned phone on PBX
(Path: ).
 : The assigned extension is registered
on the phone.
: The assigned extension is registered
on the phone. : The assigned extension is unregistered
on the phone.
: The assigned extension is unregistered
on the phone.

- In future use, the IP phone will automatically download the configuration file from the PBX, and applies the configurations.