Configure a VLAN on Yeastar P-Series PBX System
This topic describes how to configure a VLAN on Yeastar P-Series PBX System.
Background information
VLAN allows you to segment out a physical network into virtual networks with different subnets. For example, one network is used by one department and another network is used by another department.
VLAN feature on the Yeastar P-Series PBX System is used to filter network traffic. Only the devices that have the same VLAN ID can communicate with the PBX. You can set up VLAN on LAN interface or WAN interface. To allow network traffic from multiple subnets, you can add VLAN sub interfaces on the PBX.
Configure a VLAN for a network interface
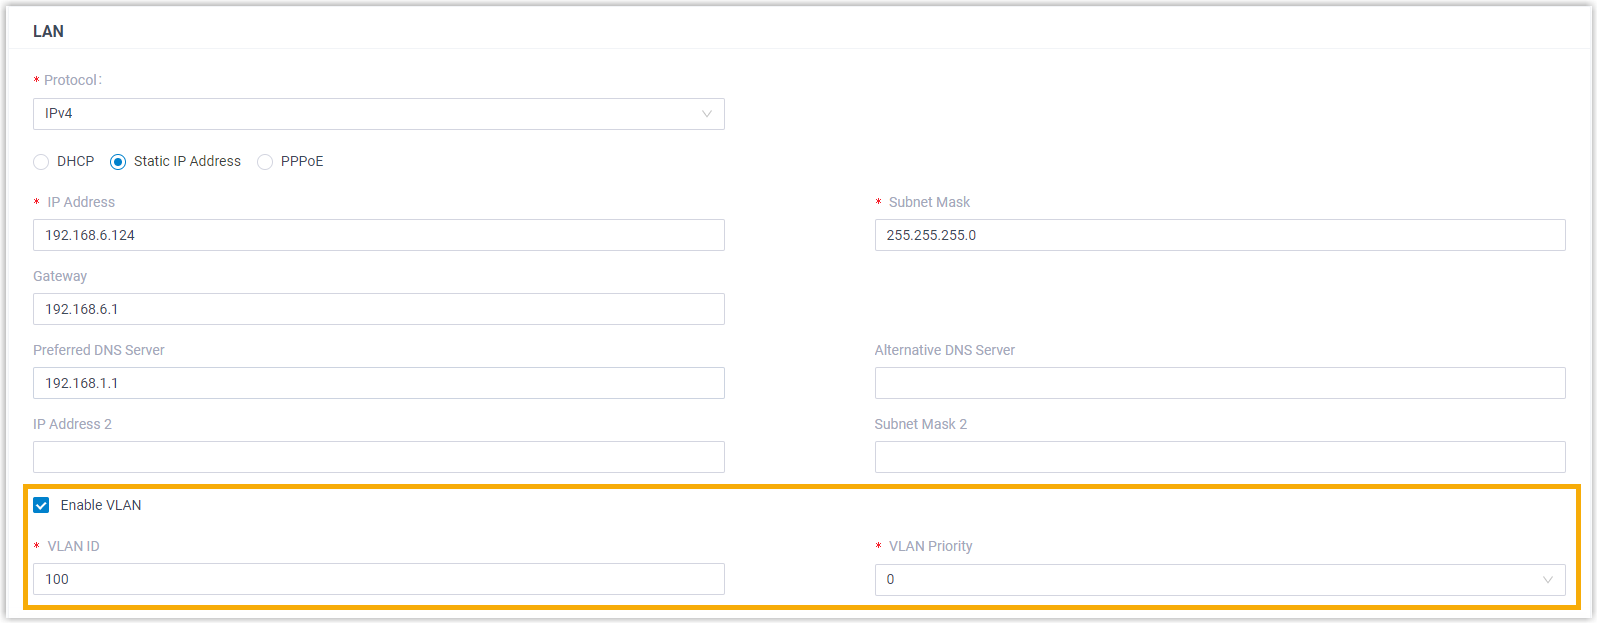
The following instructions assume that you need to set a VLAN for LAN port, and the network information of the LAN port is as the following. You want to restrict that only the devices with VLAN ID 100 can communicate with the PBX.
- IP address: 192.168.6.124
- Gateway address: 192.168.6.1
- Subnet mask: 255.255.255.0
- Procedure
-
- Log in the PBX web portal, go to .
- Configure the Ethernet port that needs to set up a VLAN.
In the scenario, configure LAN port.
- In the LAN section, select the checkbox of Enable VLAN.
- In the VLAN ID field, enter
an ID for the PBX. In this example, enter 100.Note: The devices that need to communicate with the PBX should have the same VLAN ID.
- In the drop-down list of VLAN
Priority, select the priority value
that is associated with the VLAN ID.
The priority value is between
0to7.7has the highest priority.
- Click Save and reboot the PBX to take effect.
- Result
-
Only the device that is in the same local network segment 192.168.6.X and has the same VLAN ID 100 can communicate with the PBX.
Add a VLAN subinterafce
A VLAN subinterface is a virtual interface created by dividing one physical Ethernet interface (LAN or WAN) into multiple logical interfaces.
If the PBX has only one physical Ethernet interface, but needs to route traffic via two different subnets, you can configure VLAN for the main interface (LAN or WAN) and add a VLAN subinterface with a different subnet.
The following instructions assume that you need to add a VLAN subinterface for LAN interface.
- Main interface (LAN): For network traffic in subnet 192.168.6.0/24 with VLAN ID 100.
- Sub interface: For network traffic in subnet 192.168.5.0/24 with VLAN ID 105.
- Procedure
-
- Log in the PBX web portal, go to .
- Configure the Ethernet port that needs to set up a VLAN.
- In the LAN section, select the checkbox of Enable VLAN.
- In the VLAN ID field, enter
an ID for the PBX. In this example, enter 100.Note: The devices that need to communicate with the PBX should have the same VLAN ID.
- In the drop-down list of VLAN
Priority, select the priority value
that is associated with the VLAN ID.
The priority value is between
0to7.7has the highest priority.
- In the LAN section, select the checkbox
of Enable VLAN Subinterface 1 and
configure the following settings.
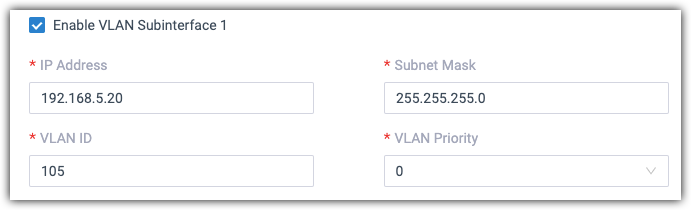
- IP Address: Assign an IP address that is in the subnet 192.168.5.0/24, for example, 192.168.5.20.
- Subnet Mask: Enter the subnet mask. In this scenario, enter 255.255.255.0.
- VLAN ID: Assign a VLAN ID for the sub interface, for example, enter 105.
- VLAN Priority: Set a priority for the VLAN ID, for example, enter 0.
- Click Save and reboot the PBX to take effect.
- Result
-
- The network traffic from subnet 192.168.6.0/24 and has VLAN ID 100 will be routed to the PBX VLAN interface.
- The network traffic from subnet 192.168.5.0/24 and has VLAN ID 105 will be routed to the VLAN sub interface.