Synchronize Exchange Room Resources to Yeastar Workplace
This topic describes how to synchronize Exchange room resources (room mailboxes) to Yeastar Workplace, so that the meeting room calendars can stay in sync between the two platforms.
Prerequisites
- You have integrated Yeastar Workplace with Microsoft Exchange.
- You have created the desired room resources (room mailboxes) on Exchange.
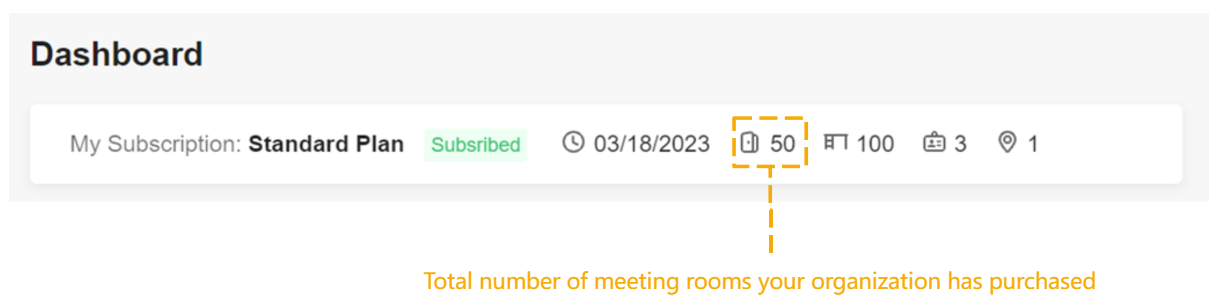
- Ensure that your organization has purchased a sufficient number of rooms on
Yeastar Workplace for importing Exchange room resources.Tip: Go to Dashboard to view the number of available meeting rooms.
Step 1. Create a room list on Exchange
Create a room list and add all the existing room mailboxes (room resources), so that Yeastar Workplace can access them.
-
On the Exchange server, open Exchange Management Shell.
-
In the Exchange Management Shell window, run the following commands in sequence.
$Members=Get-Mailbox -Filter {(RecipientTypeDetails -eq "RoomMailbox")}New-DistributionGroup -Name "Room List Name" –RoomList -Members $MembersImportant: Replace the Room List Name with the custom name you specified for the room list before running the command.
Step 2. Synchronize room resources from Exchange to Yeastar Workplace
- Log in to Yeastar Workplace admin portal, go to .
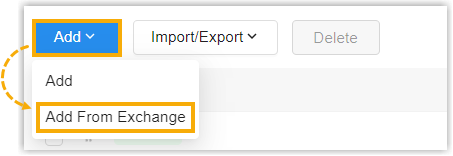
- Click Add and select Add From
Exchange.
-
In the pop-up window, select the desired room resources to be synced to Yeastar Workplace, and click Save.
Result
The specified Exchange room resources are synced to Yeastar Workplace.
-
The synced room resources are displayed on the Room Management page, with a label
 .
.
-
Users now can book these rooms via Yeastar Workplace.
-
Meeting room calendars between Yeastar Workplace and Outlook stay in sync, any meeting schedules and changes are updated across the two platforms automatically.
-
You can edit and delete the synced room resources as needed, the result will not be updated to room mailboxes in Exchange.
What to do next
FAQs
- Q: How to create room mailboxes on Exchange?
-
- Log in to Exchange Admin Center, go to .
- Click
 and select
Room mailbox.
and select
Room mailbox. - In the pop-up window, create a room mailbox.
- Configure the room mailbox information.
- Room name: Specify a name
to help you identify this room mailbox.
The room name will be displayed in the resource mailbox list in the Exchange Admin Center.
- Alias: Specify an alias
for this room mailbox.
The alias will be combined with your Active Directory domain name as the mailbox address of the room mailbox.
- Organizational Unit: Select the organizational unit to create this room mailbox.
- Room name: Specify a name
to help you identify this room mailbox.
- Optional: Fill in the Location, Phone, and Capacity fields.
- Click Save.
- Configure the room mailbox information.
- Repeat Step 3 to create room mailboxes for all the desired rooms.