Add a Visit Type
When users invite visitors, they need to select the visit type based on the visitors. Add visitor types and design a dedicated sign-in questionnaire for each type to collect the desired information from different types of visitors.
Requirement
Yeastar Workplace Plan: Standard Plan or Pro Plan
Background information
Yeastar Workplace has three default visitor types: Visitor, Customer, and Job interviewee.
|
|
|
Procedure
- Log in to Yeastar Workplace admin portal, and go to .
- At the top of the visit type list, click Add Visit Type.
- In the pop-up dialog box, specify a name to help you identify this visit type, and click OK.
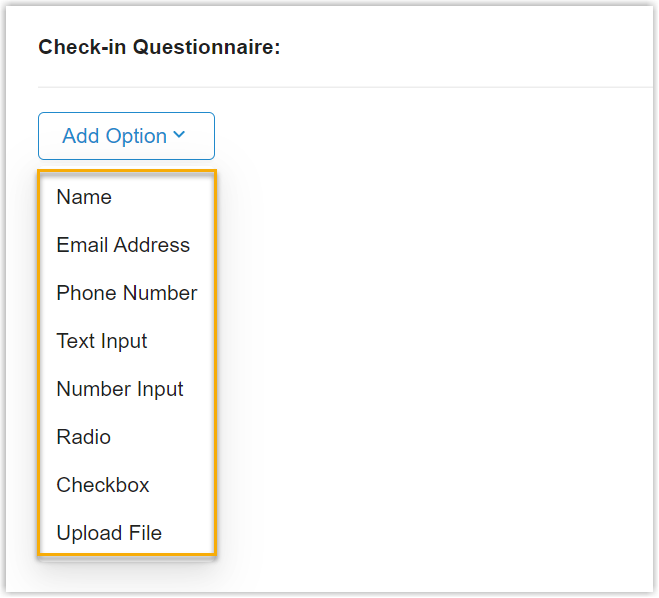
- Select the added visit type and click Add Option,
then select the desired check-in fields to be used of this visit
type.
-
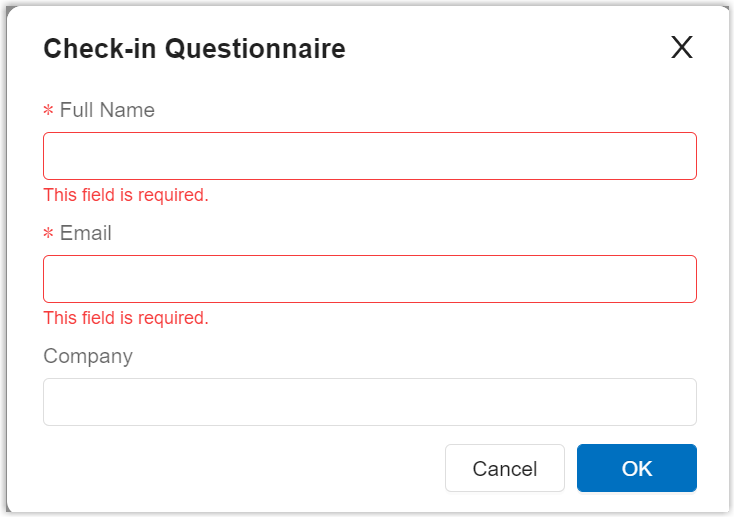
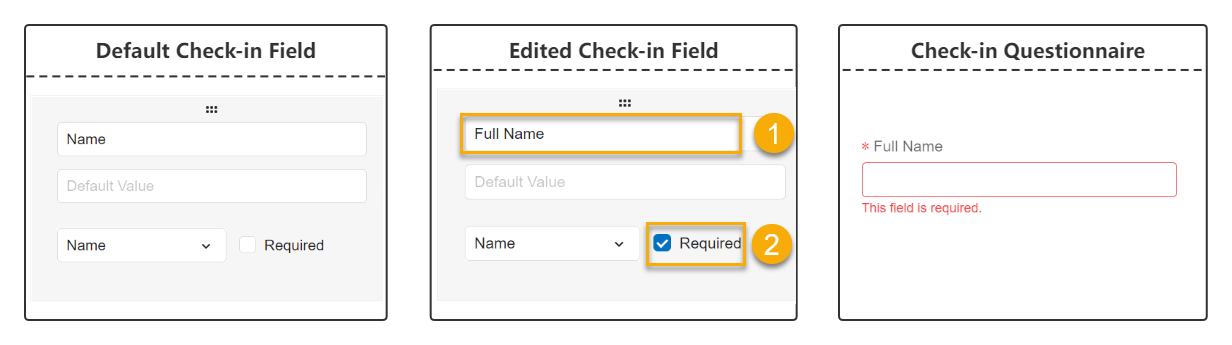
To collect basic information, select Name, Email Address, or Phone Number.
-
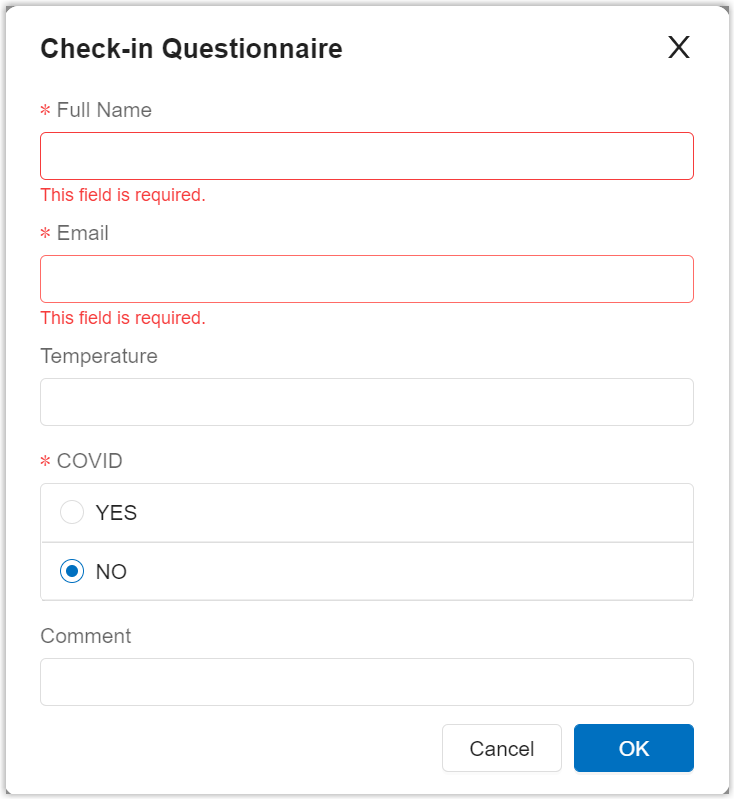
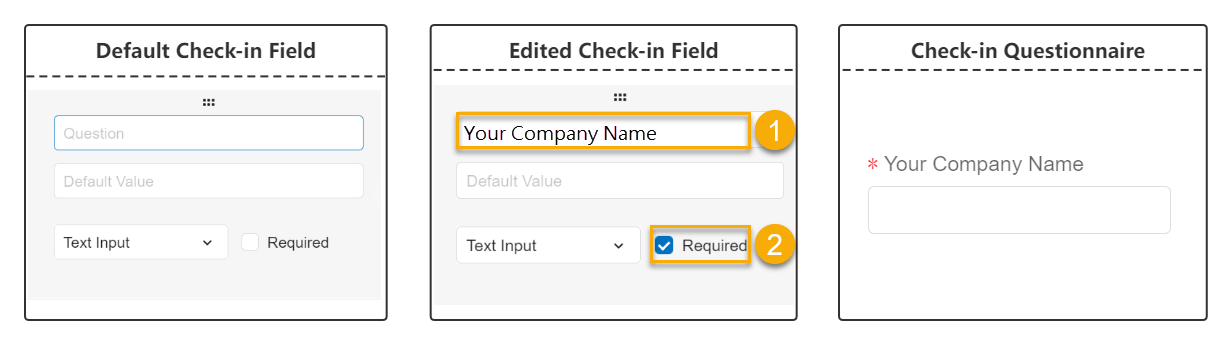
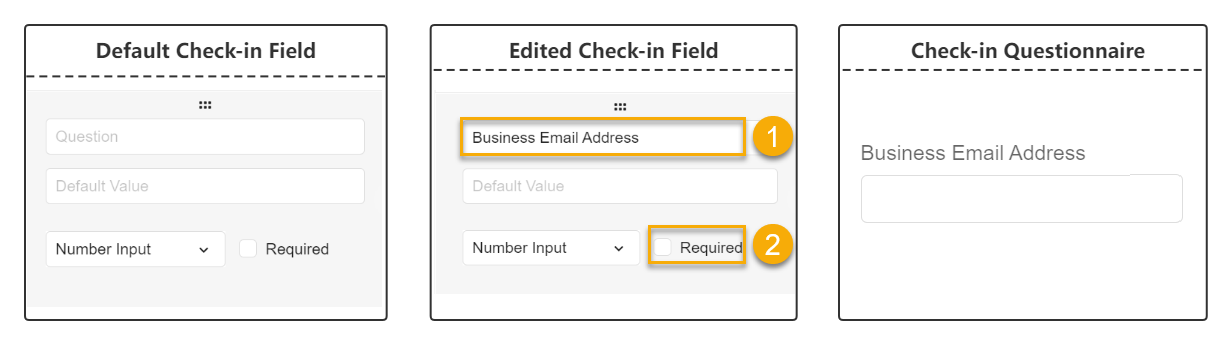
To add open-ended fields, you can select Text Input or Number Input.
-
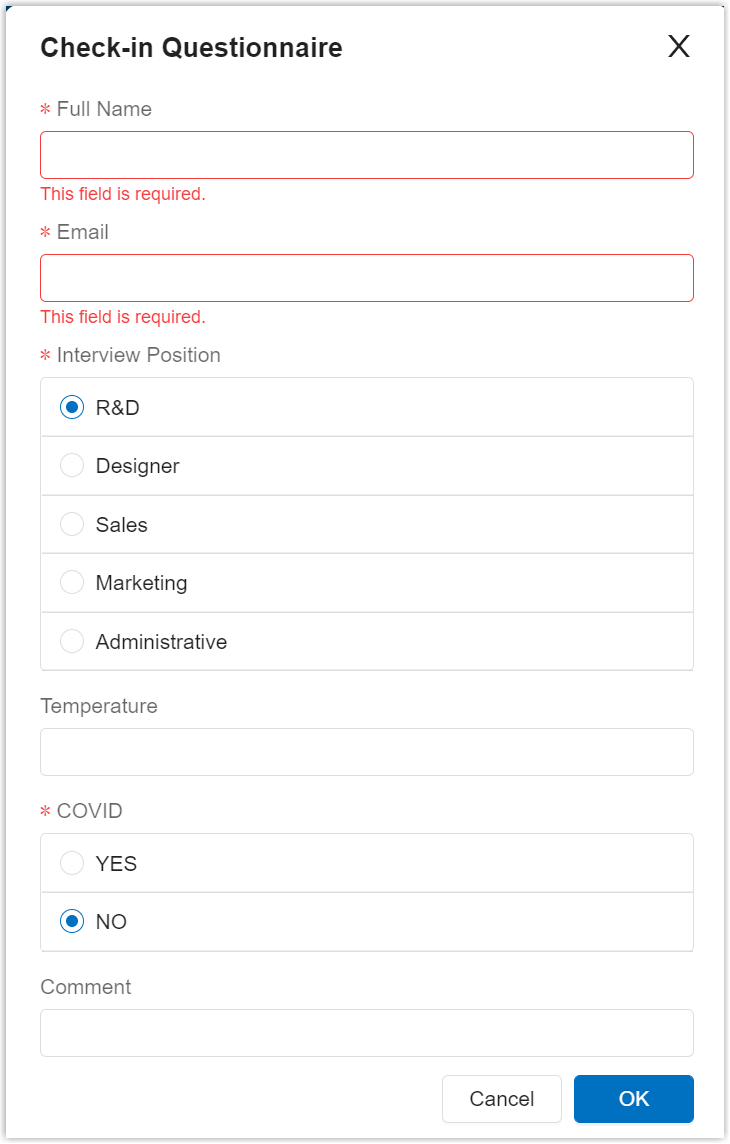
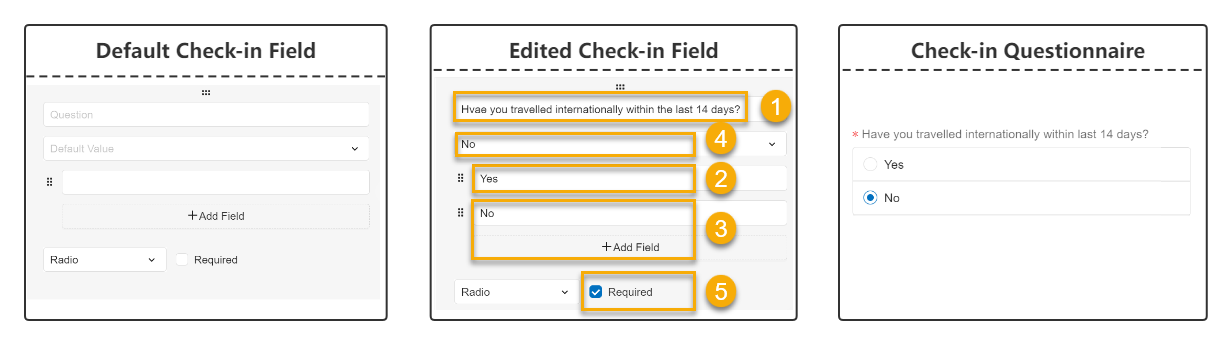
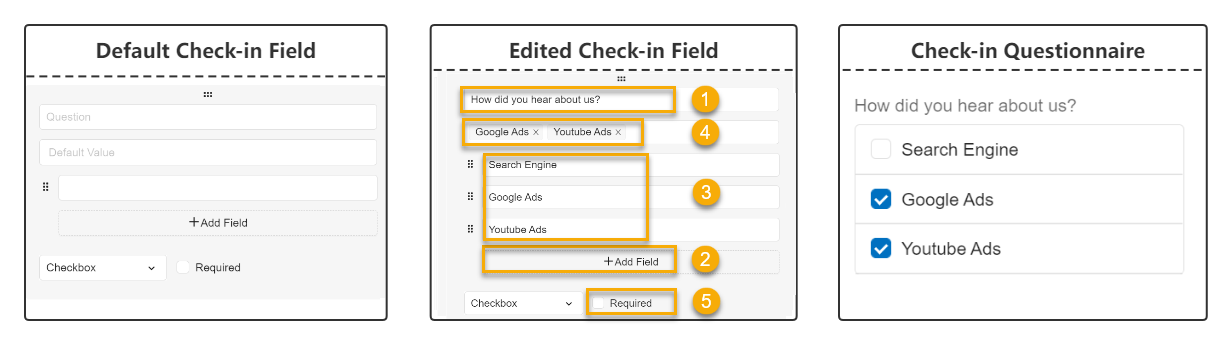
To add closed-ended fields, you can select Radio or Checkbox.
-
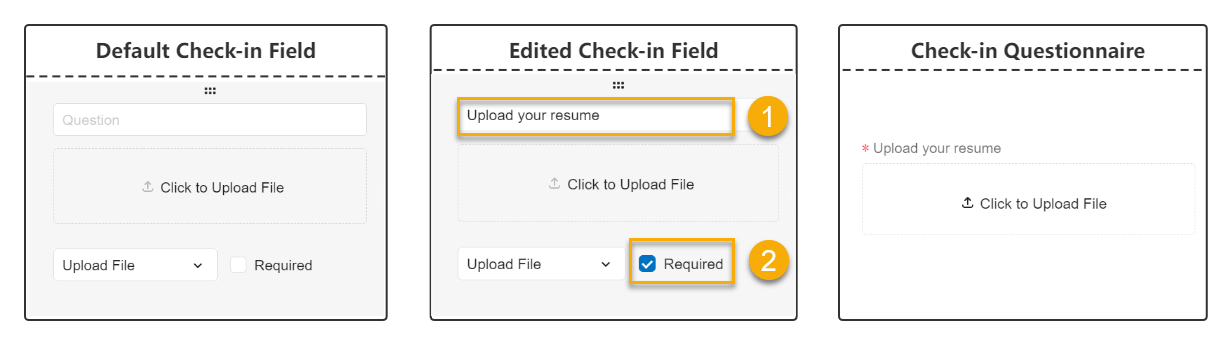
If you need visitors to upload specific materials, select Upload File.
-
- Optional: To adjust the order of the fields, click the
 of a desired field and drag it to the desired position.
 - Click Save.
Check-in fields description
- Name, Email Address, and Phone Number
- These three fields can be used to collect basic information about the
visitor.
- Text Input
- This field allows users to enter all characters, and can be used to
collect information such as company name, company address, and so
on.
- Number Input
- This field only allows numbers, letters, and characters
(
)
.
-
+
*
# input. Use this field to collect information such
as company phone number, company email address, and so on.
- Radio
- Visitors can only select one answer from the fixed set of choices you
added.
- Checkbox
- Visitors can select multiple answers from the fixed set of choices you
added.
- Upload File
- This field allows visitors to upload files.
Result
A visitor type is created and displayed on the list.
If users select this type when creating a visit schedule, the check-in fields will be used to collect desired information from the visitors.