Access the System via SSH
This topic takes Putty as an example to introduce how to access Yeastar P-Series Cloud Edition via SSH.
Procedure
- Enable SSH access on the PBX.
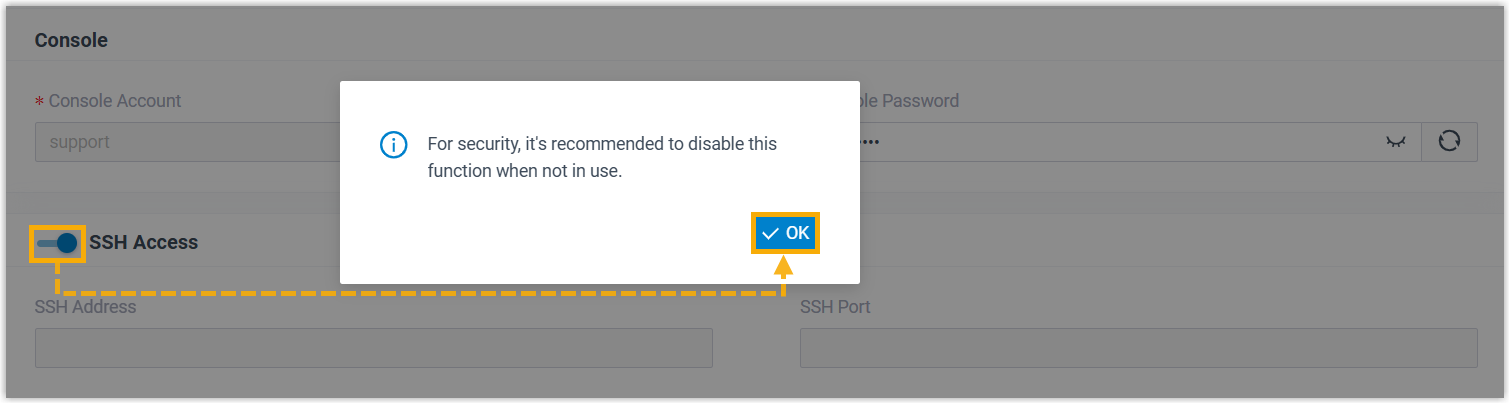
- Log in to PBX web portal, go to .
- Turn on the switch of SSH Access, then click
OK.
- In the Timeout drop-down
list, select the connection timeout, then click
Save.
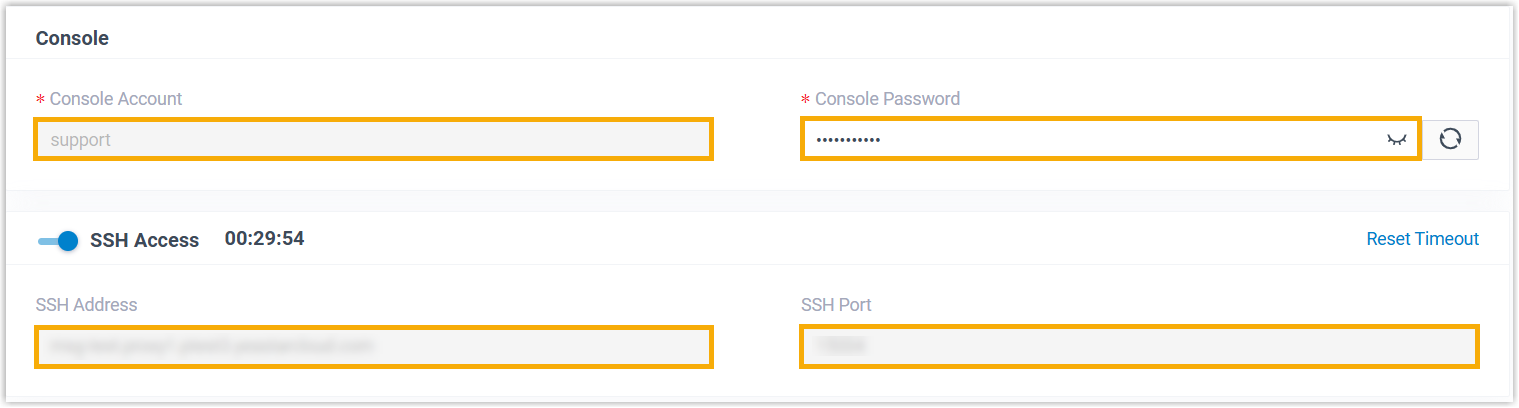
The SSH connection is enabled, and the countdown of connection time is displayed on the web page.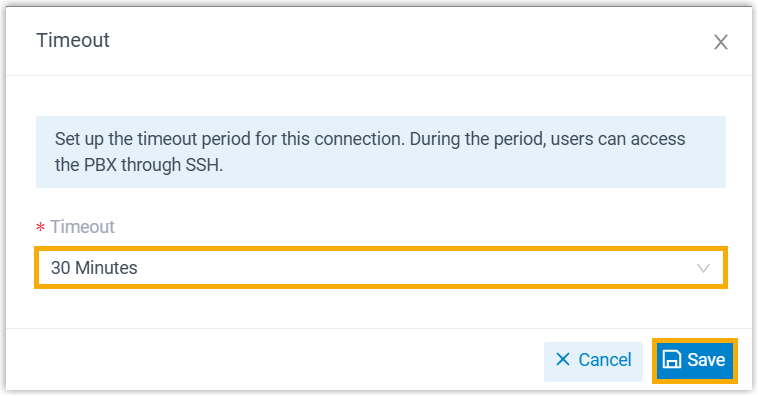 Note: You can reset the Timeout by clicking on the Reset Timeout。
-
Check and note down the SSH credentials.
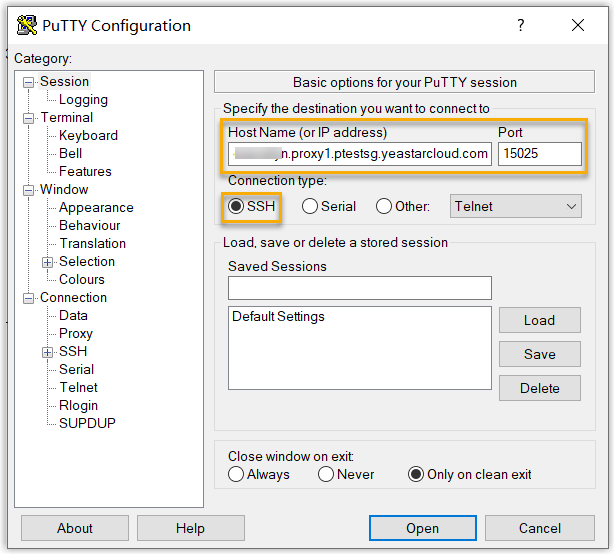
- Enter access information on Putty.
- In the Connection type field, choose SSH.
- In the Host Name (or IP address) field, enter the SSH address of PBX.
- In the Port field, enter the SSH port of PBX.
- Optional: On the left navigation bar, click , set a scrollback line number, so that you can get sufficient lines of log for debug analysis.
- Click Open.
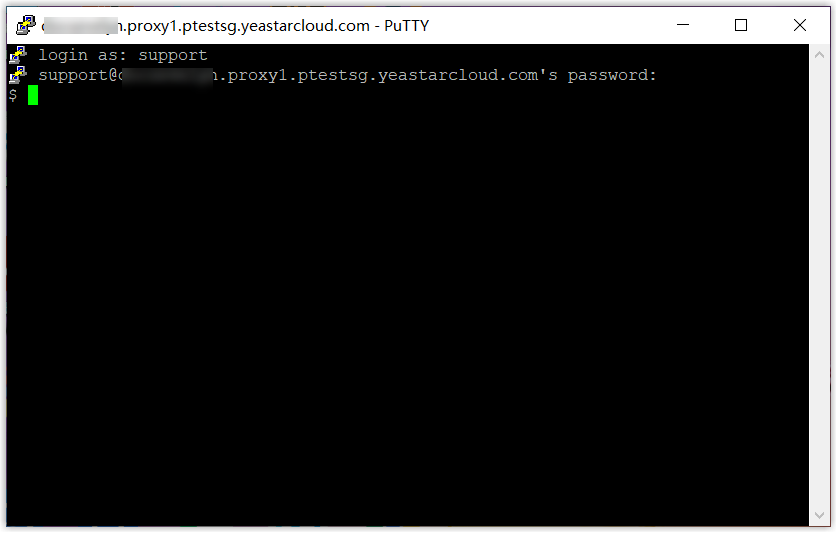
- Verify your account and password.
- In the login as field, enter
support. - In the password field, enter the password.
- In the login as field, enter
Result
If the following figure shows, you can successfully access and debug the PBX.