Switch the OEM ID of P-Series Software Edition
This topic describes how to switch the OEM ID of P-Series Software Edition that are remotely connected to Yeastar Central Management, allowing you to seamlessly rebrand the PBX systems to display your customized brand information, without affecting current system configurations or data.
Introduction
The OEM ID is a unique identifier assigned to the P-Series PBX system by Yeastar, which determines the information displayed in the product, such as logos and company names. Yeastar Central Management allows you to switch the OEM ID of a standard P-Series Software Edition to your own brand’s OEM ID, so you can unify all devices under your custom brand.
Requirements and restriction
- Requirements
-
Item Requirement Firmware - The firmware of P-Series Software Edition is 83.20.0.74 or later.
OEM ID - You already have a dedicated OEM ID for brand customization of your P-Series Software Edition.
- Contact your service provider to grant your account the necessary permission to switch PBX's OEM ID.
- Restriction
- Switching OEM ID is NOT supported on the P-Series Software Edition with the Hot Standby or Disaster Recovery feature enabled.
Prerequisites
P-Series Software Edition is connected to Yeastar Central Management.For more information, see Connect PBX System/Gateway to Yeastar Central Management Using Yeastar ID and Connect PBX System/Gateway to Yeastar Central Management Using Authentication Code.
Procedure
- Log in to Yeastar Central Management, go to .
- In the device list, set the column to display PBX's OEM ID.
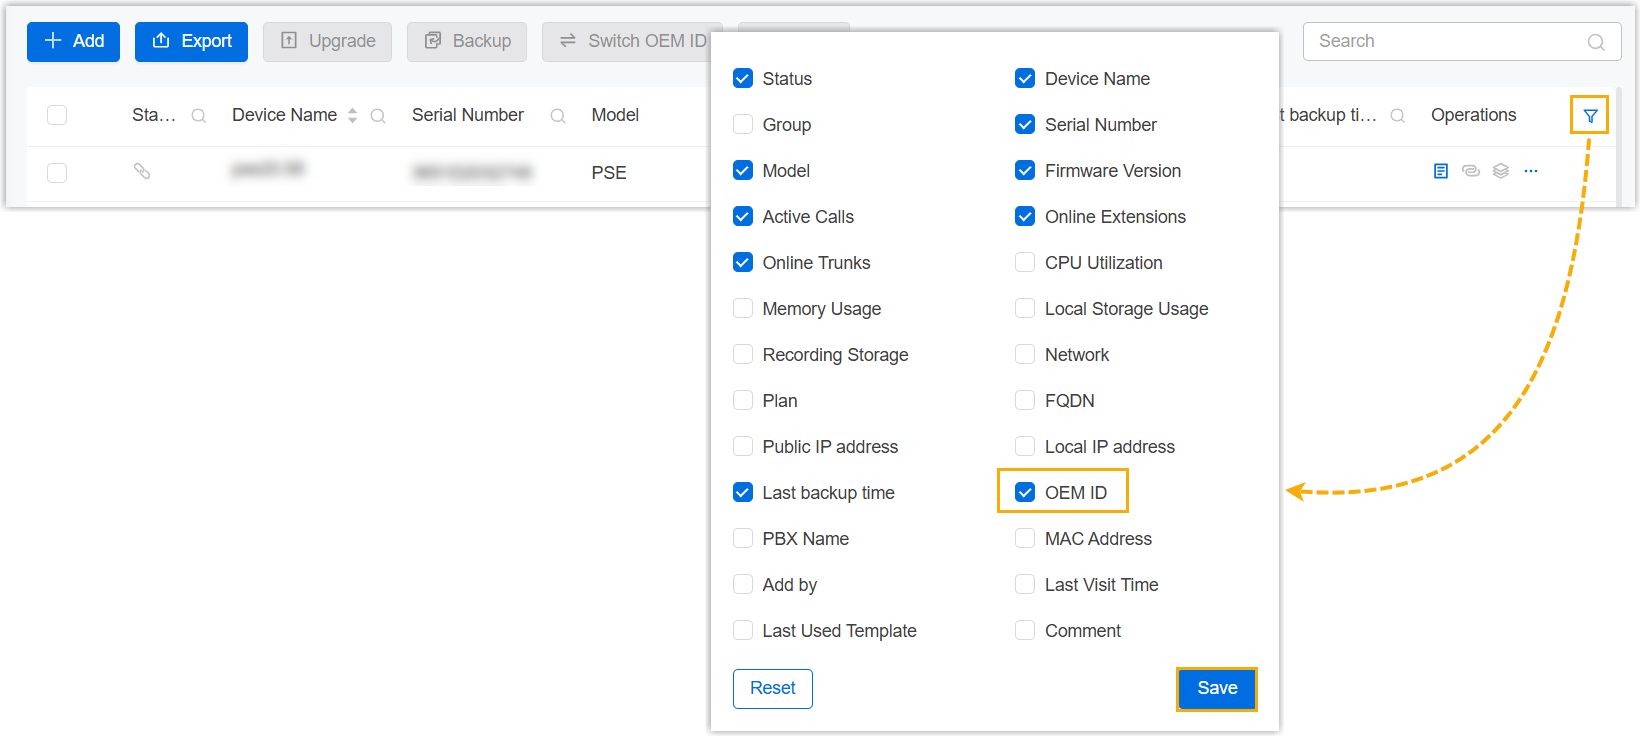
- At the right side of the Operations column,
click
 .
. - In the pop-up window, select the checkbox of OEM
ID, then click Save.
The OEM ID column appears, displaying the OEM ID of each PBX.
- At the right side of the Operations column,
click
- Filter P-Series Software Edition with the OEM ID to be switched.
- Click
 beside the Model
column, select Software Edition, then click
Search.
beside the Model
column, select Software Edition, then click
Search.
- Click beside the OEM
ID column, enter the desired OEM ID, then click
Search.

The P-Series Software Edition with the specified OEM ID are displayed.
- Click
- Select one or more desired P-Series Software Edition, then click
Switch OEM ID.

You are redirected to the Add Task page.
- Set up an OEM ID switching task.
Setting Description Name Enter a name to help you identify the task. Object Type Retain P-Series Software Edition. Task Select Switch OEM ID. Target OEM ID Select the desired OEM ID. Repeat Retain One-time. Execution Time Select the checkbox of Immediately. Timezone The field can not be edited. Creator Your name is automatically filled in, and the field can not be edited. Remark Optional. Add a note to the task. Object The Selected box lists the P-Series Software Editions that you have selected. - Click Save.
Result
- The task status is displayed as
 (Executing).
- After the task execution is completed, the followings are achieved:
- The task status is displayed as
 (Finished).
- A task execution log is generated and displayed on .

- The task status is displayed as
- The PBX reboots automatically. After restarting, your customized brand information will be displayed, while the existing system configuration will remain unchanged.