Edit a Desk
You can always make changes to some contents of a desk by editing it, including desk type, desk user, associated device, etc. This topic describes how to edit a desk in Yeastar Workplace.
Requirement
Yeastar Workplace Plan: Standard Plan or Pro Plan
Editing methods
You can edit a desk by using desk list or office map, choose one of the following methods to edit desks:
| Method | Description |
|---|---|
| Desk list | Display all the desk resources in lists, and allow you to
locate and edit desks from different buildings and floors
easily. For more information, see Edit a desk using desk list. |
| Office map | Display a floor's desk resources on a map to help you locate
specific desks easily. For more information, see Edit a desk on the office map. |
Edit a desk using desk list
- Procedure
-
-
Log in to Yeastar Workplace admin portal, go to .
-
In the desk list, click
 beside the desired
desk.
beside the desired
desk. -
Edit the desk information according to your needs.Important: The following actions will cause the users' reservations to be canceled:
- Switch the Desk Type from
Flexible Desk to
Permanent Desk.
The system will cancel all the reservations for this desk, and send a notification message about the cancellation to the corresponding users.
- Change the value of Booking
Permissions for a flexible desk.
The system will cancel reservations for users who no longer have booking permissions and send a notification message about the cancellation to them.
- Switch the Desk Type from
Flexible Desk to
Permanent Desk.
-
Click OK.
-
- Result
-
- You have edited the desk successfully.
- If you changed the value of Building or Floor, the desk will be removed from the office map automatically, you need to reassign the desk to the office map.
Edit a desk on the office map
- Procedure
-
-
Log in to Yeastar Workplace admin portal, and go to .
-
In the top right corner of a desired building, click
 and select
Floor/Map.
and select
Floor/Map. -
In the floor list, select the floor where the desk is located, and click Configure Map.
-
On the configuration page, click the desired desk and edit the desk information on the right.
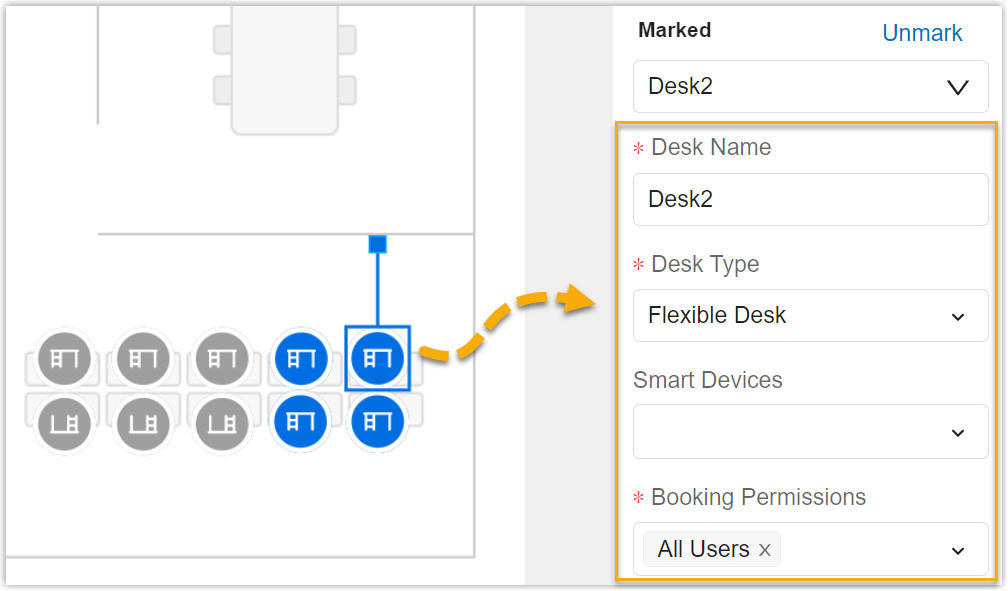 Important: The following actions will cause the users' reservations to be canceled:
- Switch the Desk Type from
Flexible Desk to
Permanent Desk.
The system will cancel all the reservations for this desk, and send a notification message about the cancellation to the corresponding users.
- Change the value of Booking
Permissions for a flexible desk.
The system will cancel reservations for users who no longer have booking permissions and send a notification message about the cancellation to them.
- Switch the Desk Type from
Flexible Desk to
Permanent Desk.
-
Click Save at the top right corner.
-
- Result
- You have edited the desk successfully.