Integrate Yeastar P-Series Software Edition with Microsoft Dynamics 365 CRM
Yeastar P-Series Software Edition supports the integration with Microsoft Dynamics 365 CRM via Channel Integration Framework (CIF). This topic describes how to set up the integration to embed the PBX system into Dynamics 365 CRM as a plugin, allowing users to handle calls within the plugin area of CRM, while continuing to perform other CRM-related tasks without switching between systems.
Requirements
| Platform | Requirement |
|---|---|
| PBX Server |
|
| Microsoft 365 |
|
| Browser |
For optimal performance, the integration is recommended to be
set up and used with the following browsers:
|
Add the PBX system as a channel provider
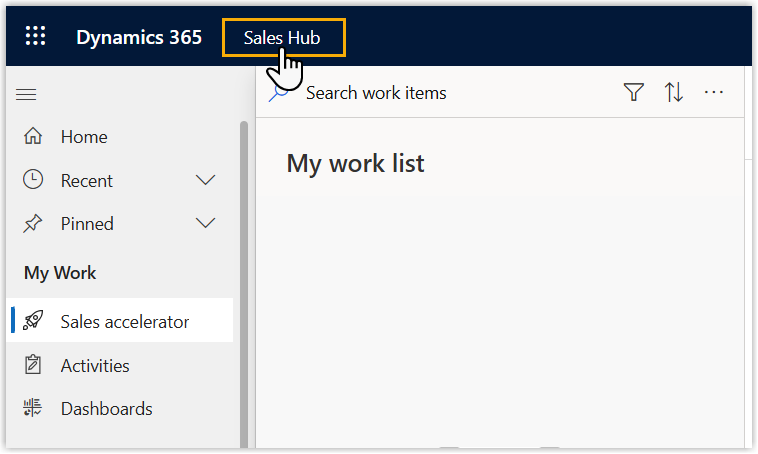
- Log in to Dynamics 365 instance (e.g.
https://{{your-organization}}.crm.dynamics.com) with the administrator account.Note: Replace your-organization with your actual domain name. - At the top of the page, click the current app name.
- In the Apps page, search for and select
Channel Integration Framework.

You are redirected to the Channel Integration Framework app.
- At the top of the tool bar, click New to add a new
channel provider.

- In the Channel Provider Configuration tab, complete
the following settings.
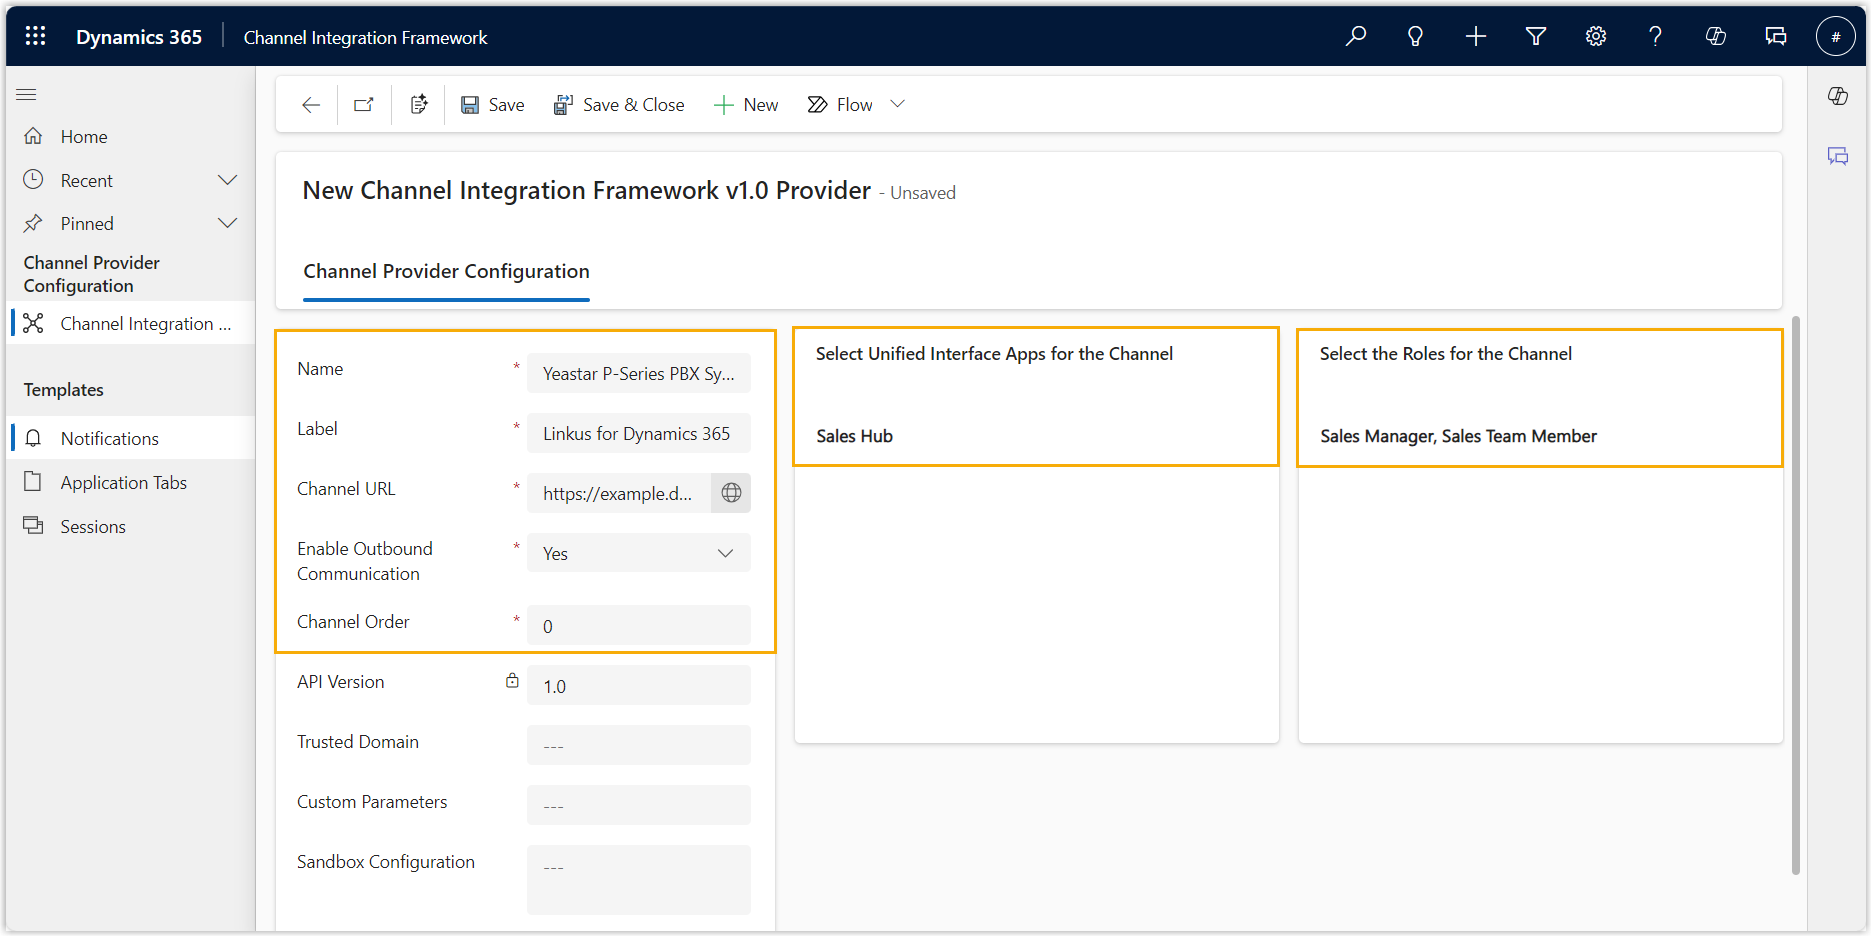
Setting Description Name Specify a name to help you identify the channel. For example, Yeastar P-Series PBX System. Label Specify the label that is displayed as the name of the channel. For example, Linkus for Dynamics 365. Channel URL Enter the URL that will connect the PBX system to Dynamics 365 in the following format: https://{{PBX_domain}}/dyncrm?base={{CRM_base_url}}- {{PBX_domain}}: The domain name of the PBX system.
- {{CRM_base_url}}: The URL of the Dynamics 365 instance.
For example, the PBX domain name and your Dynamics 365 instance URL are shown below:
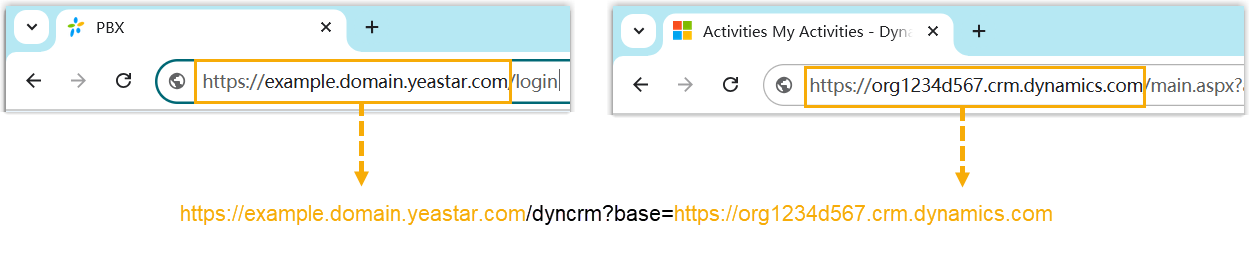
Then the channel URL should be:
https://example.domain.yeastar.com/dyncrm?base=https://org1234d567.crm.dynamics.comEnable Outbound Communication Select Yes to allow users to place calls from Dynamics 365 via the communication channel. Channel Order Specify the order in which this channel appears in the channel list. Note: Channels with lower numbers are displayed with higher priority.Select Unified Interface Apps for the Channel Search for and select Sales Hub, which will make the channel available within the Dynamics 365 CRM interface. Select the Roles for the Channel Select the user role(s) that are allowed to access the channel. - At the top of the page, click Save & Close.
The channel is created and displayed in the channel providers list.
- Activate the channel.
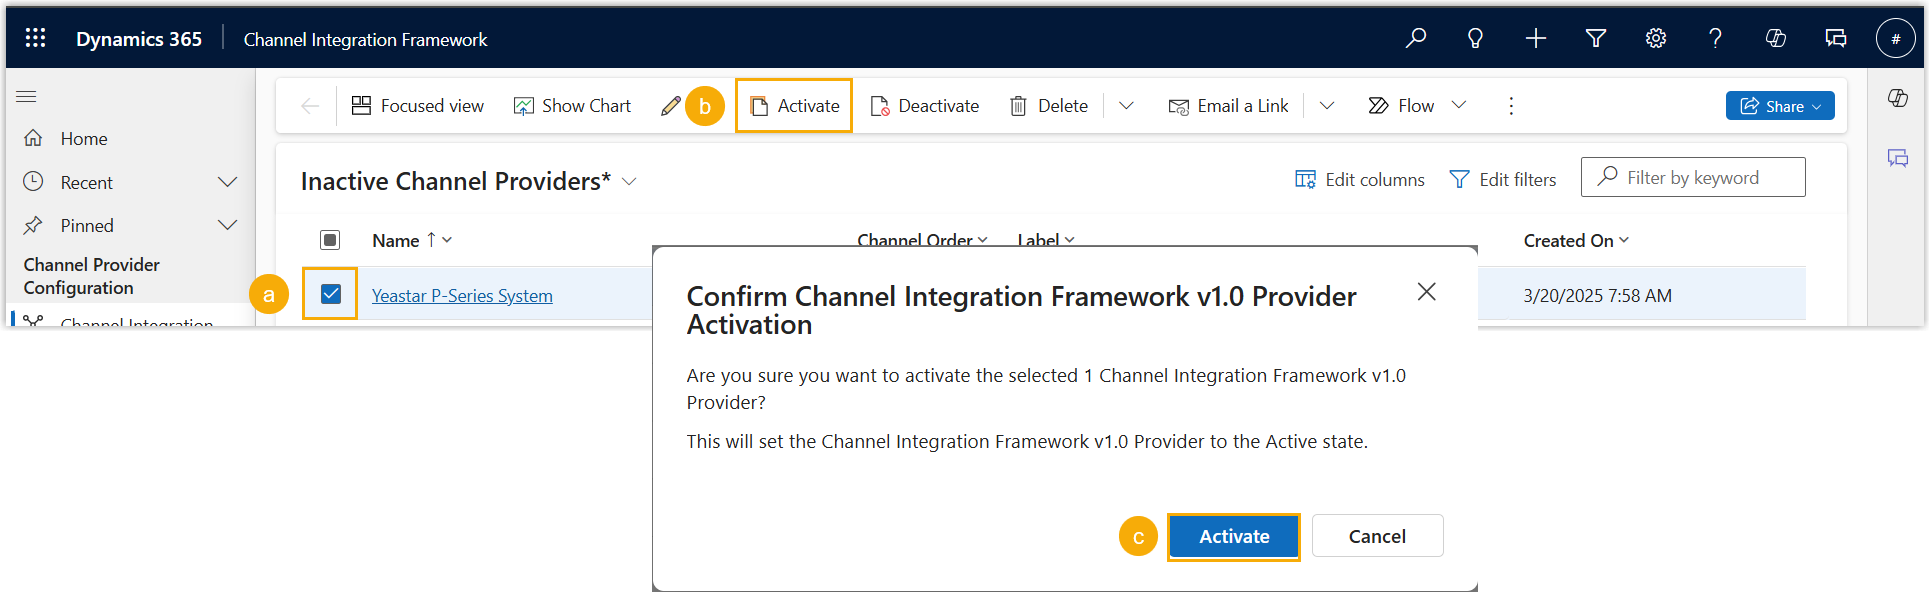
- In the channel providers list, select the channel.
- At the top of the page, click Activate.
- In the pop-up window, click Activate.
Grant users access to the channel
After adding the channel provider, you need to assign Channel Access security role to the specific users. This ensures that users with the appropriate roles, as specified in the channel configuration, can have access to the channel.
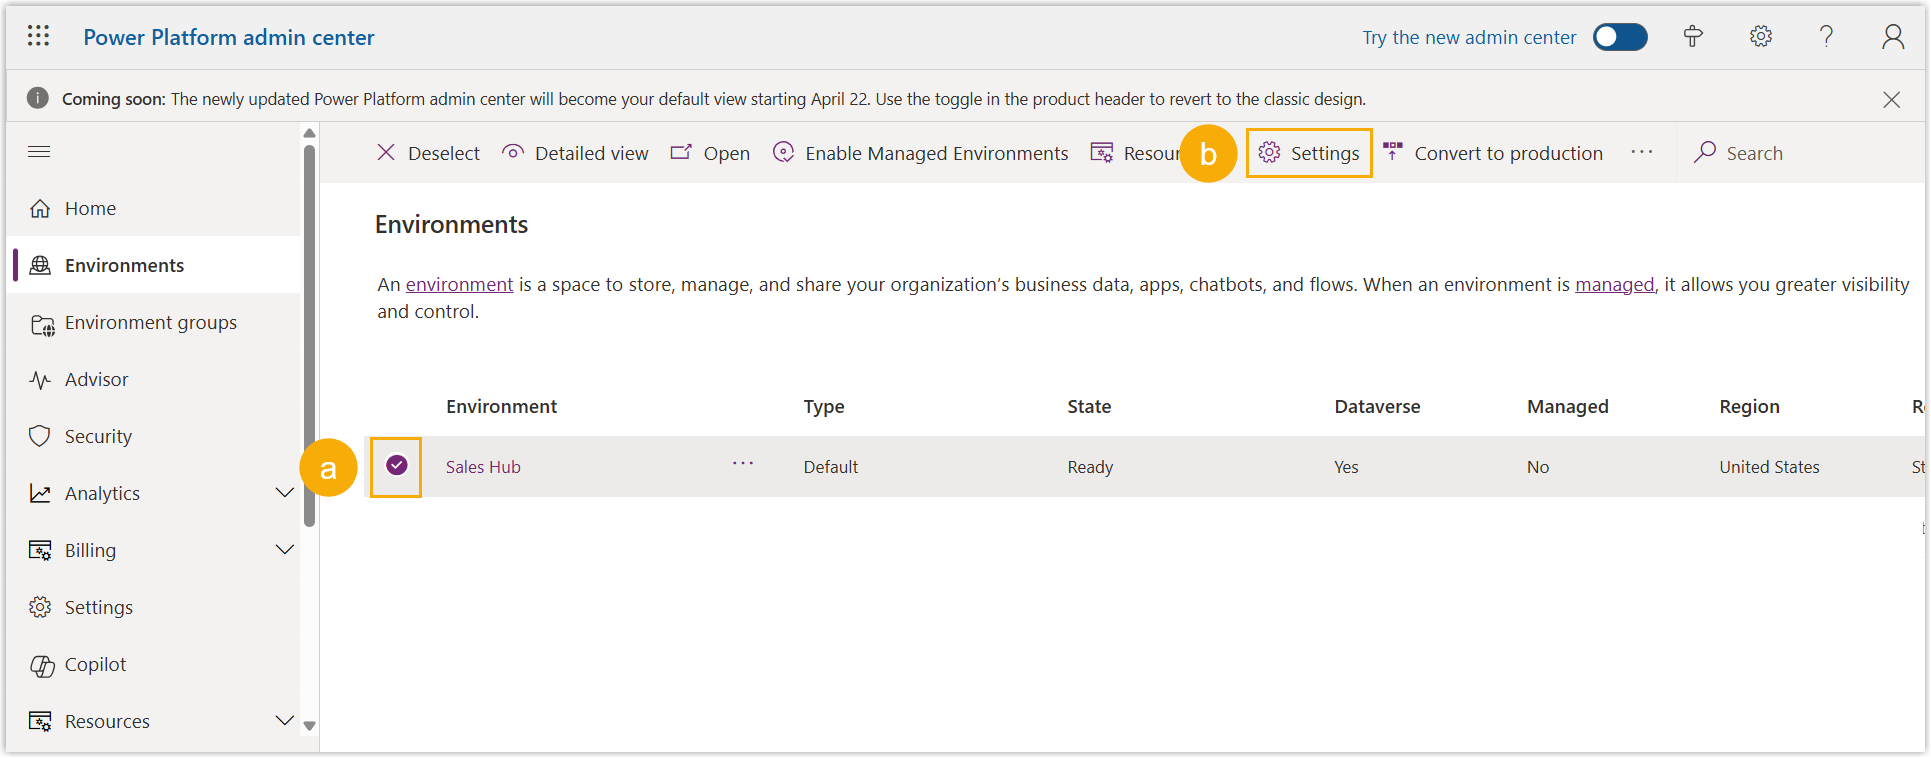
- Log in to Microsoft Power Platform Admin Center.
- In the Environments page, select your sales hub, then
click Settings.
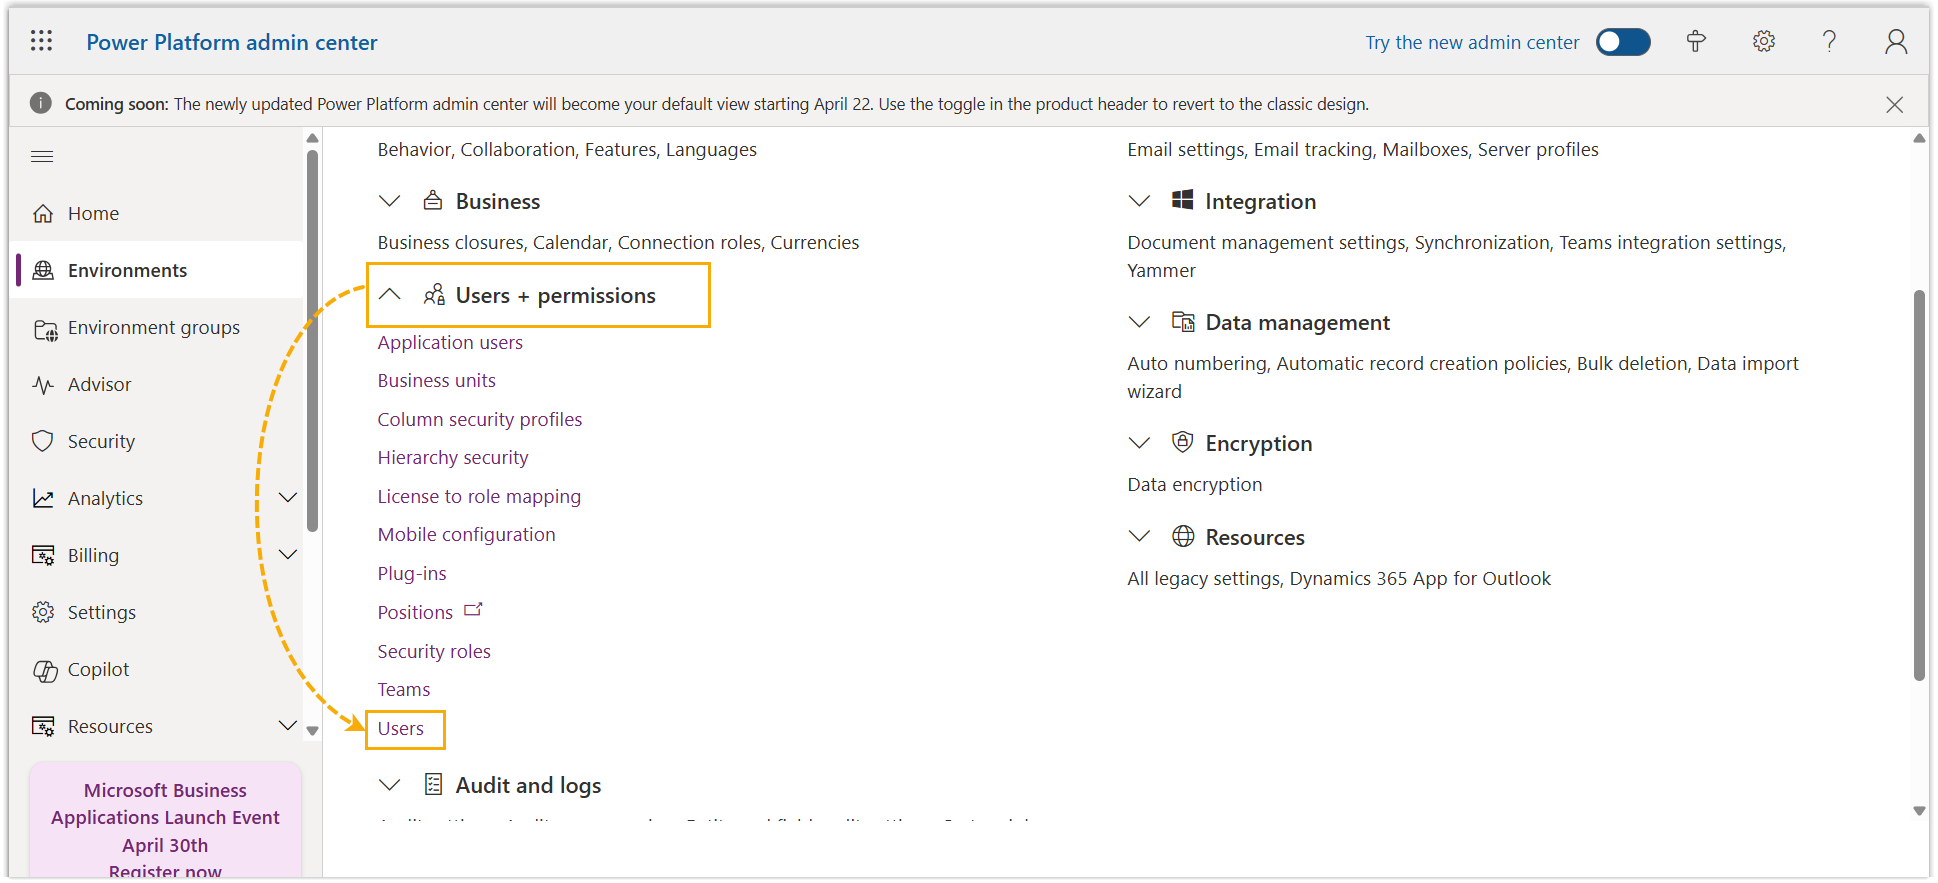
- Click Users + permissions, then select
Users.
- Click
 beside a user, then select Manage
security roles.
beside a user, then select Manage
security roles.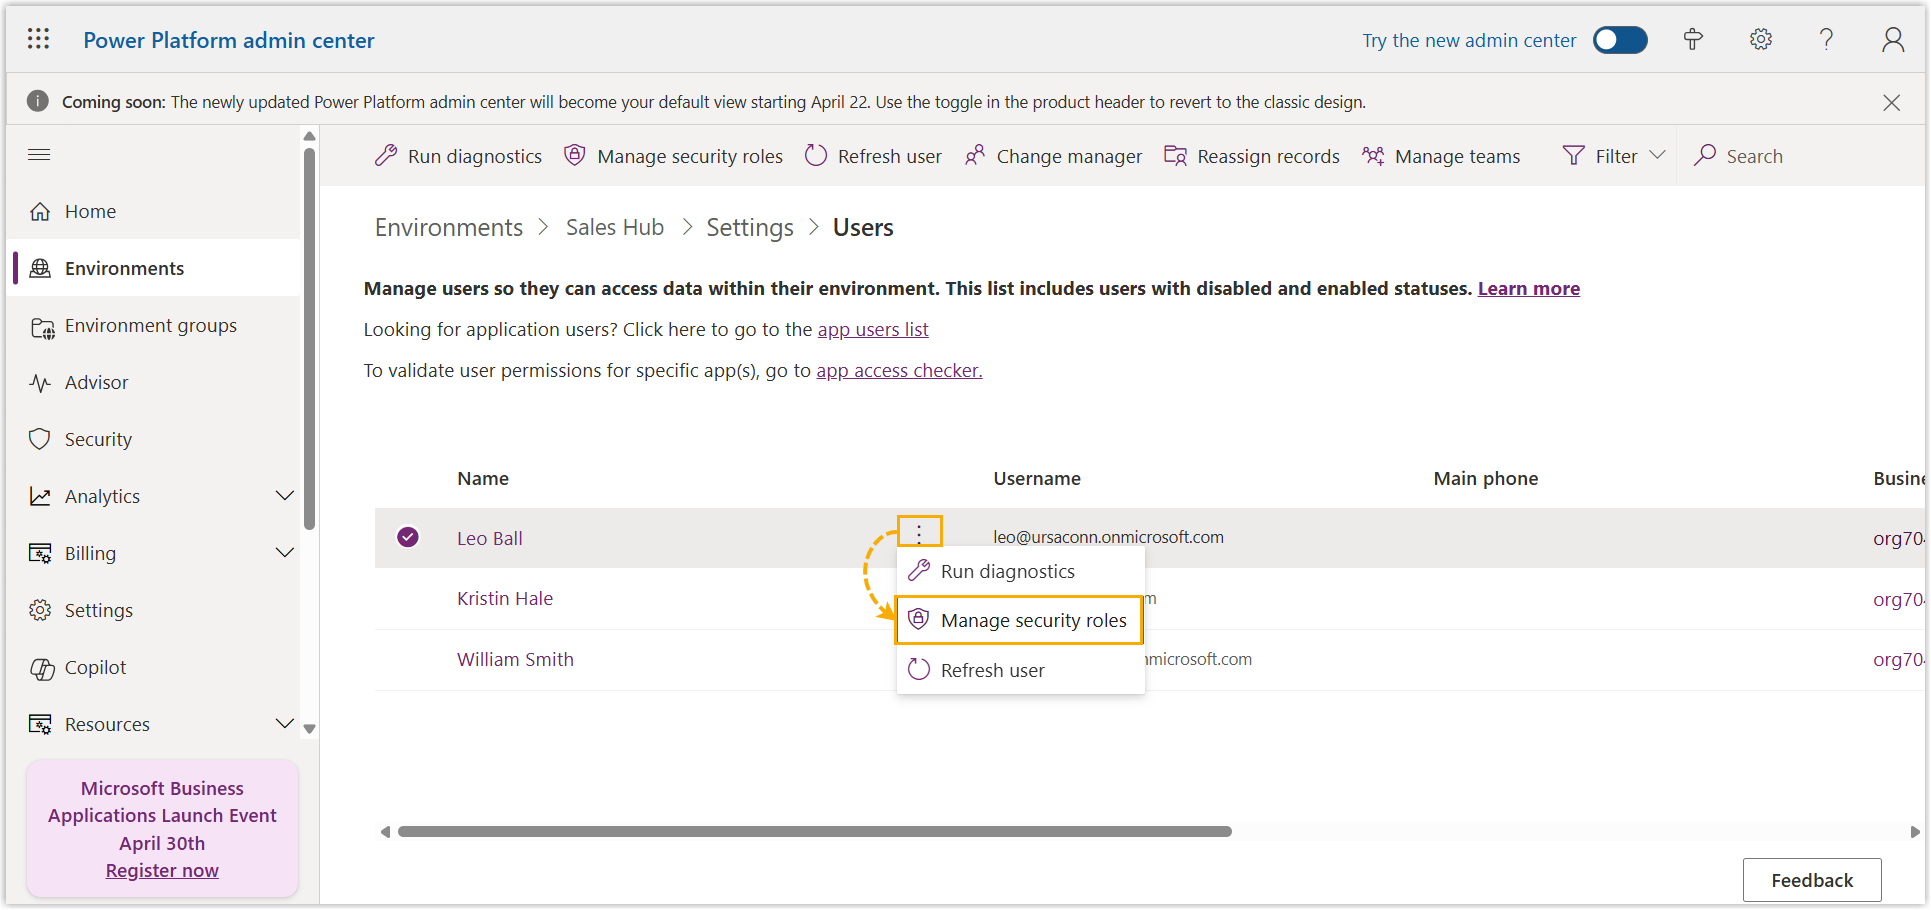
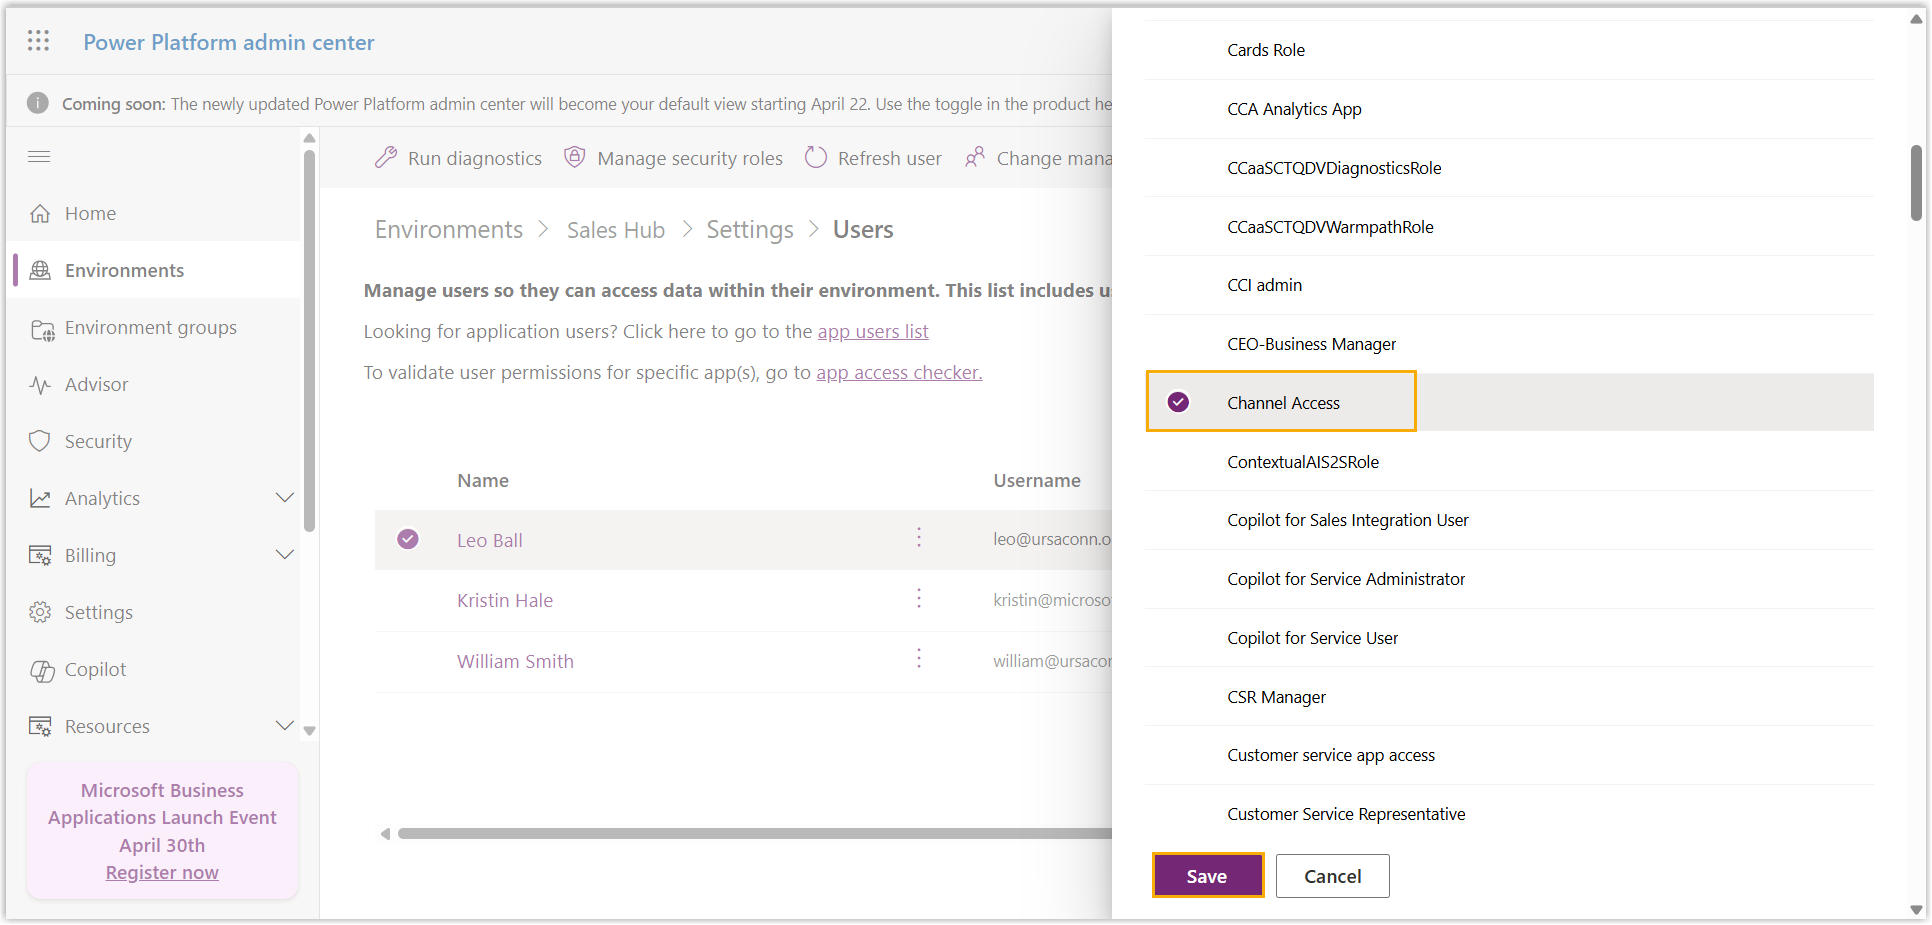
- In the right panel, select Channel Access, then click
Save.
Result
- A channel has been successfully set up.
-
Users with specified security roles can see an embedded plugin (referred to as the "Linkus for Dynamics 365" plugin) in their Sales Hub app, and they can use this plugin to handle calls directly within Dynamics 365 CRM.
What to do next
- If you want to allow users to log in to their extension account via SSO
within the embedded plugin, you need to configure the SSO redirect URI in
the third-party application (such as Microsoft Entra ID and Google
Workspace) using the following
format:
For more information about the SSO configurations, see the following topics:https://{{PBX_domain}}/dyncrm/login - Users can log in to Linkus within Dynamics 365 CRM and configure the Dynamics integration settings according to their needs.